
 As soon as we get a new apartment or refitting the old capital, followed by furniture there is a question of lamps. And if the industry had long ago mastered the production of sets of furniture, then pick up otnositelnye lamps is almost impossible, despite the abundance in the shops all sorts of chandeliers, sconces, lamps and floor lamps. The reason is simple: the headset lights are not made.
When such “unsolvable” question arose, and in front of me, after futile wanderings in the e-shop couldn’t help but wonder: why me, architect, do not engage in the manufacture of such a headset on their own? After all, my son and I are longtime subscribers to the journal “modelist-Konstruktor” and something for the house has already done on its recommendations. But where to start? What to put in the Foundation of the integrated solutions of lighting, what part of them?
Fall to the paper the first sketches. It becomes clear: a single item should be a lamp and some decorative detail in General, the same. Stopped in the shade of the “snowflake” — for its excellent decorative qualities, especially when the lamp is on. Further developed the principle of sbornosti chandeliers of the same decorative details. After some trials it turned out the lamp, which was the basis of the whole housing of the headset.
The manufacture of such lamps is simple, available not even particularly skilled in DIY person. But with careful execution you get a good uniform set, but still with minimal costs which is also important.
Figure 1 shows how the simplest of materials — steel, iron packing strip (two-wire or tape wire), mounting screws with nuts (from the children’s designer) and parts of cartridges and ceiling — you can make one lantern. In the same way made and mnogorozhkovye chandeliers and sconces, and floor lamps, only varies the number of lamps and elements.
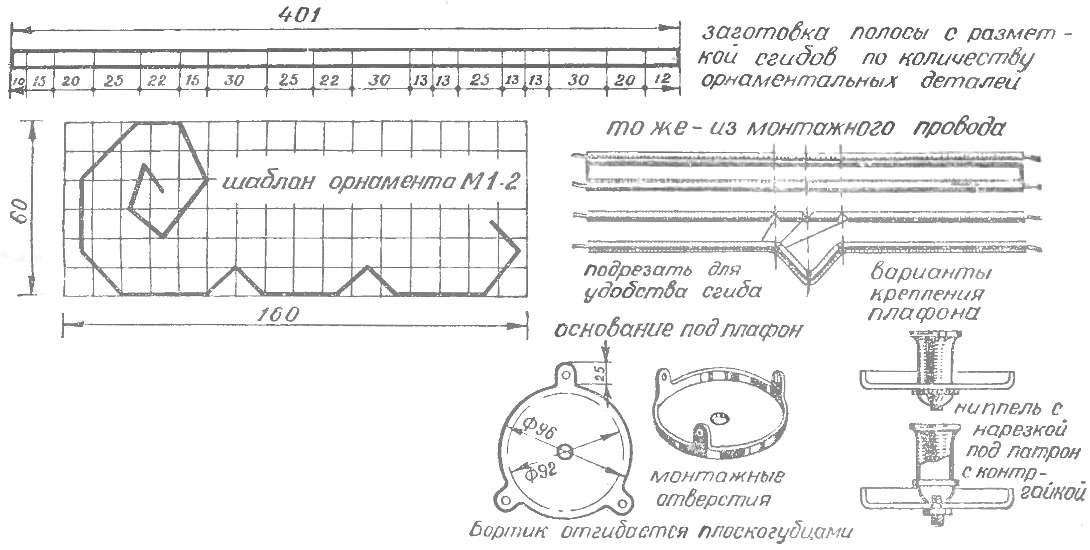
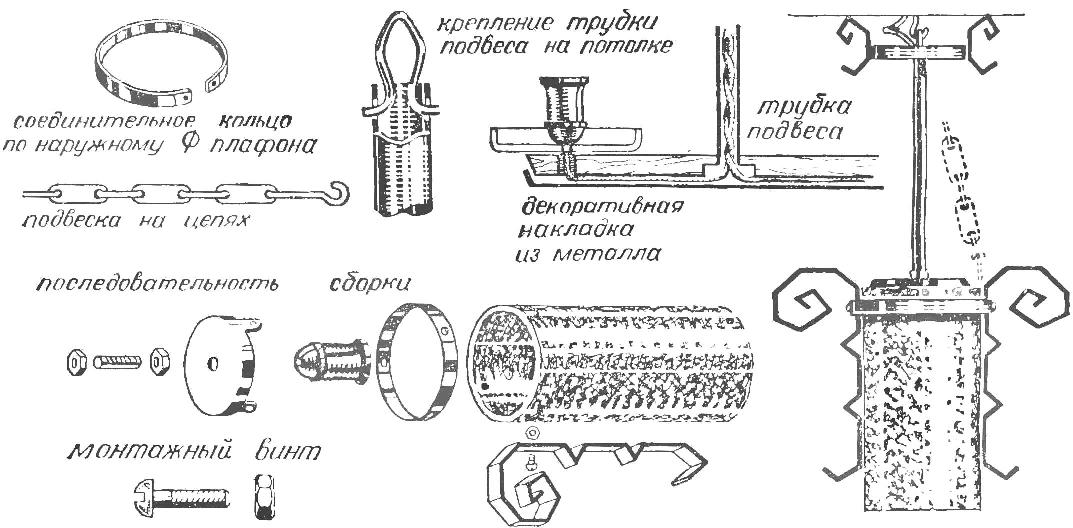
Fig. 1. Manufacture of parts and chandelier installation.
Operation procedure: on the tin circle (can be cut from a tin can of suitable size) draws a template of the base of the lampshade, then the workpiece is cut with ordinary scissors, drilled the holes for the cartridge and securing the edges, and the dotted lines folded back with pliers so that the base is tightly inserted into the upper part of the canopy.
The cartridge is mounted with the nipple (from the small opening) or the plug part (large hole). Then the decorative ring is made of strips of sheet metal with holes for fasteners. Consequently, they are drilled or pierced with a hot awl through the holes in the ceiling: because the “snowflake” is made of Plexiglas and is easily processed. Manufacturer of decorative ornament-the pattern is easy and does not require special explanation.
Plan to visit Yerevan? Then hotel Hotel in Yerevan | Nare for you.
The number of such decorative elements are cut strips of iron (or tape two or three wire leads, see option), rascherchivayut the size of the template and bend as illustrated. You should only seek their sameness, wondering for the template. Next comes the Assembly of the lamp and equip it with wire. Mounting screws wrapped with a screwdriver on the outside and the nuts hold the hand inside of the canopy.
If the lamp is intended for suspension on chains, between pattern design and a decorative ring on the ceiling hooks are clamped (see Fig. 2) if the tube is in its upper end is inserted, the diamond-shaped Razina loop.
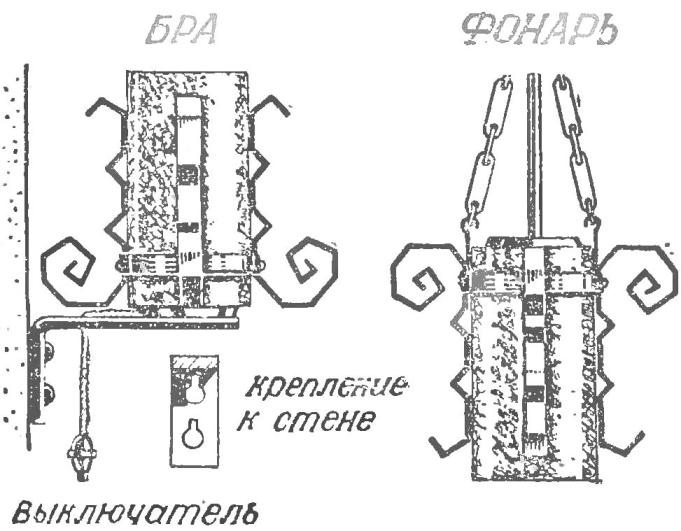
Fig. 2. General view odnorazovoe sconces and chandeliers-lamp unified detailed.
For installation of fixtures is any stable platform base for wall sconces — crankshaft holder from the tube or strip of iron with a thickness of 2-3 mm, for chandeliers — connecting rings (or squares, triangles, etc.), straps, blocks.
If the suspension of the luminaire on the tube or just on a current-carrying wire from the ceiling reinforce the small rosette to cover the ceiling hook and the attachment point of the wires from the lamp and the mains. The socket can serve as a painted metal cover or a small Bank. The attached “whiskers”, made as ornament, hit the ceiling and provide stability and horizontality of the socket.
Installation of chandeliers using a block of wood is clear from the drawing. The wire from the ceiling when it is mounted on a wooden bar and decorated with moulding (groove), metal or any other material. All parts before Assembly (except mounting screws) must be covered by a black nitrocellulose lacquer (enamel) and dried.
Figure 3 shows a General view of the unified wall lamp and chandelier lamp.
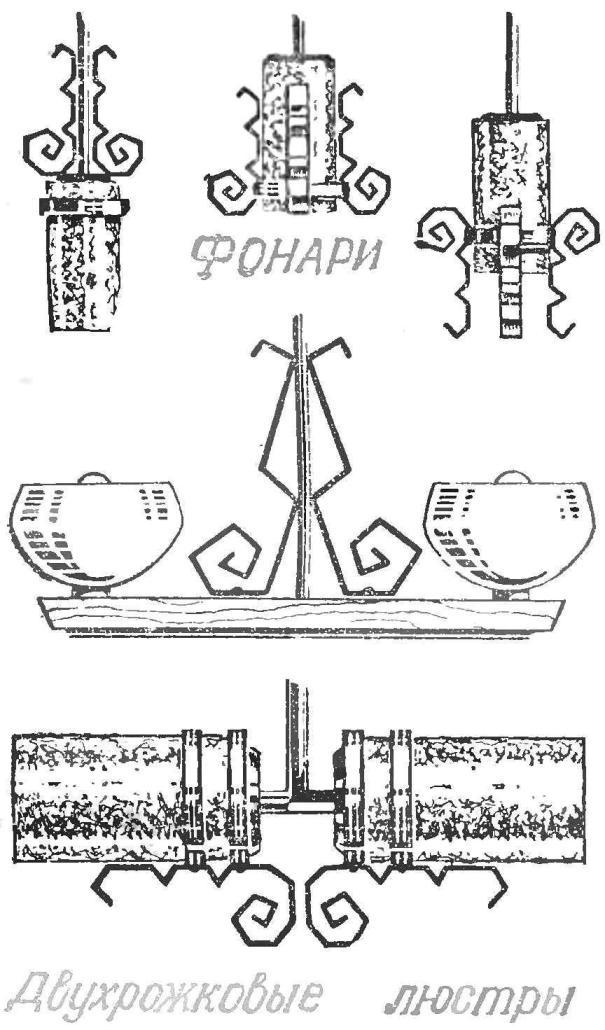
Fig. 3. Options for layout details for the design of the chandeliers.
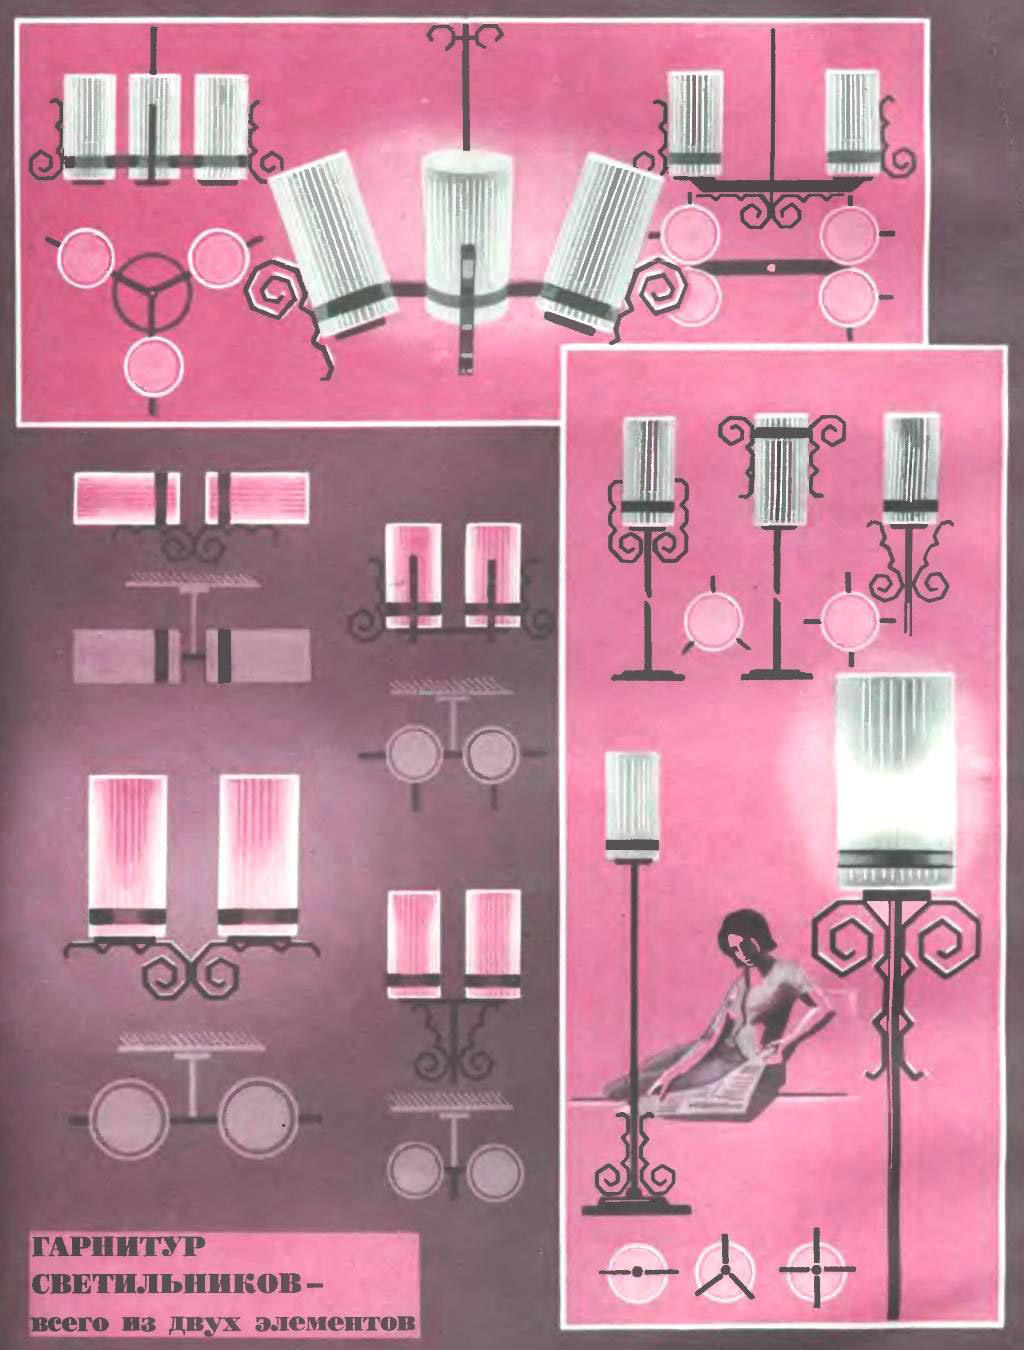
Lighting fittings used in the home comes down to four main types: light — kitchen, hallway, bedrooms, sconces — local lighting in rooms, corridors, for example the mirror; floor lamp — a portable lamp for local lighting; chandelier for rooms.
All these types of fixtures can be one-, two-, three-, four -, and even Patiashvili, the number of used bulbs. By varying the number, location and pattern of the main decorative elements, it is possible to obtain a large number of different types of lights to create odnomernogo headset in your apartment. It should be remembered that the stricter and simpler lamps made, the better they will be combined with modern furniture.
Figure 4 shows some of the layout made based on the proposed unified elements; in order not to hamper the imagination of the artists, shows another variant of the decorative pattern of metal strips.
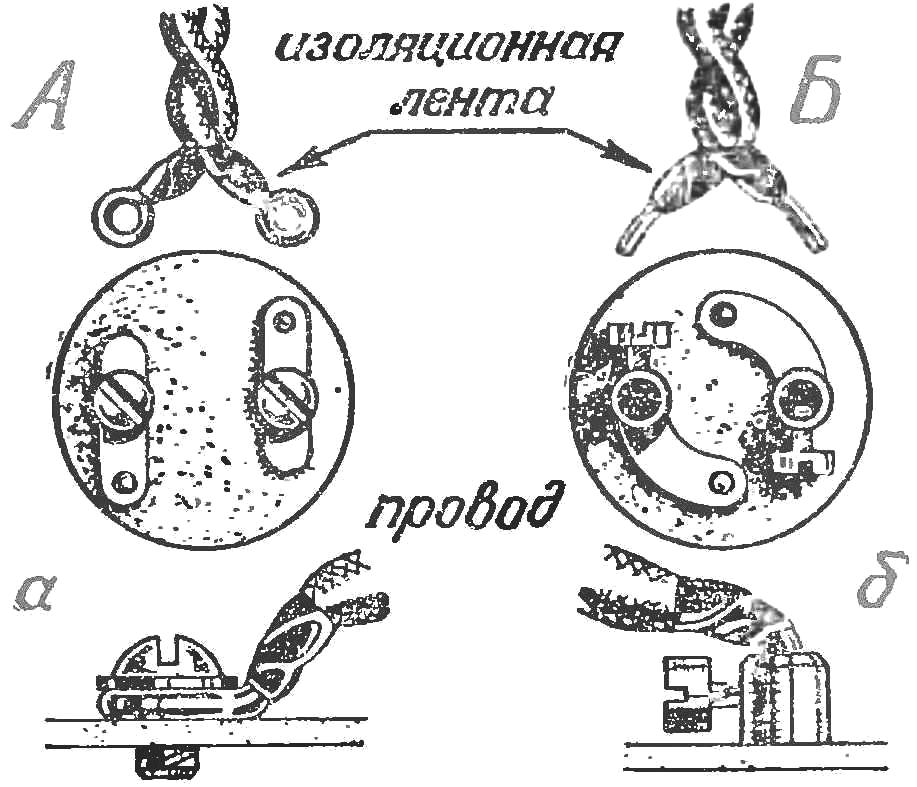
Fig. 4. Methods of attaching the wires to the cartridge:
A — loop, B — bonder
It follows that the variance consists of a figure of decorative elements, their number, shape of the applicable ceiling, the location of the decor and the amount used of light bulbs, that is practically the options are limitless, giving full play to the imagination and taste of the manufacturer.
For convenience additionally shows the exemplary development of types of lamps (except lamps and table lamps).
A LITTLE BIT ABOUT SAFETY
Because these products have to deal with the current voltage 127-220 in and among manufacturers of lamps may be people who have no experience in electrical engineering, you need to comply with the required specifications.
For installation of lighting fixtures should only be applied to a lighting wire: all these substitutes in the form of a bell, radio and telephone cords are unacceptable. The ends of the wires should be tightly pressed to the terminals of lampholders (see Fig. 5), otherwise sparking at the loose contact will heat the wire and can lead to destruction of insulation and even cause a short circuit, causing a fire. If the wire is stranded, the ends have a tight twist, and even better after twisting soldered (zaludit) tin.
When laying the lighting wires in the fixture and attach to the mains strictly follow the integrity of the insulation; all exposed ends of the wires should be securely wrapped with insulating tape.
A. HENNINGSEN, architect
Recommend to read
 GRAVITEAM
To explore the law of gravity is always more difficult than any other section of the school of physics. The fact that to explain this phenomenon the teacher has literally "on fingers".... FLEET OF HOMEMADE
"Born, live and work in rural areas, writes to the editor our reader N. Kurbatov from the village of Borisovka-2 Belgorod region. Since his school years always was doing something: model...
