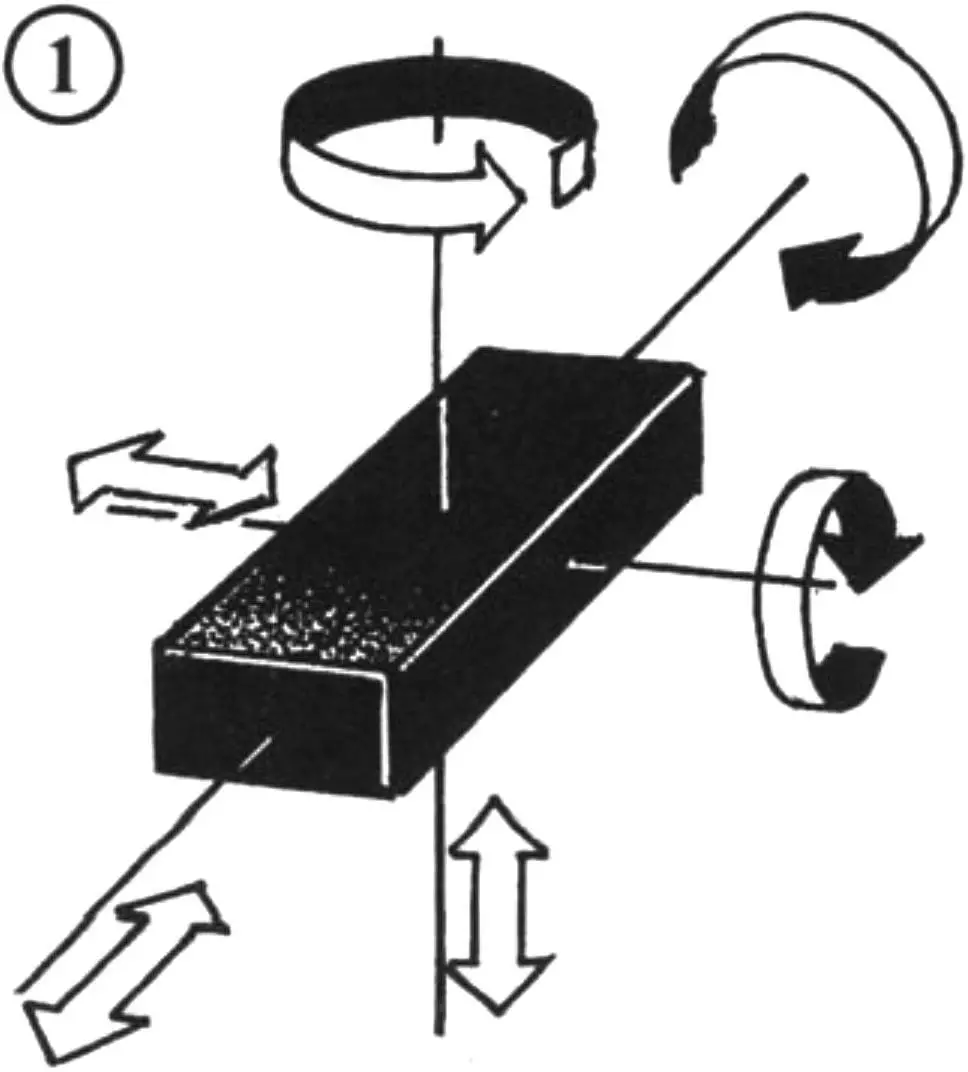
A workpiece intended for machining must not shift, rotate, vibrate, or deform under the action of the cutting tool.
In the process of hand machining (this primarily applies to making one’s own designs), several methods of securing plates, rods, or tubes can be used. The figures show some variants of the corresponding fixtures.
Plates and rectangular parts
Such workpieces are clamped in a vise so that the surface to be machined is as close as possible to the vise jaw. The part being cut off should protrude beyond the vise enough that the saw handle does not strike the vise during cutting. When sawing plates, the best results can be achieved using the methods shown in Figures 2a and 2b.
To avoid scratching the part and damaging the vise serrations during machining, soft inserts made of soft material (aluminum, copper, plastic, or wood) are used.
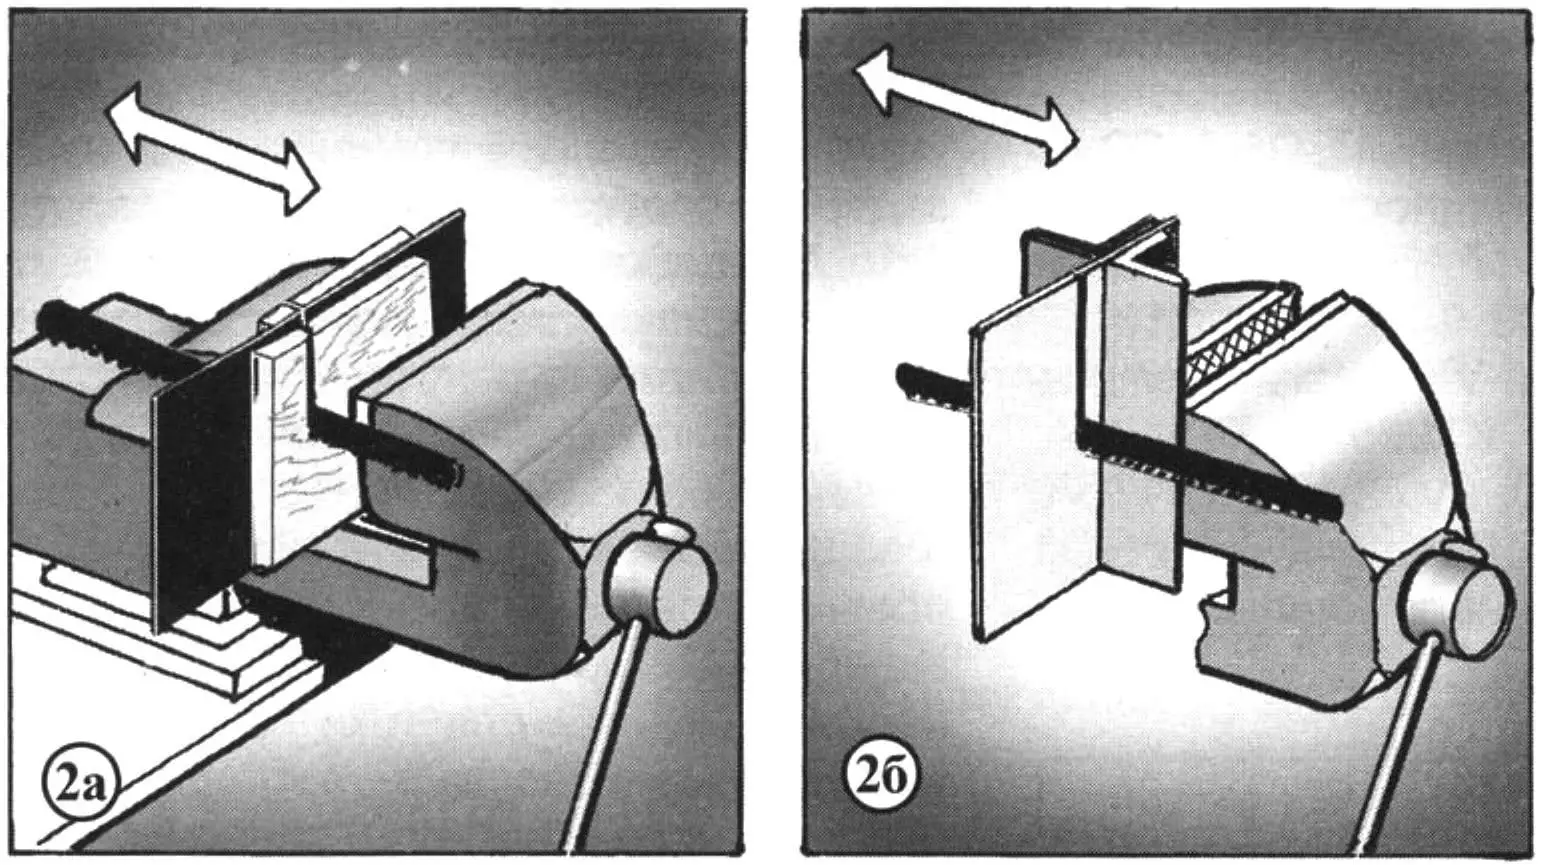
a — between two wooden boards; b — between angle irons
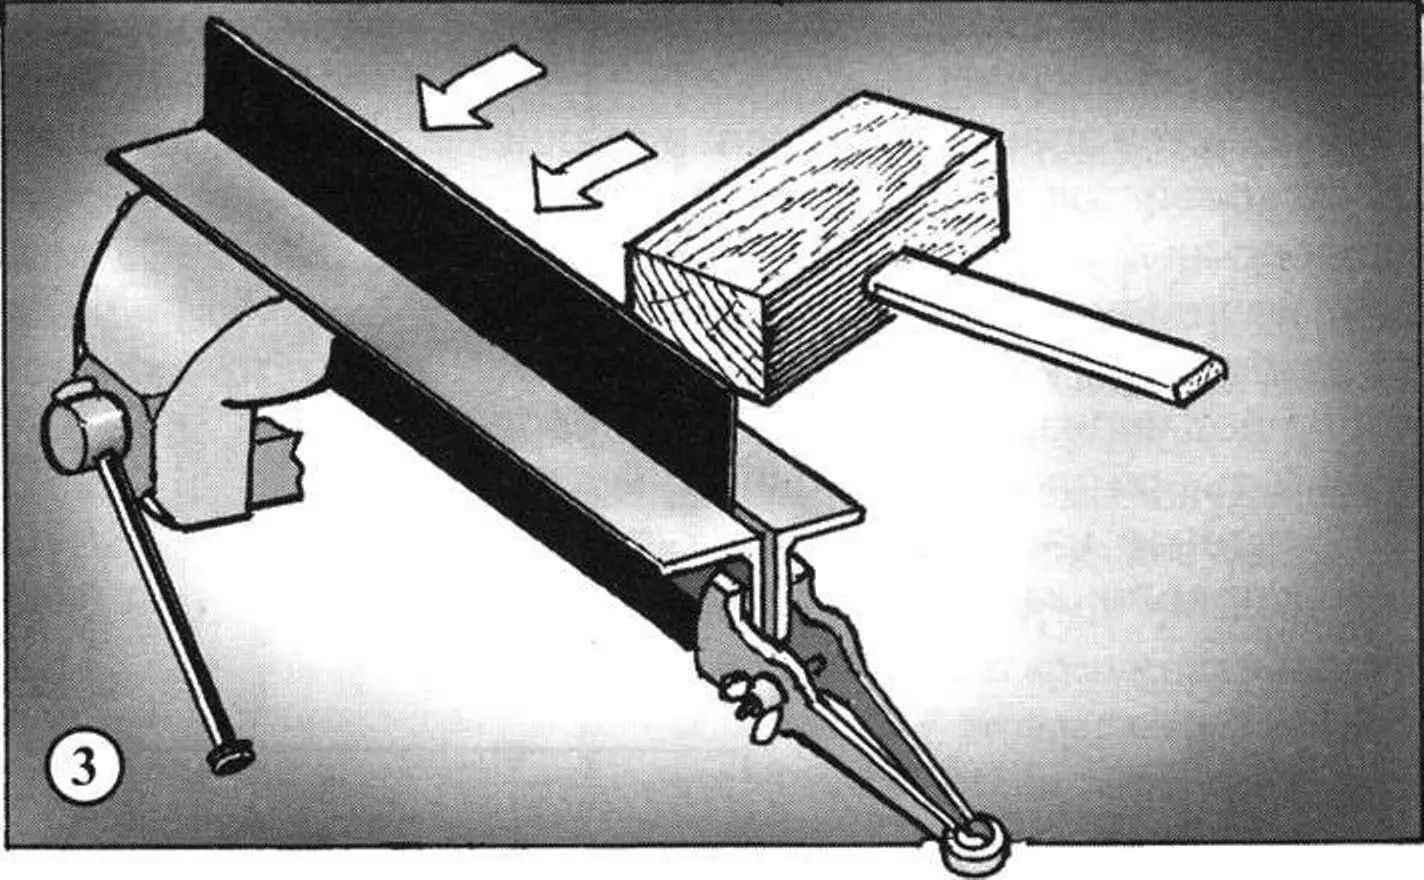
If the long part of a flat workpiece is to be bent at a right angle, the plate must be clamped between two steel angle irons (Fig. 3) slightly longer than the plate. The ends of the angle irons should be squeezed with hand vises, or a process hole should be made in them and they should be secured with a bolted joint.
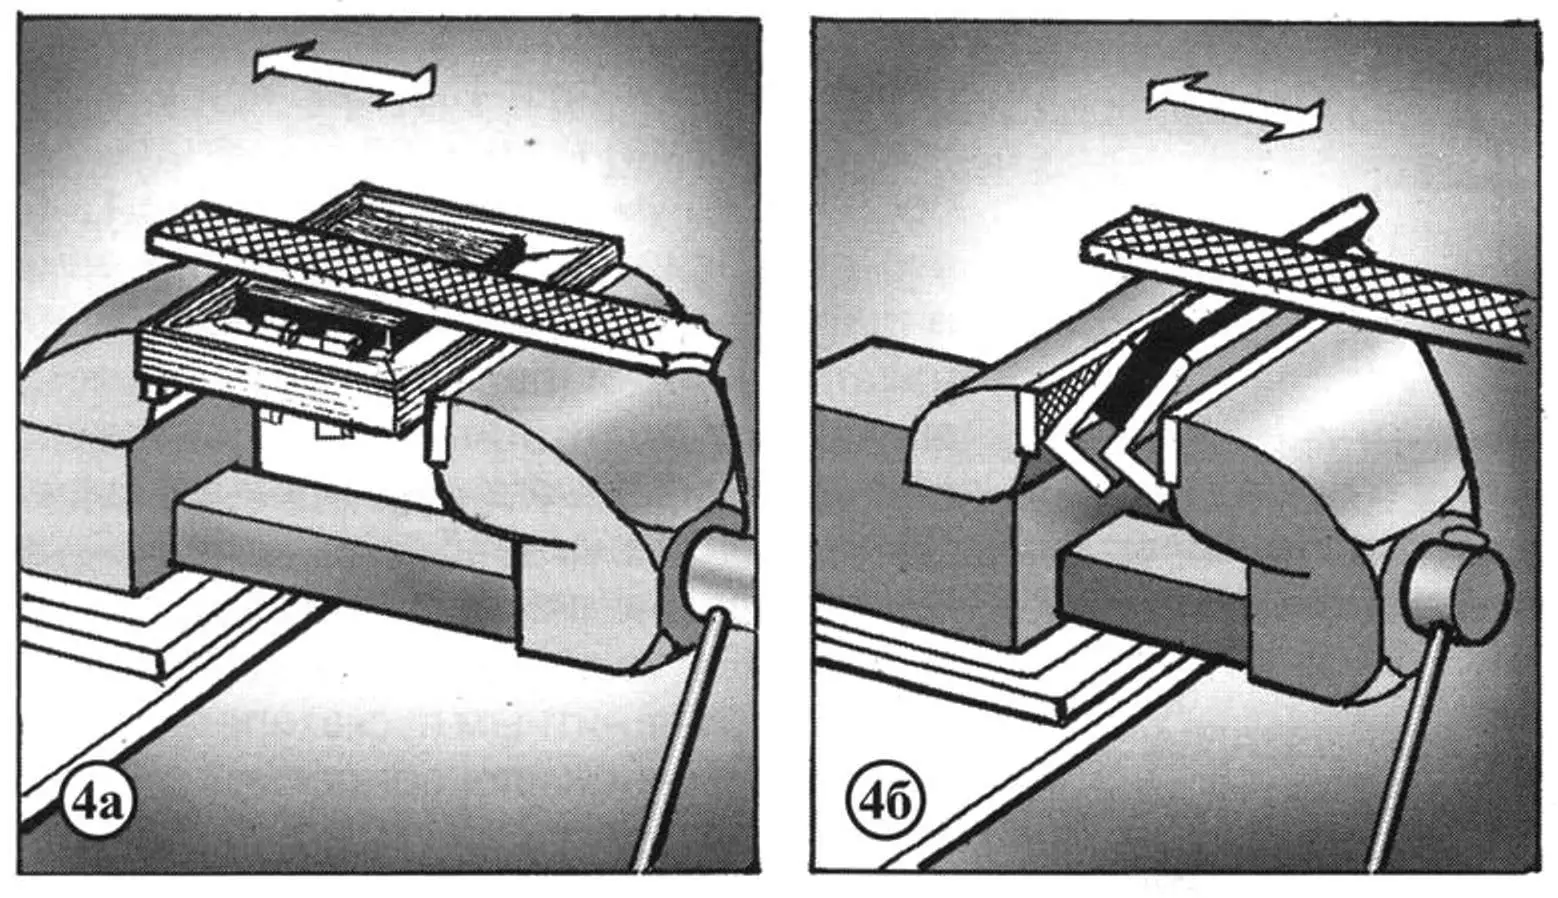
a — using a wooden block with pegs; b — using steel angle irons set at an angle
Filing the surface of a thin plate is made easier by clamping it in a vise on a wooden block with a window, using pegs inserted into that window (Fig. 4a). For filing the edges of a rectangular part at an angle, you can use the clamping method shown in Figure 4b.
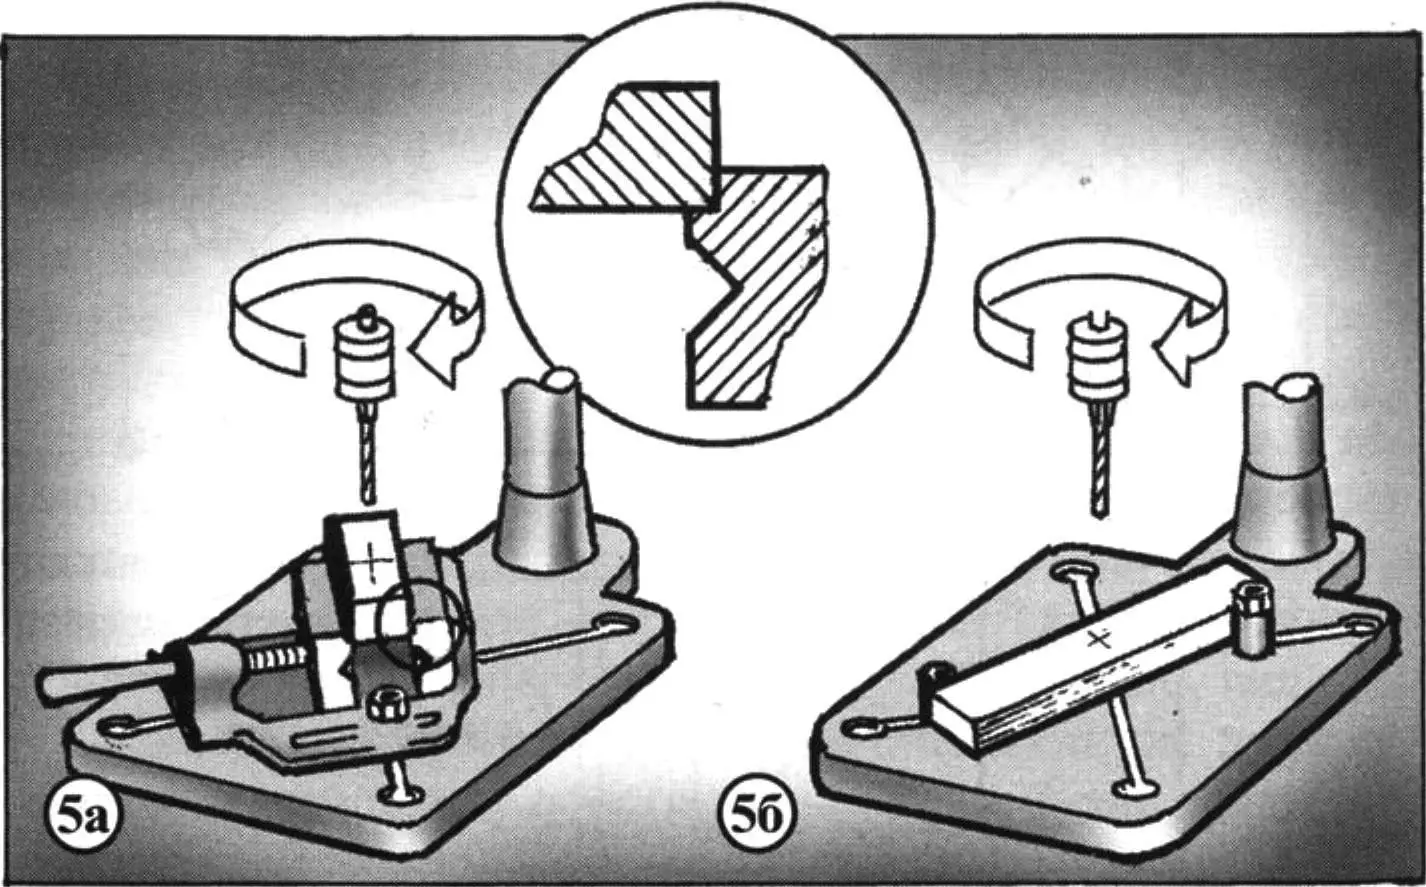
a — using a standard vise whose jaws keep the hole perpendicular to the bottom of the object; b — using support sleeves (make sure the hole axis coincides with the center hole on the drill table, and that the support sleeves are correctly placed)
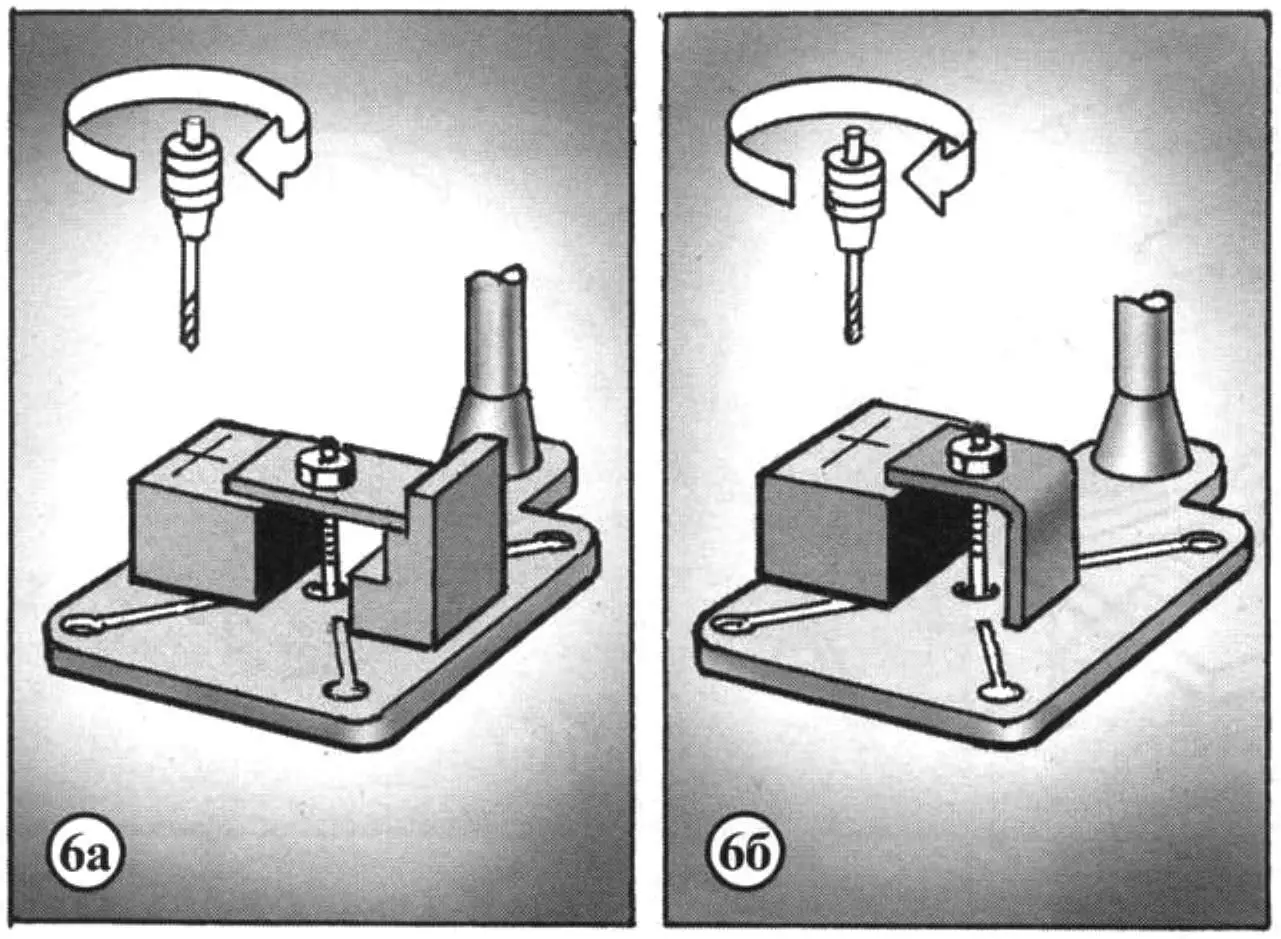
When a hole must be drilled, the hole axis must be perpendicular to the surface of the part in which it is made. The clamping must keep the workpiece from rotating or shifting during drill rotation. The drill, when going through, must not damage the fixture or cause unsafe rotation of the supporting inserts. Examples of workpiece clamping that meet these conditions are shown in Figures 5a, 5b, and also 6a, 6b. In each such case, when a hole must be made, a hand drill mounted on a stand is used.
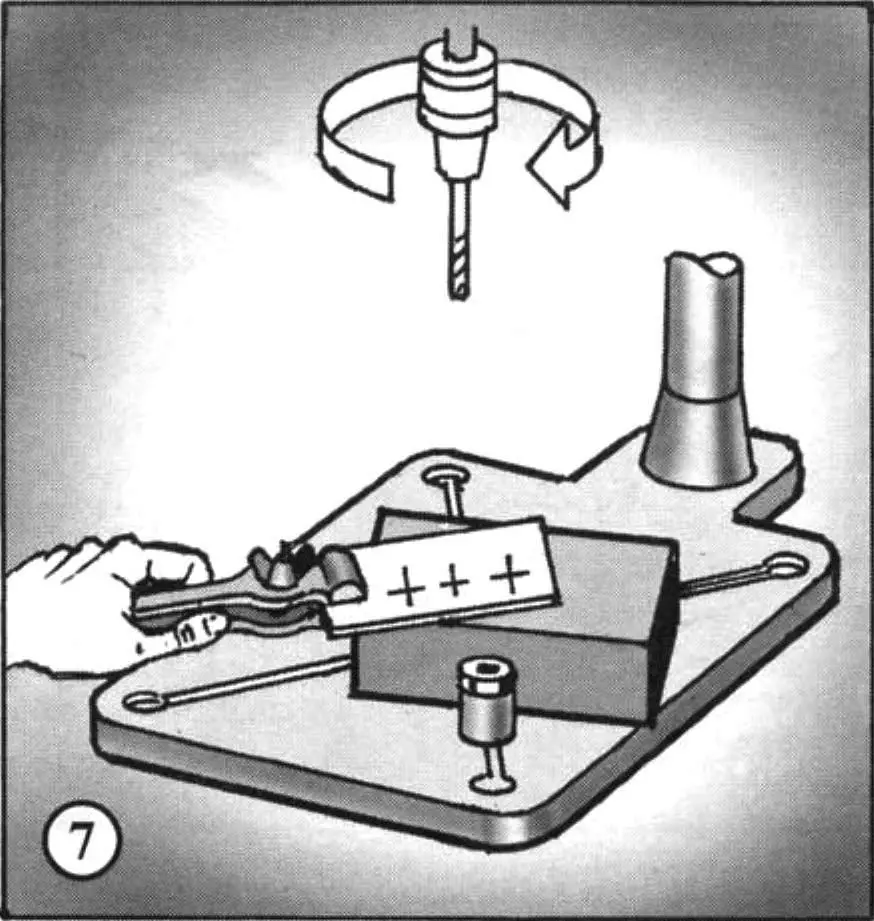
If a small-diameter hole must be drilled, the support area during drilling may be small; hand vises are sufficient (Fig. 7). Even so, the supporting block must be clamped so as to prevent it from rotating at the moment the drill passes through the workpiece.
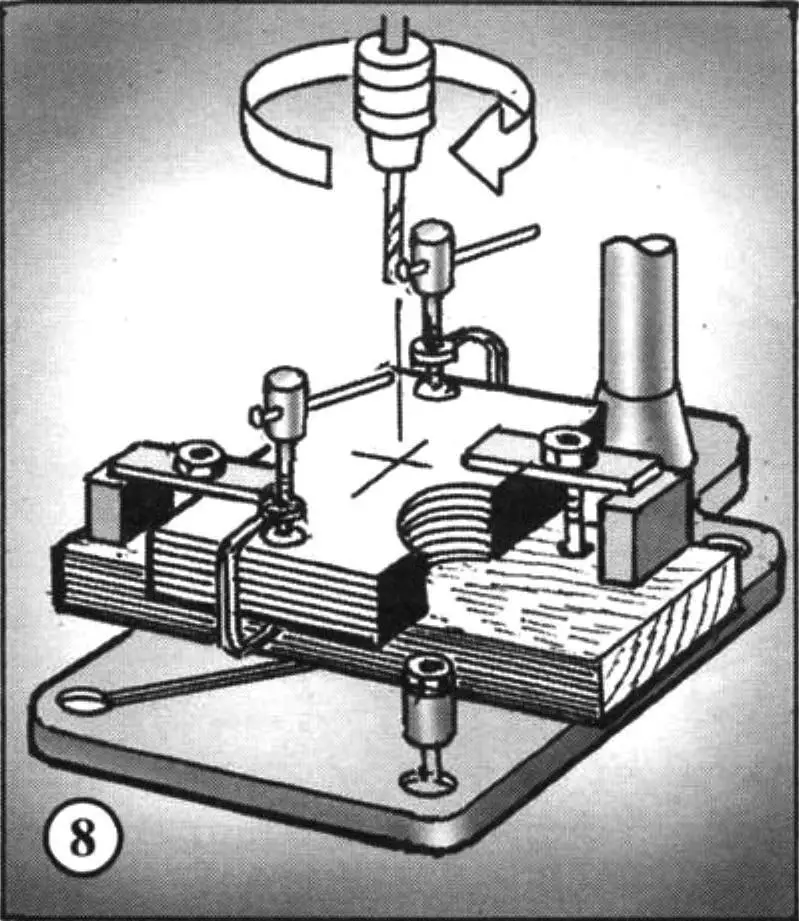
It often happens that identical holes are needed in several identical parts. To avoid tedious repeated operations, it is enough to stack all the parts together, press them tightly against one another, secure them with clamps, then place the resulting pack in a fixture and drill the holes (Fig. 8). Simultaneous machining of several identical workpieces can also be used in other cases, for example when filing surfaces or sawing.
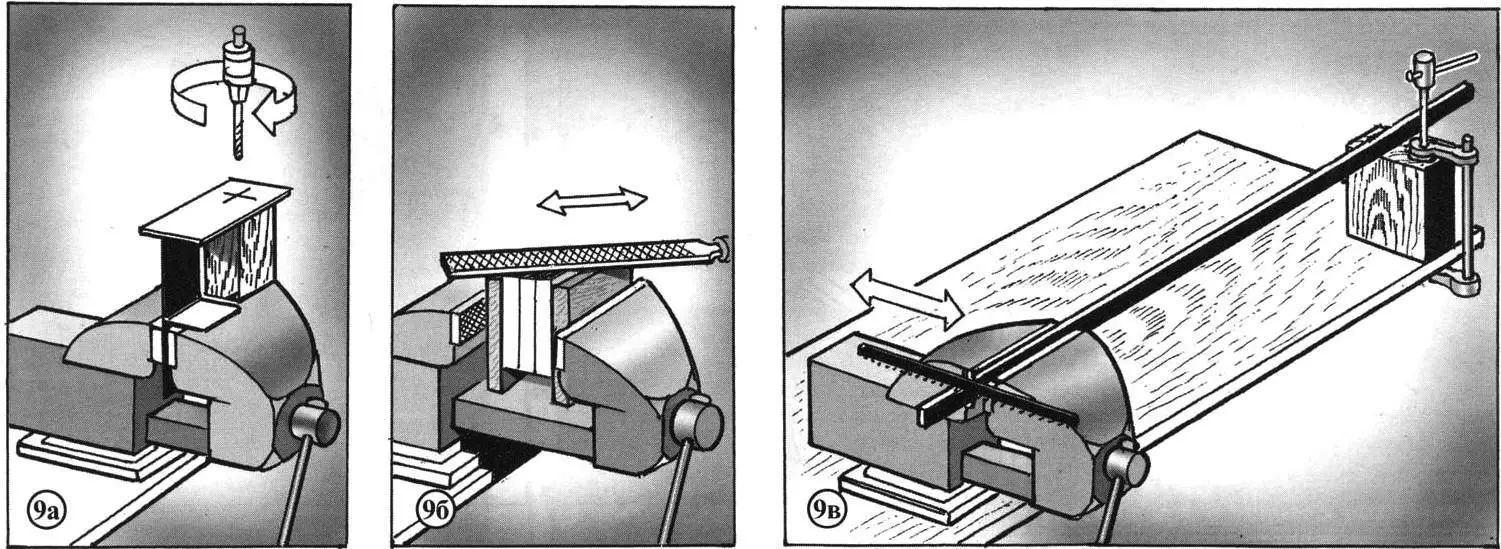
Special attention is required when clamping parts of complex shape, when their design itself does not provide the needed stability. This applies both to drilling holes (Fig. 9a) and to other machining cases (Fig. 9b), where additional stops or inserts must be used to make the workpiece clamping rigid while preventing deformation of the area being machined. The need for an additional support for the object is especially clear when cutting a long rectangle, angle iron, or tube (Fig. 9c).
Rolled stock and spherical parts
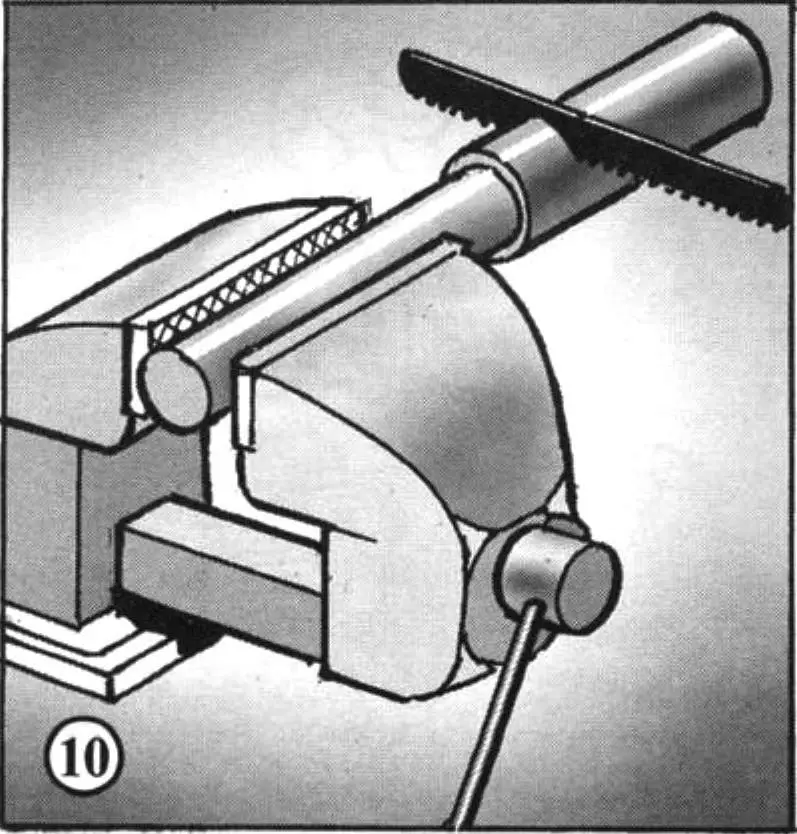
To saw thin-walled tubes, you can either press them tightly onto a round wooden rod (Fig. 10) or clamp them between blocks with recesses. After this simple preparation, you can safely proceed to sawing the tube.
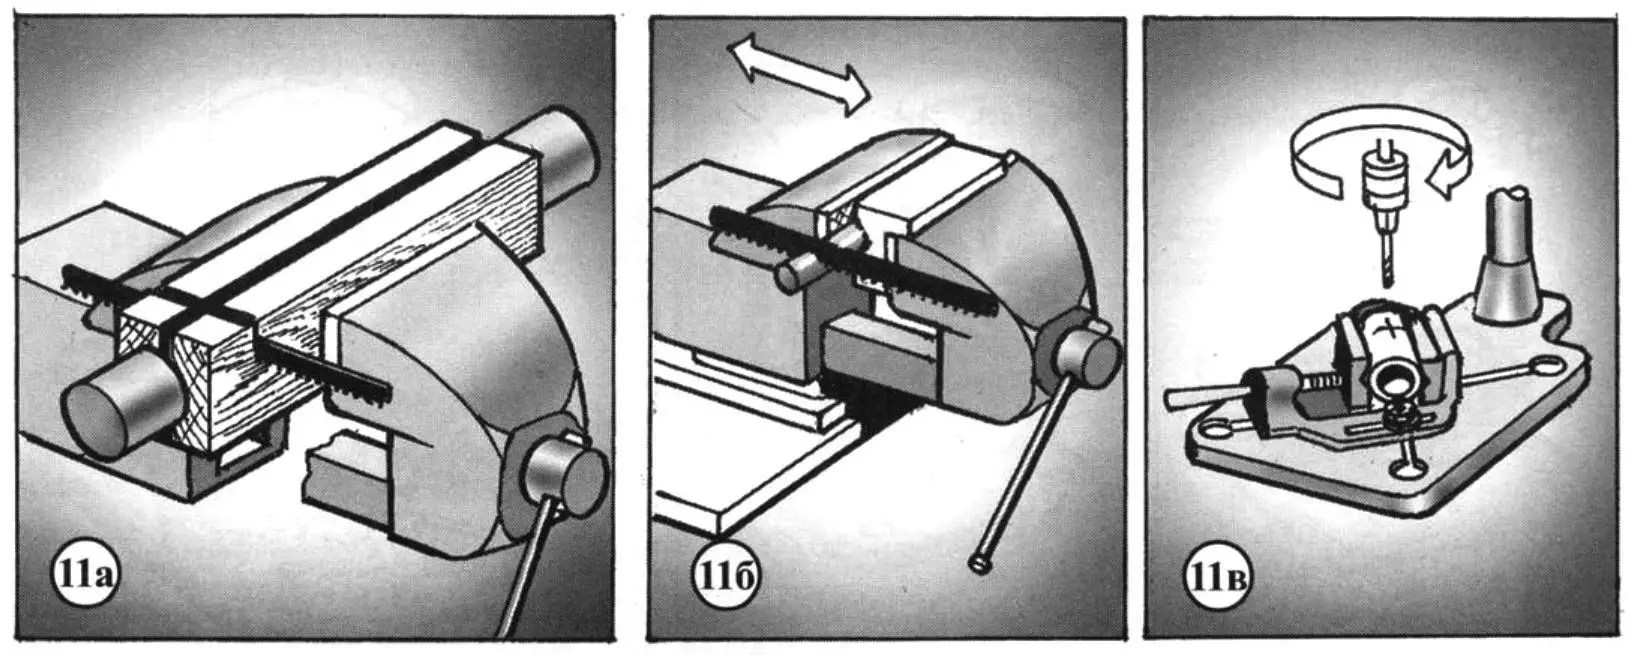
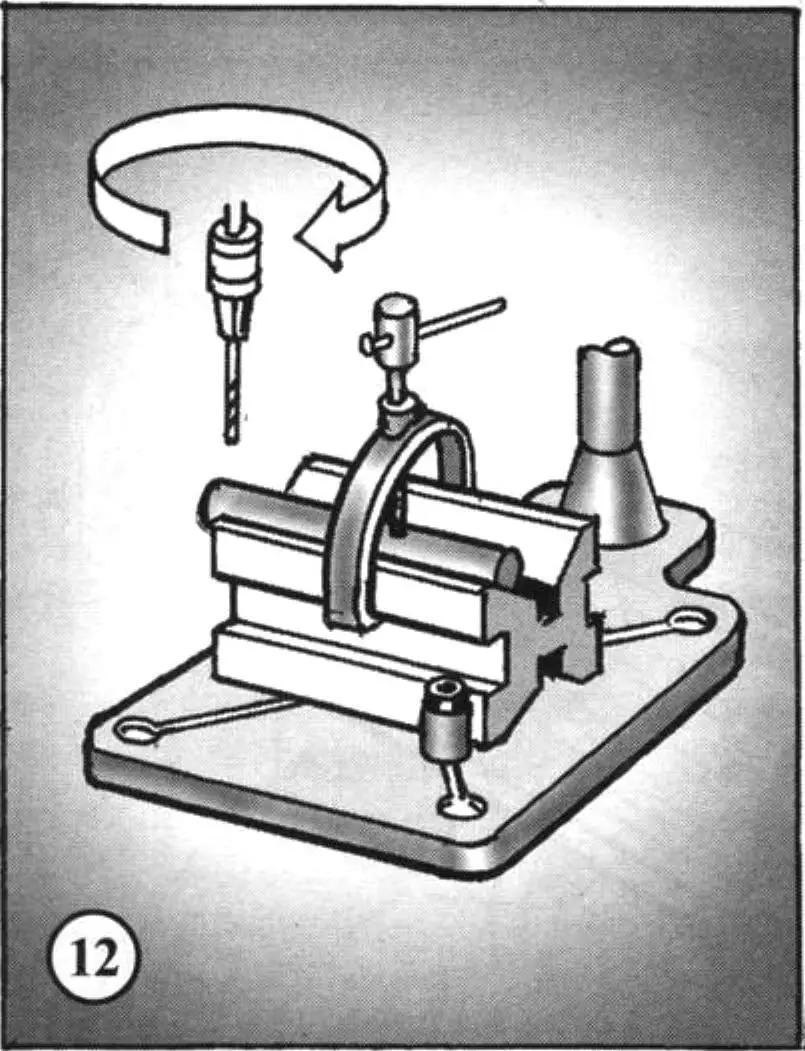
Tubes with thicker walls, as well as round-section rods, should be clamped in a vise using prismatic inserts (Fig. 11 a, b), or a standard vise whose jaws have prismatic recesses (Fig. 11 c), or universal prisms. The use of such prismatic fixtures when clamping roller-shaped objects on a drill table is also shown in Figure 12.
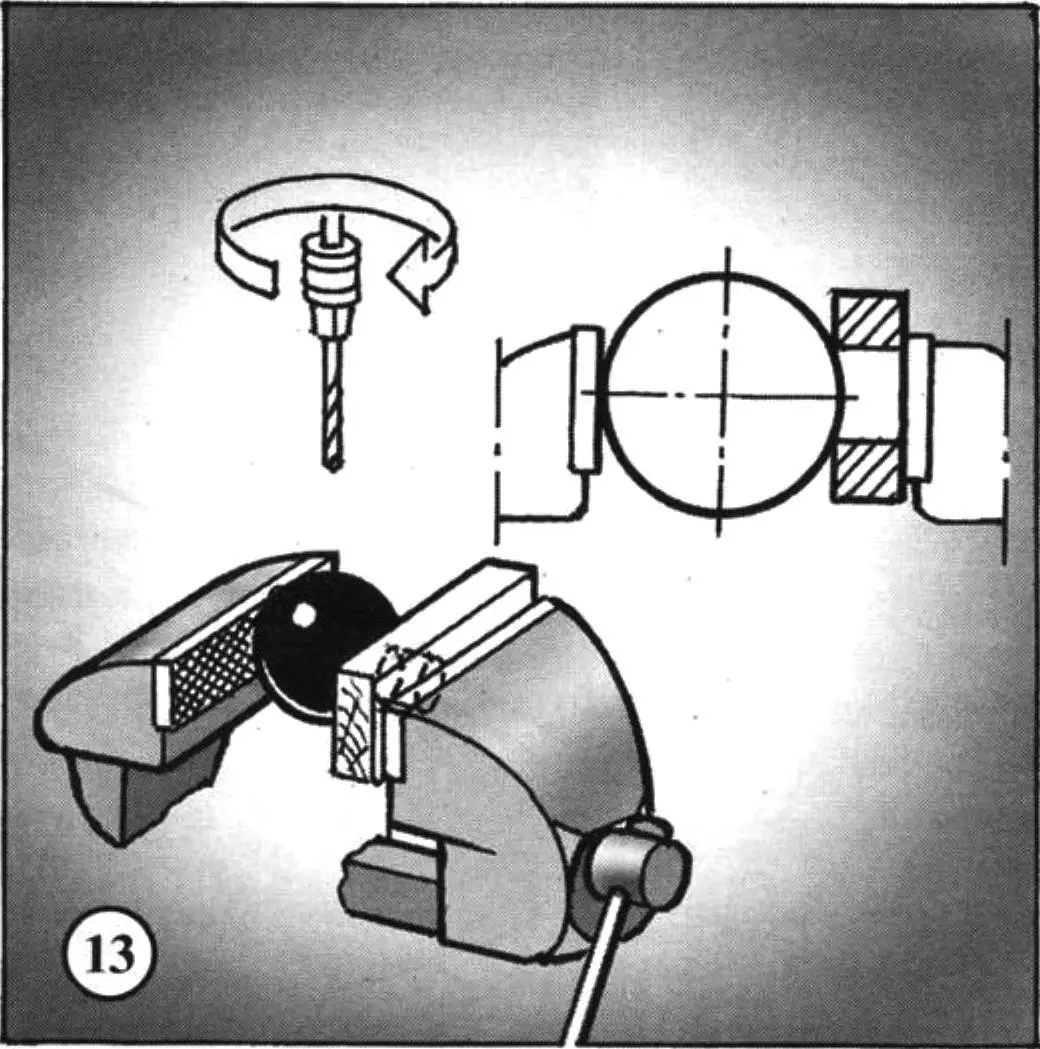
A simple insert with a hole (Fig. 13) makes it much easier to clamp a ball in a vise.
Carpentry clamps
Quite a few specialized fixtures are used when working with wood (in addition to a workbench). For example, pressing sheet materials is made easier by a frame platform with wedge clamps, which is indispensable for veneering (Fig. 14).
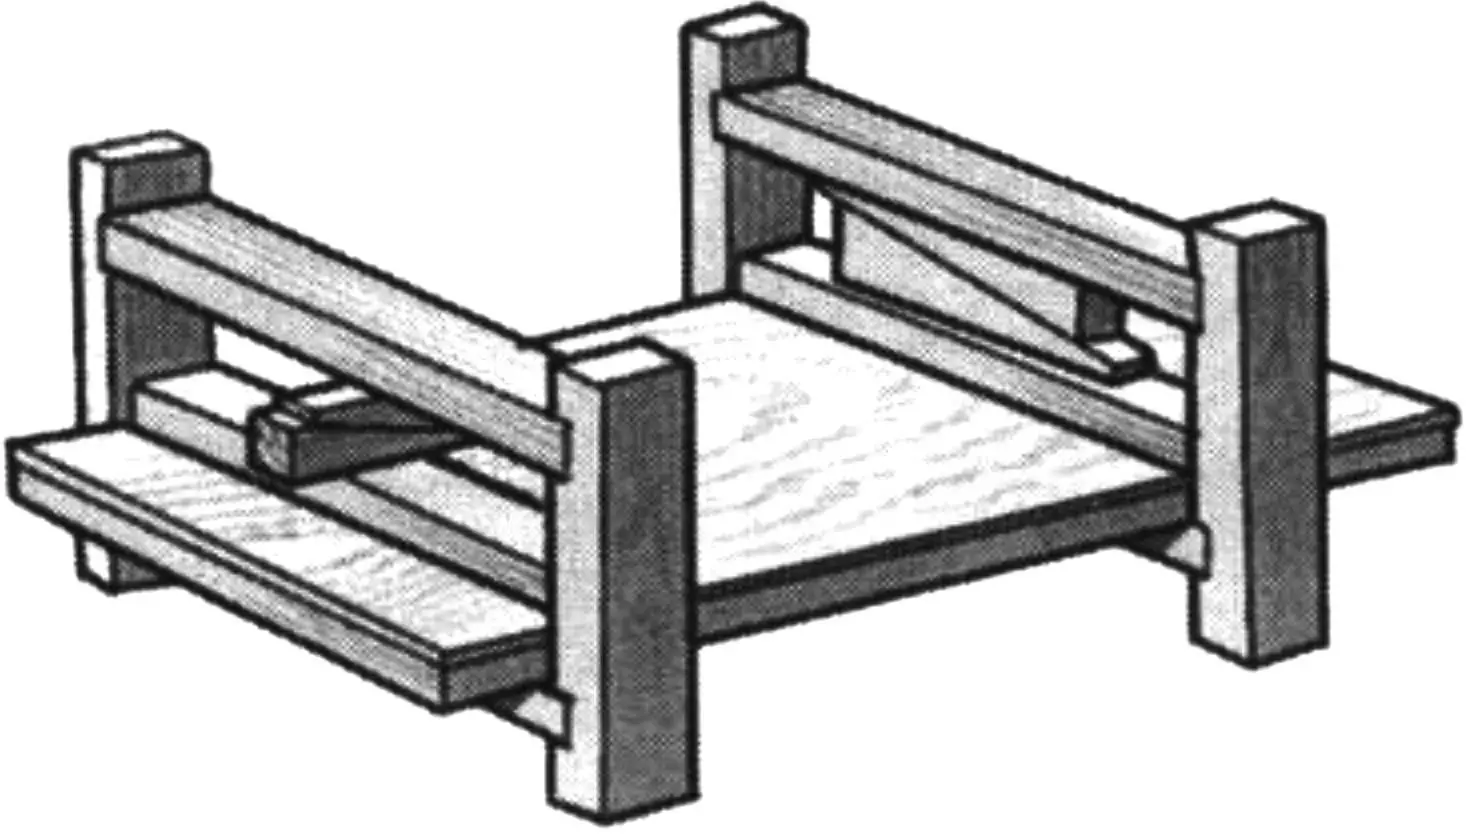
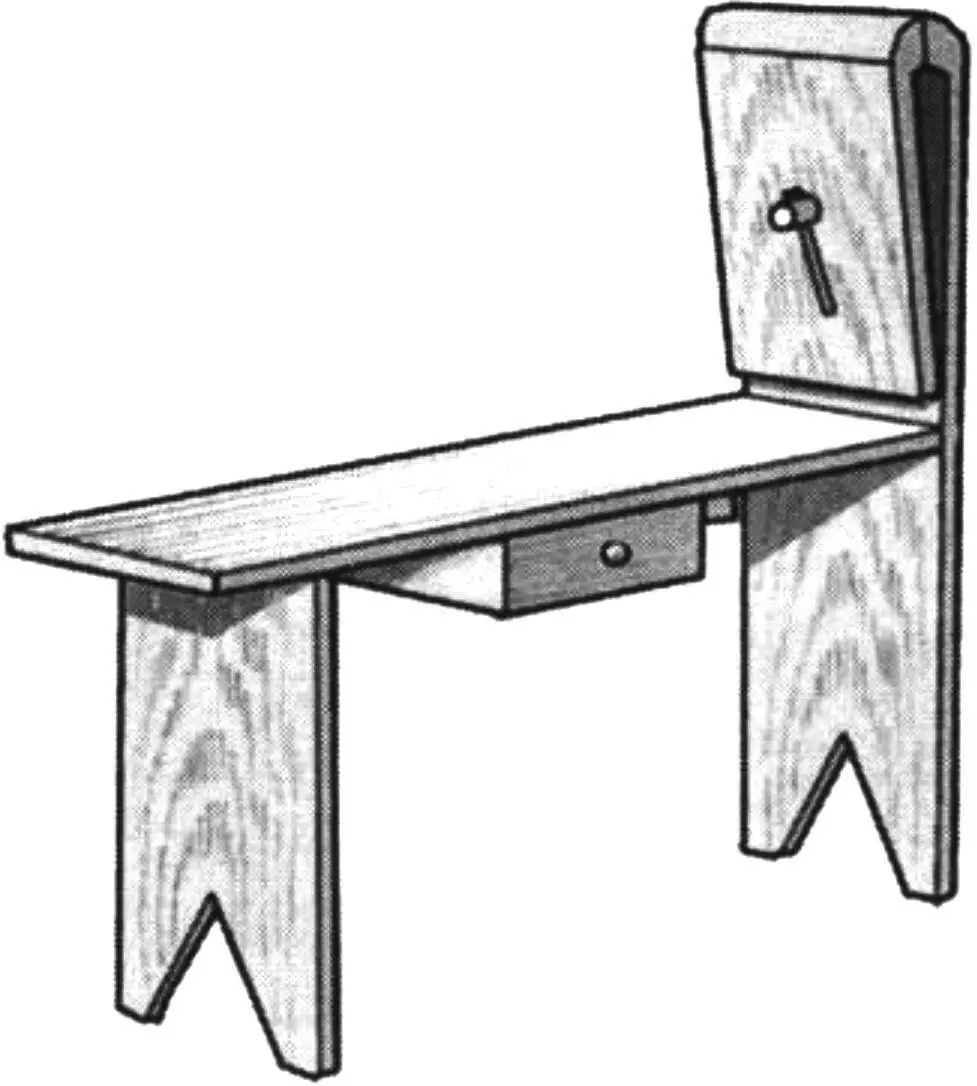
Veneer with an attractive grain is rolled onto a furniture panel with an adhesive layer and covered with a flat panel that is pressed with wedges while it dries. And if a saw or hacksaw has become dull and its teeth need sharpening, special vise with a bench will help — they make this operation convenient (Fig. 15).
“Modelist-Konstruktor” No. 5’2008, B. VLADIMIROV (based on foreign press materials)
Recommend to read
 CONVENIENT SCREWDRIVER
The usual tip is a spatula she is hidden by a rubber tube. This sheath not only protects the working tip of a screwdriver, but pockets. Pulled the head of the screw, it will screw it in... SAUNA IN THE GARDEN
During project development, and construction of baths, saunas in the garden, I proceeded from the fact that it took less materials and time. And this, I think I managed, mostly by...
