When my second child was born, we once again faced the problem of washing diapers, baby undershirts, and romper suits. Wash by hand? Long and tedious. Wash in a large washing machine? That is completely uneconomical — neither in terms of detergent consumption, nor water and electricity use… And a large machine also takes quite a lot of time. Of course, one could buy a small one, such as a “Malyutka” or “Feya,” but nowadays it is hard to buy even a bucket, let alone a machine.
Speaking of a bucket. Why not make a miniature washing machine yourself, using an ordinary plastic bucket as the base? As it turned out, making a “one-bucket” micromachine is not all that difficult — I managed to assemble it in just a couple of evenings.
I began by dismantling my old “Yauza” tape recorder — its tape-transport mechanism was quite suitable as the power unit for my mini-machine. On the chassis of the tape-transport mechanism I left only the electric motor, the drive from the motor to the flywheel, and the playback start knob. I moved the wire resistor closer to the motor and slightly shortened the speed-change pusher.
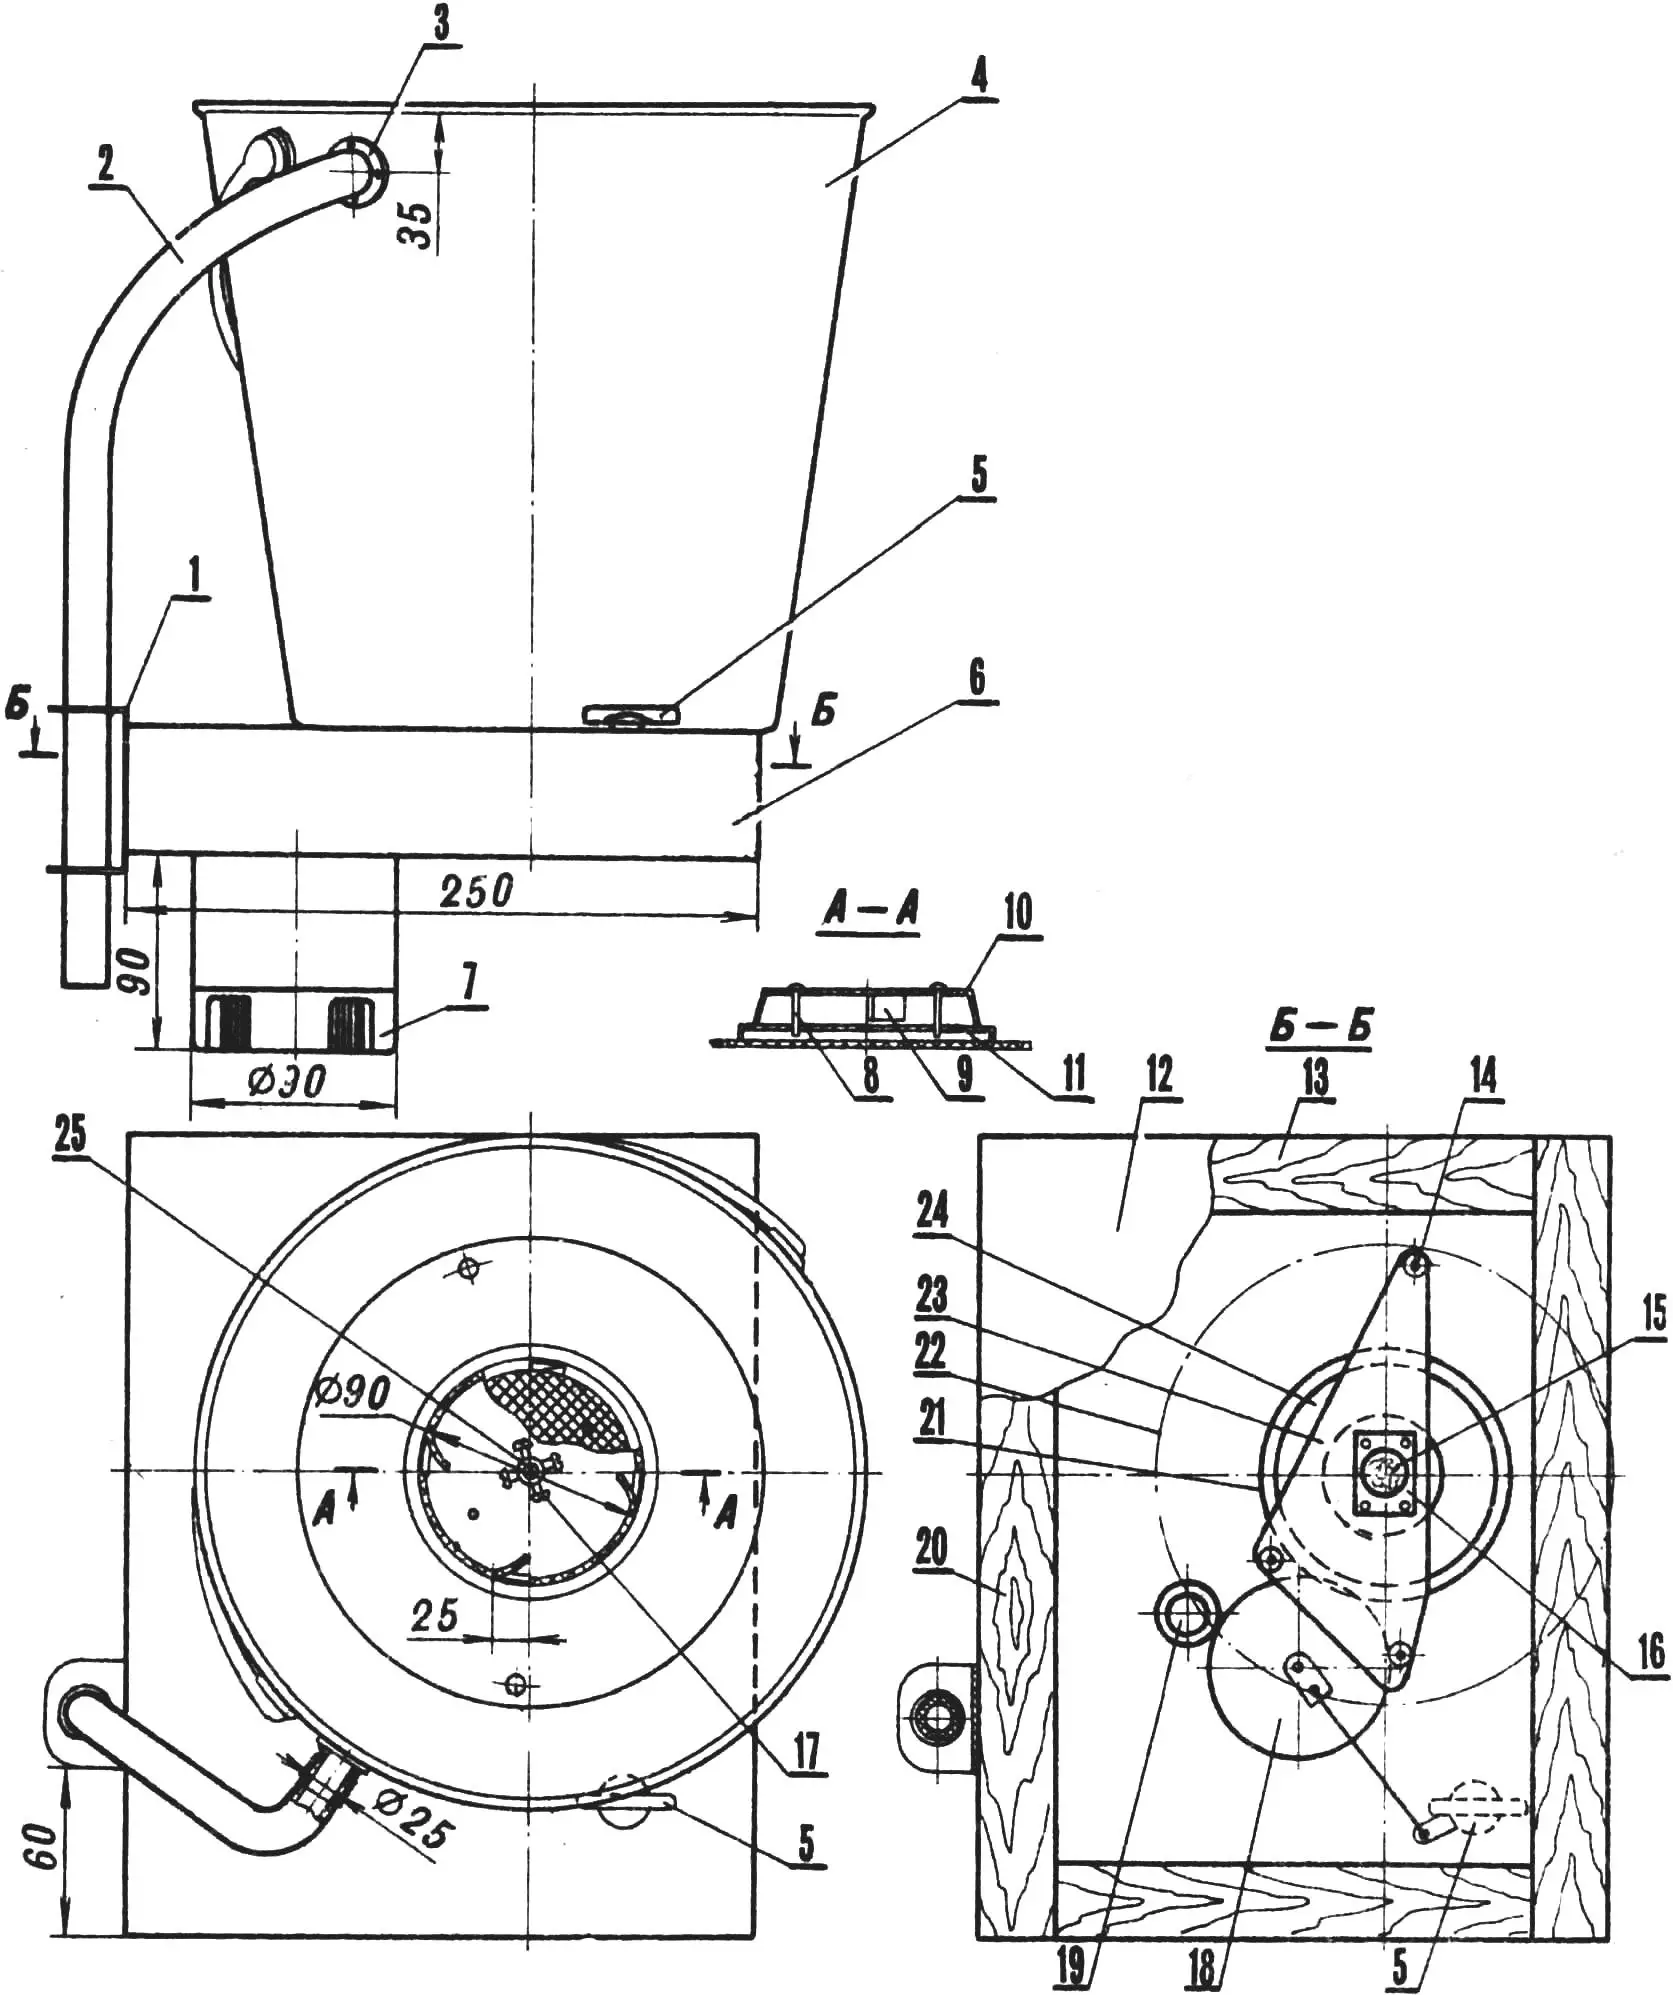
1 — hose holder, 2 — drain hose, 3 — nozzle, 4 — machine tank (plastic bucket), 5 — electric motor switch (playback start knob of the tape-transport mechanism), 6 — power-unit cladding (plastic), 7 — electric motor housing, 8 — activator mounting screws, 9 — activator working blades, 10 — activator (children’s sieve), 11 — activator base (vernier-device disc from an old radio receiver), 12 — plastic cladding, 13, 20 — frame (wooden bars of 30×35 mm cross-section), 14 — rubber gasket, 15 — seal (solidol grease), 16 — rubber gasket, 17 — screws fastening the activator to the flywheel shaft, 18 — rubberized roller, 19 — electric motor shaft adapter, 21 — flywheel shield (duralumin strip 7 mm high), 22 — position of the bucket body, 23 — power-unit panel, 24 — flywheel, 25 — flywheel shaft.
As the tank of the mini-machine I used an ordinary plastic bucket with a capacity of 9 liters. This bucket is fastened to the tape-transport chassis with the standard screws available on the chassis, using rubber gaskets. The hole for the flywheel shaft was cut in place so that the clearance between the shaft and the bucket body would be minimal. I had no way to make a sealed bushing, so I had to use rubber, and around the flywheel a shield of duralumin. In the flywheel itself I drilled six holes, so that water seeping from the bucket and getting onto the flywheel eventually runs down into the bathtub on which my machine is placed, without getting onto the electric motor.
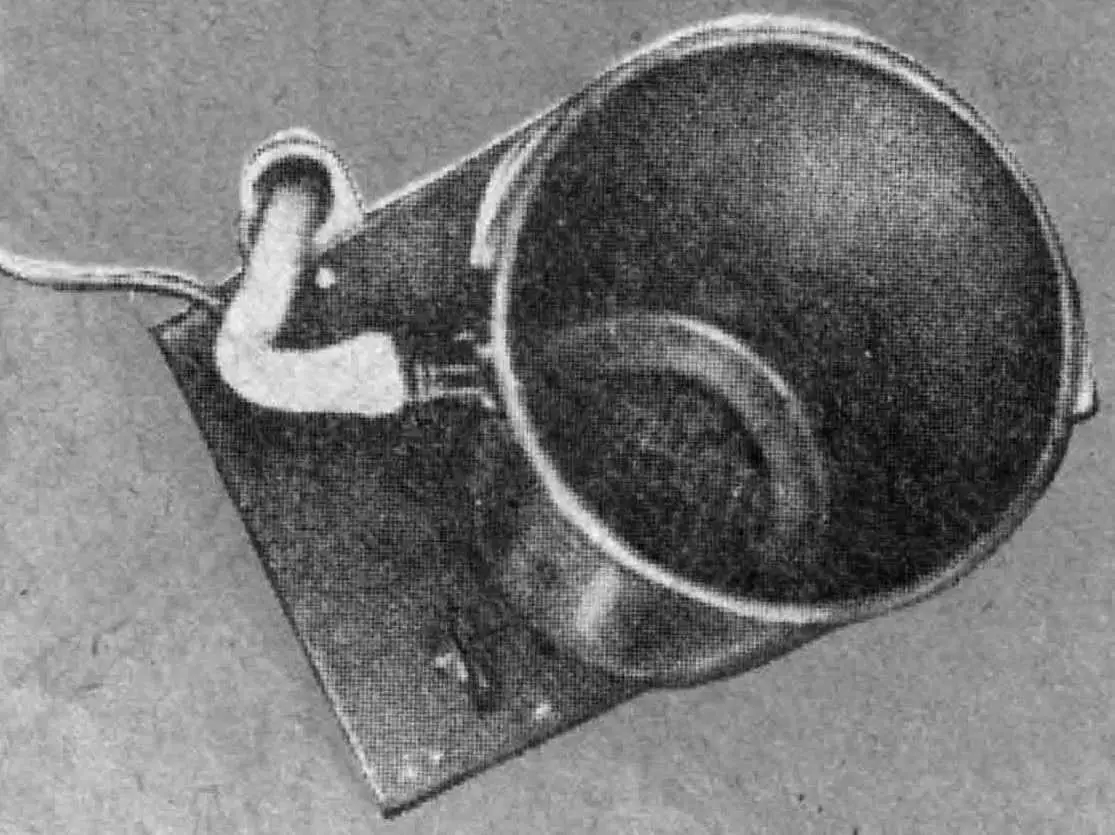
The washing-machine activator is made from a children’s toy — a sieve. On its side surface I made slits and bent them inward to form a kind of blades. When this part rotates, the bent ends catch the water and throw it upward. The sieve-activator itself is mounted with a pair of screws onto a duralumin disc (I used a vernier device from an old radio receiver as this disc), and that disc is fixed on the flywheel shaft.
The power transformer for the electric motor is installed separately from the washing machine itself and is connected to the motor by a long cord with reliable insulation.
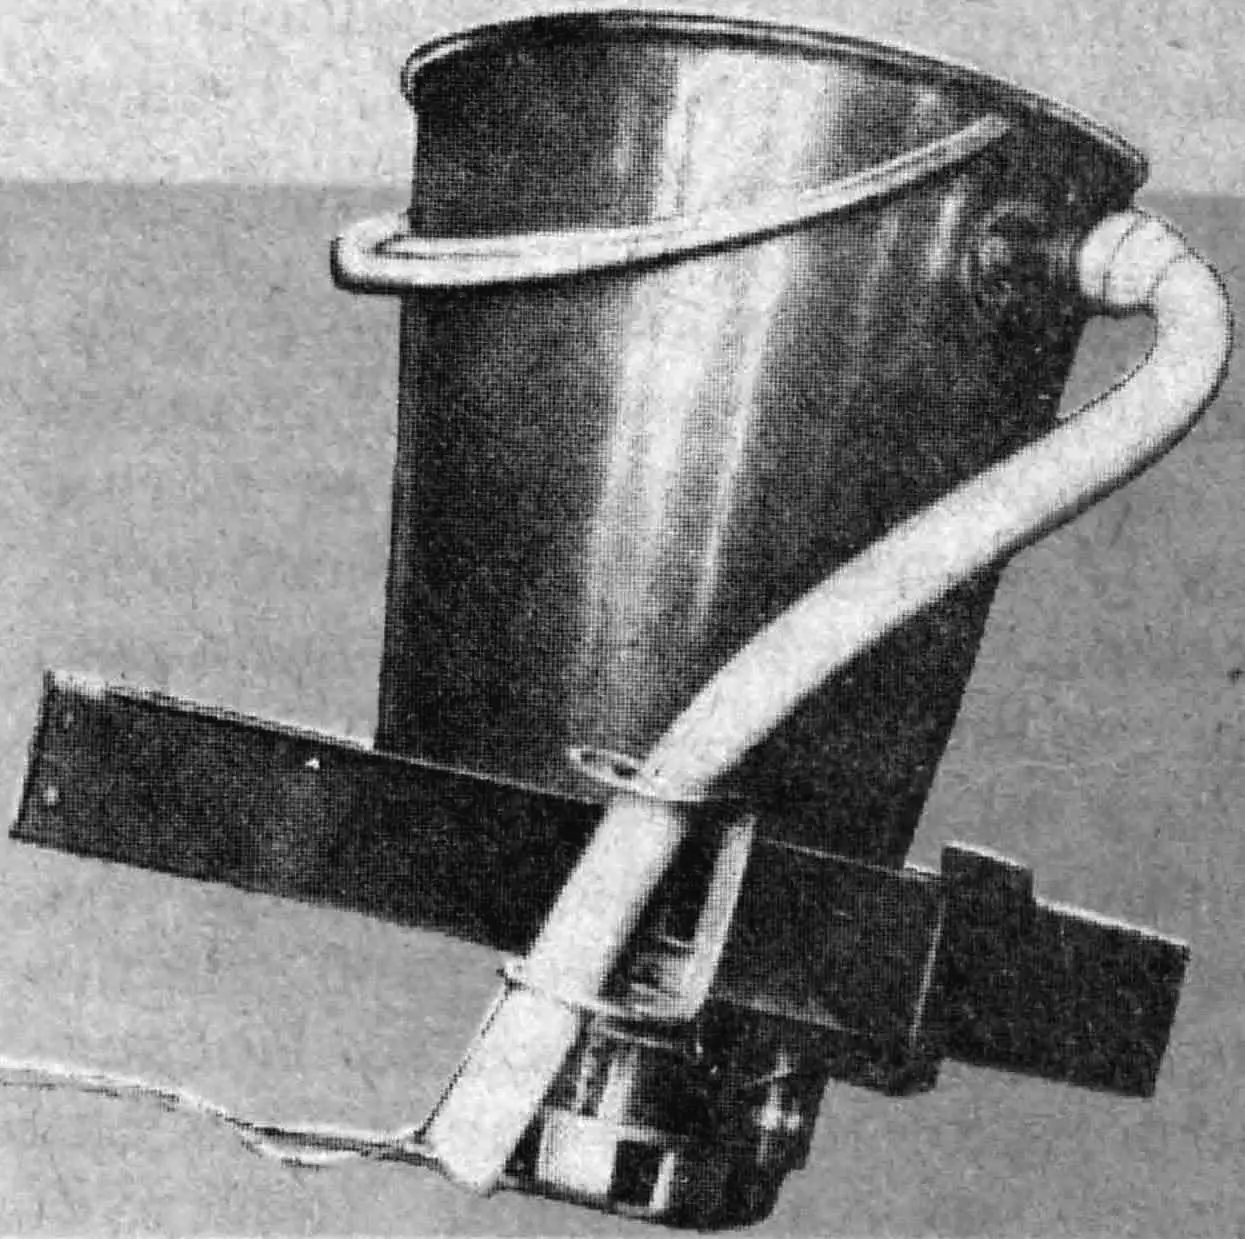
In the upper part of the bucket a nozzle is fixed with a hose pulled over it, which is led outside the machine. It is used when rinsing laundry: the machine is set on two boards over the bathtub, clean water comes in from the tap, and dirty water drains through the fitting and hose. One only needs to adjust the water flow.
The machine’s power unit is enclosed on all sides with plastic panels.
I have been using this machine for about a year and am quite satisfied with it. It washes baby laundry fairly well, is almost silent, and the electric motor does not overheat even during prolonged operation. The normal load is one diaper or two or three pairs of romper suits.
“M-K” 9’92, V. NIKOLAEV, Samara
Recommend to read
 TIMER ON CO2…
Without the engine the model doesn't fly. But to rely on the ice today is not necessary: the mass of the motors is just terrible. You can, of course, many years ago, to do "resinator"... UNDER THE MOTTO “SPEED”
The emblem of the Leningrad order of Lenin shipbuilding Institute — sailboat on the open book — a notice to all shipbuilders. Bold design solutions, the movement of the search inherent...
