
Having a stove (wood or coal-fired) makes it quite possible to supply hot water to the kitchen sink and even a shower using a water heater — a device that utilizes the heat of hot flue gases exhausted through the stove’s chimney.
The design and operating principle of the device are as follows (Fig. 1, 2). The water heater pipe is installed in the chimney as close to the stove as possible. Hot water flows from the heater through pipes into a metal tank (for example, a used fire extinguisher cylinder), which contains a coil and is connected to the plumbing system and a faucet above the sink. The water inside the tank is heated by boiling water circulating through the heater coil.
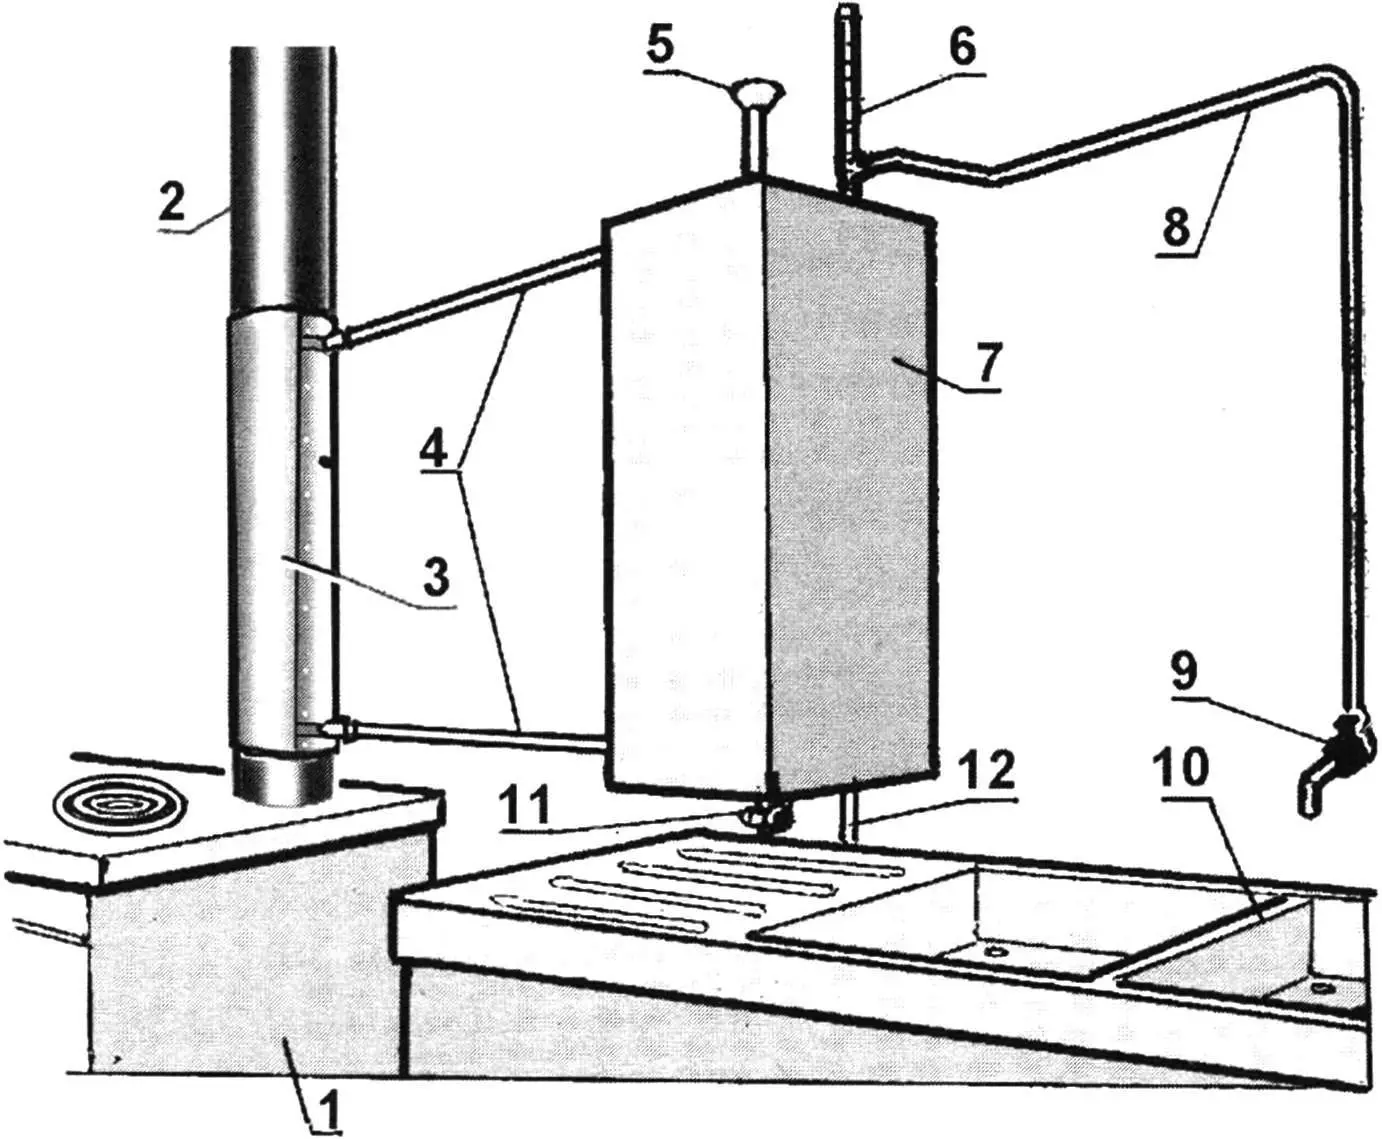
1 — stove; 2 — chimney pipe; 3 — heater casing; 4 — pipes to the coil; 5 — filler neck; 6 — thermometer; 7 — “thermos” box; 8 — pipe to the outlet tap; 9 — outlet tap; 10 — sink; 11 — coil drain valve; 12 — plumbing
Heater Manufacturing
The elbow pipe in the chimney (Fig. 2) is about 700 mm long. It is the main component of the heating device and has threads on both ends for pipe connection with the coil. Two strips of sheet metal, shaped into a spiral with several turns around the pipe, are welded onto this elbow. To ease bending, the spiral can be notched transversely using metal shears. The pipe and spiral should be tightly joined to ensure maximum heat transfer (a continuous weld is required for this). This part of the heater is enclosed in a tin casing shaped like a pipe, connected to the stove’s firebox outlet, and forming the lower chimney section. To allow for cleaning, part of this casing is removable.
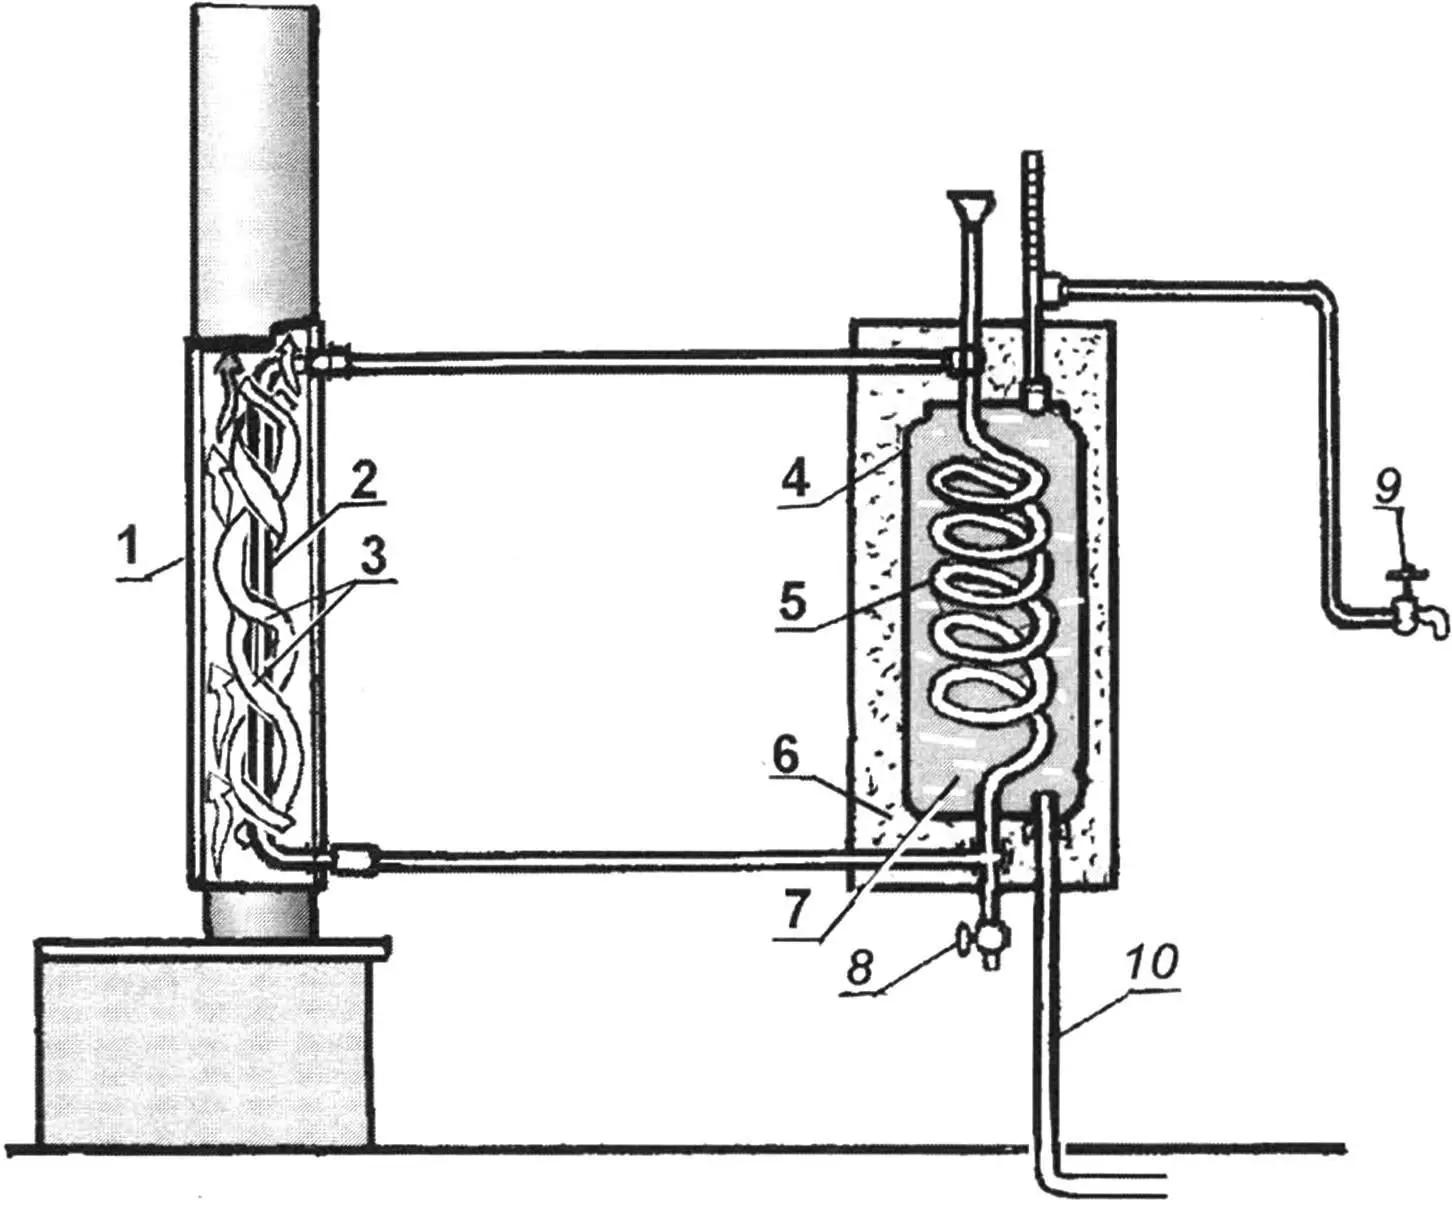
1 — heater casing; 2 — heater elbow; 3 — heat intensifying plates; 4 — heat storage tank; 5 — coil; 6 — thermal insulation; 7 — heated water; 8 — coil drain valve; 9 — outlet tap; 10 — plumbing
The coil is manufactured separately and placed inside the tank in such a way as to enable pipe connection with the heater installed in the chimney. The tank itself is connected to the plumbing system and to a pipe with a thermometer and outlet tap (Fig. 2). A pipe with a funnel at the top of the coil allows manual filling in the absence of water pressure.
The tank is filled with water from below — either via plumbing or from a water container if there is no centralized supply. Another pipe (on top) connects the tank to the household water system — to the sink or shower. The outlet tap at the end of this pipe delivers hot water to the sink.
Installation and Operation
The insulated tank box is mounted on the kitchen wall as close as possible to the stove and sink. The connecting pipes should be as short as possible to reduce heat loss. Two pipes from the heater elbow are connected to the tank using standard tees. If feasible, lay the pipes horizontally to support normal water circulation.
A crucial step is assembling the “thermos” box. A casing made from plywood or 8–10 mm thick boards is built with holes for the pipes. The space between the tank and casing is filled with any insulation material — such as fiberglass — which allows hot water to be stored for up to 24 hours.
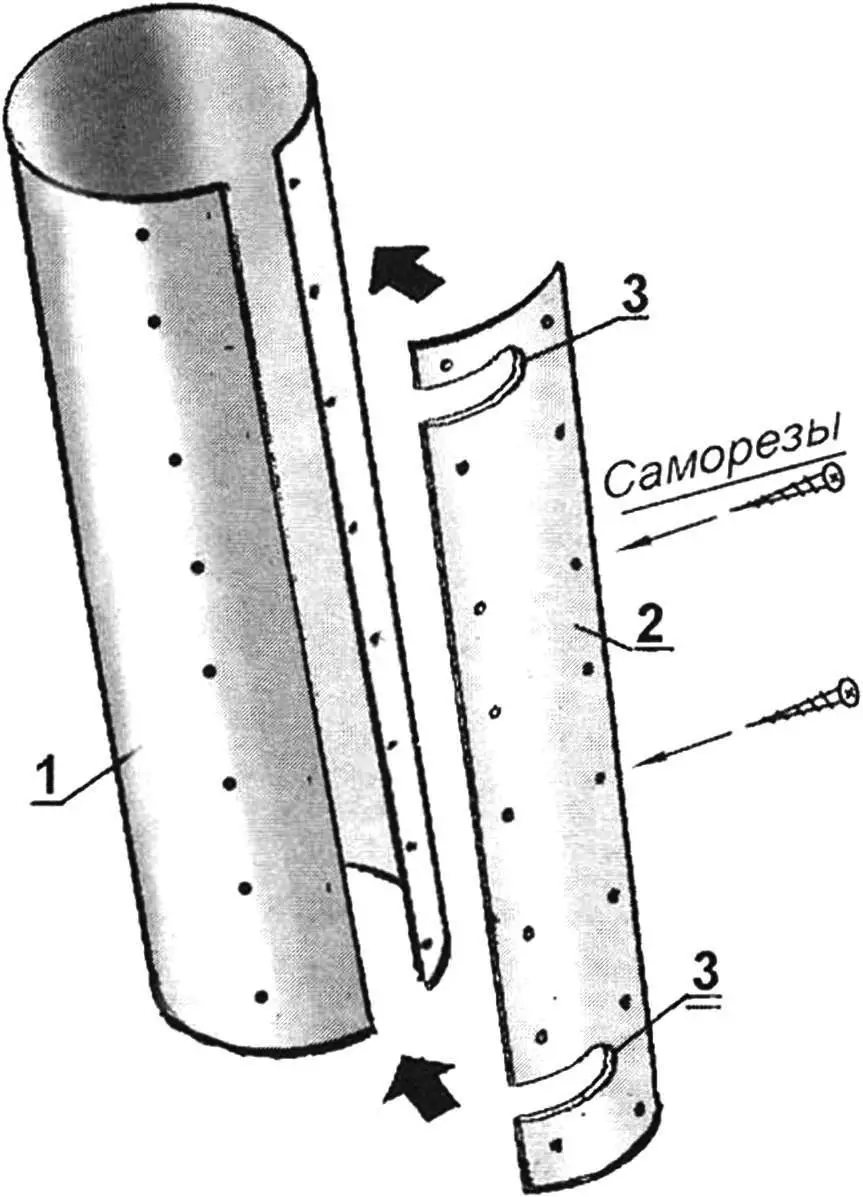
1 — chimney spacer; 2 — fastening plate; 3 — holes for heater pipes
Before lighting the stove, fill the heater and coil with water. If there’s no running water, it’s best to use rain or melted snow to avoid limescale deposits inside the tank. Pour the water through the funnel, but not to the top — allow space for expansion when heated.
When the tank is connected to the plumbing system, it remains pressurized. If air gets trapped in the system, open the outlet tap near the sink to release it.
Once the stove is lit, water in the heater begins to circulate due to the temperature difference between various system parts, thus heating the tank. Hot water flows out of the tank through the sink tap and is automatically replaced by cold water. Always ensure the water level remains above the top tee on the tank to maintain uninterrupted circulation.
V. BORISOV
Recommend to read
 GARDENER-BUILDER
When the erection even garden shed great importance is the accuracy of the marking: for example, improperly laid Foundation can cause distortion and cracking of walls, roof and other...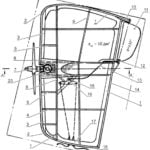 “BOUZOUKI” IN “DIPLOMAT”
Modern models of air fight as a championship class and "Junior" are in many respects similar in construction and, accordingly, on the concept. They completely satisfy the "fighters"...
