The frame is assembled using polyvinyl acetate, or casein glue and screws. During Assembly carefully check relative positioning of elements of longitudinal and transverse sets of straight out. Other longitudinal elements of the set are adjusted at the place, that is, the rail is applied to the frames, to indicate its position on them, and then cut the slots.
After Stripping frame, panel it with plywood or hardboard. Start with the bottoms. Attach the workpiece (4X1000X2000 mm), draw the frame with an allowance of 3-5 mm on the side and cut it off. Then lubricate the mating surface with glue, put the trim on the frame and the transom, nails with a length of about 20 mm nailed it to the details of the set. When the glue is dry, carefully apply a plane the contours of the sheet.
Fig. 1. Three-wheeled amphibious:
1 — swivel, 2 — seat, 3 — wheel, 4 — driving wheel amphibious, 5 — body, 6 — crankshaft, 7 — starcrazy, 8 — steering drum.
Fig. 2. Steering gear:
1 — steering wheel 2 — steering shaft 3 — pin with washer 4 bracket, steering bearing (steel S3), 5 — Central support bearing 6 — bearing, 7 — keel beams, 8 — the hull bottom.
Similarly, the side panel and deck. The joints carefully apply zarovnaya outside and inside with epoxy putty. External contours it is useful to additionally cover the boat fabric in a single layer. You can glue it with any resin, including parquet lacquer as well as paint grades GF and PF.
Now take up rowing mechanism. It includes the crankshaft, bent from steel rod Ø 12 to 14 mm, two bike wheels (we recommend to use the front wheels of the bicycles “Schoolboy” or “Kama”) and two paddle wheels collected from six plywood (10 mm thick) or aluminum (3 mm thick) plates each. The rowing plate dimensions 150X250 mm. Mount it to the wheel rim dural corners and pints with countersunk head. In the center of the rowing plate is collected through a notched plate made of aluminum with a thickness of 2 mm.
Bearing crankshaft clip on trapezoidal wooden bar thickness of 35 mm, lined on both sides chetyrehkilometrovoy plywood. To the bar the same screw bearing, steering column steel bracket with holes, bent from strips with a thickness of 4 mm. Steering column — dural pipe Ø 20-22 mm — lock in the bearing with two cotter pins.
The steering wheel is desirable to use ready, but you can make your own by bending it out of aluminum pipe with a diameter of about 20 mm. or use the ring from the old Vienna chair. The spoke bagels cut of duralumin sheet thickness of about 3 mm. Central sleeve carved on a lathe, or pick the perfect bar.
Rear driven wheel (from a child’s Bicycle or stroller) is fixed on the swing arm, welded from the front of the old bike frames and steel plate. On the transom Board it is secured with four bolts. The steering drum is a round wooden boss Ø 110 mm duralumin with two names.
Fig. 3. Device front axle amphibians:
1 — wheel (off the bike “Pupil”), 2 — deck, 3 — edging of the cockpit, a 4 — pedal (plywood or PCB), 5 — center support bearing (brass or MDI S2), 6 — crankshaft (steel Ø 12 to 14 mm) 7 — mounting bracket of the propeller blades (dural area 20×20 mm), 8 — row plate (plywood or aluminum S10 S3) 9 — figure plate, 10 — strengthening of Board (plywood S12), the 11 bearing sleeve (brass, bronze), 12 — keel beams, 13 — the Central bearing and steering bearing. 14, 15 the longitudinal component of the hull.
Fig. 4. Case equiped amphibious
To control Amphipoda in water provided dural steering pen, pivotally hinged to the axis of the rear wheel. Before leaving the machine to land the pen is raised and secured with rope with a carabiner.
For posting startrow will need four to six blocks: are there any children’s designer. To adjust the tension of the ropes can be a couple of turnbuckles (turnbuckles).
Seat Amphipoda is a wooden frame covered with nylon cord or vinyl chloride tube Ø 5-6 mm. When the installation seat in the hull of the boat provide the ability to adjust its position depending on the height of the driver.
After finishing the Assembly work, prosopalgia body inside and outside and paint two or three layers enamel GF or PF. That’s all. It remains to test the amphibious as in the land and water option, recheck all joints and bearings, to eliminate a possible leak.
I. SERGEEV
Recommend to read
 “LEAR” – OFF-ROAD CONQUERER
The idea to make a cross-country passenger car came to me at the beginning of 2004, when the opportunity arose to purchase a “killed” Mitsubishi-Pajero all-terrain vehicle - only the body... MAGNET HAMMER
To fix the drawing paper on the drawing Board, a Board which is made of particle Board, is difficult. For anchoring one corner you have to use some drawing pins, as they bend. If you use...
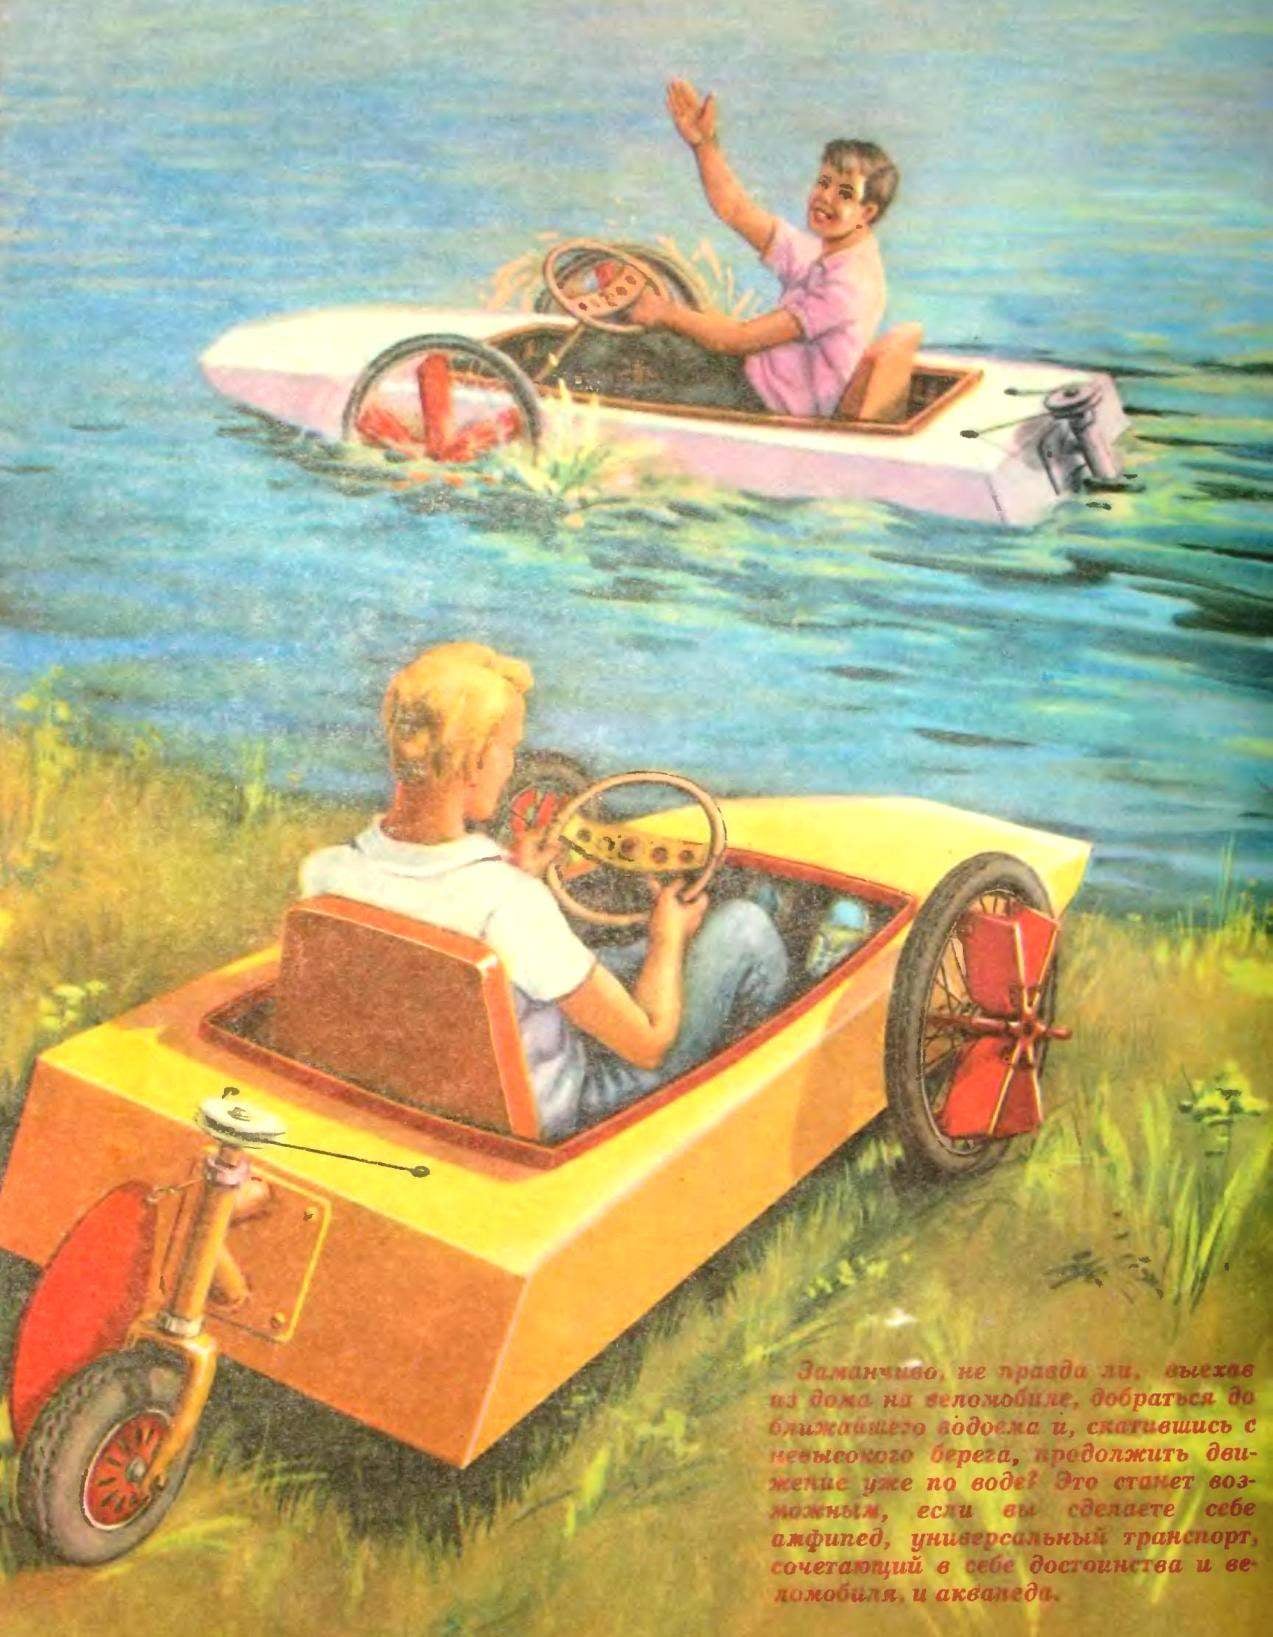
 Diverse and numerous family water bikes, but they all have a major flaw: transport them by land very difficult. Another thing — ampipe, on land he feels as confident as on the water. The secret to this versatility in the propeller — crankshaft with propeller wheels when traveling on the roads is the leading “front axle”.