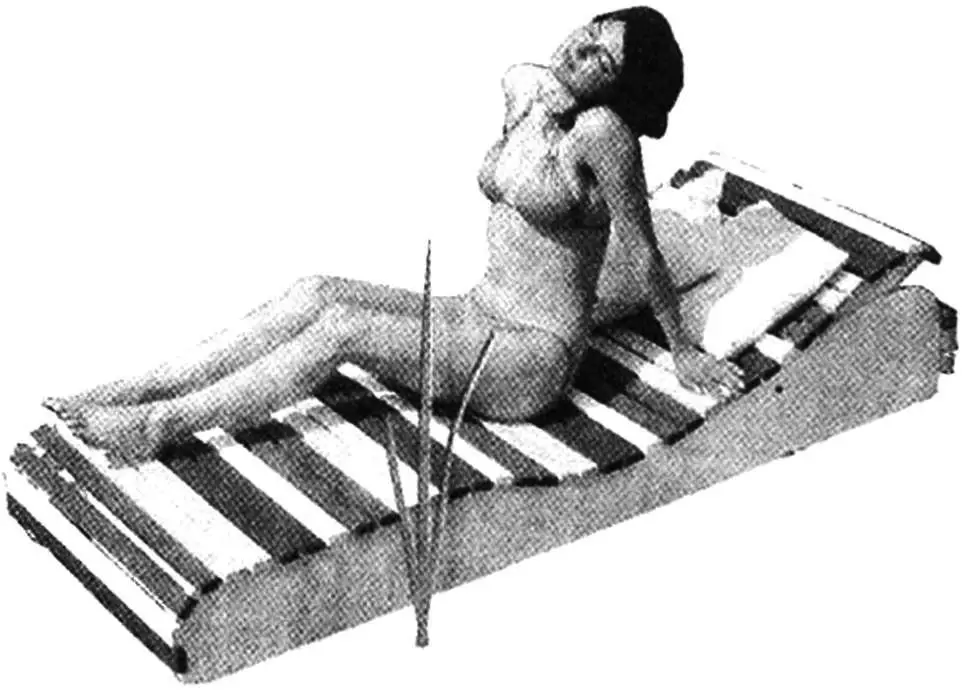
Would you like to relax and indulge in sweet idleness, lying under the sun in a comfortable lounger in a cozy corner of your country yard? Tempting, right? To make this happen, you’ll need a bit of preparatory work — but according to the Bulgarian magazine “Naprawi Sam”, it’s entirely doable for any hardworking DIY enthusiast. By following the suggested recommendations, you can build this attractive lounger for hot summer days with minimal effort and cost.
A sun lounger is always practical and comfortable, especially when you want to get a good tan. Despite its seemingly bulky design, it’s actually highly mobile and easy to move around thanks to built-in furniture wheels — just follow the sun wherever it goes on your plot.
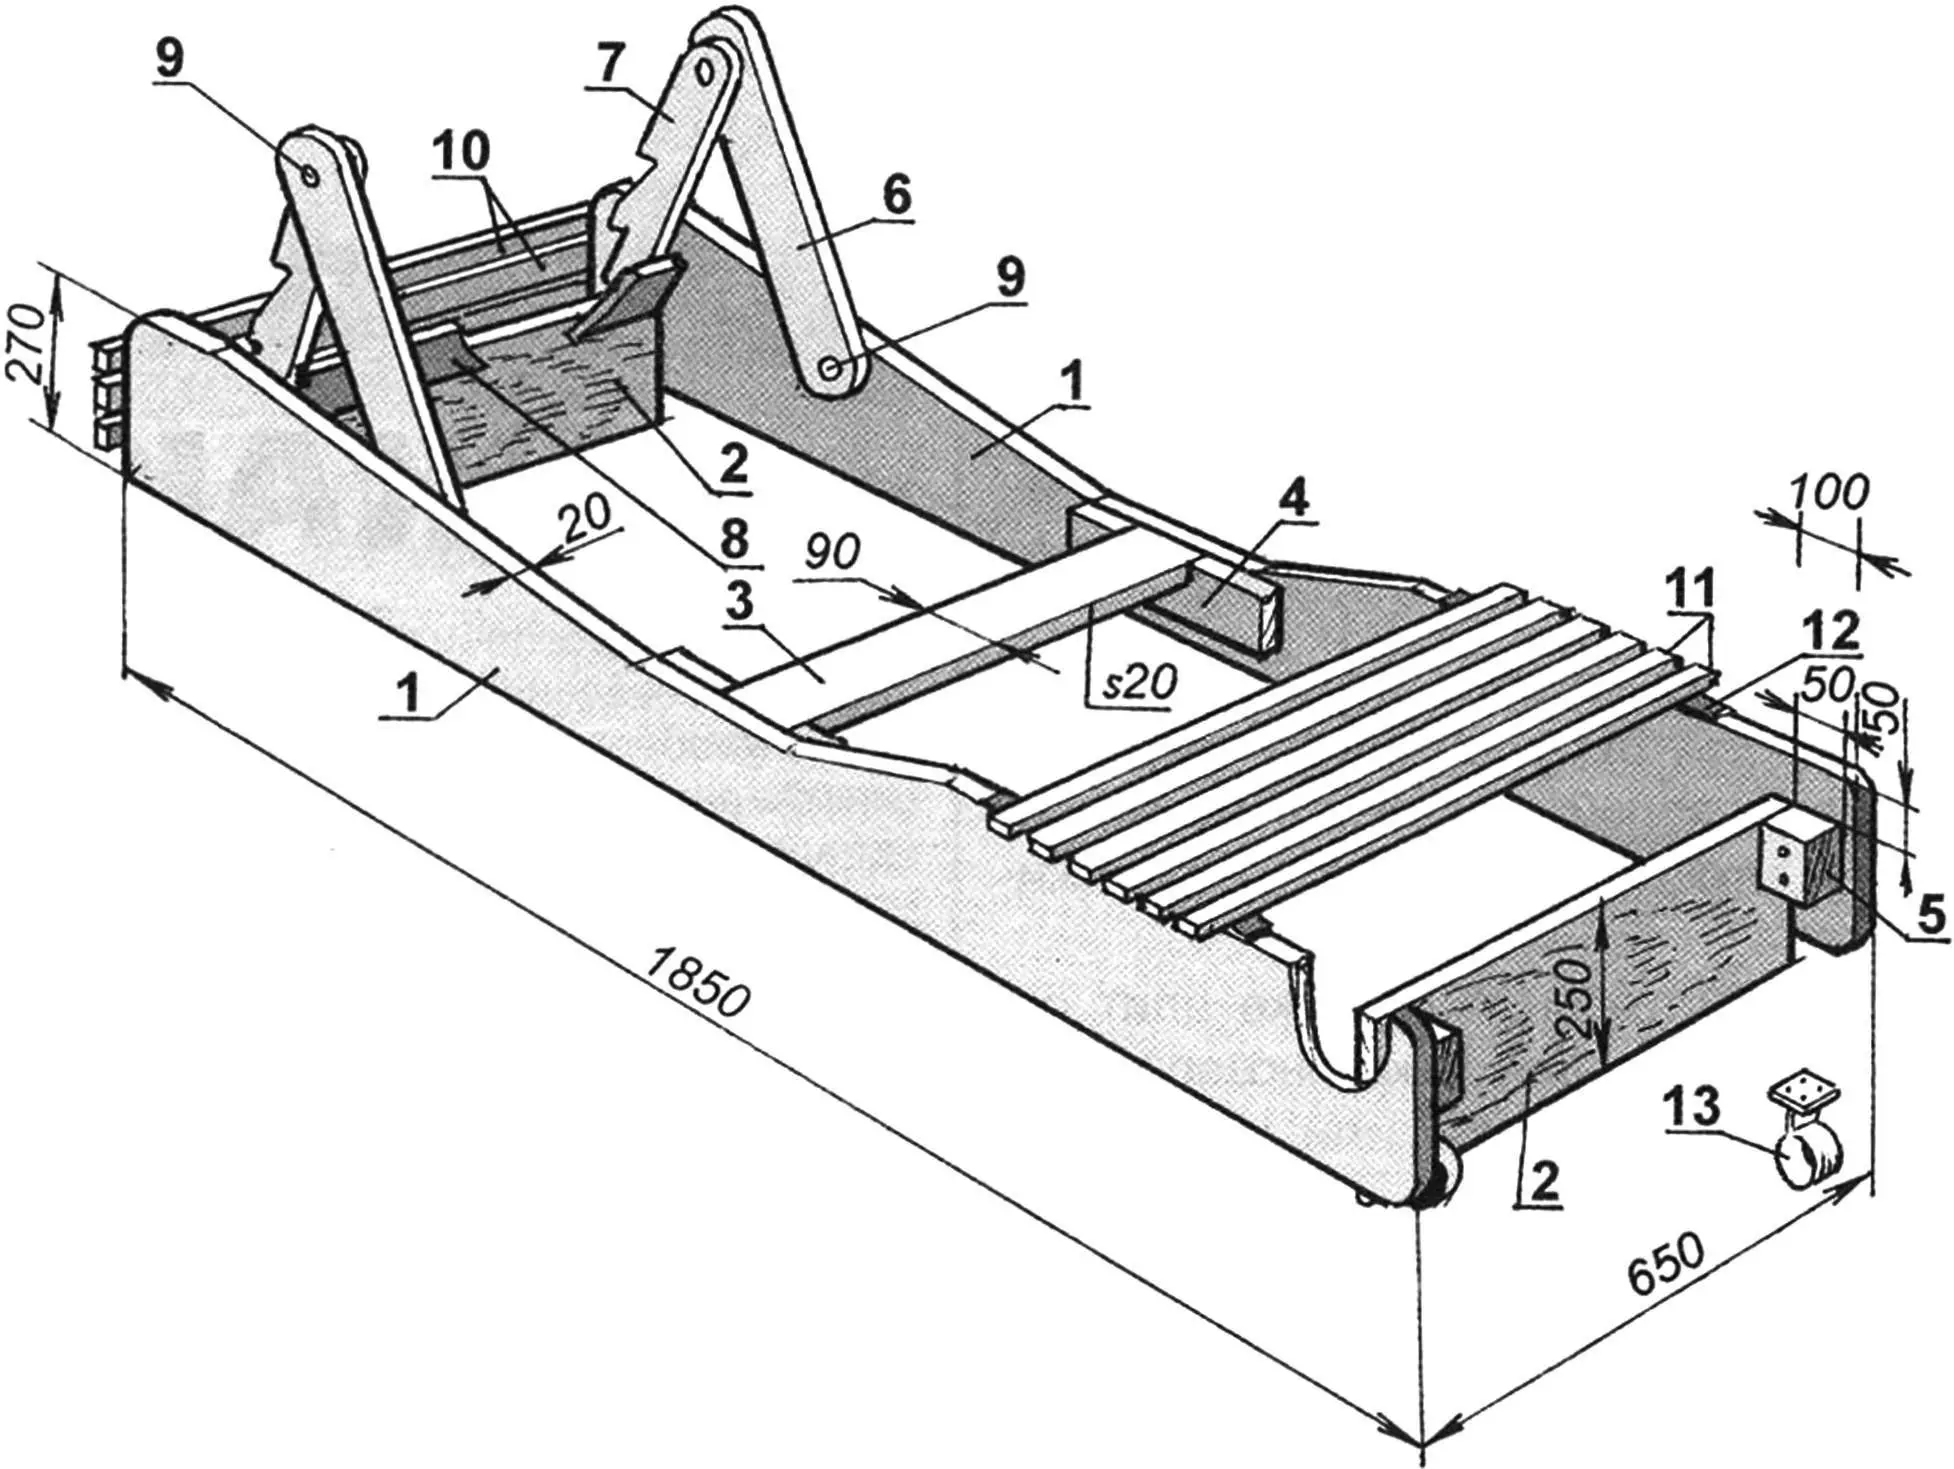
The construction consists of only three main elements: the frame, the adjustable headrest, and the covering (for both the main body and the head section).
Frame
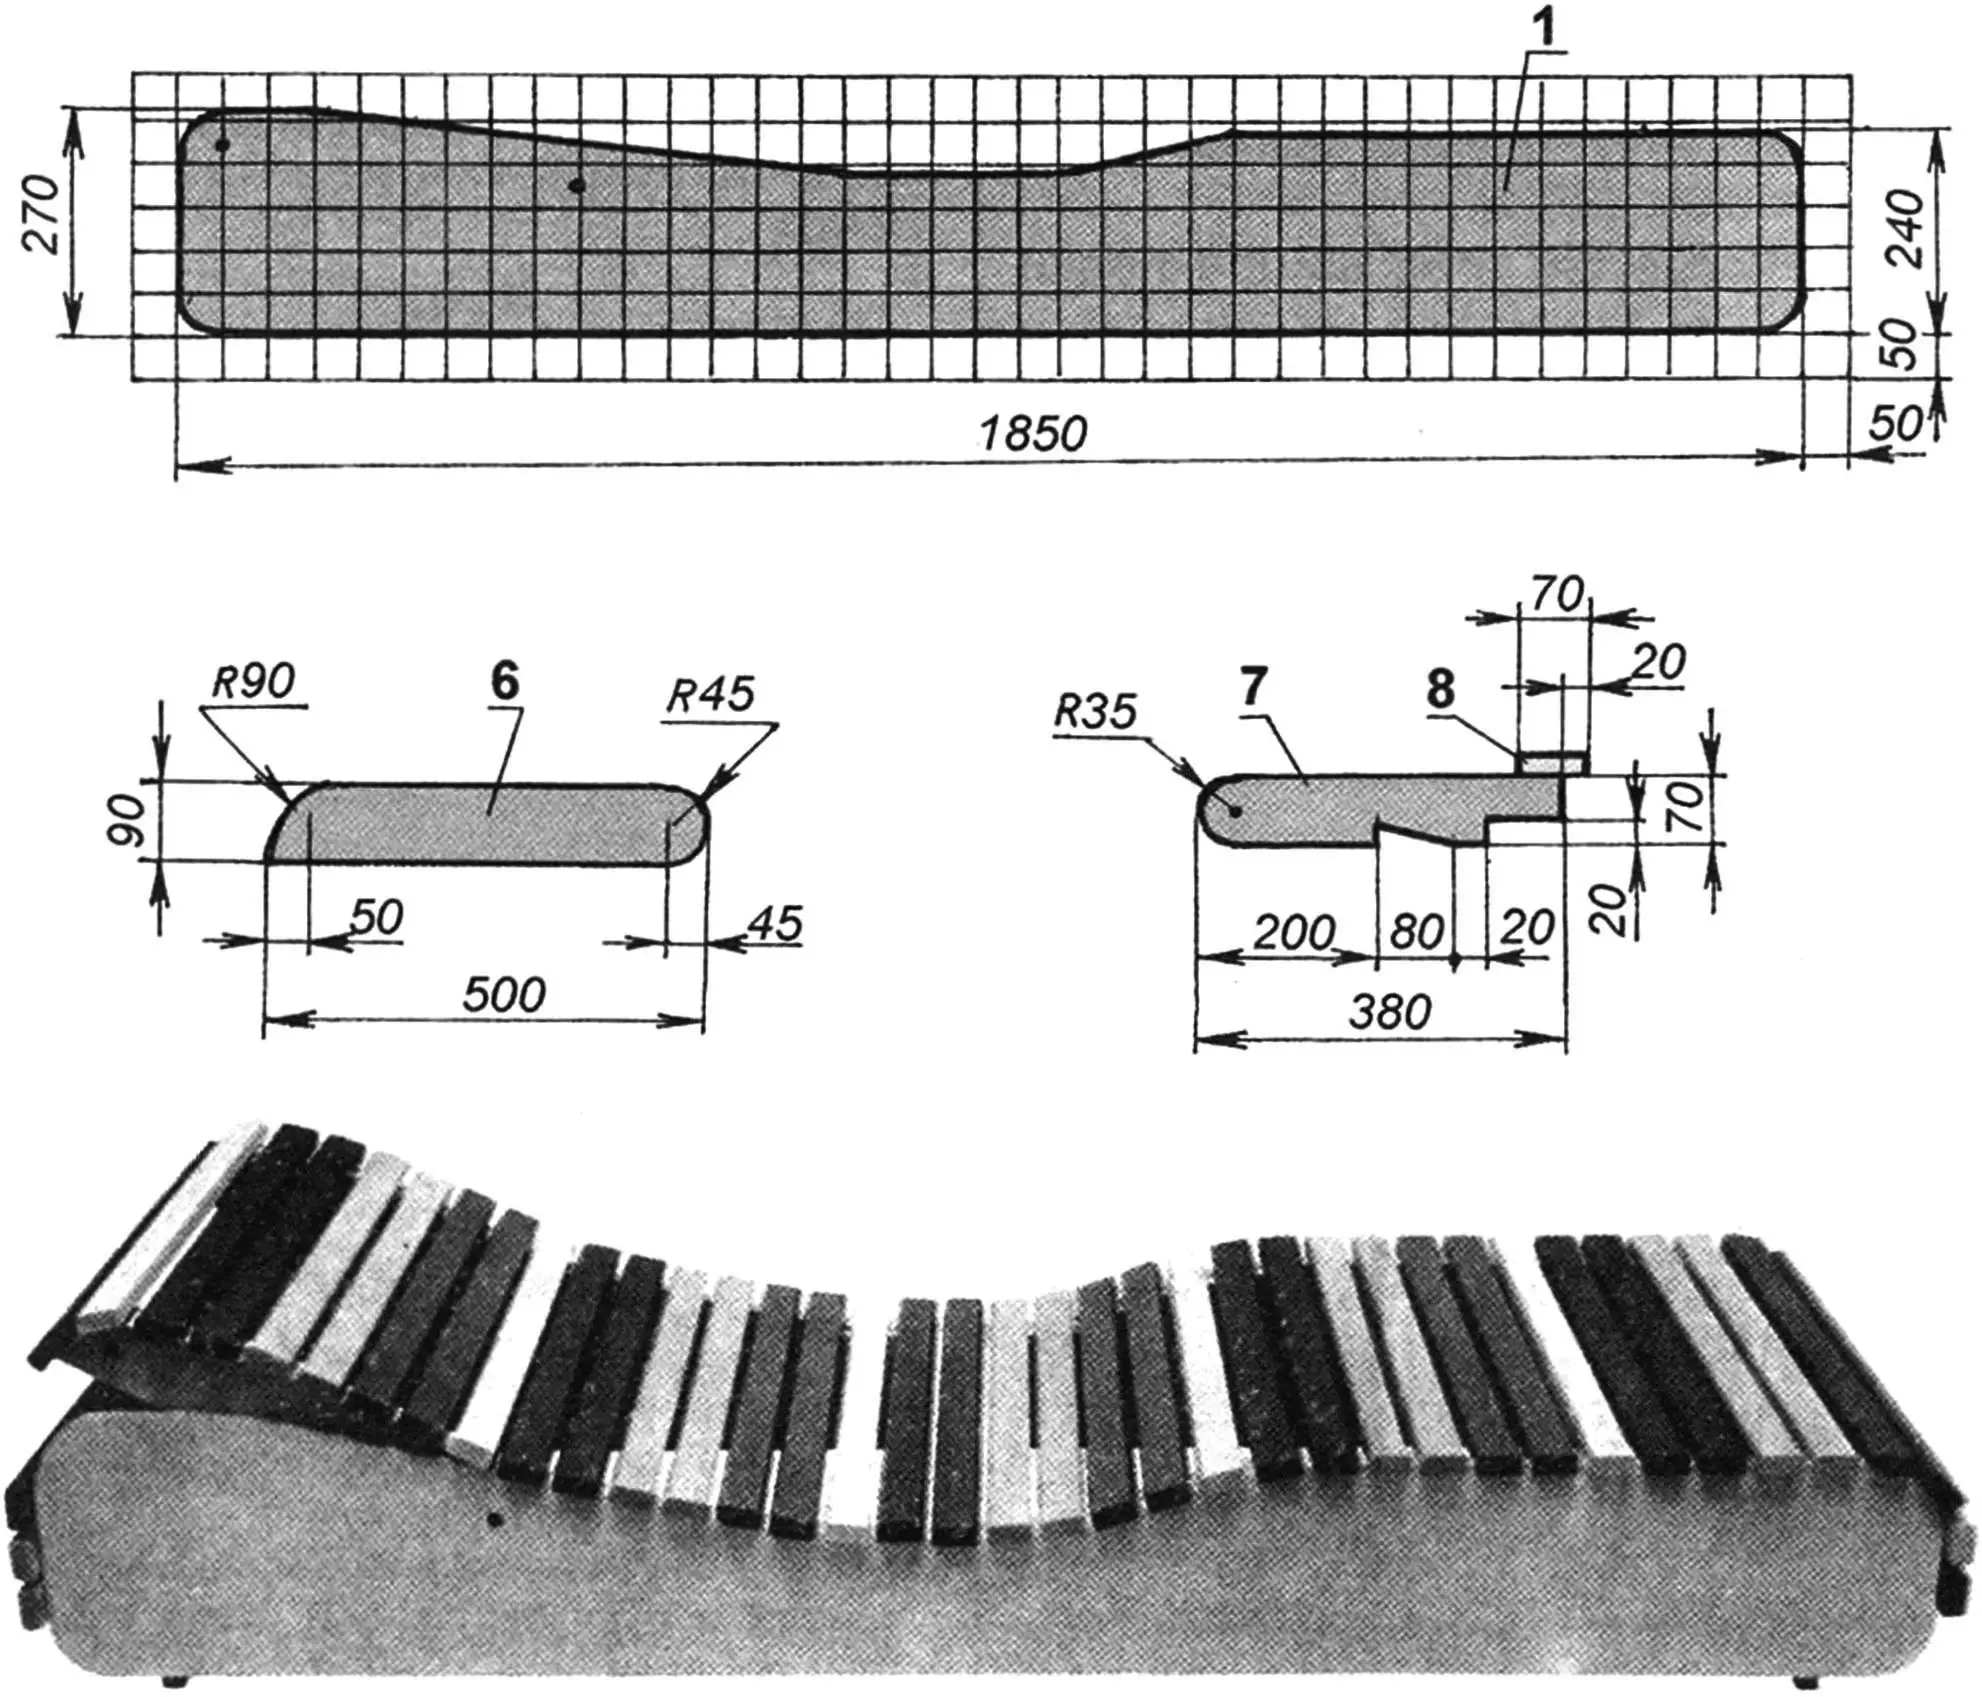
The frame is made up of two side panels, front and rear vertical crossbars, and a single horizontal middle bar. The sides can be made of boards or chipboard. You can easily make both symmetrical and identical using a cardboard template based on a scaled drawing.
| No. | Part | Dimensions, mm | Qty |
|---|---|---|---|
| 1. | Side panel | 1850x270x20 | 2 |
| 2. | Vertical crossbar | 610x250x20 | 2 |
| 3. | Middle crossbar | 610x90x20 | 1 |
| 4. | Support strip for crossbar | 300x90x20 | 2 |
| 5. | Wooden block | 90x60x60 | 2 |
| 6. | Headrest support arm | 500x90x20 | 2 |
| 7. | Headrest locking arm | 380x70x20 | 2 |
| 8. | Headrest crossbar | 570x70x20 | 1 |
| 9. | Hinge (bolt with washer and nut) | M6x48 | 4 |
| 10. | Covering (wooden slat) | 700x40x20 | 41 |
| 11. | Screw | 4×25 | 20 |
| 12. | Spacer (rubber strip) | 20x19x1850 | 2 |
| 13. | Furniture wheel | 2 |
The crossbars are wooden and are joined to the side panels using blocks (front and rear) and slats (middle). At the front ends of the side panels, the head section is covered with the same slats used for the main part. This serves both a decorative function and acts as support for adjusting the headrest angle.
Headrest
The hinged headrest is made from two pairs of narrow boards. The main ones are the supporting arms, which are hinged at one end to the side panels and at the other to the notched locking arms. These are joined at the bottom with a crossbar, which provides rigidity and supports the headrest against the inner crossbar of the frame when fully raised. Other positions are held by the notched end resting against the front slat covering.
 Main parts of the lounger:
1 — side panel; 2 — outer and inner vertical crossbars; 3 — middle horizontal crossbar; 4 — support strips for horizontal crossbar (2 pcs);
5 — wooden block (2 pcs); 6 — headrest support arm (2 pcs); 7 — notched locking arm (2 pcs); 8 — headrest crossbar;
9 — hinges (bolt with washer and nut); 10 — covering (wooden slats); 11 — screws; 12 — rubber spacer; 13 — furniture wheel (2 pcs)
The headrest arms have their own slat covering that smoothly transitions into the main lounger covering. M6 bolts with washers and nuts (or wooden dowels with locking pins) can be used as hinges.
Covering
The covering is made from wooden slats of uniform width and thickness, leaving ventilation gaps between them — about the same size as the thickness of each slat.
The slats are nailed along the entire upper edge of the side panels, extending over the back edge of the frame and ending at the front covering near the headrest.
This surface provides sufficient comfort even without a cushion, though you can always add a light mattress or folded blanket if desired.
Mobility
To make it easier to take the lounger out onto the lawn or move it around the yard, two wide-track furniture wheels are attached to the rear frame blocks that connect the crossbar and side panels. The mounting level is chosen so the wheels only touch the ground when the front of the frame is lifted. In that case, the front slats act as handles.
Finish
Since a lounger is a piece of leisure furniture, it should be bright, colorful, and cheerful. All visible parts can be painted with oil-based paints, mixing colors as you like. One suggestion — paint the side panels in a pleasant green and alternate slat colors every two slats to avoid making it look too flashy.
Before painting, all surfaces should be sanded thoroughly to remove any roughness or splinters. Start with a thinned coat so it absorbs well into the wood, then apply full-strength paint — similar to cream in consistency — in several layers, letting each one dry in between.
B. VLADIMIROV
Recommend to read
 SCRAPER ON A SNOW TRACK
In heavy snowfall the streets are cleaned by using high-performance snow removal equipment. But the janitors usually no mechanization have not, their only tool is a shovel. However, here... AND PAINT, AND LACQUER
Few people know that packaging Styrofoam is the perfect base for the manufacture of varnishes and paints. The first are obtained by dissolving the foam in solvent "647" or butyl acetate....
