Once an old friend Igor came to me with an unsolvable (as he said) problem.
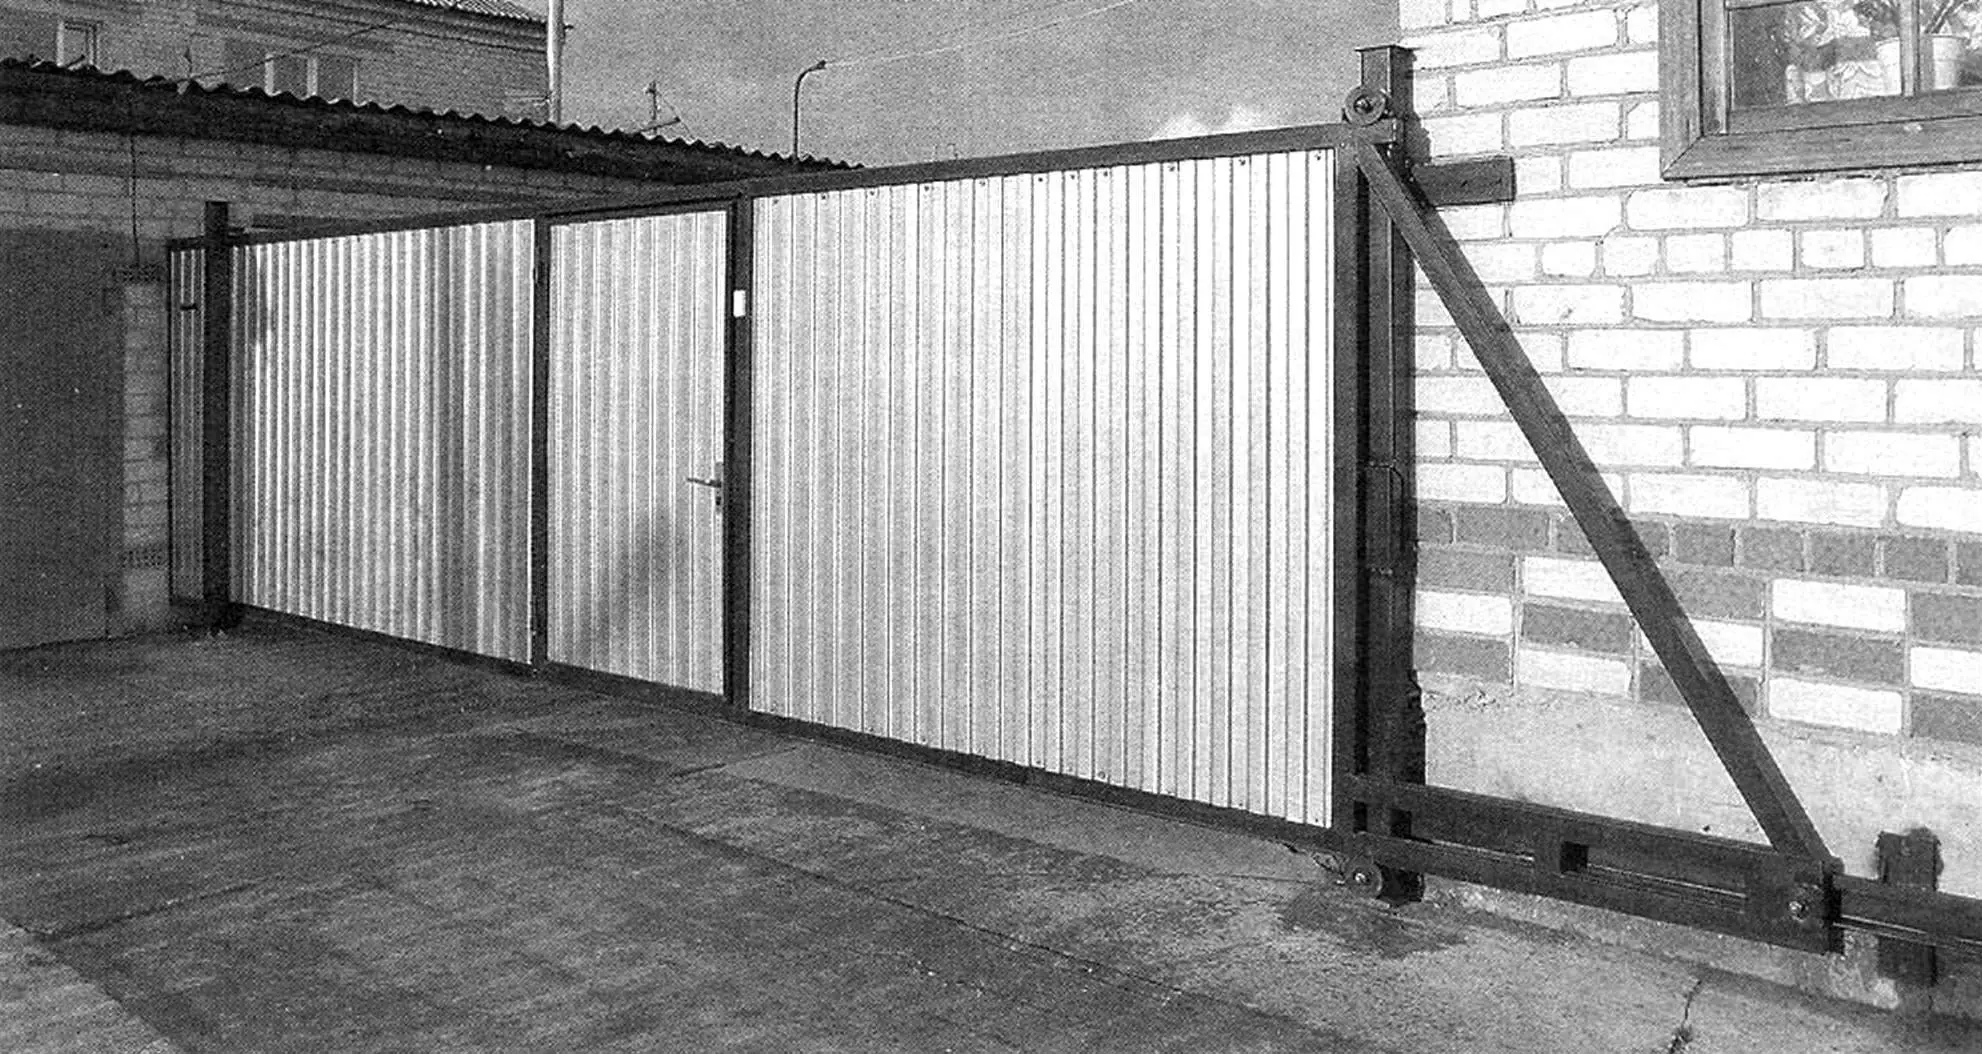
After the demarcation of the common plot of a four-apartment house where he lives, it was necessary to make and install sliding gates with a six-meter span and an integrated gate. After calling all local and regional companies, he was refused. They had no such developments in their practice yet, and he asked me for advice and help in designing and constructing large sliding gates.
I couldn’t refuse my friend and went with Igor to the site. We measured the necessary distances and dimensions with steps and a tape measure, listened to the wishes of neighbors and his wife. The gate design was already forming in my head, and I quickly sketched out drawings. Then we talked with my friend about the necessary main materials and set the day to start work.
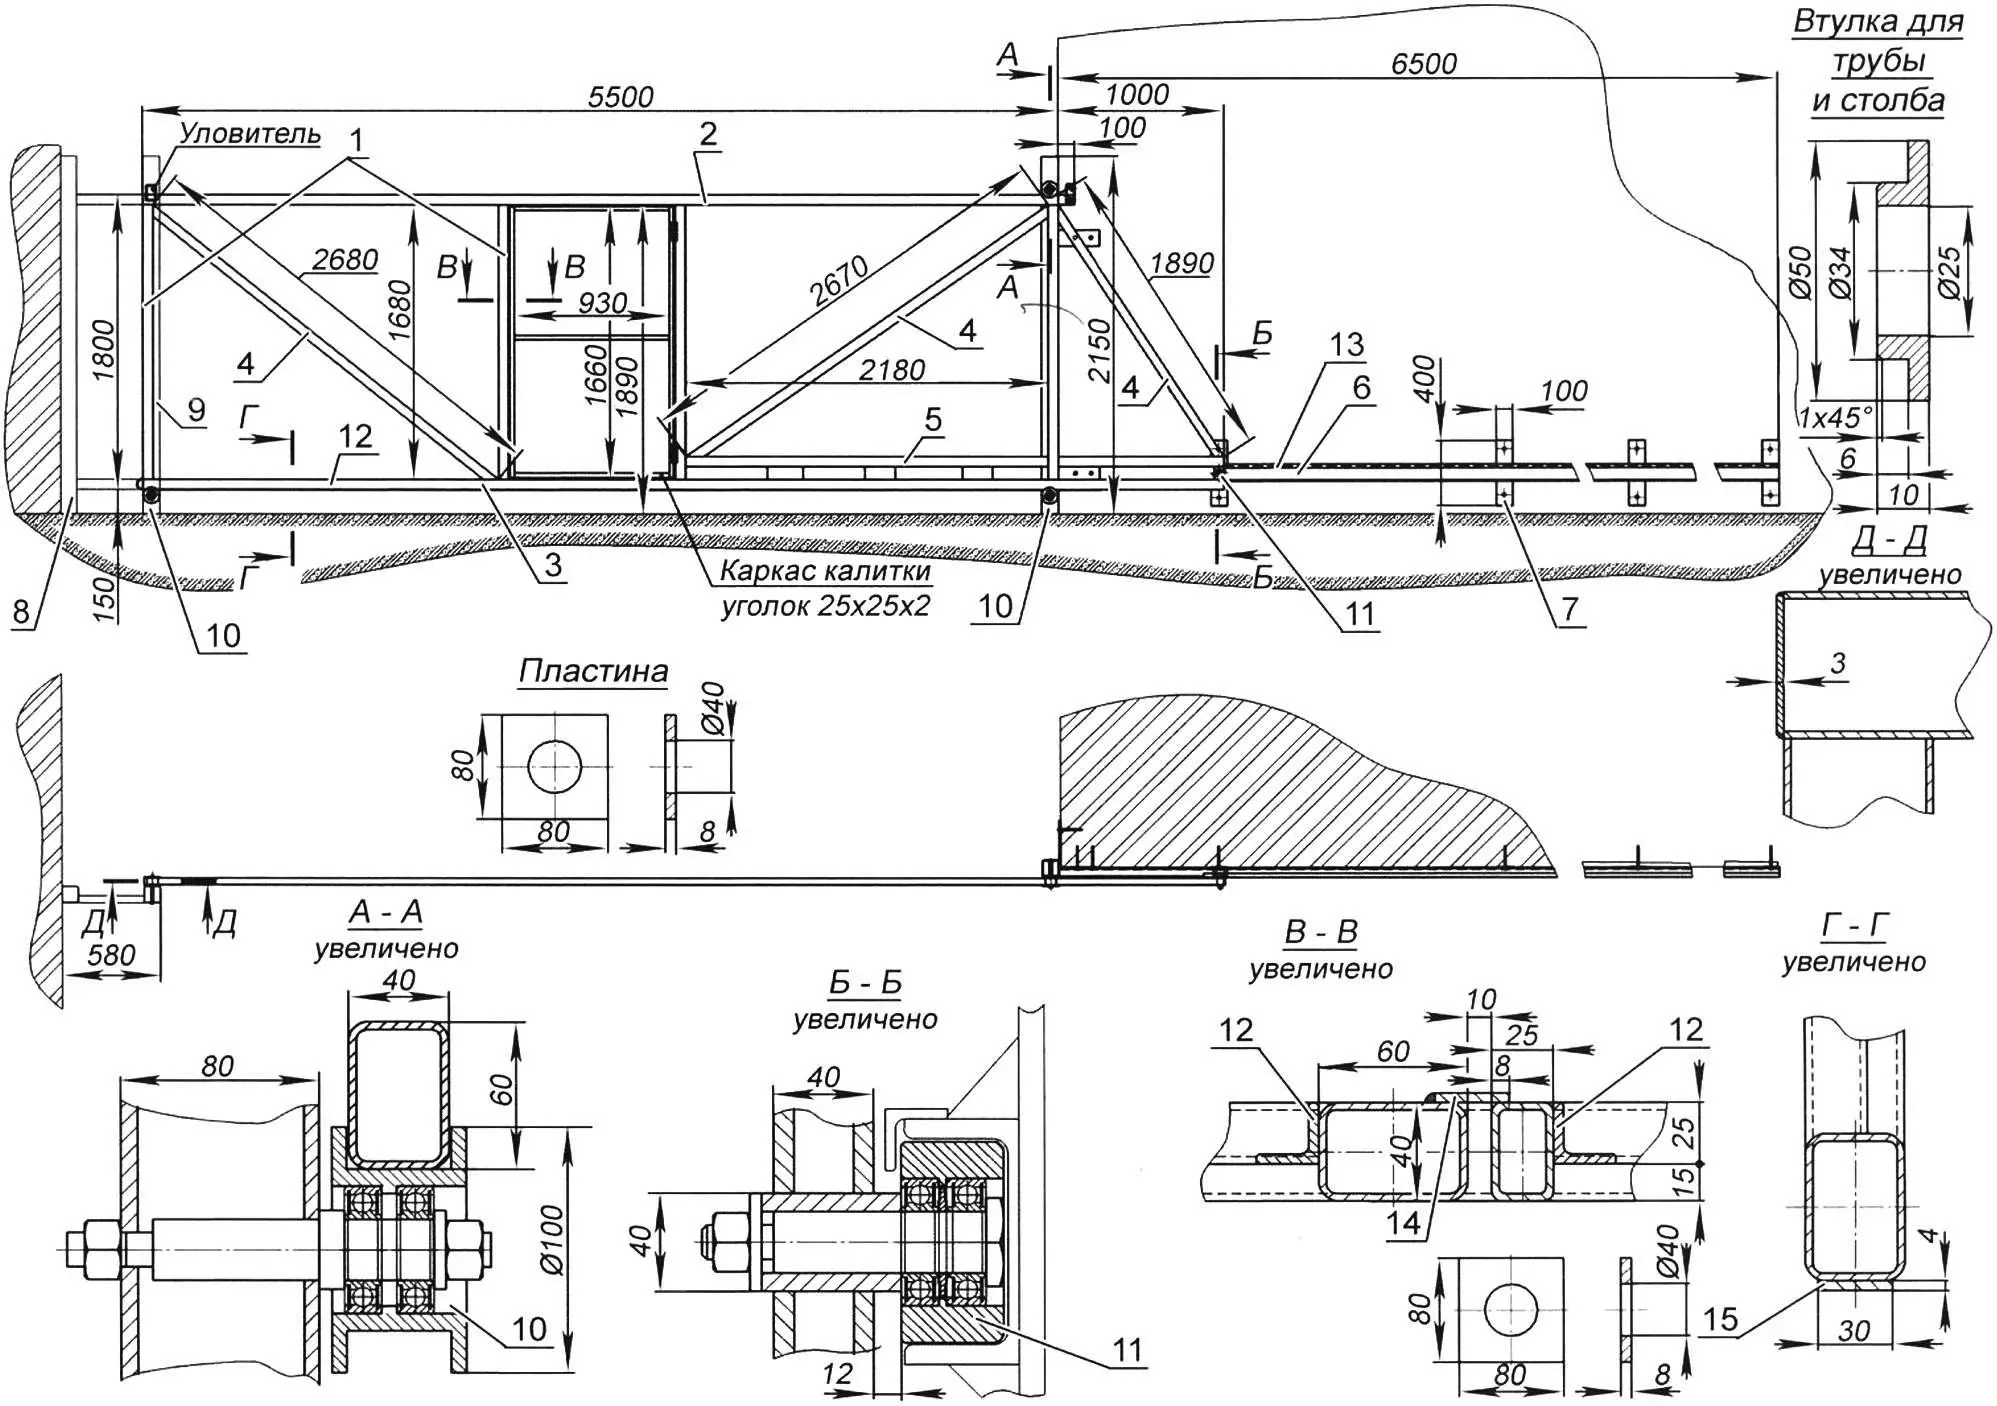
1 – post (tube 60x40x2, 4 pcs.); 2 – top frame (tube 60x40x2); 3 – bottom frame (tube 60x40x2); 4 – brace (tube 40x25x2, 3 pcs.); 5 – reinforcement (tube 60x40x2, connected to the rear half of the bottom frame with spacers); 6 – guide rail (channel No. 10 with straight flange); 7 – channel mounting strips to wall (4 pcs.); 8 – support (wall-mounted) post (tube 80×80, 2 pcs.); 9 – support (intermediate) post (tube 80×80); 10 – tube rollers (3 pcs.); 11 – channel roller; 12 – internal edging for mounting profiled sheets (angle 25×25); 13 – guide channel edging, for mounting it to the wall (angle 25×25); 14 – gate travel limiter (steel strip s3); 13 – steel anti-wear strip (s3)
At home, I made drawings of the gates, gate, and fence, and calculated the material requirements.
The sliding gates consist of:
– truss frame with guide roller and end stop (length 6500 mm, height 1800 mm);
– guide channel (length 6500 mm) with bumper and end stop;
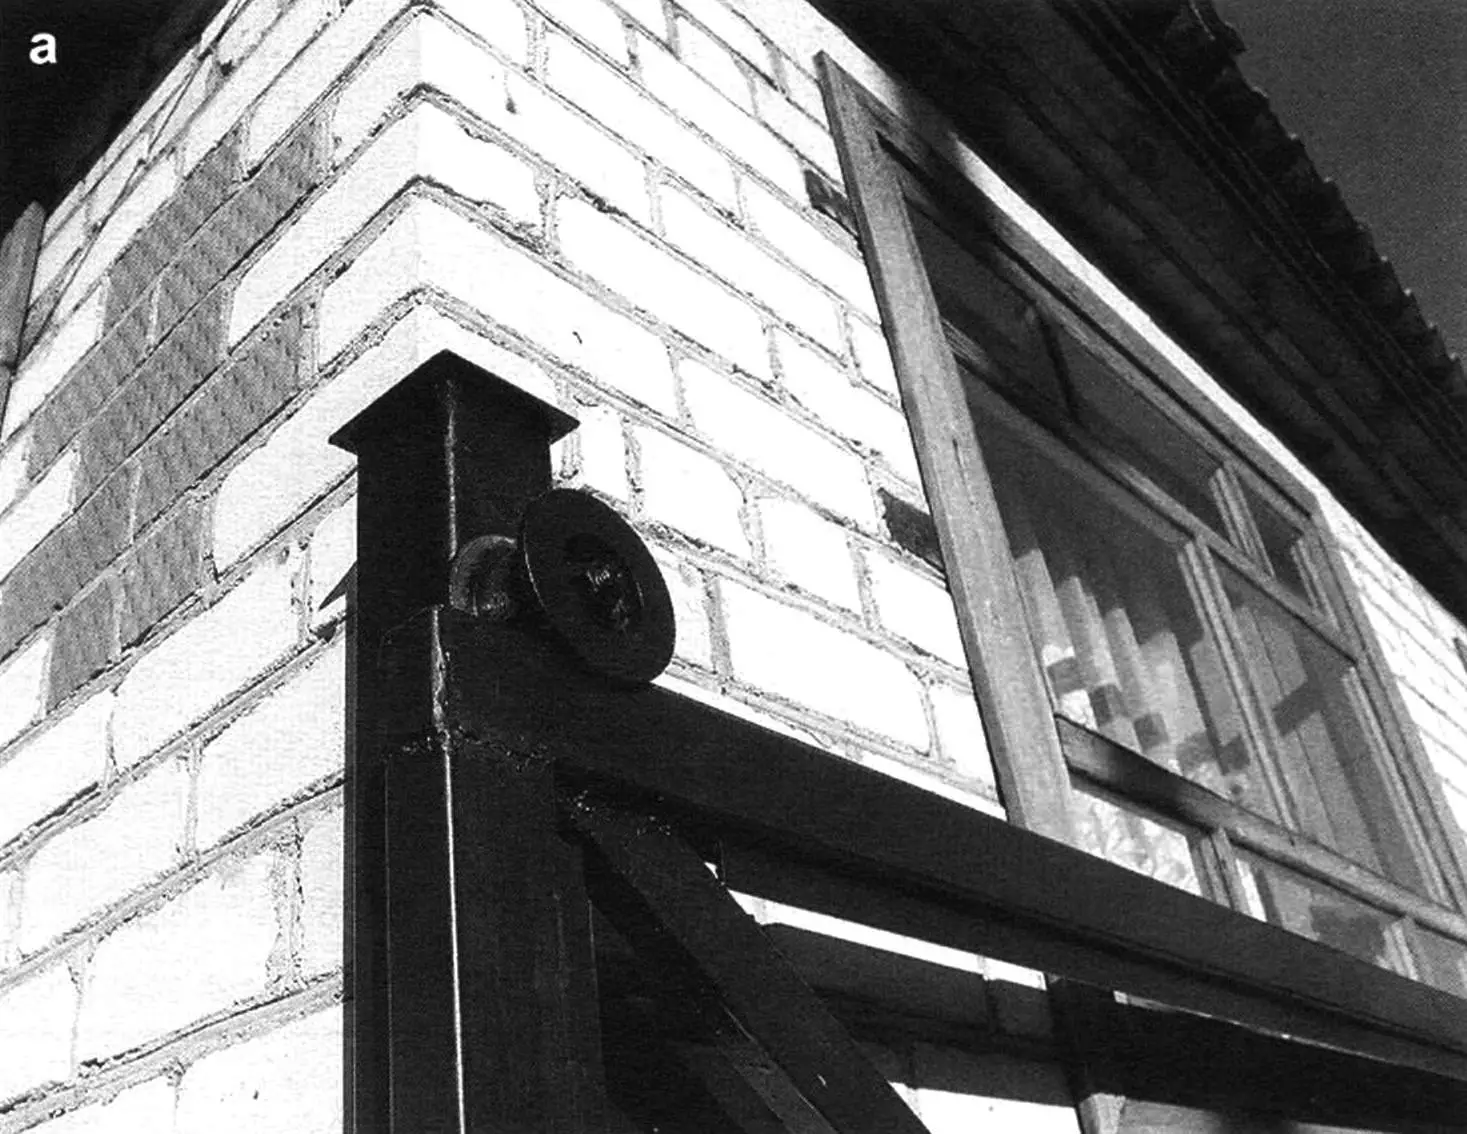
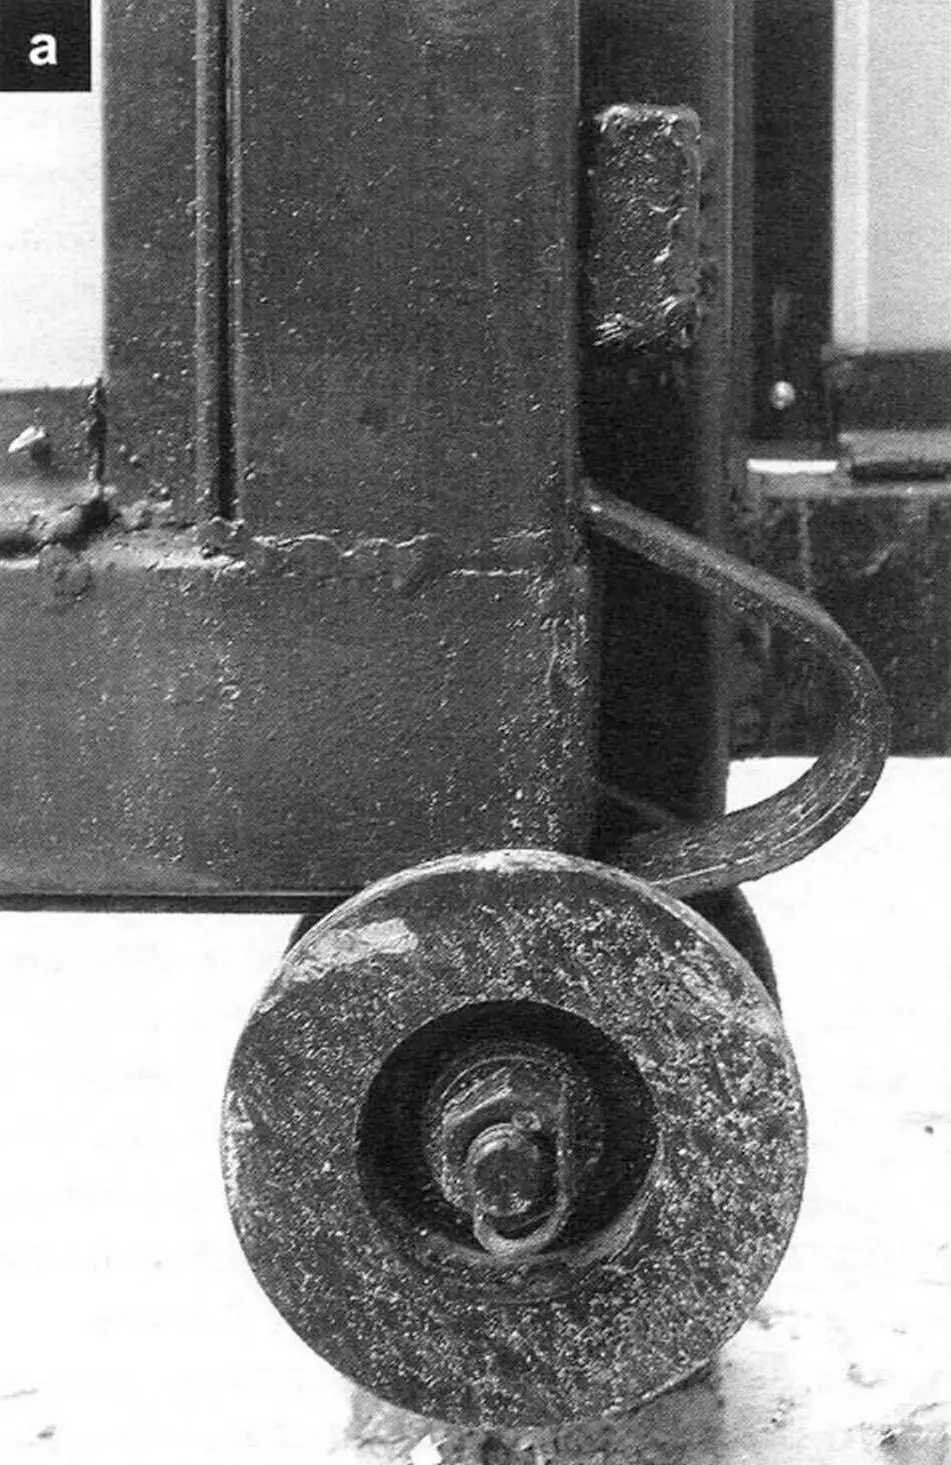
– right support (wall-mounted) post (tube with cross-section 80x80mm and length 2500 mm) with support and retaining rollers;
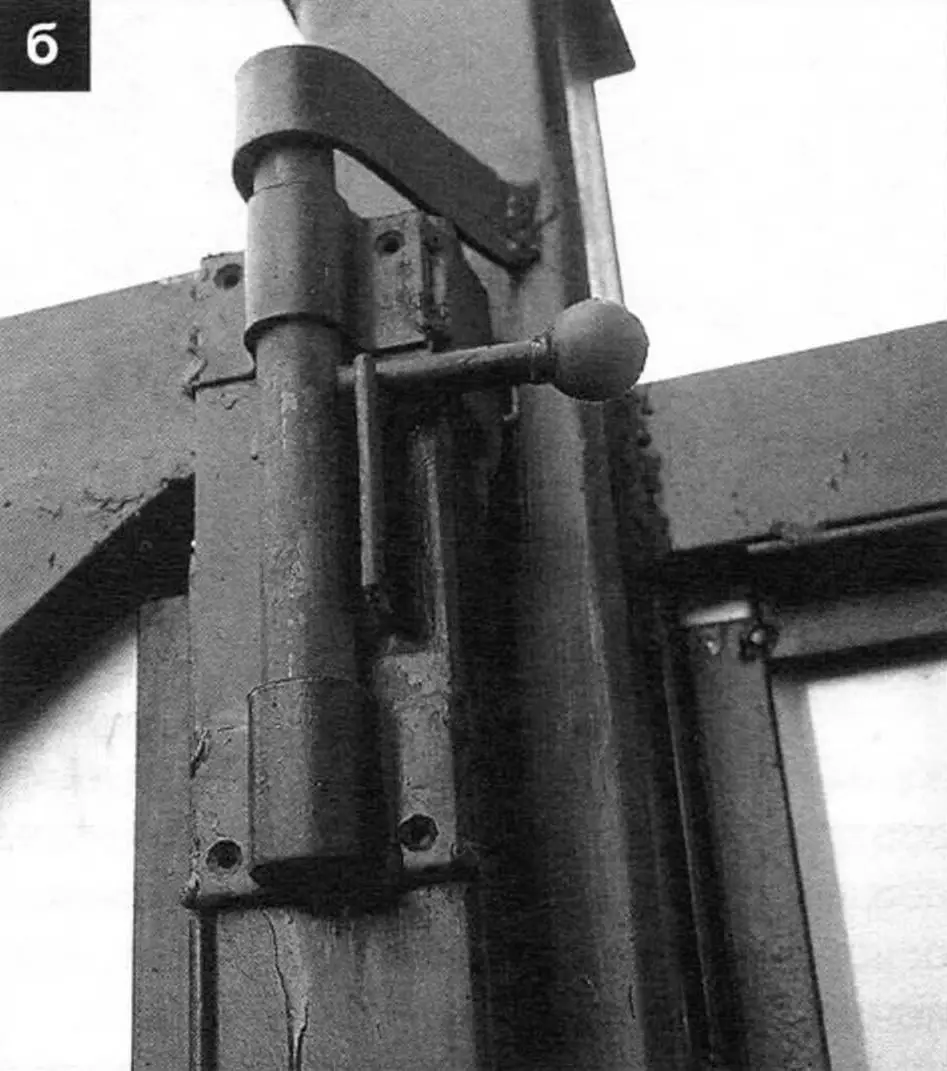
– left support post (tube with cross-section 80×80 mm and length 2500 mm) with receiving roller and locking bolt.

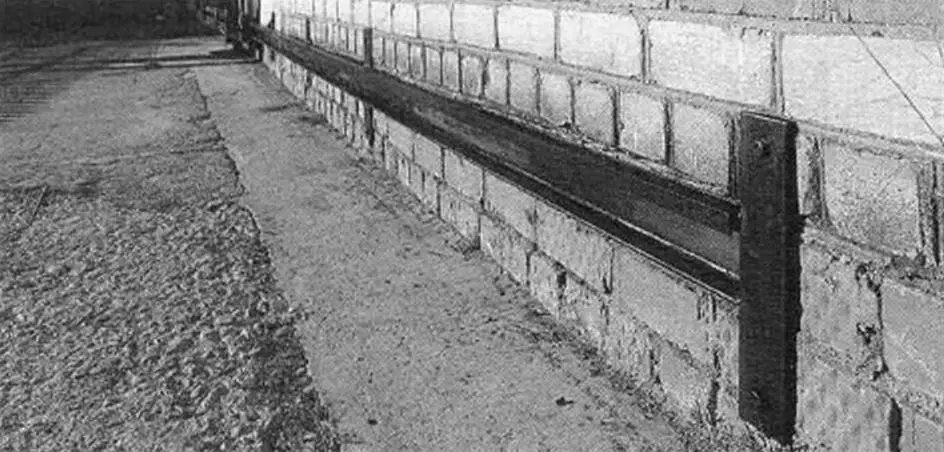
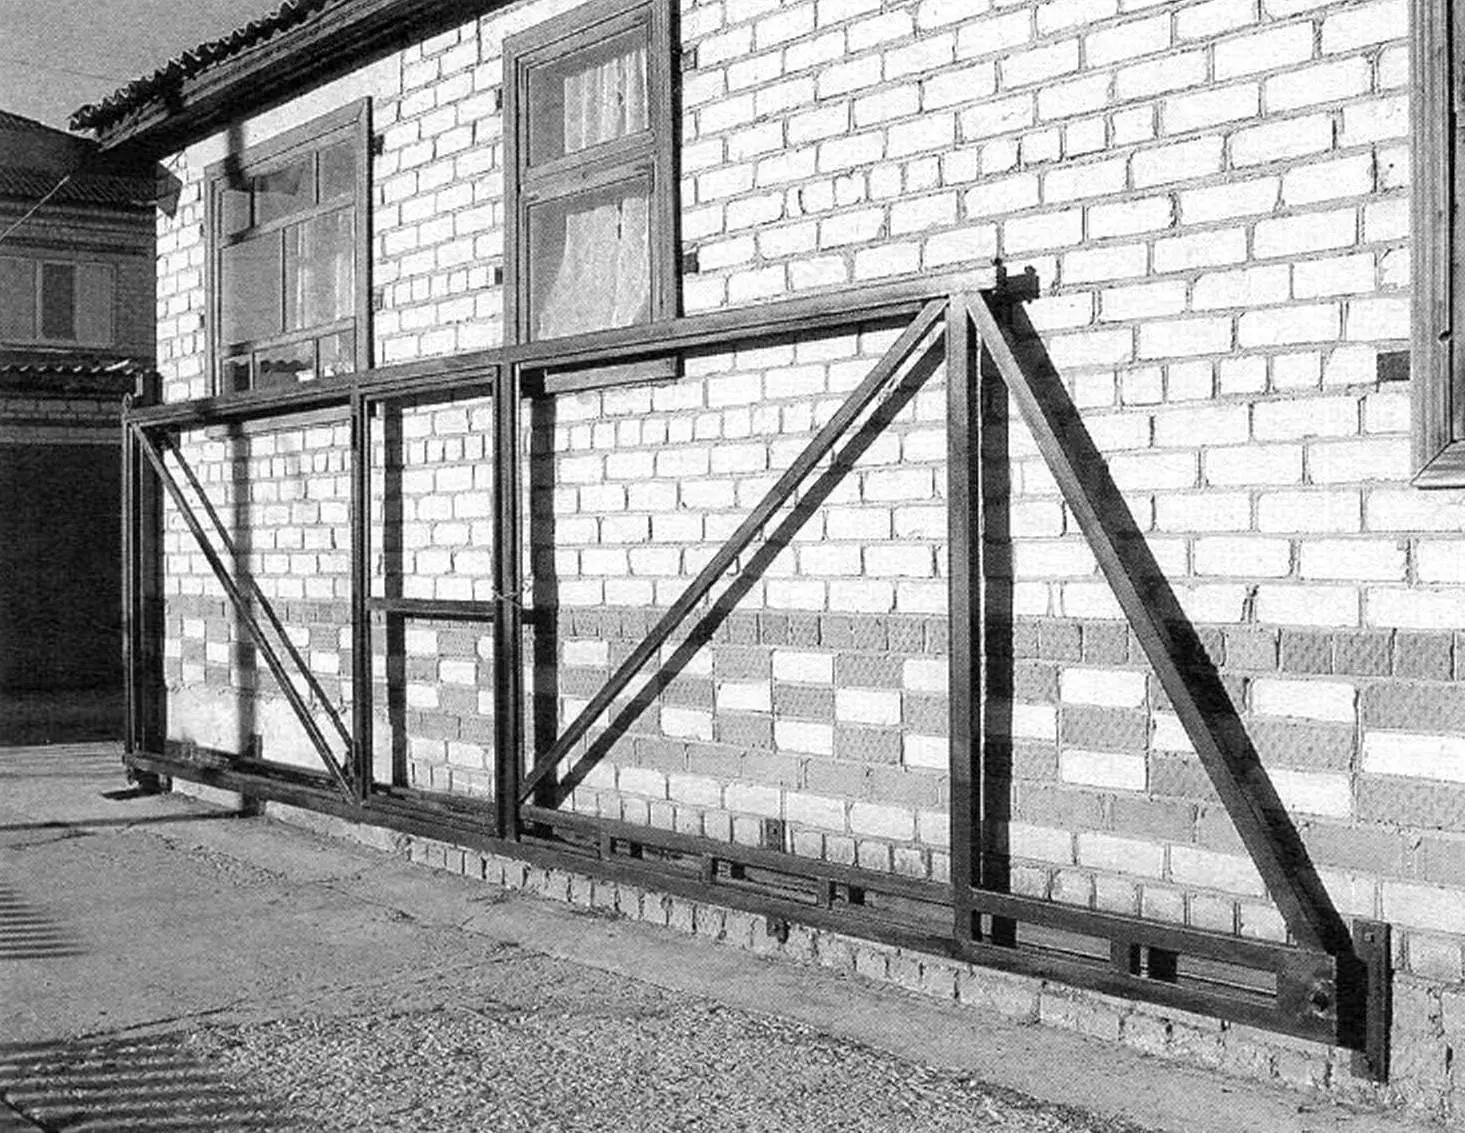
We had to make three support posts: one more, additional, I installed flush against the shed wall and connected it with welded crossbars to the left post – it turned out to be a short fence. But it didn’t spoil the appearance, and it reliably protected the shed wall from the impact of the gates when closing.
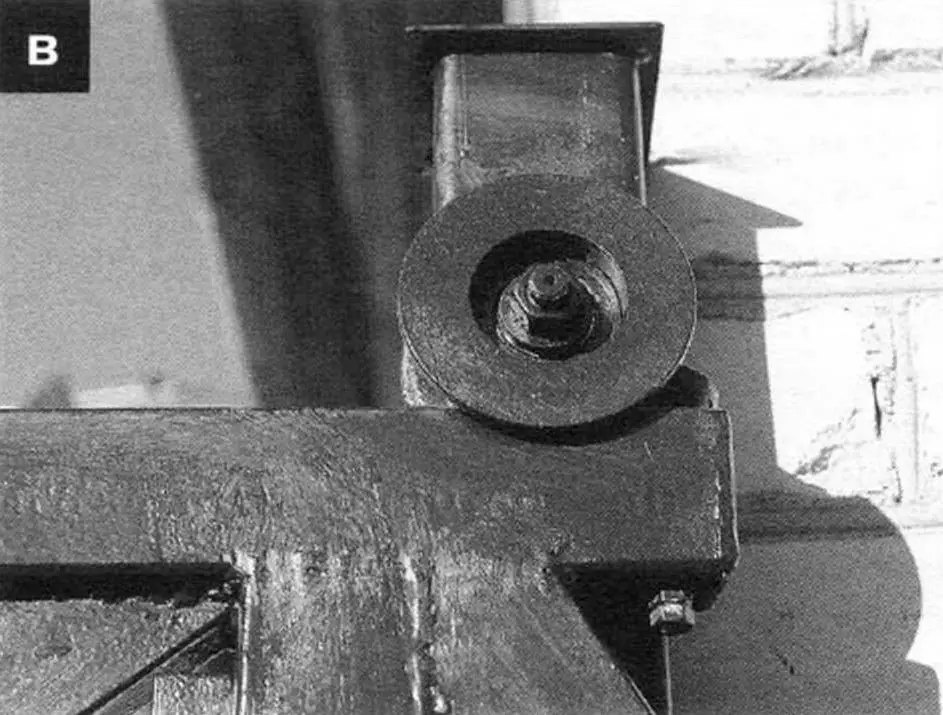
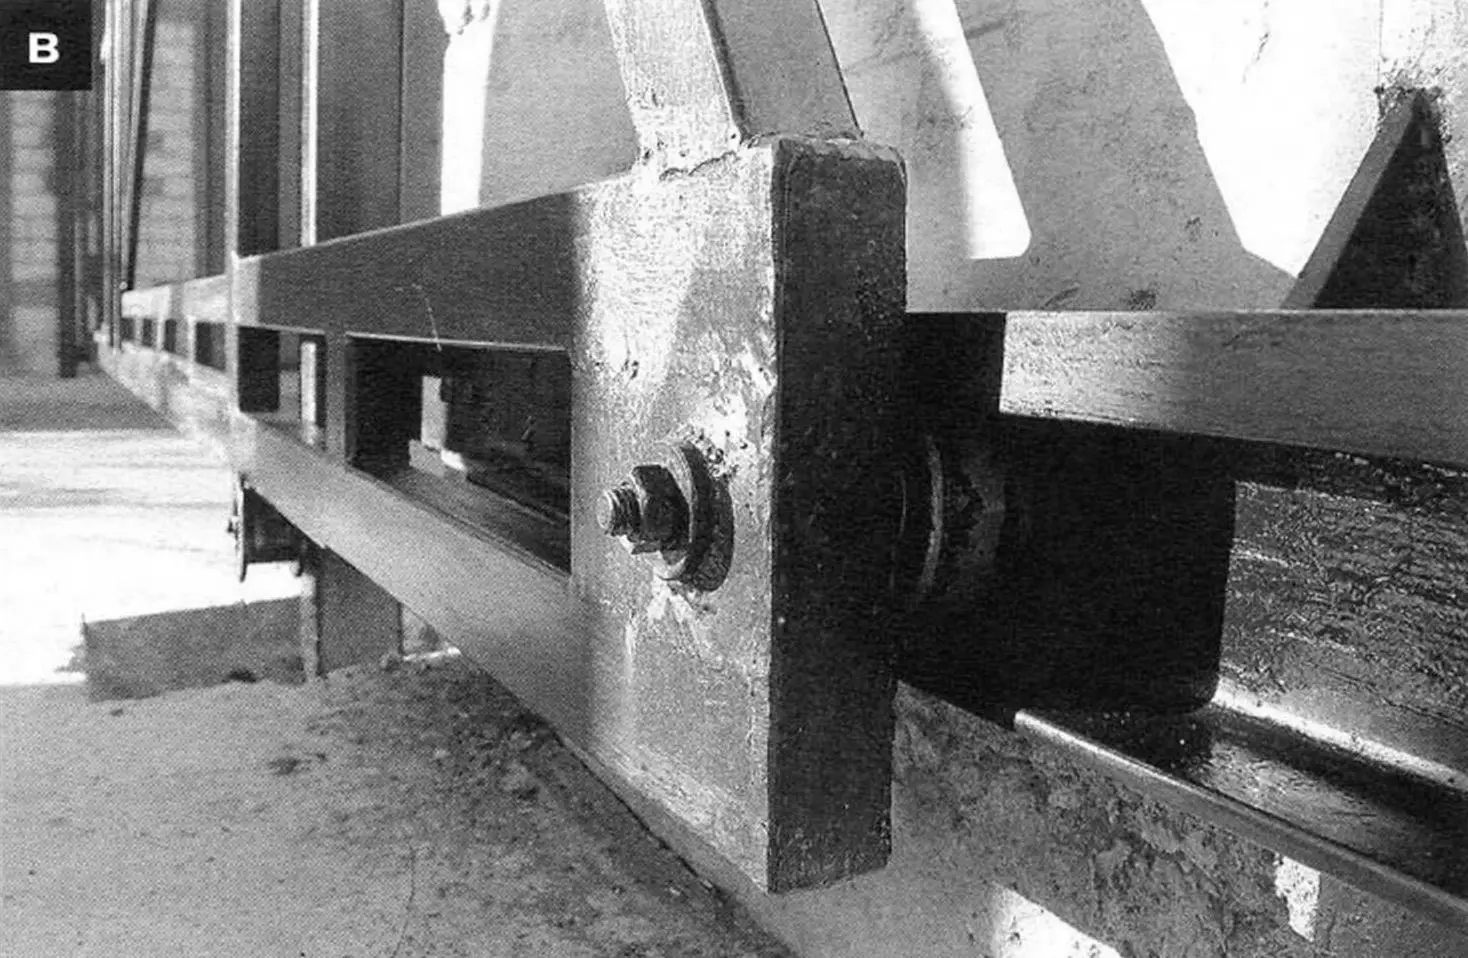
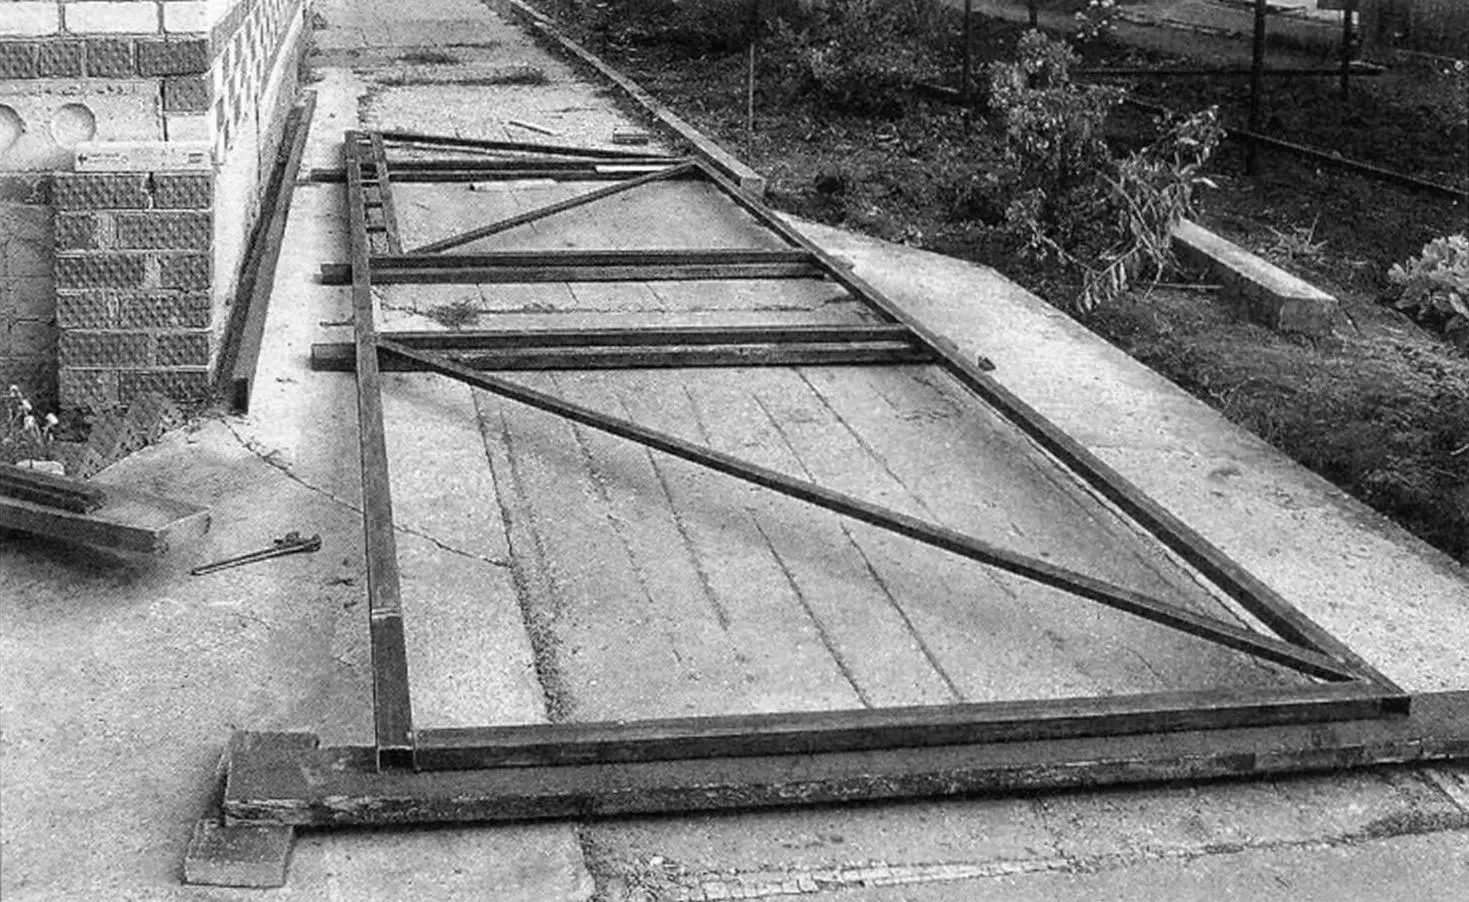
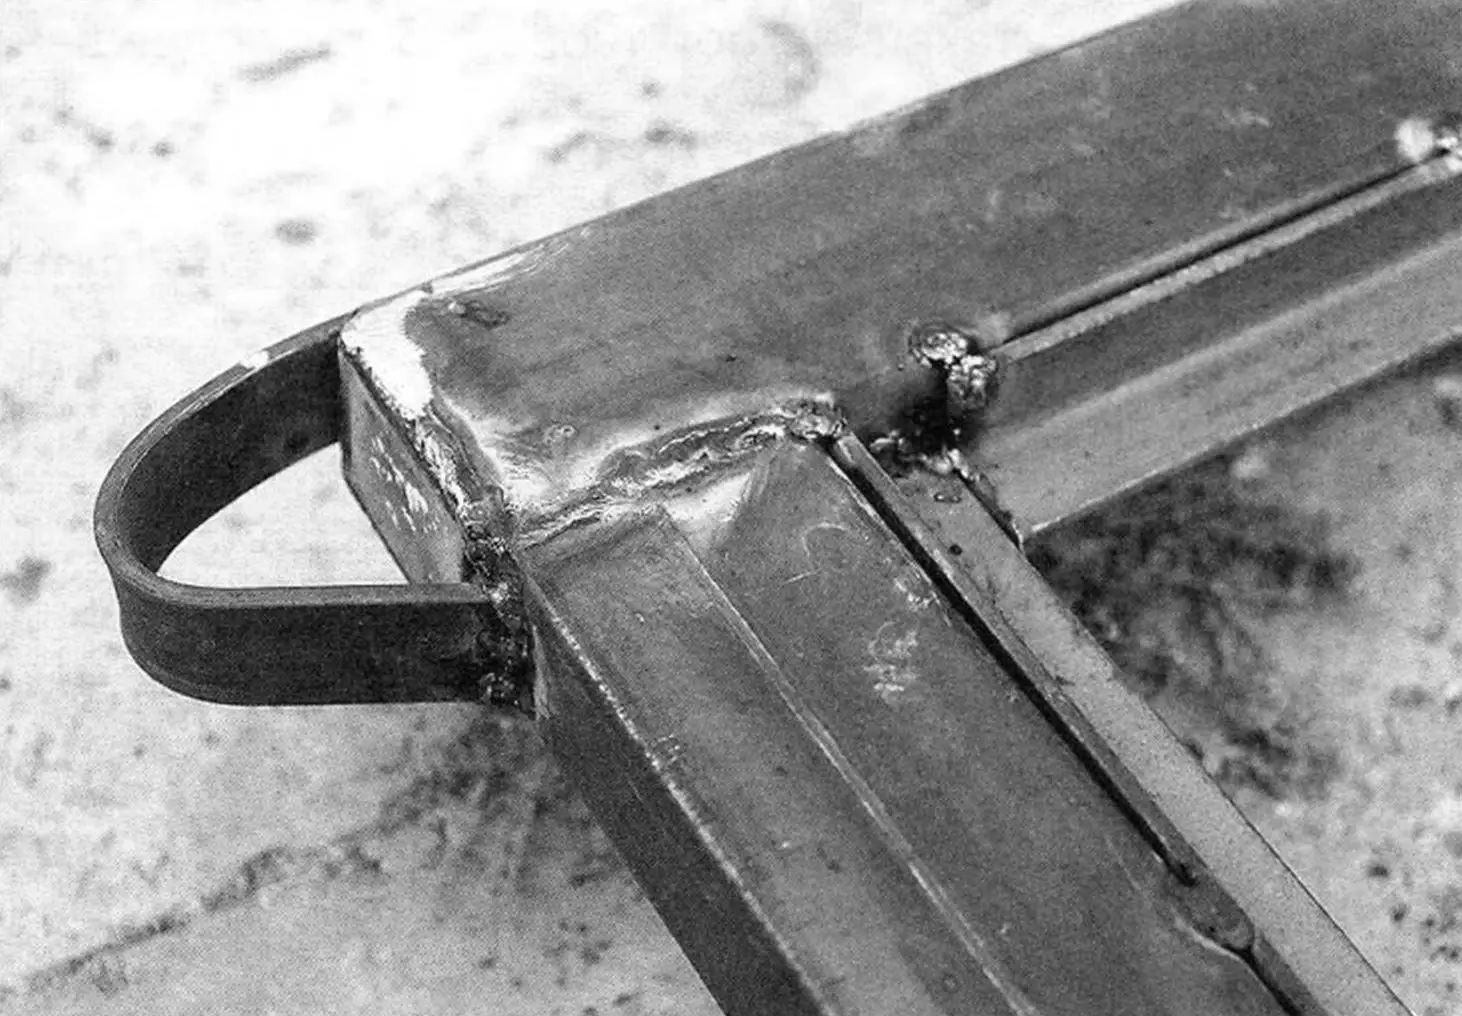
The truss frame is welded from square profile tubes with cross-section 60x40x2 mm and 40x25x2 mm with edging angle of dimensions 25x25x4 mm (for mounting metal profiled sheet). There are no reinforcing gussets, but an additional reinforcing parallel for load distribution in the “tail” has been introduced. Here, a bushing for mounting the axis of the guide roller along the channel is welded in.
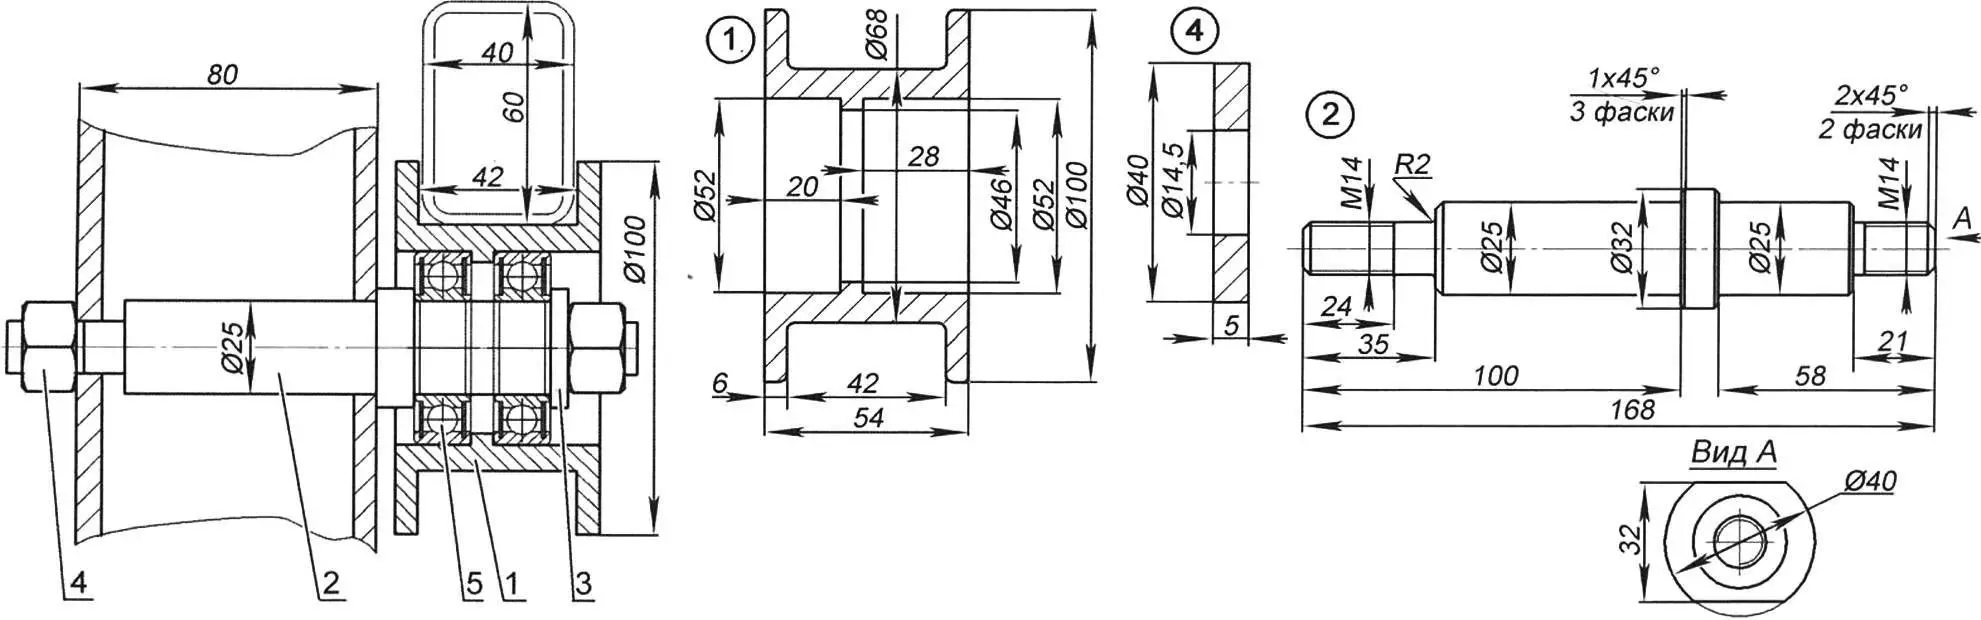
1 – housing; 2 – axis; 3 – washer; 4 – nut M14; 5 – bearing 80205 (2 pcs.)
The guide roller along the channel consists of a housing, axis, spacer washer, two bearings No. 80205, and a washer with nut M14.
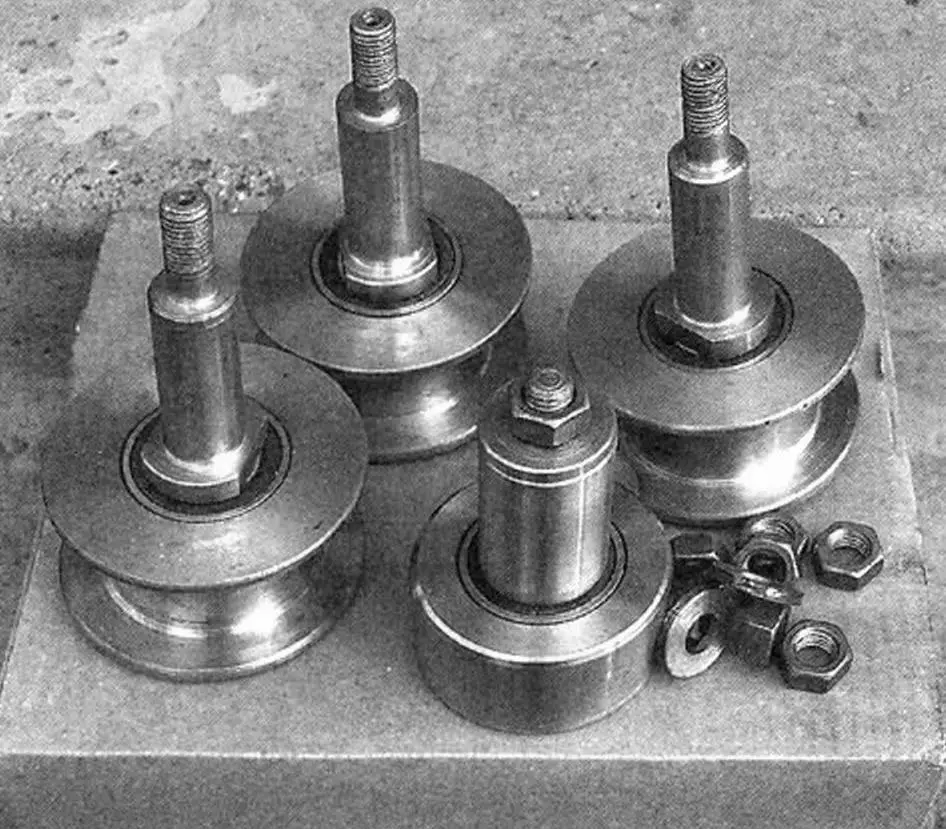
The support roller along the tube consists of a housing, axis, washer, two bearings No. 80205, and nut M14.
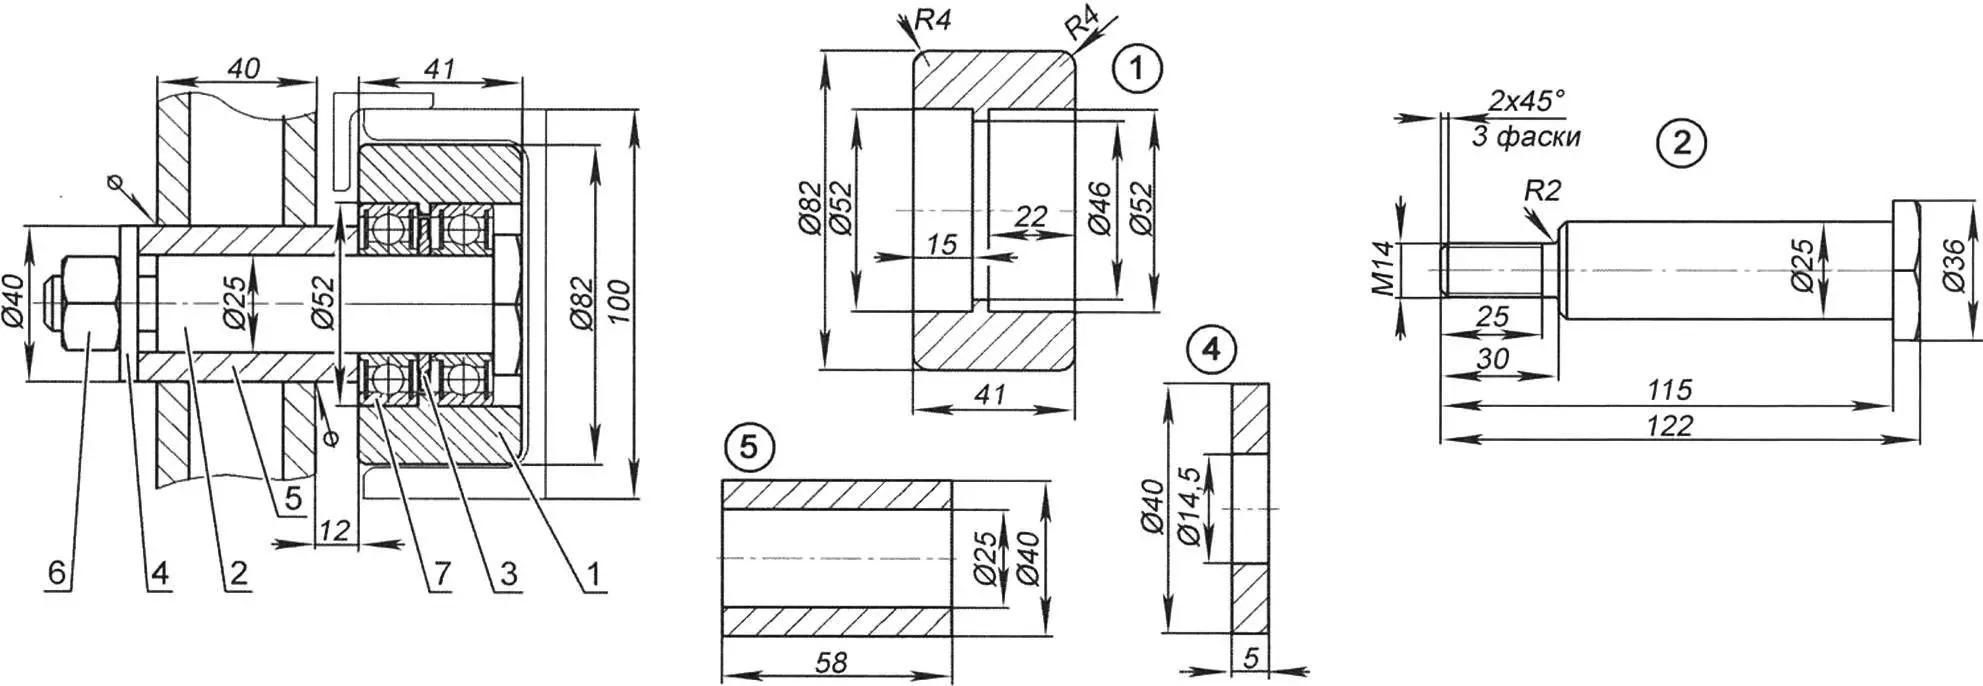
1 – housing; 2 – axis; 3 – spacer washer; 4 – washer; 5 – bushing; 6 – nut M14; 7 – bearing 80205 (2 pcs.)
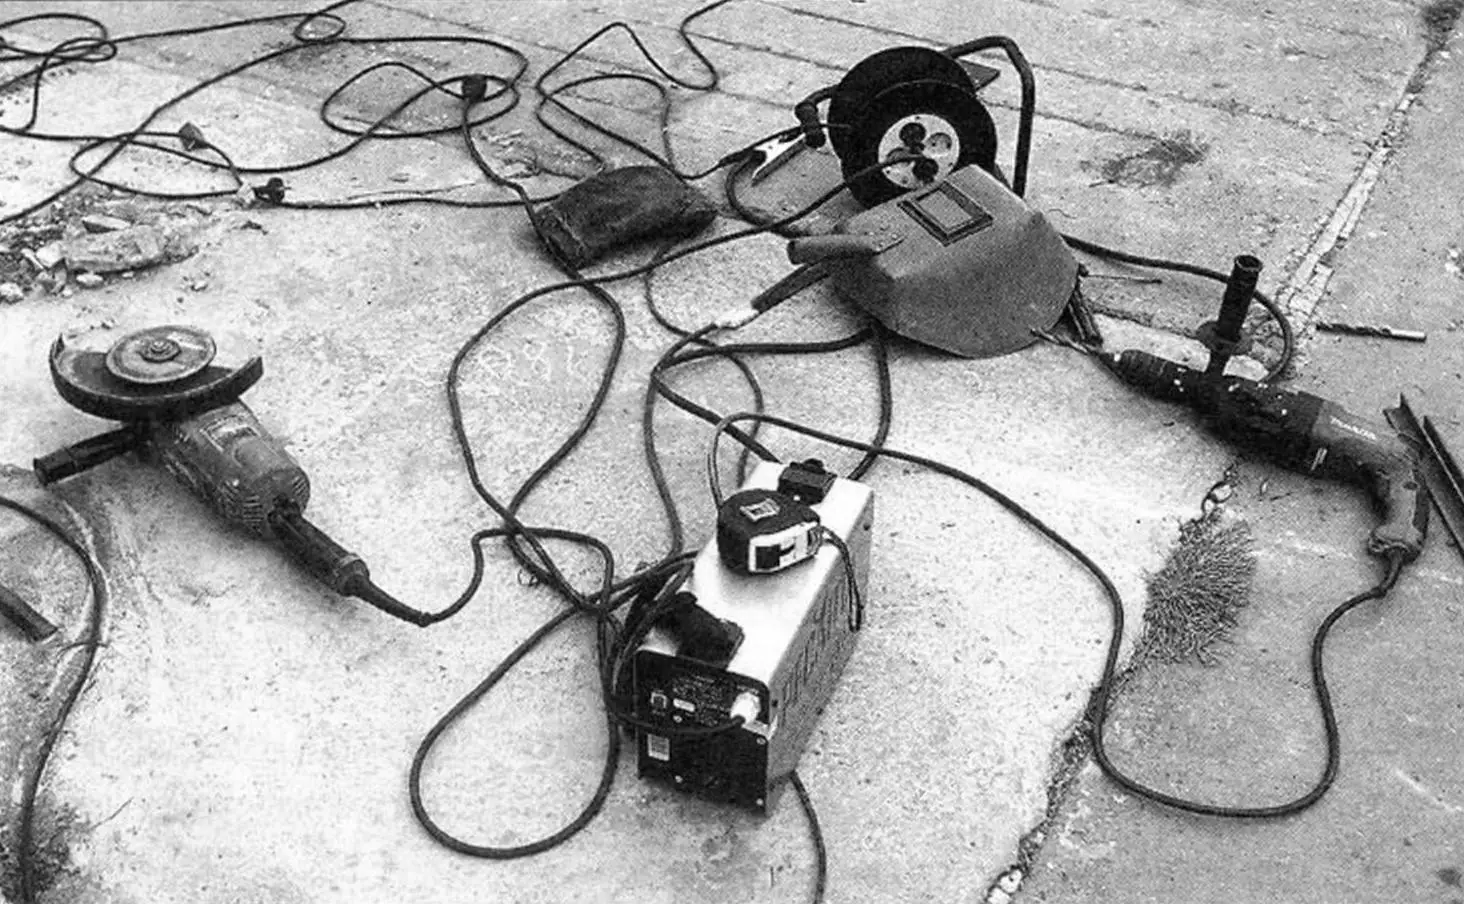
The completed drawings in the following days were given to a turner to manufacture all turned parts; materials and components were also purchased; the yard construction site was cleared.
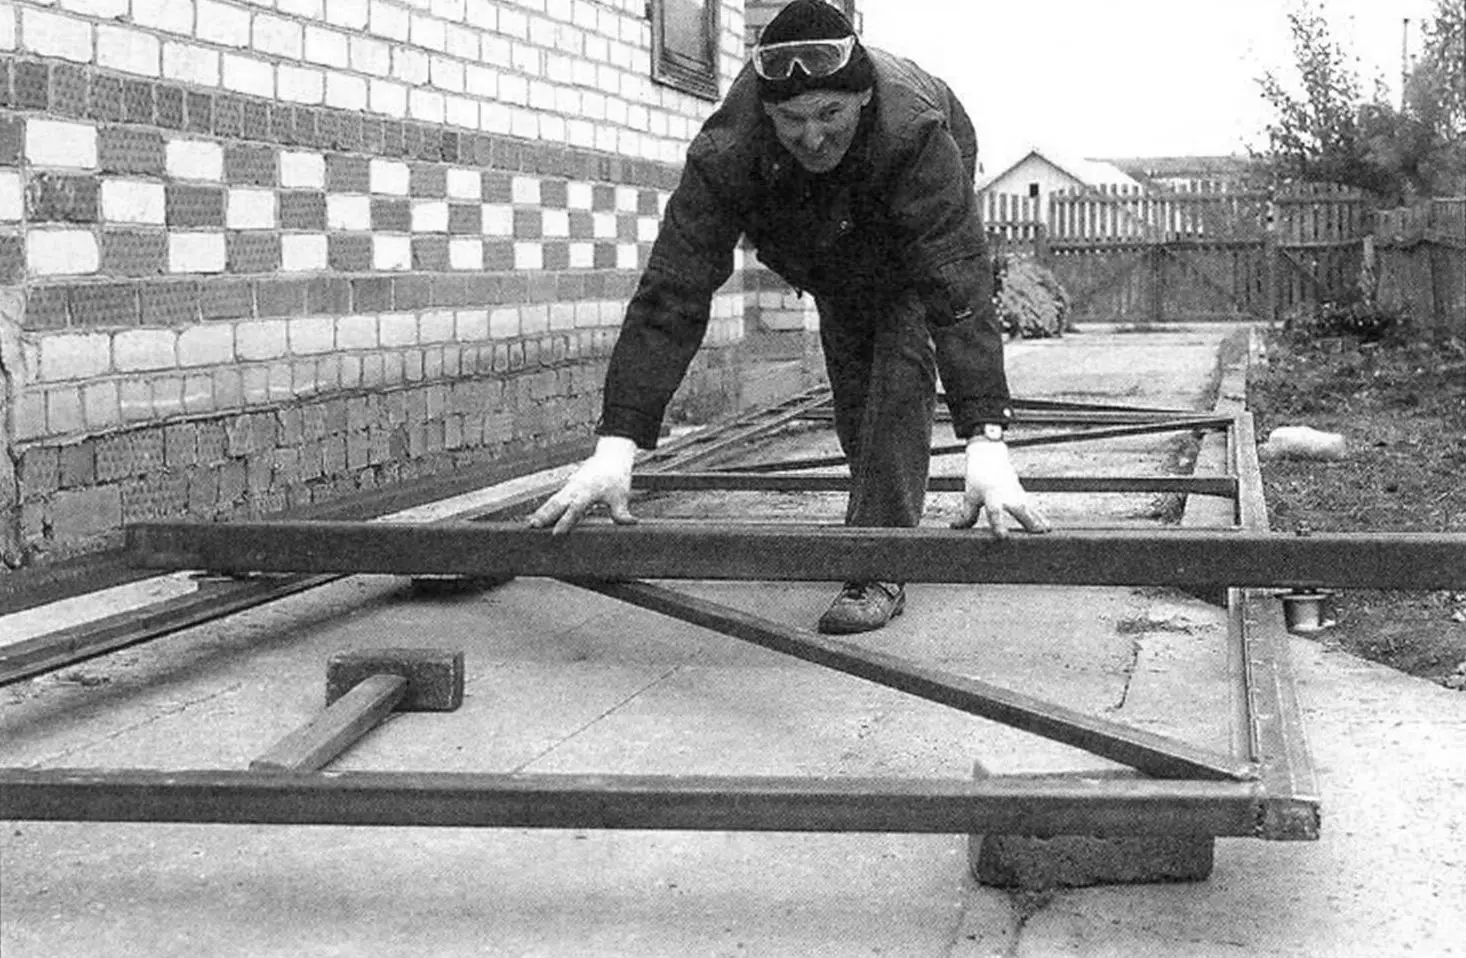
Already on the following weekends, we welded the gate frame and prepared holes-wells for the support posts.
On Sunday, the gate frame was finished and a support post made of square tube with cross-section 80×80 mm was installed flush against the corner of the brick veranda. We even managed to drill holes in the post for the roller axes, taking into account the distance to the ground of 150 mm and the actual gate height of 1800 mm.
It’s appropriate to joke that a started business, whether it’s a meal, a bath, or a revolution, cannot be postponed!
The next day, we successfully drilled holes in the brick wall and secured the guide channel plates with anchor bolts Ш12×140 mm. Then we welded a bumper angle of dimensions 25×25 to the channel and performed the first rolling of the gate frame on the rollers. By the way – successfully!
An important rule of any work is not to relax when approaching the finish.
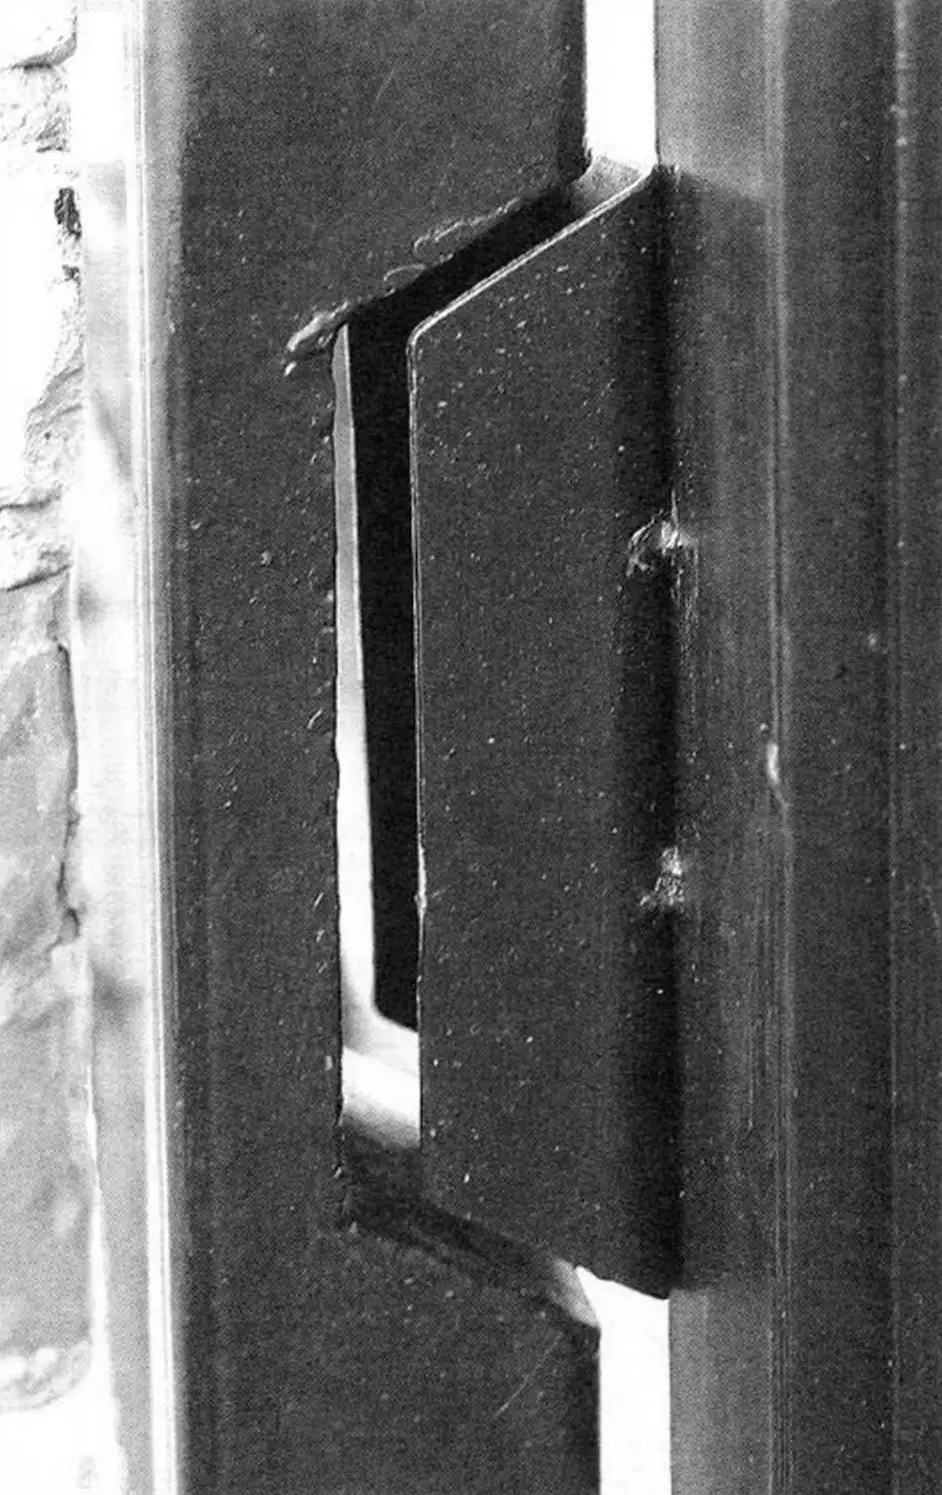
In the following evening days, we made end position stops, the front support post with lower roller, gate frame with hinges, bolts, and lock in the gate.
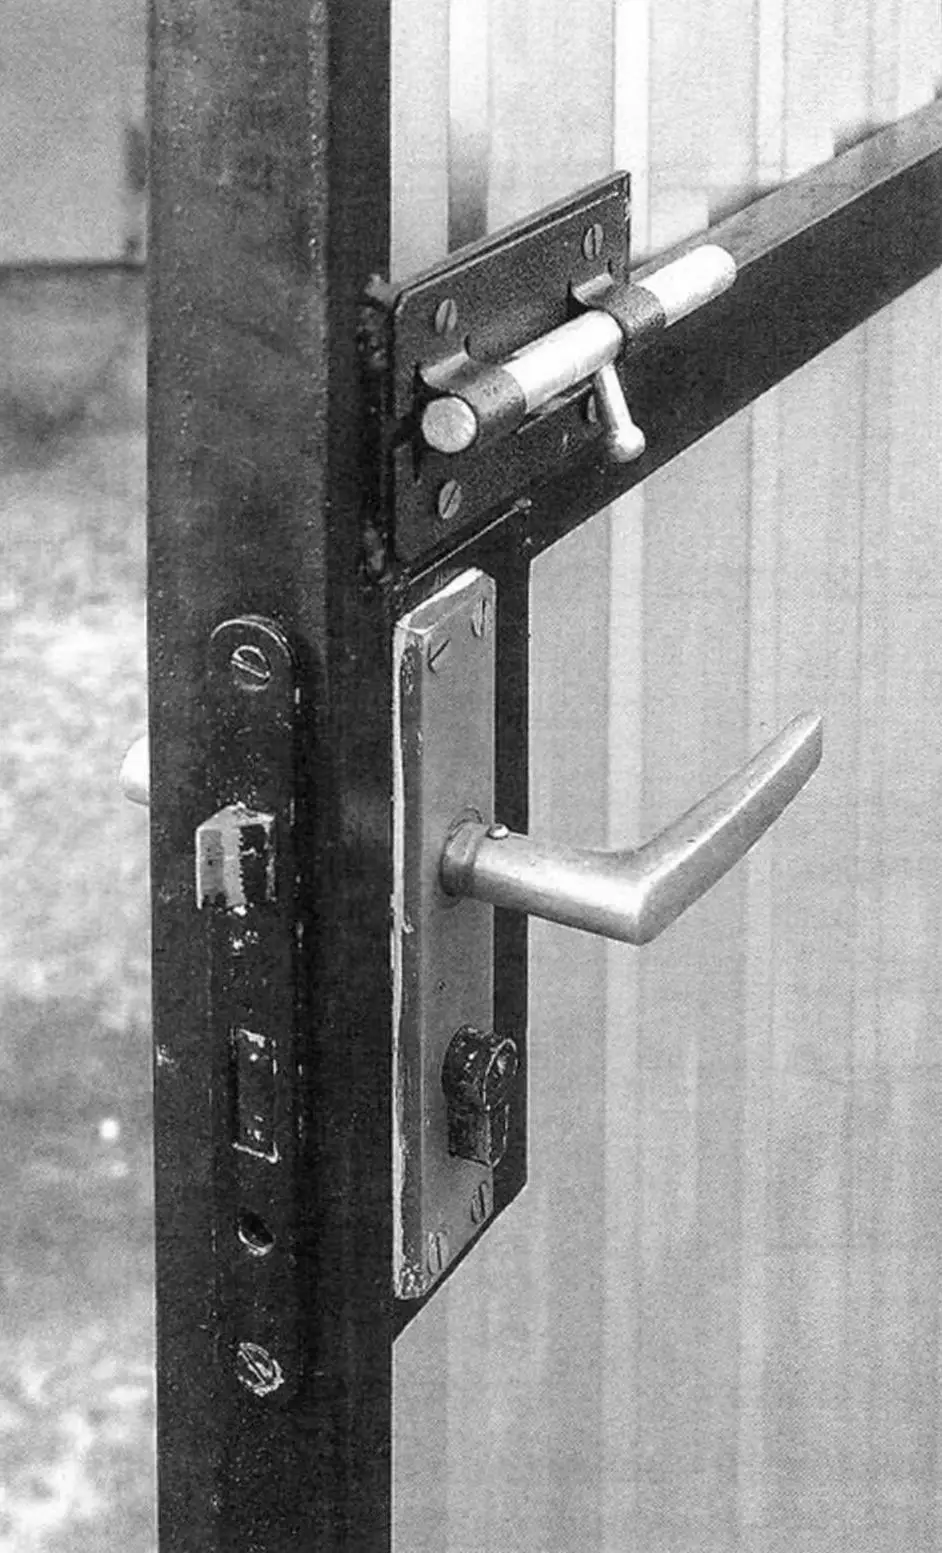
At the completion of all work, the hostess Tatyana personally painted the entire structure, and the owner sheathed the gates with metal profiled sheet with a ridge height of 8 mm on a break rivet.
It would be good to install an electric drive and a remote control. But Igor left these works for himself “for later.”
Maybe in the description of the sliding gate construction I missed something from the “little things,” but from the fairly detailed drawings, I hope everything will be clear to the reader.
«Modelist-Konstruktor» No. 9’2016, A. MATVEYCHUK
Recommend to read
 DUTIL
DUTIL
"It is easier to pull than push" — the ancients said. Indeed, what if leading and control functions to combine in one wheel and make it no pushing and pulling! In the classical scheme of...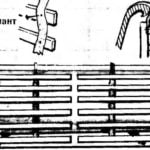 THE SCREEN-GRID
Offer a convenient way to store lattices for the bathroom. They should be using metal hooks to hang over the edge of the bath in Thane they will not take the place of, and in addition,...
