
For many operations performed in training workshops and technical clubs, a portable universal tool similar to a dental drill would be very convenient. However, it is almost impossible to buy such a device, and as always in such cases, the question arises: is it possible to make something similar with your own hands?
The main hard-to-find part of the device is the flexible shaft. But a flexible shaft of a car or motorcycle speedometer operates on almost the same principle — and it is much easier to get this decommissioned part.
I used a cable from a truck: it turned out to be more suitable for connecting both to the small motor and to the working head.
Structurally, the mini drill consists of three parts: the motor, the flexible shaft, and the working head with a standard three-jaw chuck from a drill with a shortened Morse taper. As a drive, an electric motor of type DKS‑1 with a power of 35 W for 220 V is used. Any other motor with a power of up to 60 W and a speed of 2700–5000 rpm can also be used.
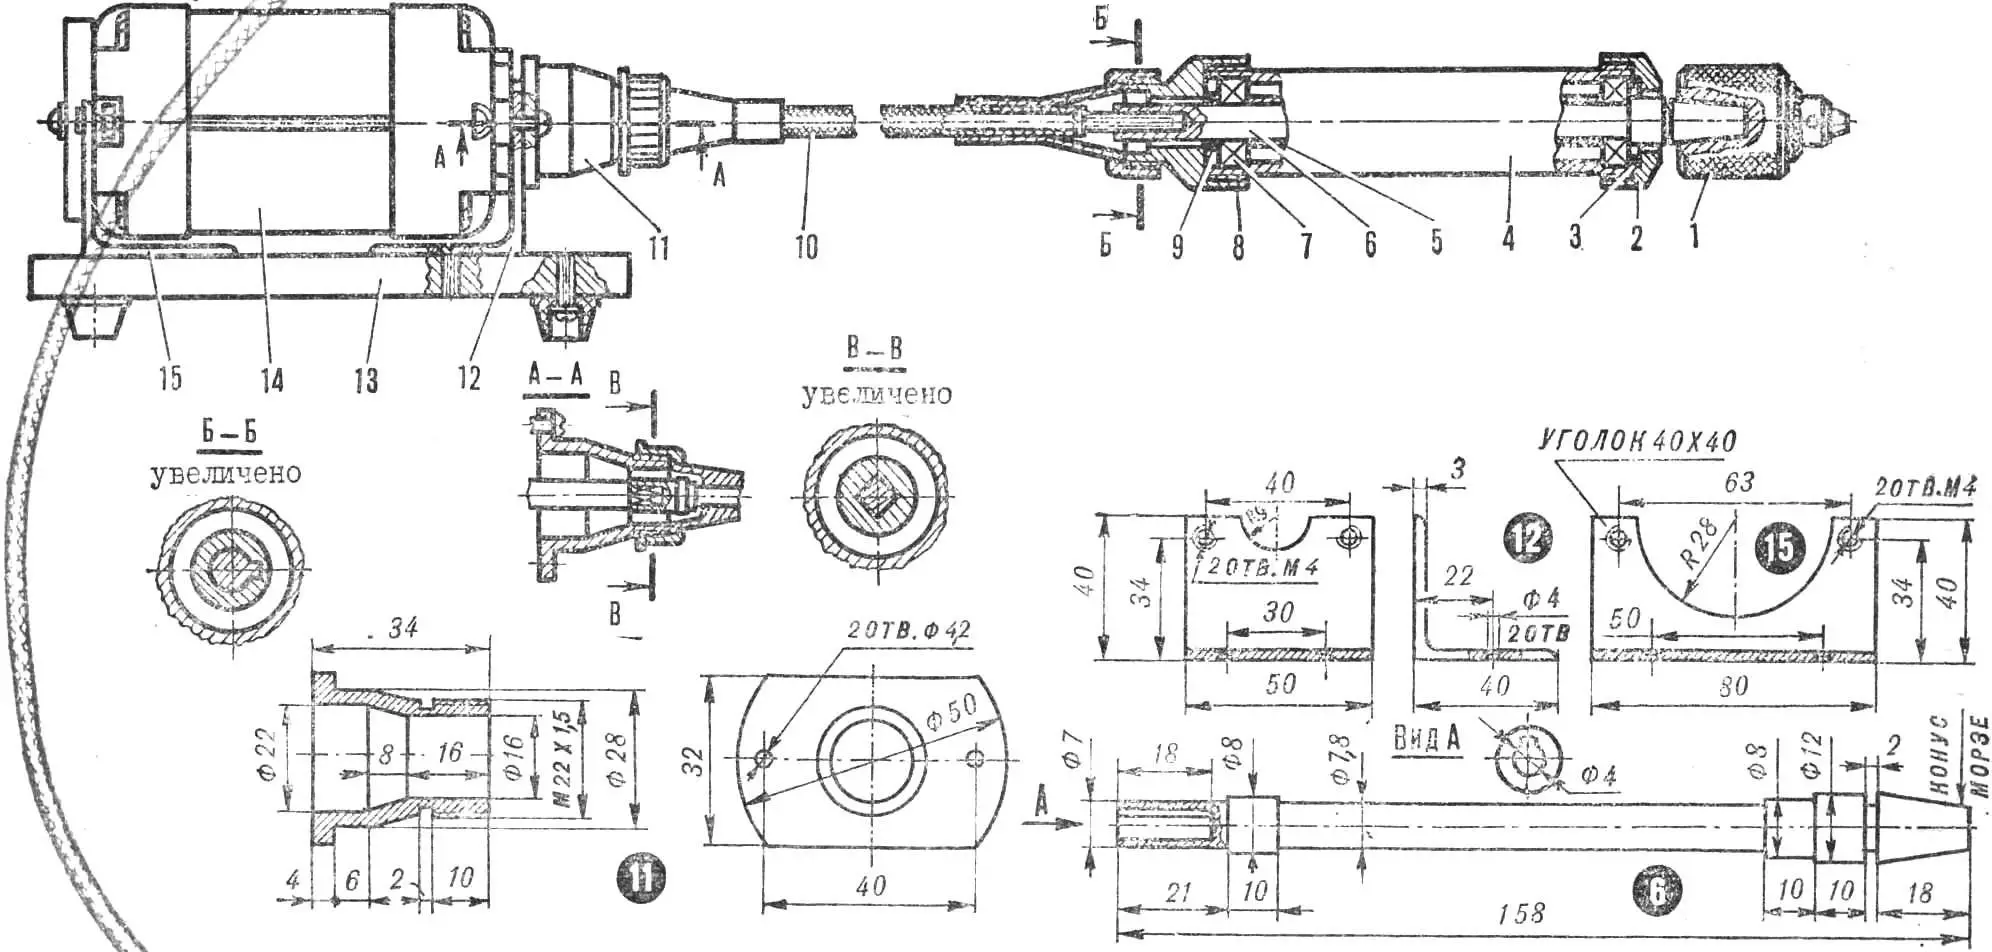
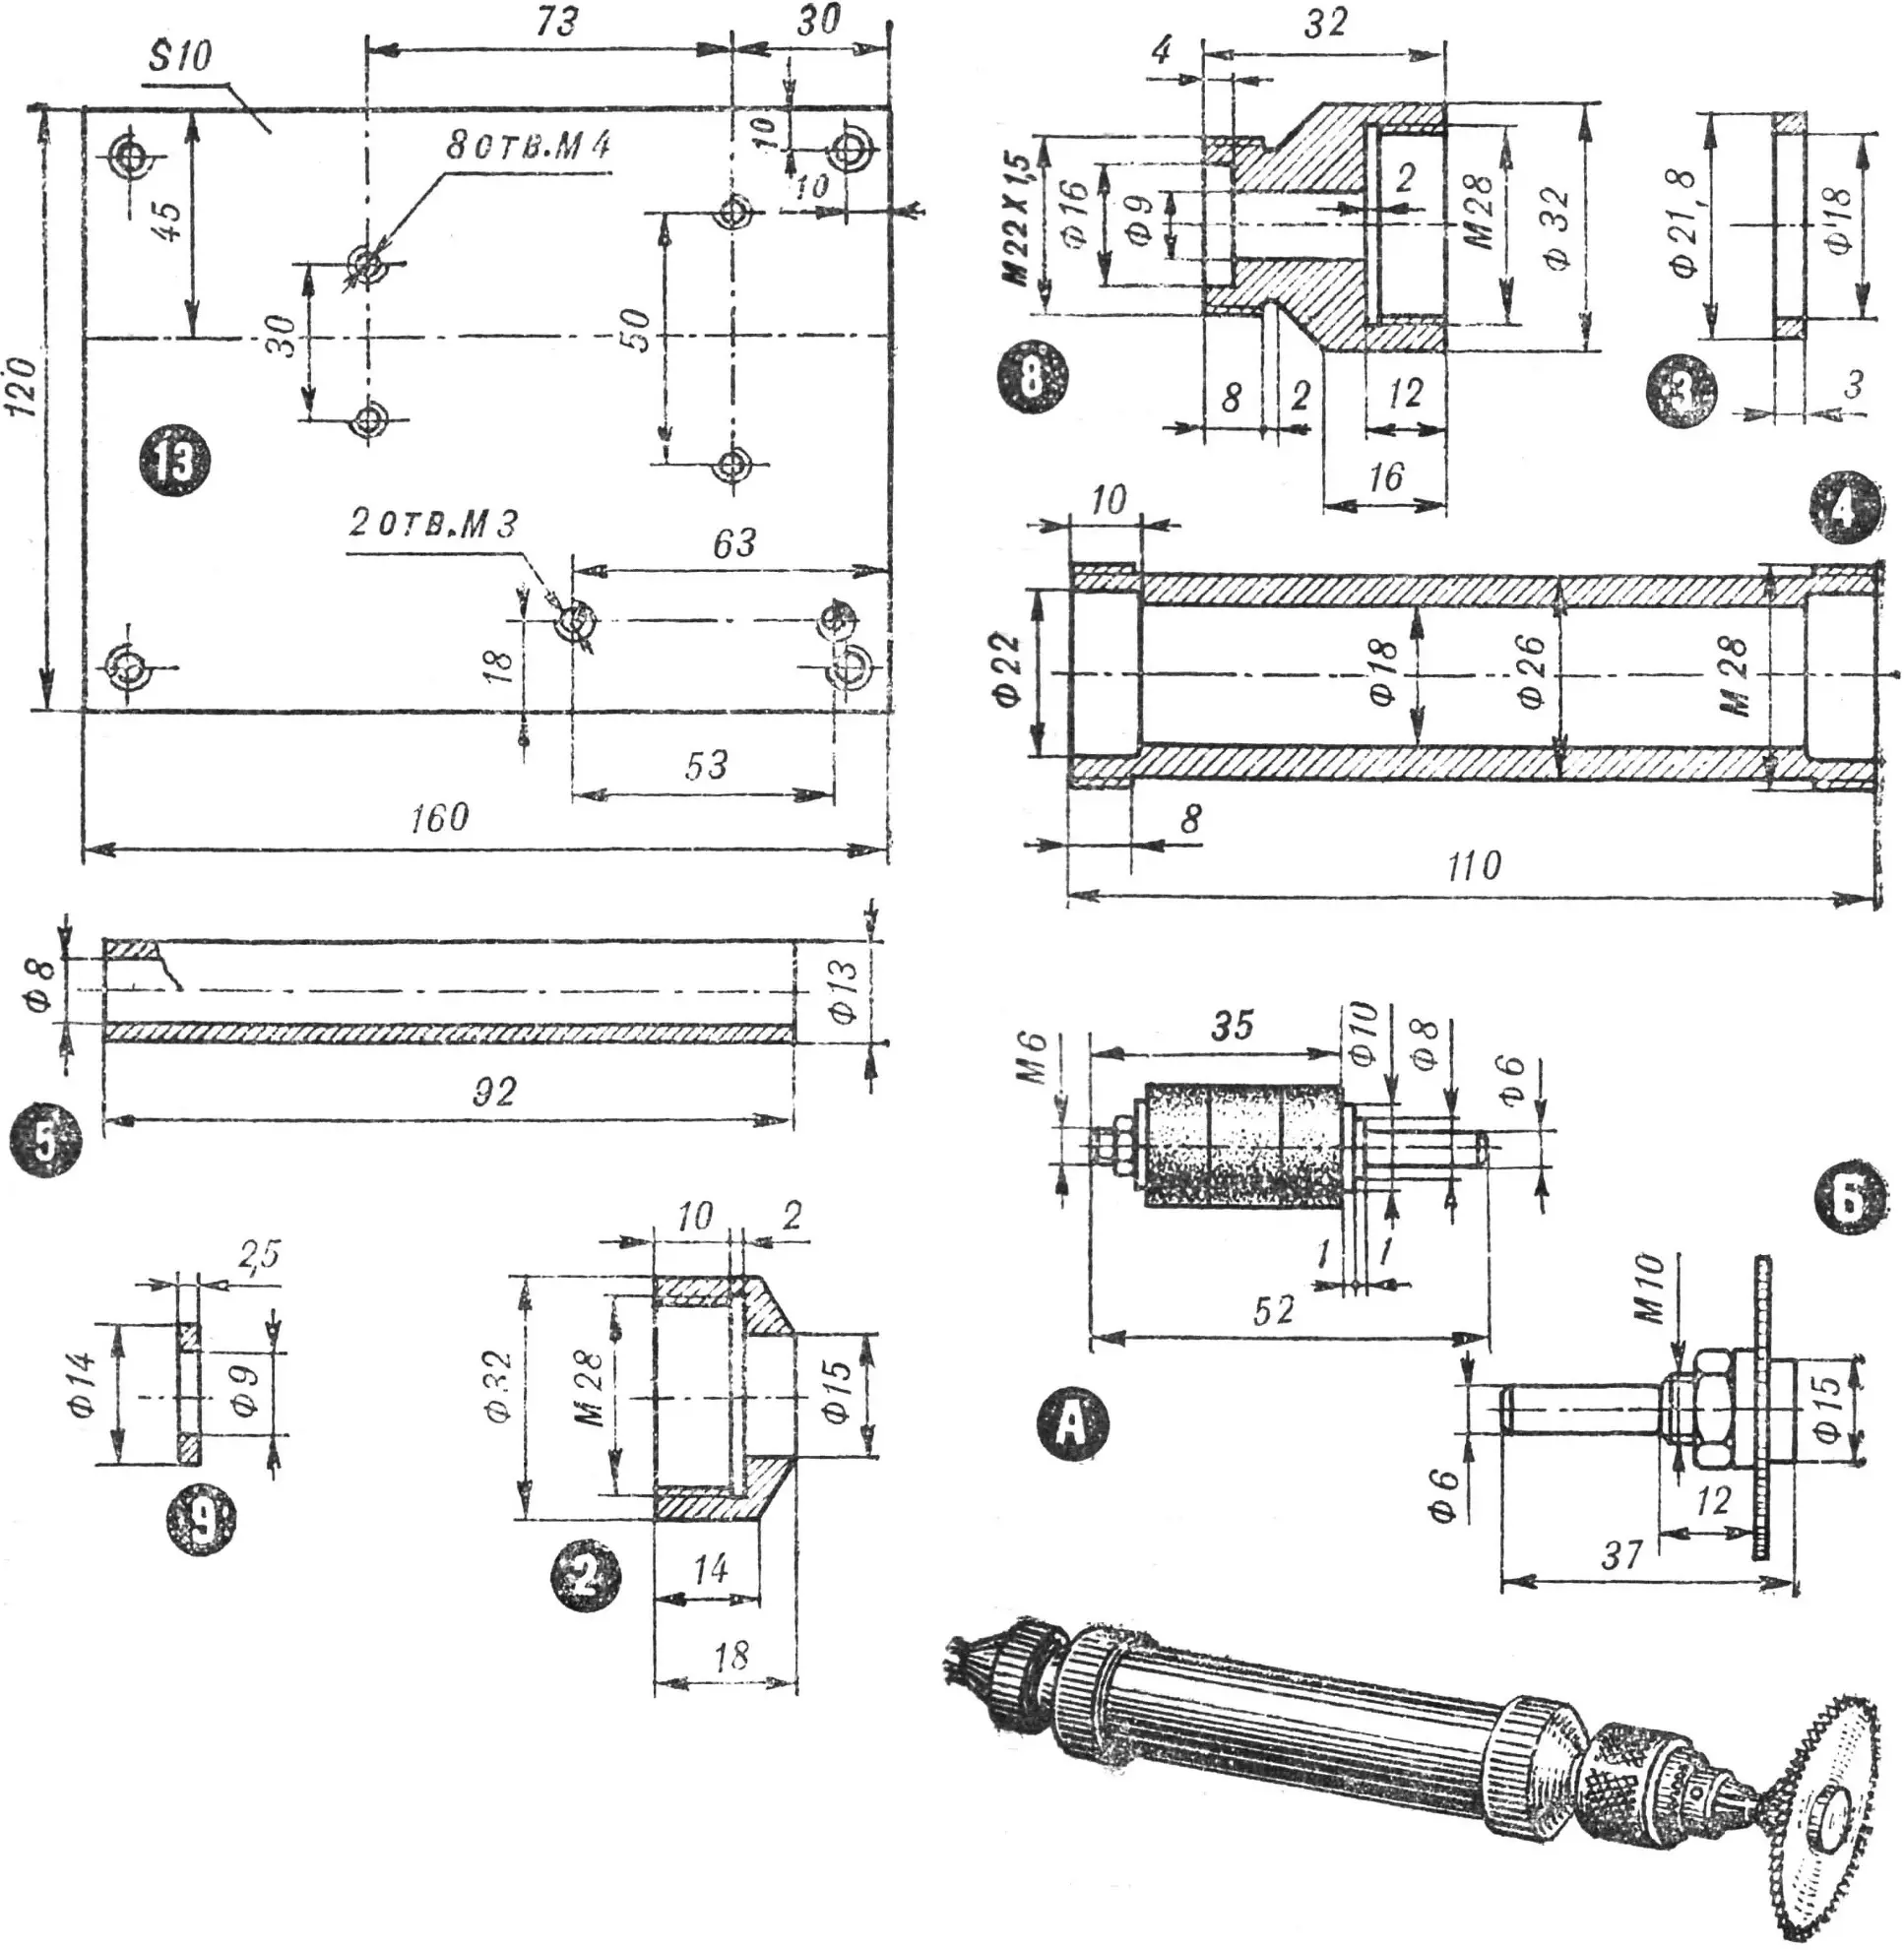
1 — chuck (No. 1A), 2 — front cover, 3 — ring (D16T), 4 — housing of the working head (D16T), 5 — tube, 6 — shaft (Steel 45), 7 — ball bearing, 8 — rear cover (D16T), 9 — ring (D16T), 10 — flexible shaft, 11 — adapter bush (D16T), 12 — angle bracket (D16T), 13 — base (textolite S 10 mm), 14 — electric motor, 15 — rear angle bracket. A — cutter assembly and toolholder diagram, B — polishing head and its toolholder.
The design of the working head is simple and is clear from the drawing. It is assembled in the following sequence. A No. 18 ball bearing is pressed onto the shaft up to the stop, then, together with the shaft, it is inserted into the recess of the housing, a spacer bush is fitted, and a second identical bearing is pressed into it up to the stop. Before assembly, both bearings are carefully washed in kerosene, and after pressing they are lubricated with thick grease or technical petroleum jelly. The shaft must rotate freely in the housing without sticking. After making sure of this, the front and rear covers of the housing are screwed on. Then the end of the cable is inserted into the shaft and the union nut of the flexible shaft is screwed on.
The motor is mounted on the base in the following order. Two angle brackets are fastened with M4×10 screws on a board or thick textolite plate of a suitable size, and the electric motor is fixed between them. The adapter bush and the motor are attached to the right bracket with M5×12 screws; into the left bracket the ends of the studs connecting the front and rear covers of the motor are inserted. Then the second end of the flexible shaft cable is connected, and its union nut is screwed onto the adapter bush. The capacitor in its casing and the switch can also be mounted on the motor base. Rubber stoppers from medical vials can be used as the feet of the base.
To work with the mini drill, you can also make micro-tools. These can be ready-made dental burs, grinding wheels, drill bits up to 6 mm in diameter. For homemade tools it is enough to make a toolholder base, while the working part can be interchangeable: cutters, abrasive stones, disk saws. They are put onto the toolholder together with washers and fastened with nuts. For working with disk cutters and saws, the working head must be fixed stationary, for example, by means of liners and a bench vise. Even better is to make a special table with appropriate mounting for the working head.
With the mini drill it is convenient to drill holes in plastics and metals, sharpen cutting tools, polish parts, mill complex surfaces, engrave, cut sheet material, and perform many other operations.
“M‑K” 9’81, A. ASHAEV, Roshal
Recommend to read
 SECRETS FLAPPING FLIGHT
...Model takes off from any position. It was enough to tighten the rubber motor, and two-winged "bird", vigorously rebounding wings, began the rapid acceleration into the sky. She looked...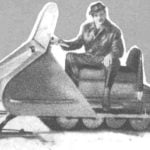 MOTONARTY “DREAM”
Built by A. Baldin from the city of podporozhe Leningrad region. This is his fourth design, and, as he writes, the most successful. The car has an enviable maneuverability, decent speed....
