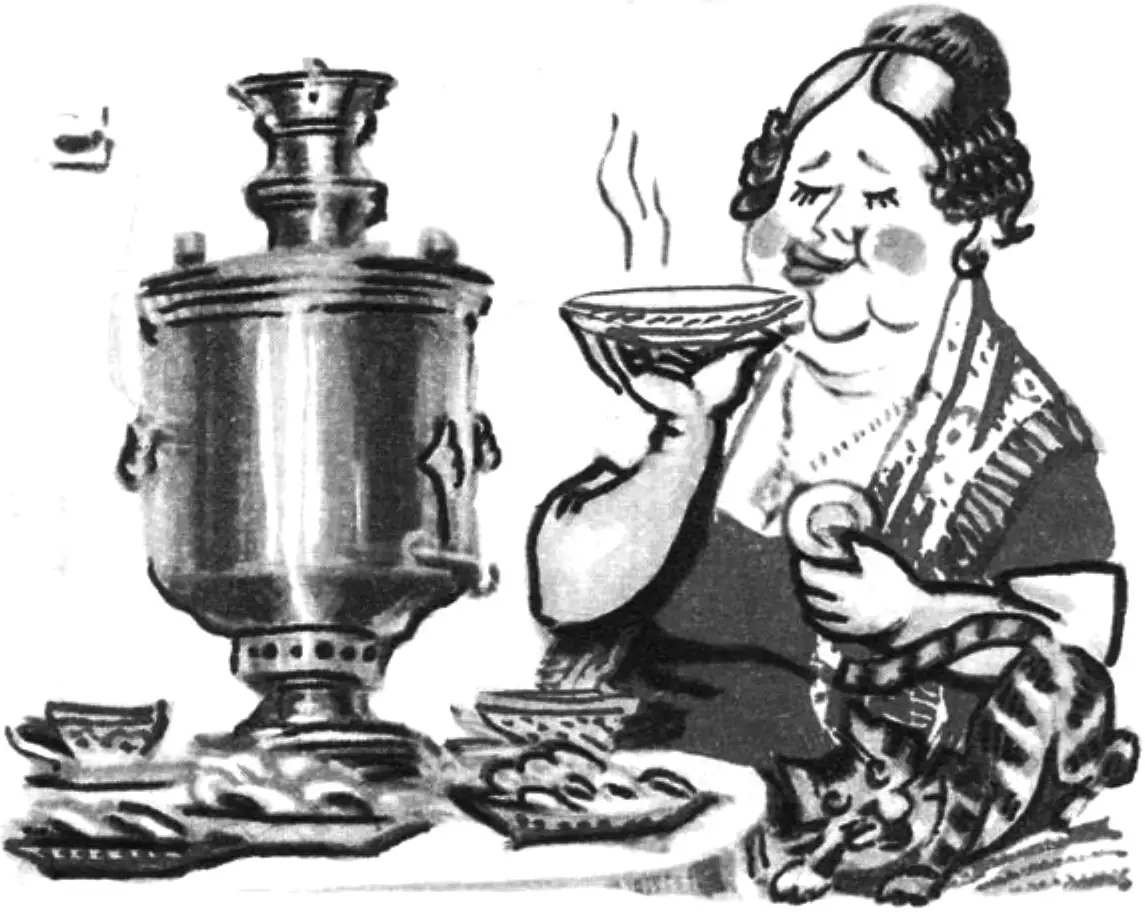
When there is an antique samovar in the house, it would be a shame not to use it at least on special occasions. You can even avoid the hassle of lighting a fire and simply pour ready-made boiling water inside. At first, that is what I did, until I decided to equip this relic with a tubular electric heating element (TEN), while keeping the samovar’s external appearance and the basis of its unique design practically unchanged.
As the TEN, a so-called household immersion heater rated at 1.2 kW was adapted. However, the plastic head with wires had to be removed. The tubular spiral also had to be slightly straightened so that the heater could fit freely between the samovar body and the fire tube.
The handles caused more trouble… Located on the samovar lid, besides performing their main function, they also had to serve as housings for electrical connectors. At the same time, with no wires visible and with the rotating covers closed, they had to look no different from the original on the outside.
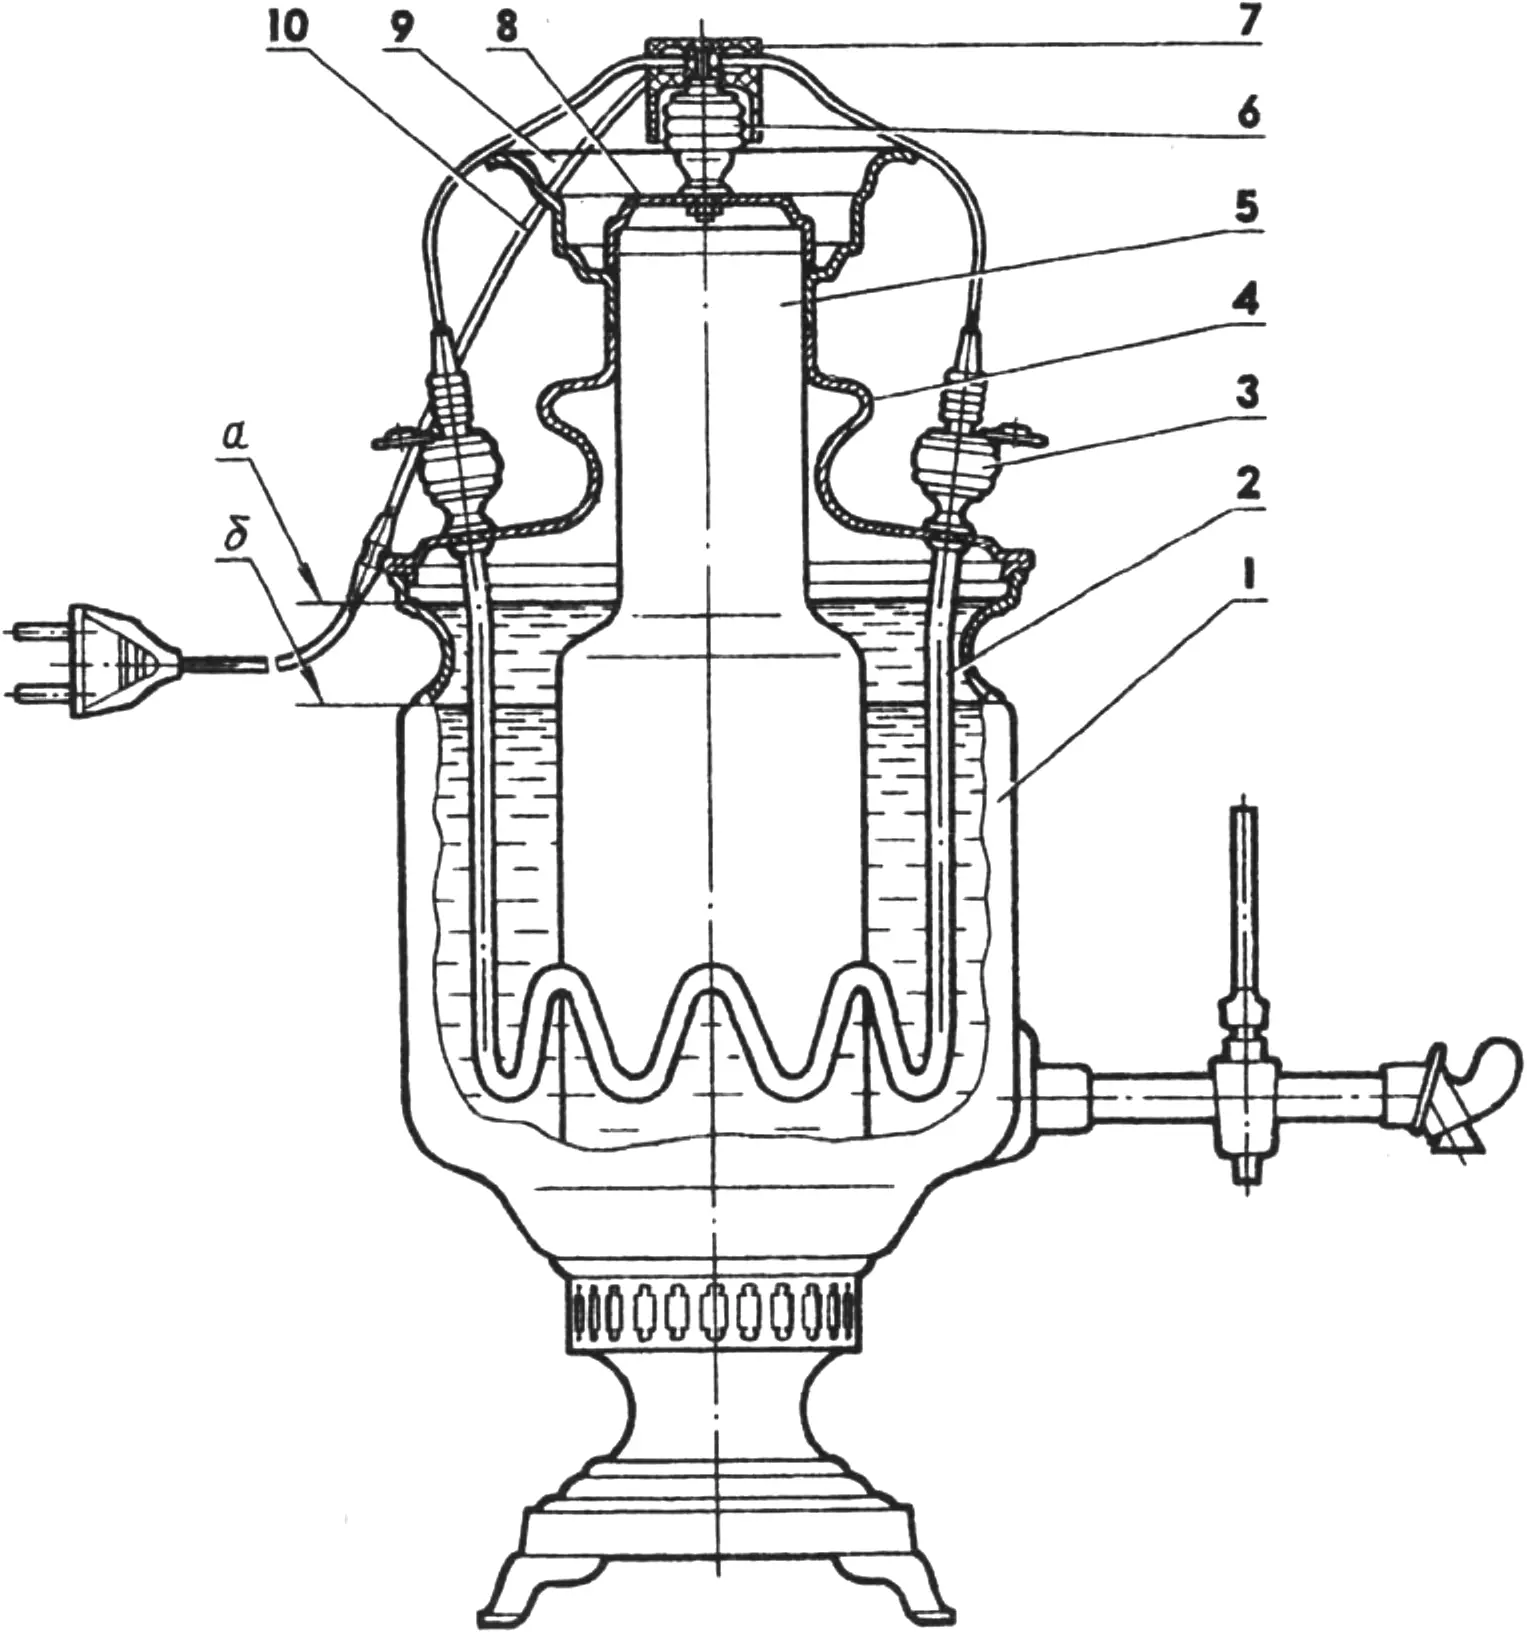
1 — samovar body; 2 — electric heater; 3 — handle-plug (2 pcs.); 4 — lid; 5 — fire tube; 6 — plug handle; 7 — wire splitter clamp; 8 — plug; 9 — burner; 10 — power cord; upper (a) and lower (b) allowable water fill levels in the samovar.
In addition, the samovar received a modern electrical connection, quite compact. It also had to be made by hand, since industrial samples were unsuitable for non-standard equipment. Fortunately, there are not many parts in a samovar electrical connection.
In short, it took some effort. What was the result?
First, the samovar retained its “face.” Second, it can be heated not only with firewood, as before, but also from the mains.
True, such combined samovars are already produced by the Tula “Shtamp” plant. But they use a TEN that is inserted into the samovar body, which means the electrical connector sticks out and is not at all an ornament to the design. Besides, the connection between the TEN and the body must be sealed, which is ensured by rubber gaskets. Rubber, however, cracks with prolonged heating (and simply over time), and the connection loses its seal. And if there is no new gasket at hand, the samovar can no longer be used.
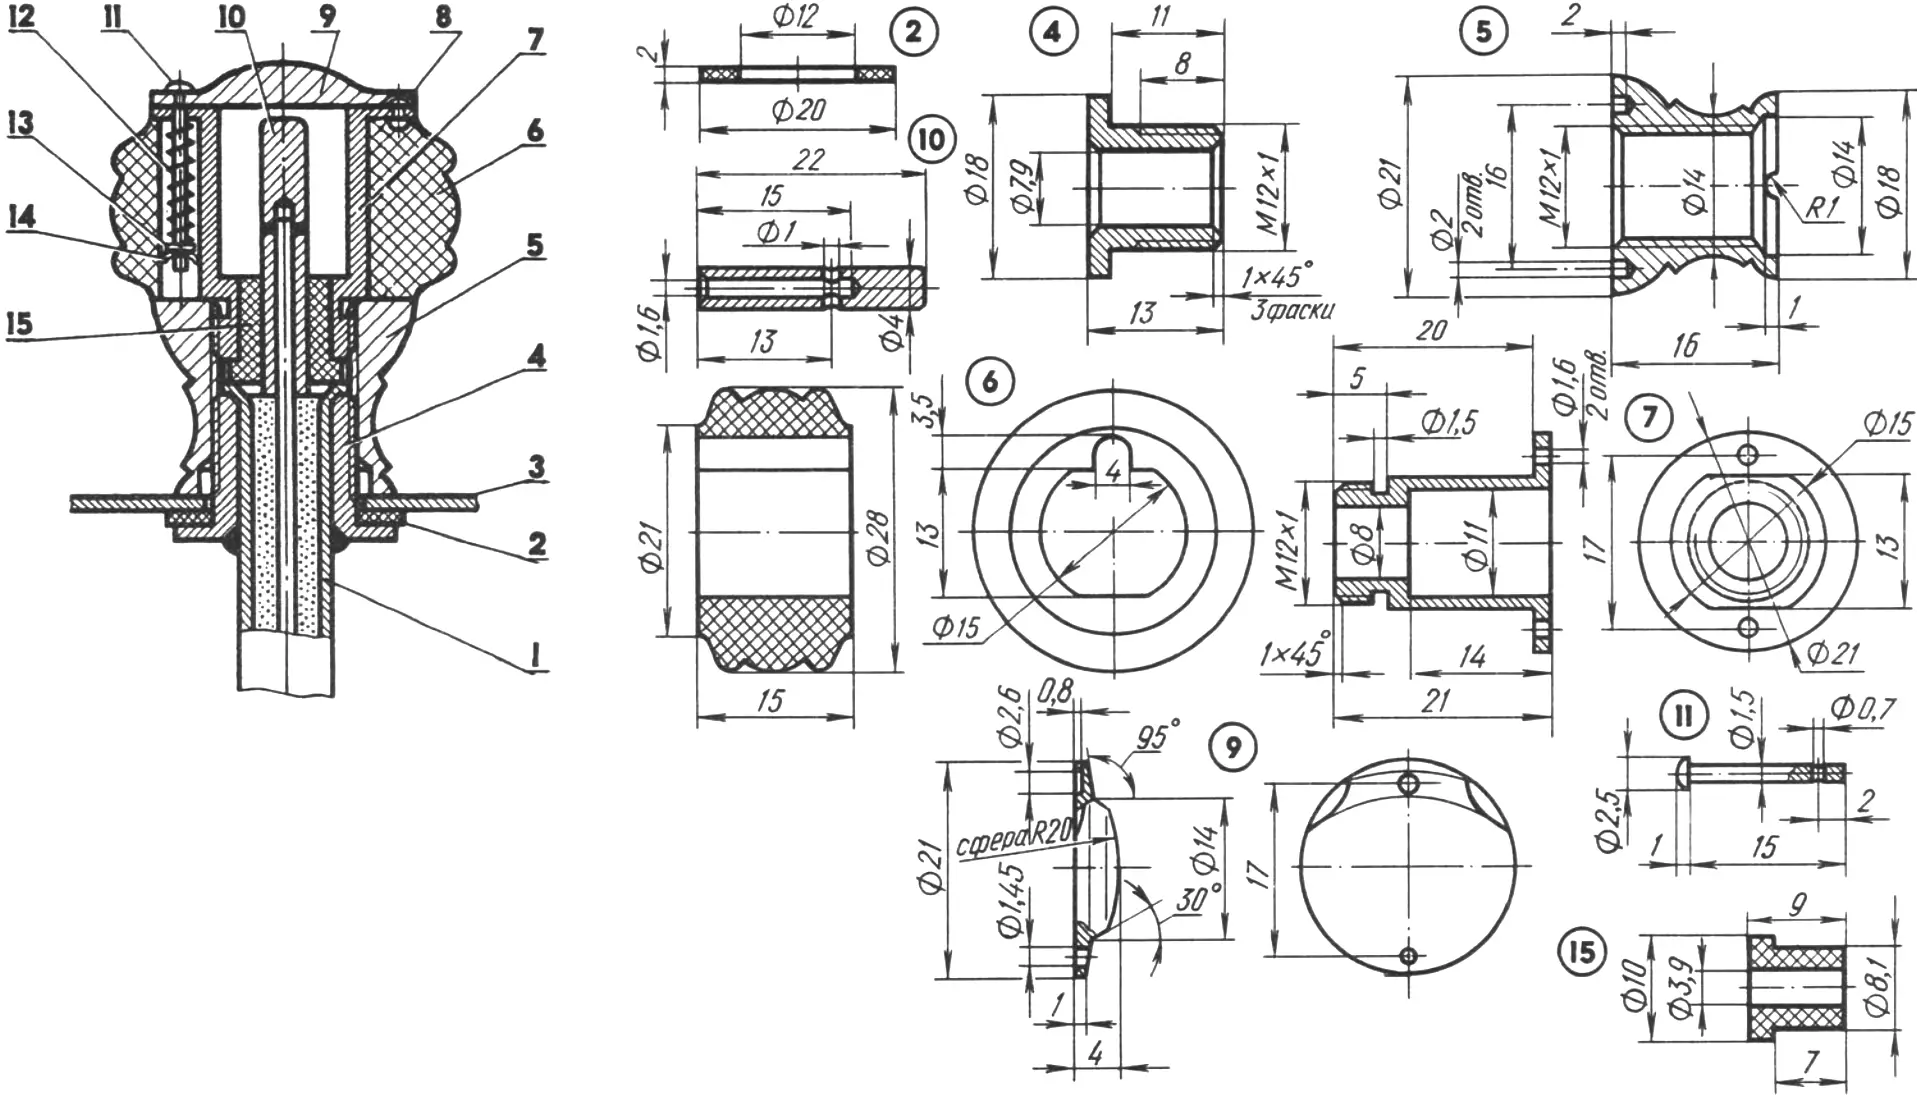
1 — TEN body; 2 — gasket (PTFE or caprolon); 3 — samovar lid; 4 — threaded bushing; 5 — shaped nut; 6 — knob; 7 — threaded sleeve; 8 — lock; 9 — rotating cover; 10 — contact pin; 11 — cover pivot; 12 — spring (from disposable gas lighters, shortened); 13 — washer; 14 — cotter pin; 15 — insulator (PTFE, caprolon, or rubber).
In the proposed design, however, the electrical connectors are located on the samovar lid, that is, above the water level, and do not require a sealed connection. This means that the samovar’s operability does not depend on the quality of gaskets (there may be none at all). Moreover, no additional holes need to be made in the body. And, finally, third, the heater of the proposed design can be installed in a purely electric samovar, which will increase its reliability and service life.
By the way, Russian Patent No. 2073995 was granted for the samovar design.
In conclusion, a few more recommendations. A household TEN rated at 1.2 kW is best suited for samovars up to 5 liters; with a larger capacity, the heating time will be too long. It is advisable to use a TEN with a body made of a copper alloy. It should be bent very carefully so as not to damage the electric spiral inside.
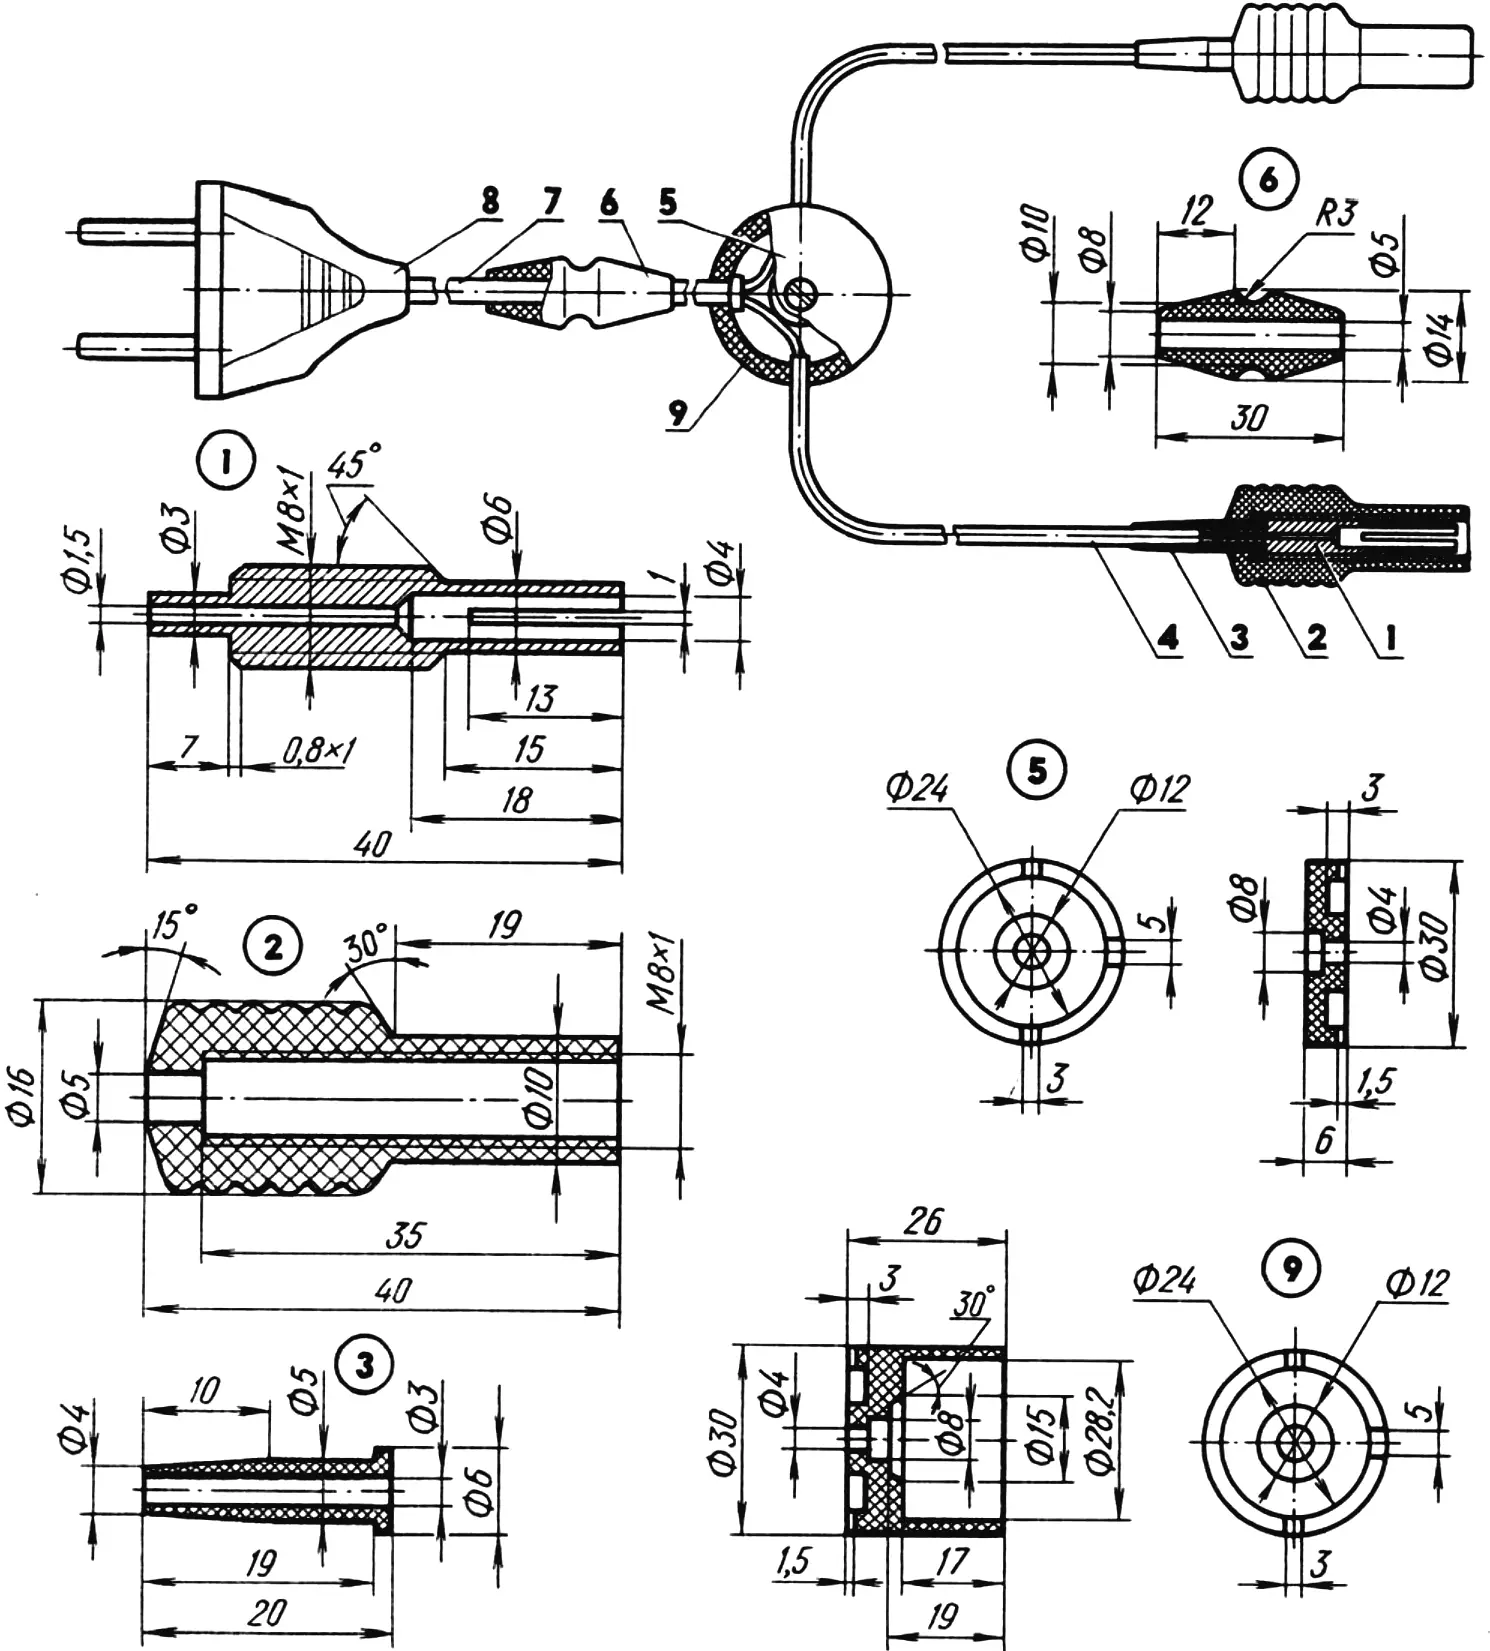
1 — contact sleeve (bronze or brass, 2 pcs.); 2 — plug body (2 pcs.); 3 — flexible bushing; 4 — single-core wire; 5 — splitter clamp cover; 6 — shaped bushing; 7 — mains cord; 8 — plug; 9 — splitter clamp base.
For a copper samovar, it is best to make all metal parts from bronze. External surfaces should preferably be polished.
I advise turning the knobs from hardwood (oak, beech). If necessary, treat them with wood stain and coat them with furniture varnish in 2—3 layers. All other non-metal parts can be made from PTFE or caprolon.
I recommend pressing the threaded bushings onto the boiler tube with an interference fit, flaring the tube ends, and soldering the joint. This is necessary so that the bushings do not turn when tightening the shaped nuts. Solder the contact pin to the heating spiral terminal. Fit the insulator onto the contact pin tightly so that it enters the connector body snugly.
The pivots can be press-fitted into the rotating covers, and the springs can be taken from disposable gas lighters, shortened to the required size.
As for the length of the single-core wires of the mains cord, they should preferably not be tightly stretched in the working position.
“Modelist-Konstruktor” No. 5’98, V. GOLOVNYA
Recommend to read
 ADD MIRROR
The schematic of this flip shelves became almost a classic and even entered one of the tutorials on technical drawing for school students. However, there is no limit to perfection. Its... WINDSURFING: the prize of “M-K” — “Orbit”
We can safely say: all-Union competitions "the prize of the Heroes of the Cosmos" today, the most popular competitions of fans of Windsurfing. Last year, no" was attended by about 170...
