What should you give preference when designing an amphibian: teach it to swim well, turning it into a boat on wheels, or let it run well on land and slowly overcome water obstacles? This is the first question that comes to mind for anyone planning to build such a machine. Almost no one can combine the maximum of both qualities in one design. And something becomes important.
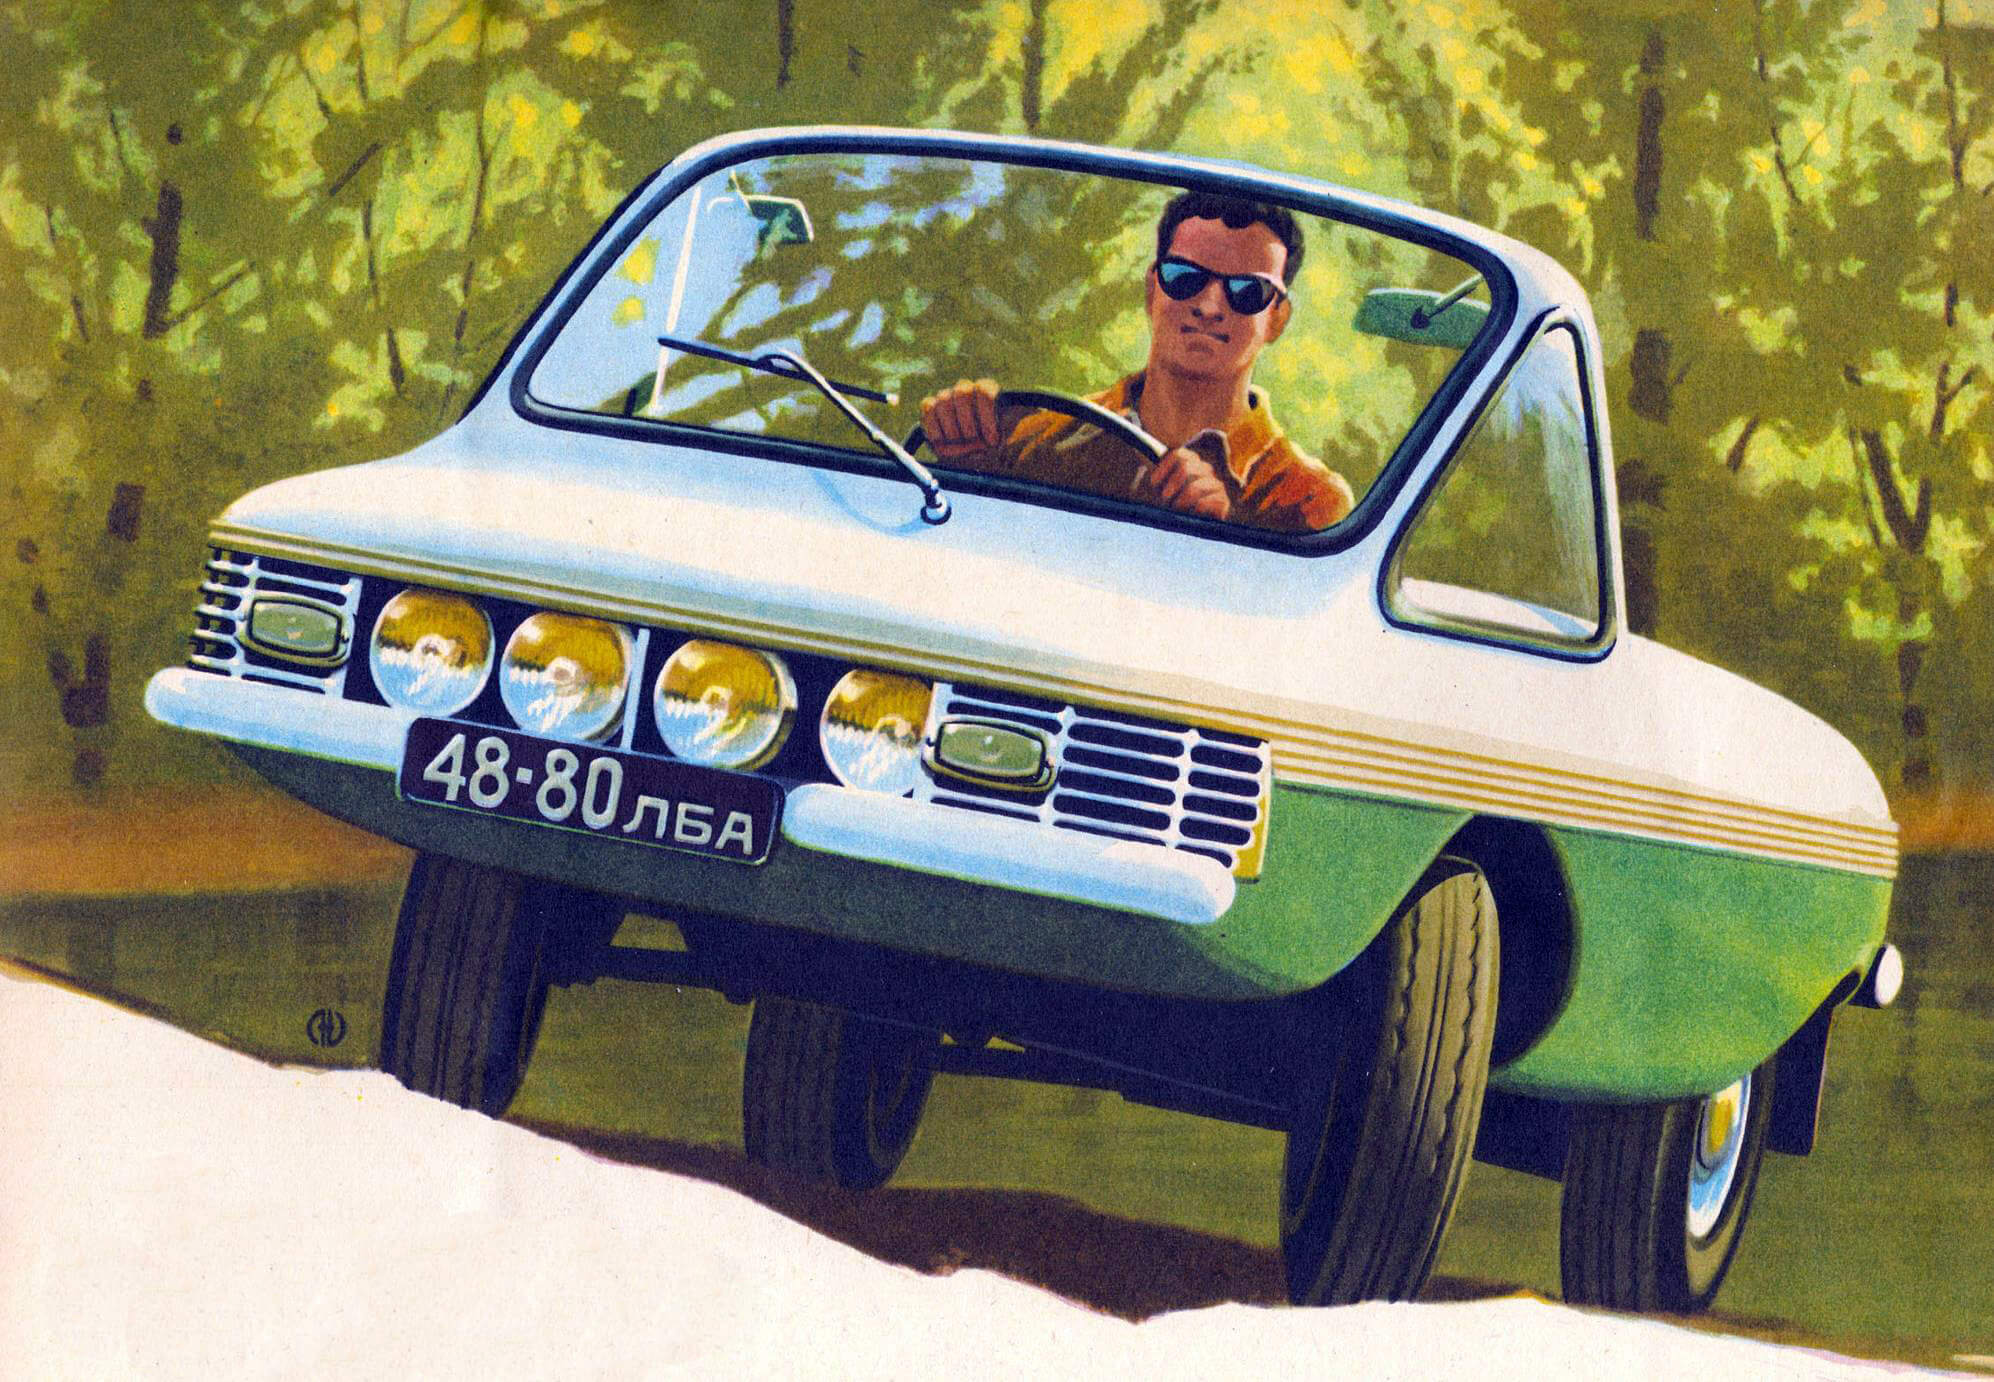
Leninabad Airport flight mechanic Anatoly Novin, whose car we offer to your attention, decided (based on local conditions) to give priority to automotive qualities. But… he made it “with an eye to the future”, as evidenced by the name of the minicar – “Dolphin”.
Today, “Dolphin” by A. Kovina runs on land at speeds of up to 100 km/h and is not afraid of water – it has good buoyancy. The streamlined, carefully sealed body allows you to bring the design to an amphibious version by installing a propeller drive or, at worst, mounting an outboard motor on the transom.
Some of the designer’s comments about the layout of the machine are curious. “For better maneuverability and smoothness, the base was chosen to be relatively short,” writes A. Kovin. “And therefore, in order to maintain stability, it was necessary to distribute the load equally across the axles. The task boiled down mainly to loading the front of the car, since the engine and gearbox were located at the rear. That is why the remaining units were moved as far forward as possible: the main gas tank, battery, steering mechanism, cockpit canopy and even the driver’s seat. Thus, the driver found himself between the front wheel covers and in the center of the car. This immediately provided a number of advantages: good visibility, a short distance from the driver’s eyes to the front of the car, which is especially important when driving through closed intersections. The driver’s weight loaded the front axle to the maximum, which gave a weight distribution along the axles of 50X50%. The passenger seat is located almost in the center of the base, which improves the load on the axles. The alignment of the spare tire, which is located on the floor under the passenger seat, does not change either.”
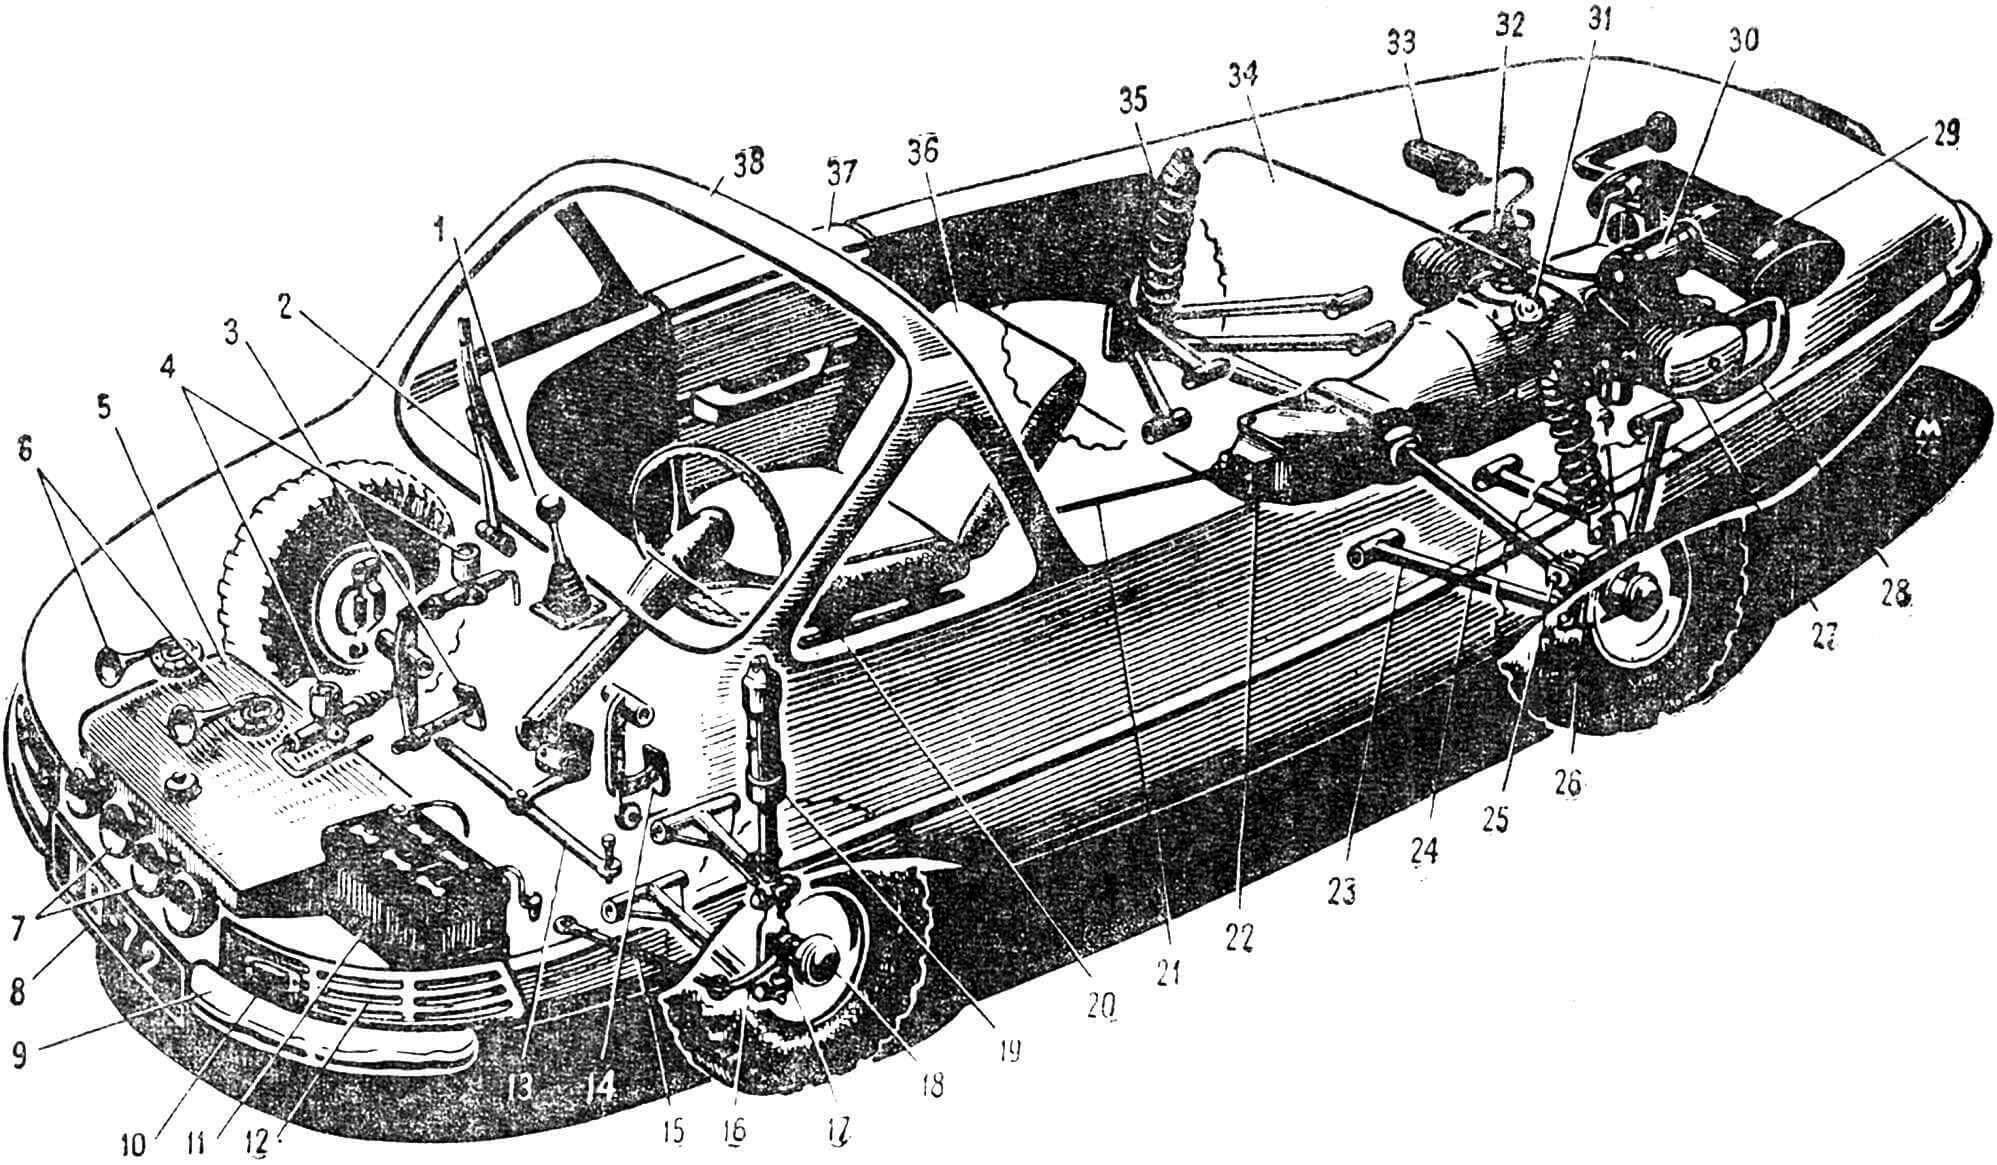
1 — gear shift lever, 2 — windshield wiper, 3 — foot brake pedal, 4 — master brake cylinders (separately for front and rear wheels), 5 — gas tank, 6 — sound signals, 7 — headlights, 8 — license plate shield, 9 — bumper, 10 — turn signal, 11 — battery, 12 — air intake duct grille, 13 — tie rod, 14 — clutch pedal (cable control), 15 — steering rod, 16 — front wheel suspension arm, 17 — steering knuckle, 18 — wheel hub, 19 — spring-hydraulic suspension shock absorber, 20 — driver’s seat, adjustable for length and backrest tilt, 21 — transmission control rod, 22 — gearbox, 23 — rear wheel suspension arm, 24 — drive axle, 25 – universal joint, 26 – rear wheel hub stand, 27 – engine, 28 – exhaust system, 29 – exhaust noise muffler, 30 – generator, 31 – coil mechanism for controlling carburetors, 32 – breaker – ignition distributor, 33 – high voltage coil, 34 — back of the rear seat, 35 — spring with pneumatic cylinder for the rear wheel suspension, 36 — back of the driver’s seat, 37 — door, 38 — windshield frame (fiberglass).
If the driver’s seat is centrally located, it would be more advantageous to use a diamond-shaped arrangement of four individual seats. But the sufficient width of the car made it possible to install one 3-seater seat, behind which it was possible to place a small additional trunk. With this arrangement, one door on the right was sufficient for the driver and passengers to exit freely.
In the version of the car with a hard roof, you will also need a second door, on the opposite side. In this case, the doors should open upward, since the car has high thresholds in the doorways to prevent water from pouring in.
It is difficult to agree with the author’s last remark, since a hard roof will not only spoil the appearance of the Dolphin, but will also significantly affect its buoyancy and stability. It is probably better to get by with an easily removable awning. True, in this case the car will cease to be “winter”, but – we have already said – it is impossible to combine all the positive qualities of land and “waterfowl” transport in one design.
DESIGN DESCRIPTION
The BODY consists of transverse and longitudinal strength sets and casing (1.2 mm duralumin). The transverse set consists of 10 frames (Fig. 1), the longitudinal set consists of duralumin corners. Frames located outside the passenger and engine compartments are of a closed type. The transverse set is mounted on two channels curved along the contour of the car. For greater strength during riveting, gussets and linings made of sheet duralumin 3-4 mm thick are used. The sheathing was riveted to the frame in small (due to its complex configuration) end-to-end sheets. For the nose and tail curves, the frame was made separately and reinforced with a 10X10 corner. These parts were sheathed with duralumin. At the mounting points of the chassis and engine, the body was reinforced using 20X20 corners and 3-5 mm thick duralumin sheets. The chassis elements are connected to the body with bolts and rivets through rubber gaskets.

1 — corner along the contour of the frame; 2 – holes for the passage of air cooling the engine; 3 — relief holes; 4 – corner for flooring; 5 – holes for wiring rods and control cables and pipelines.
The frame of the cabin canopy is welded and is attached to the body with M4 bolts with countersunk heads. The windshield, edged with a duralumin strip, is tempered; the side glass is 6 mm thick organic glass. The front and rear decorative grilles are made of sheet duralumin 4 mm thick and polished.
CHASSIS . If the body of the Dolphin is almost completely homemade, then its chassis is mainly assembled from serial components and parts. So, the wheels, along with brakes, steering knuckles and struts (front) were taken from Zaporozhets. The shock absorbers are also ready-made.
But the independent suspension of all wheels – parallelogram type – was developed independently. Its levers are made of pipes. Silent blocks are used as hinges. The front shock absorbers are pneumohydraulic, with an air pressure of about 30 kg/ cm2 . The rear shock-absorbing unit is shown in Figure 2. It is noteworthy that the pressure in its pneumatic cylinders can be adjusted on the fly using a pressure reducing valve and taps. This allows you to make a small cylinder of compressed air.
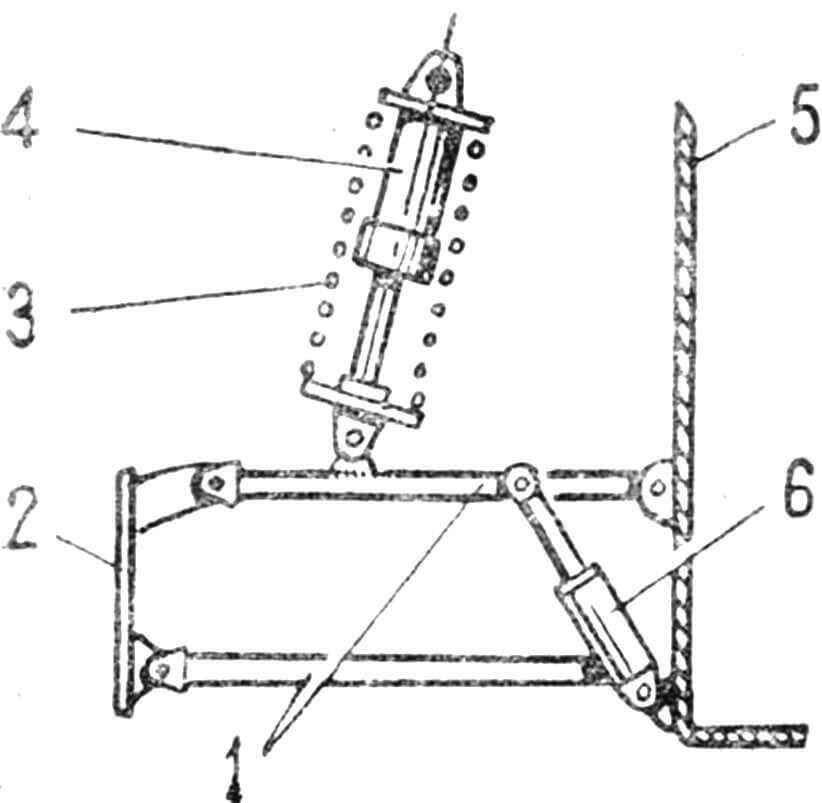
1 — lower suspension arm; 2 — rear wheel stand; 3 – spring; 4 – pneumatic cylinder; 5 — body; 6 – shock absorber.
During operation, it turned out that the rear suspension works better, softer, since its rigidity is maintained regardless of the load. And if you consider that the full load reaches 50% of the vehicle’s own weight, it is clear how important this is.
BRAKES hydraulic. Two master brake cylinders are used, one for the front wheels and the other for the rear wheels. The parking brake with drive to the rear wheels is made in the usual way.
The M-61K ENGINE is connected to the ZAZ-965 gearbox, as shown in Figure 3. Parts 5 and 14-16 are homemade, steel. Adapter flange 5 is attached to the gearbox housing 4 with M10 bolts. The engine crankcase is also attached to the flange with 4 M10 bolts. For centering, the flange has two collars. The M8XI studs of the engine crankcase are turned out, the holes are slightly drilled out, and the M10 thread is cut. Bearing 8 is pressed into the flange bore. During assembly it is filled with grease, and during operation it is lubricated through a grease nipple.
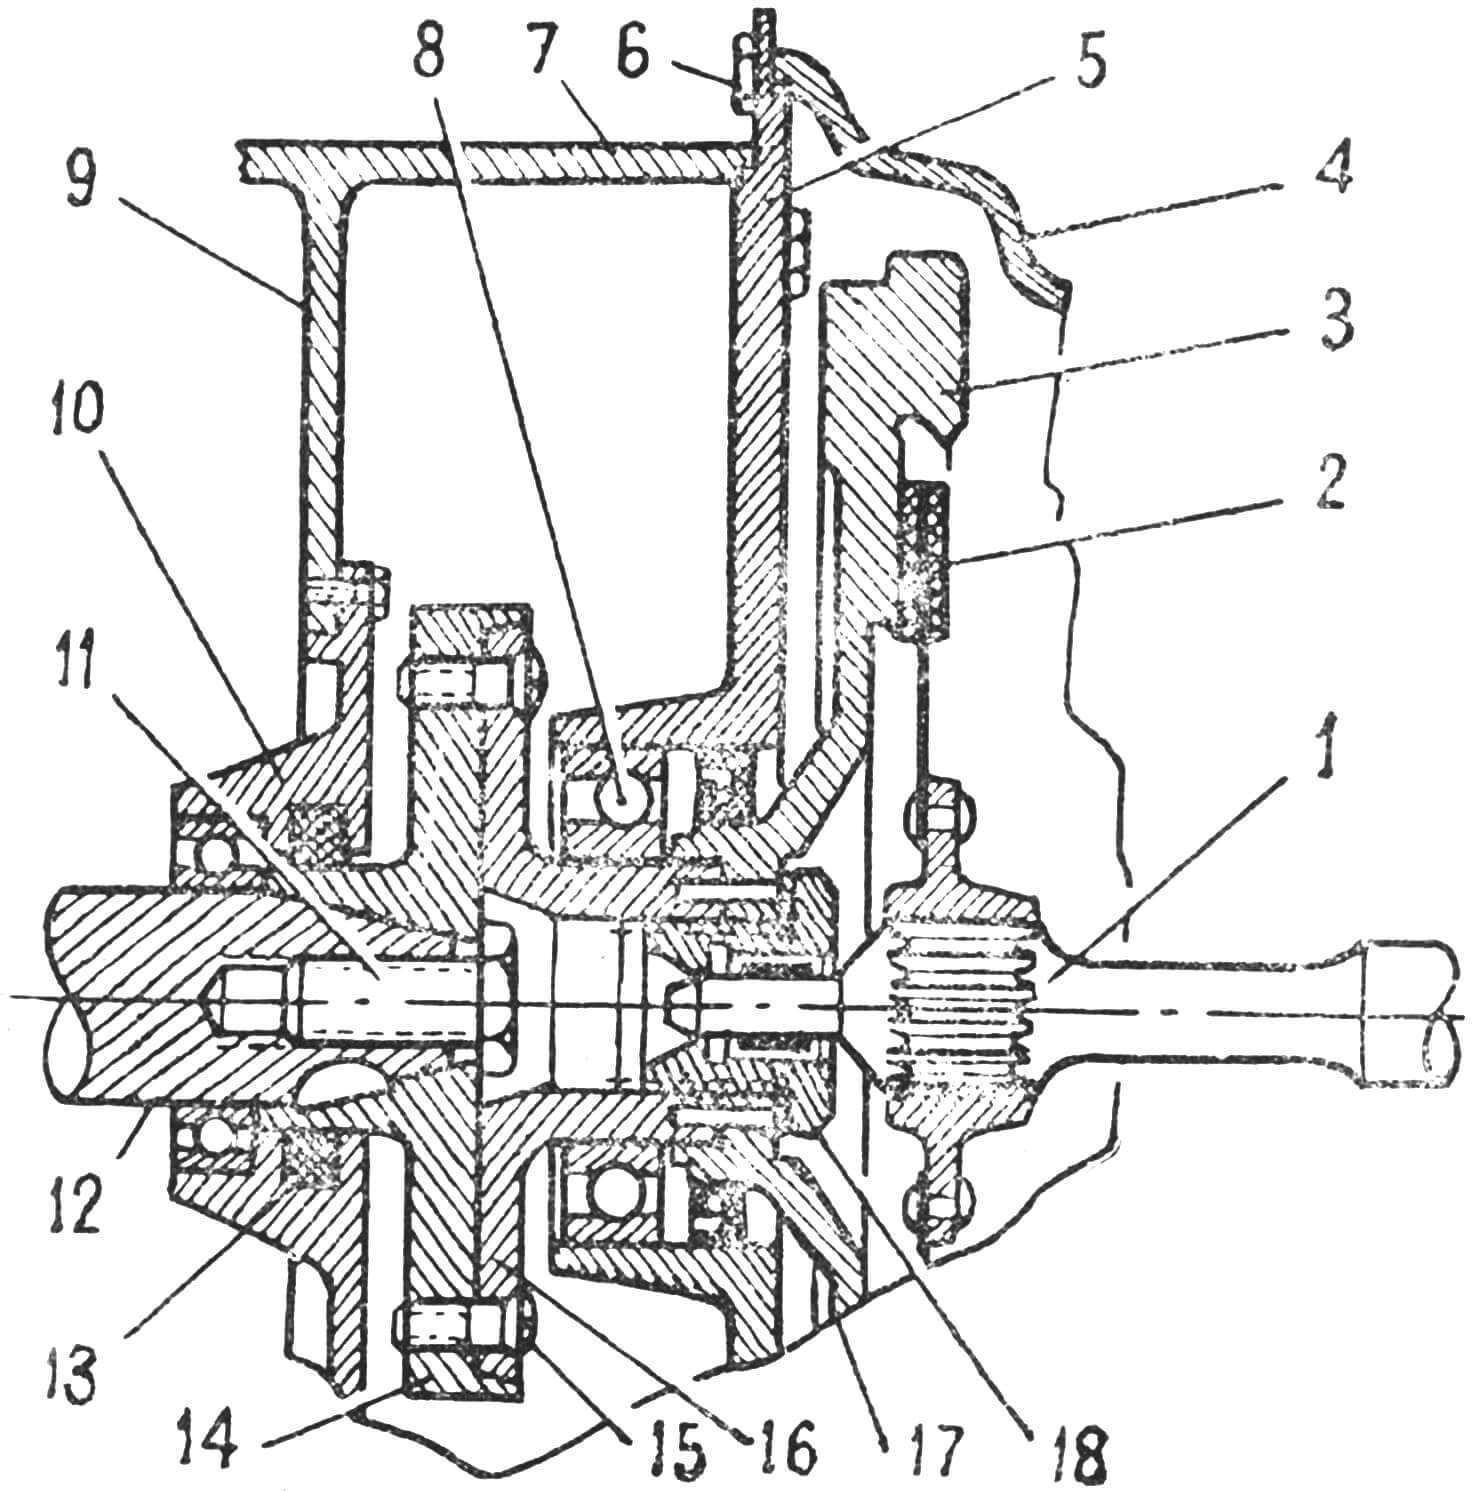
1 — gearbox input shaft; 2 — clutch friction disc; 3 – flywheel; 4 — gearbox housing; 5 – adapter flange; 6— bolt securing the flange to the gearbox; 7 — body; 8 — bearing No. 310; 9 — engine crankcase; 10 — rear engine cover; 11 — M10 bolt; 12 — crankshaft shank; 13 — oil seal; 14 — adapter; 15 — M8 bolt; 16 — flywheel shaft; 17 — pin; 18 — flywheel bolt with needle bearing.
This connection required cutting off the back of the oil pan and then installing a new pan wall and a rebuilt cover.
A flange is welded onto the engine adapter cover, and bearing sockets are bored into it to remove the generator drive shaft. Carburetors – motorcycle ones. The throttle valves are controlled by cables with a synchronizing leveling rocker.
The engine is forced to cool by two electric fans, the speed of which is regulated depending on the engine temperature. The temperature of the cylinders can be judged by a device whose sensor is thermocouples installed under the spark plugs.
The engine is fed with gasoline by gravity. For this purpose, a 5.0-liter fuel tank is installed in the engine compartment, which is replenished with gasoline from the main tank using an electric pump.
ELECTRICAL EQUIPMENT is made according to the usual automotive circuit. The car’s breaker-distributor is installed on the engine. Its roller receives rotation from the oil pump drive gear. But since the gear ratio of this drive is 1:4, the opposite high-voltage terminals on the distributor cap had to be connected, and thus only two wires go to the spark plugs.
TECHNICAL CHARACTERISTICS OF THE MICROCAR
Dimensions (in mm):
length – 4000, wheelbase – 1800, gauge – 1250.
Weight, kg 620.
Number of places 4.
The body is load-bearing, riveted, made of 1.2 mm thick duralumin. Engine M-61K.
Gearbox from ZAZ-965.
Cooling is forced.
The brakes are hydraulic.
Speed - up to 100 km/h.
Electrical equipment 12th century.
Recommend to read
 INSTEAD OF LIPSTICK — FERRITE
To match the antenna output stage of a simple Amateur transmitter on the bands 80 and 160 meters are usually used FERROVIAL made on the basis of a unified regulator of the size of the...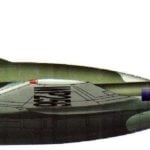 REACTIVE “FRAME” DE-HAVILLAND
This project began with specification E6/41, dated November 1941 In her Ministry of aviation industry of great Britain has offered the firm "de Havilland air craft company" to explore...
