It is hard for an outsider to understand anglers who sit all day, as if hypnotized, with a fishing rod, never taking their eyes off the float. Of course, patience eventually runs out even for the most devoted, especially if the fish does not often reward them with bites. That is why many experiment, trying in practice various devices that signal a bite. Electronics provide considerable help in this. An example is a simple electronic device with which you can monitor four rods at once — a light and sound signal will alert you to a bite on any of them. The indicator can be used when fishing from the shore, from a boat, and through the ice, determining the moment of a bite on any of the four rods in the evening and at night, as well as while being at some distance from the fishing spot.
The principle of the indicator is simple. A sensor (Fig. 1) is mounted on the rod close to the reel; when a fish bites, the tension of the line closes a contact pair that switches on power to the electronic device — the corresponding lamp lights up, and a sound signal is produced at the same time.
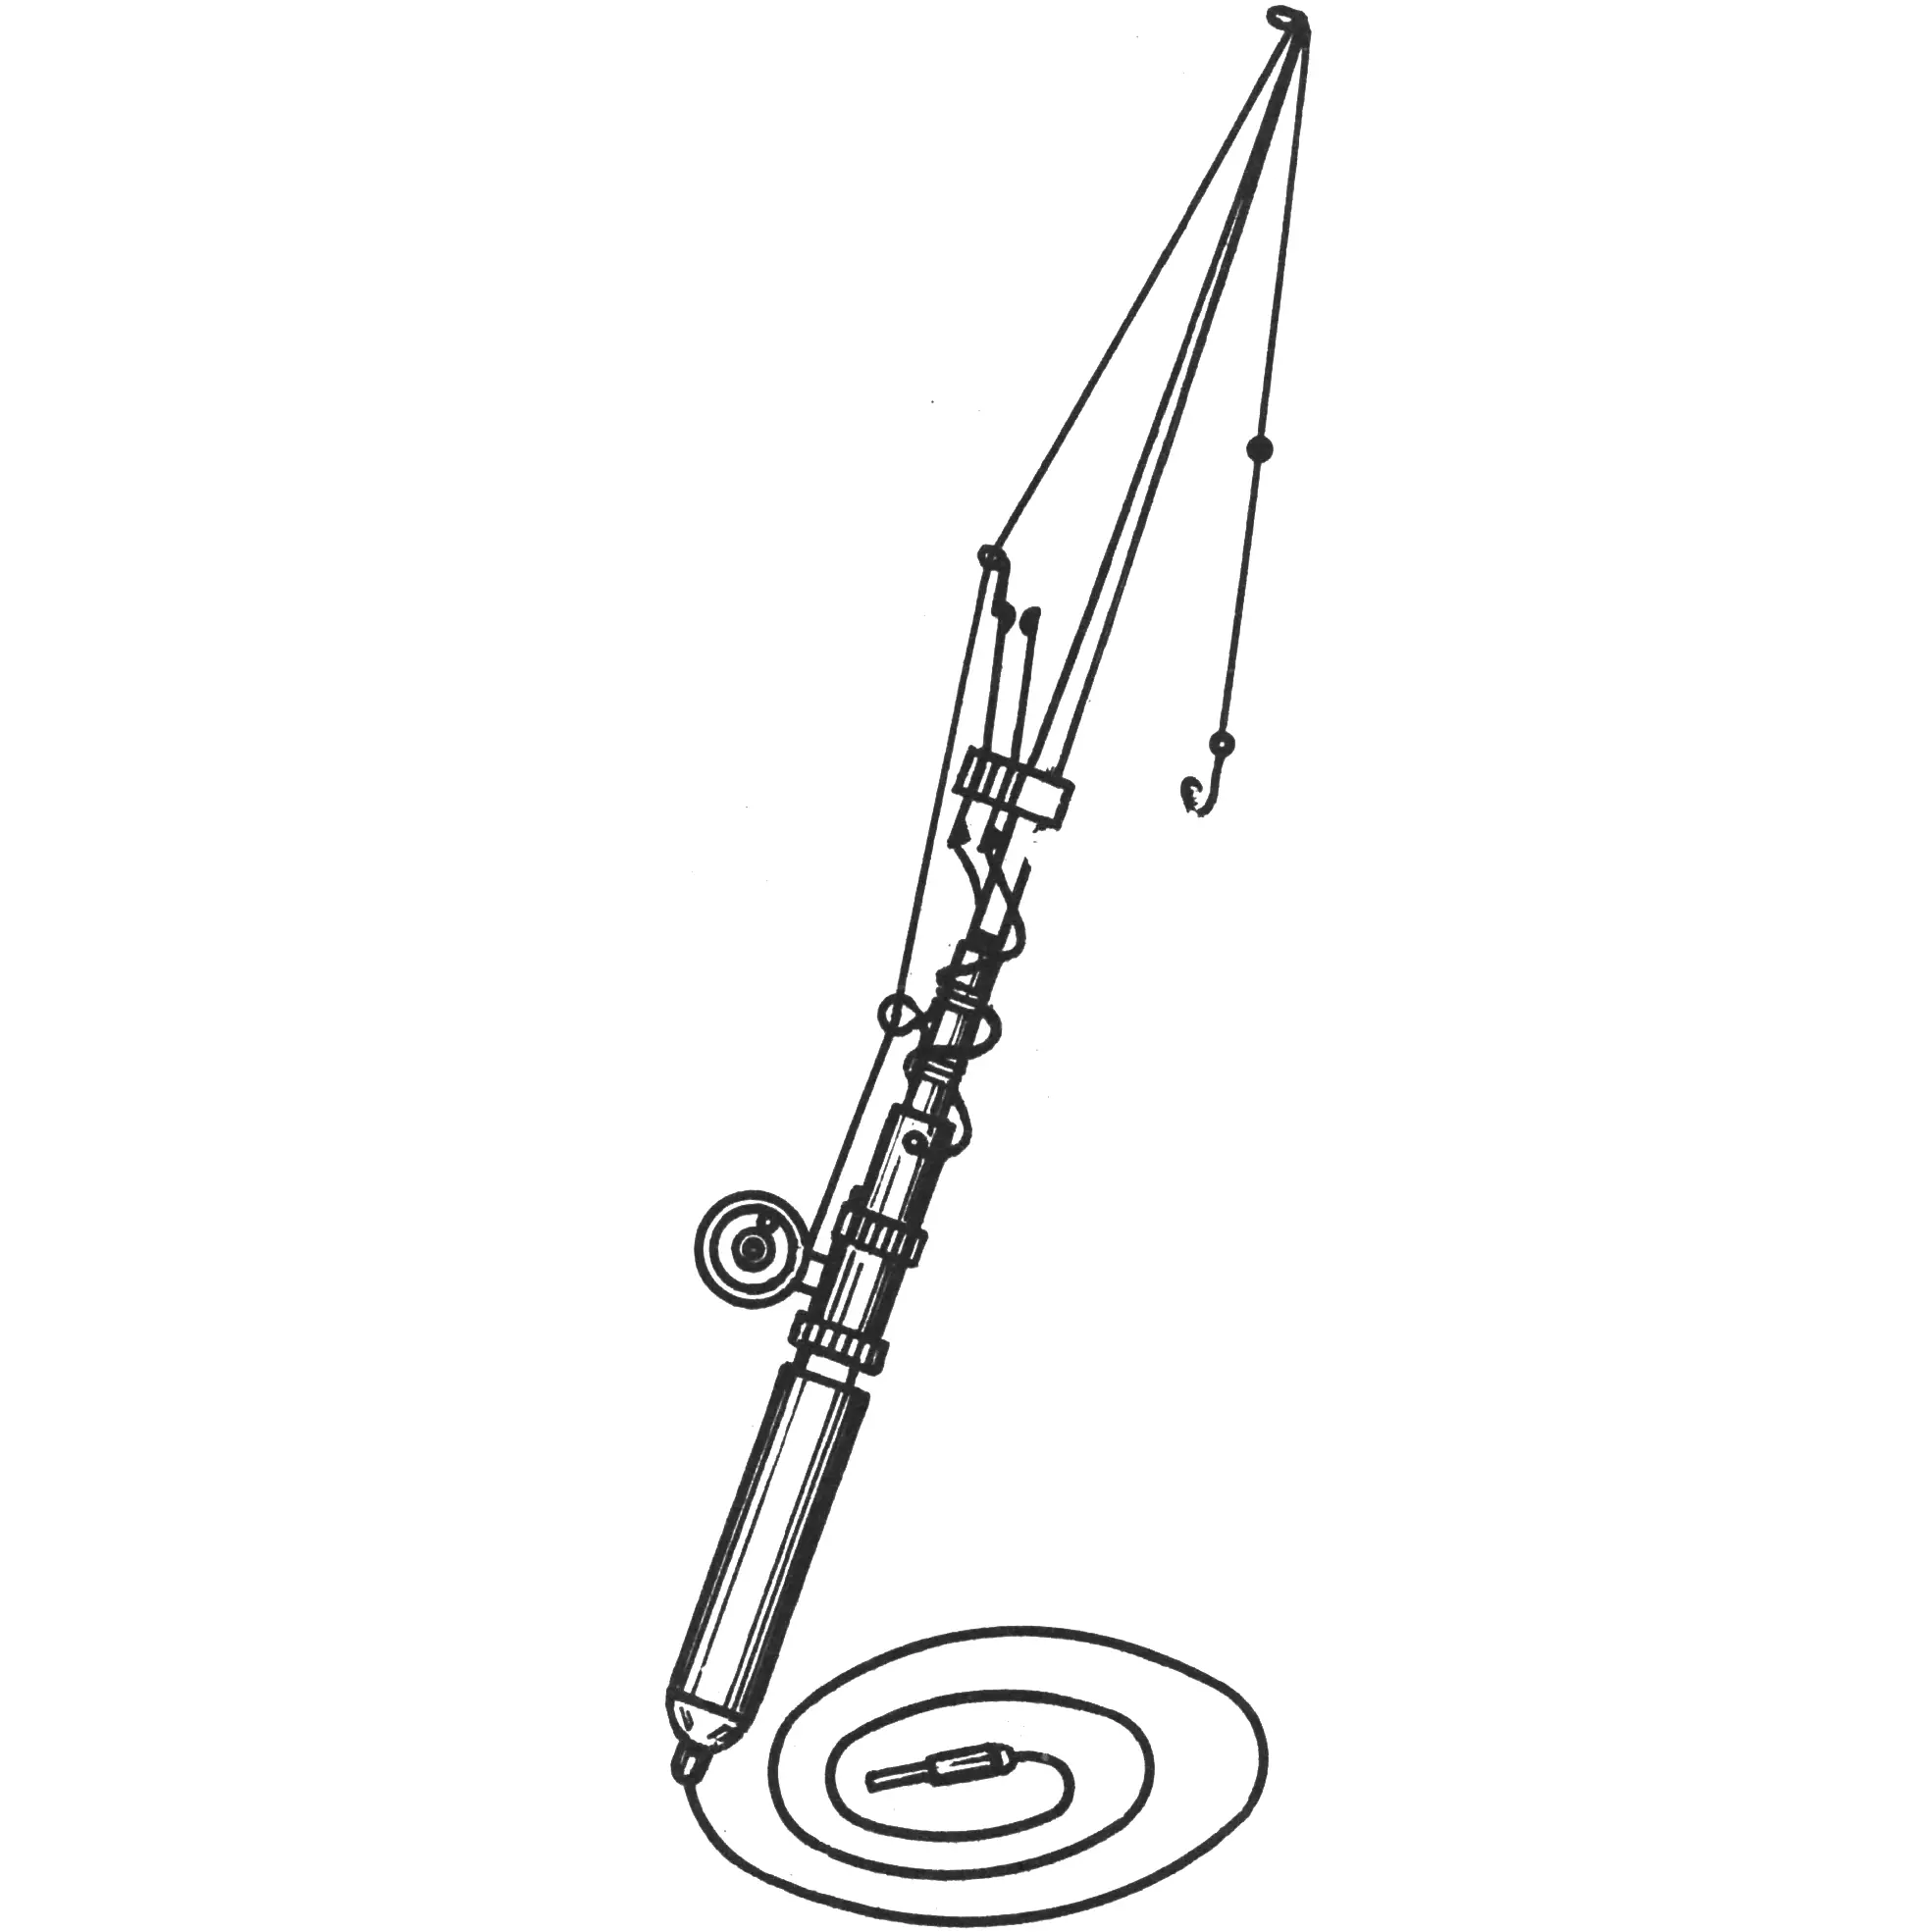
The sensor design can vary. For example, switches of the MP5, MP3A type, or a closing contact pair from any relay will do. In the worst case, the sensor is easy to make yourself. For this, take two elastic metal (for example, bronze) plates 50—80 mm long and 5 mm wide. At one end, drill Ø 2 mm holes for copper rivets that act as contacts. In the same place, a small ring for passing the line is soldered to the upper plate of the sensor. At the other end, drill Ø 0.8—1 mm holes for connecting mounting wires, and then, stepping back 10 and 18 mm from the end, drill two more Ø 3 mm holes for fastening screws. The assembly uses insulating spacers made of textolite or getinax; their thickness depends on the gap between the plates. During assembly, insulating tubes (pieces of a ballpoint pen refill) are inserted into the fastening holes, and screws are placed in them to attach the sensor to a bushing mounted on the rod. Instead of it, metal brackets, clamps, etc. can be used.
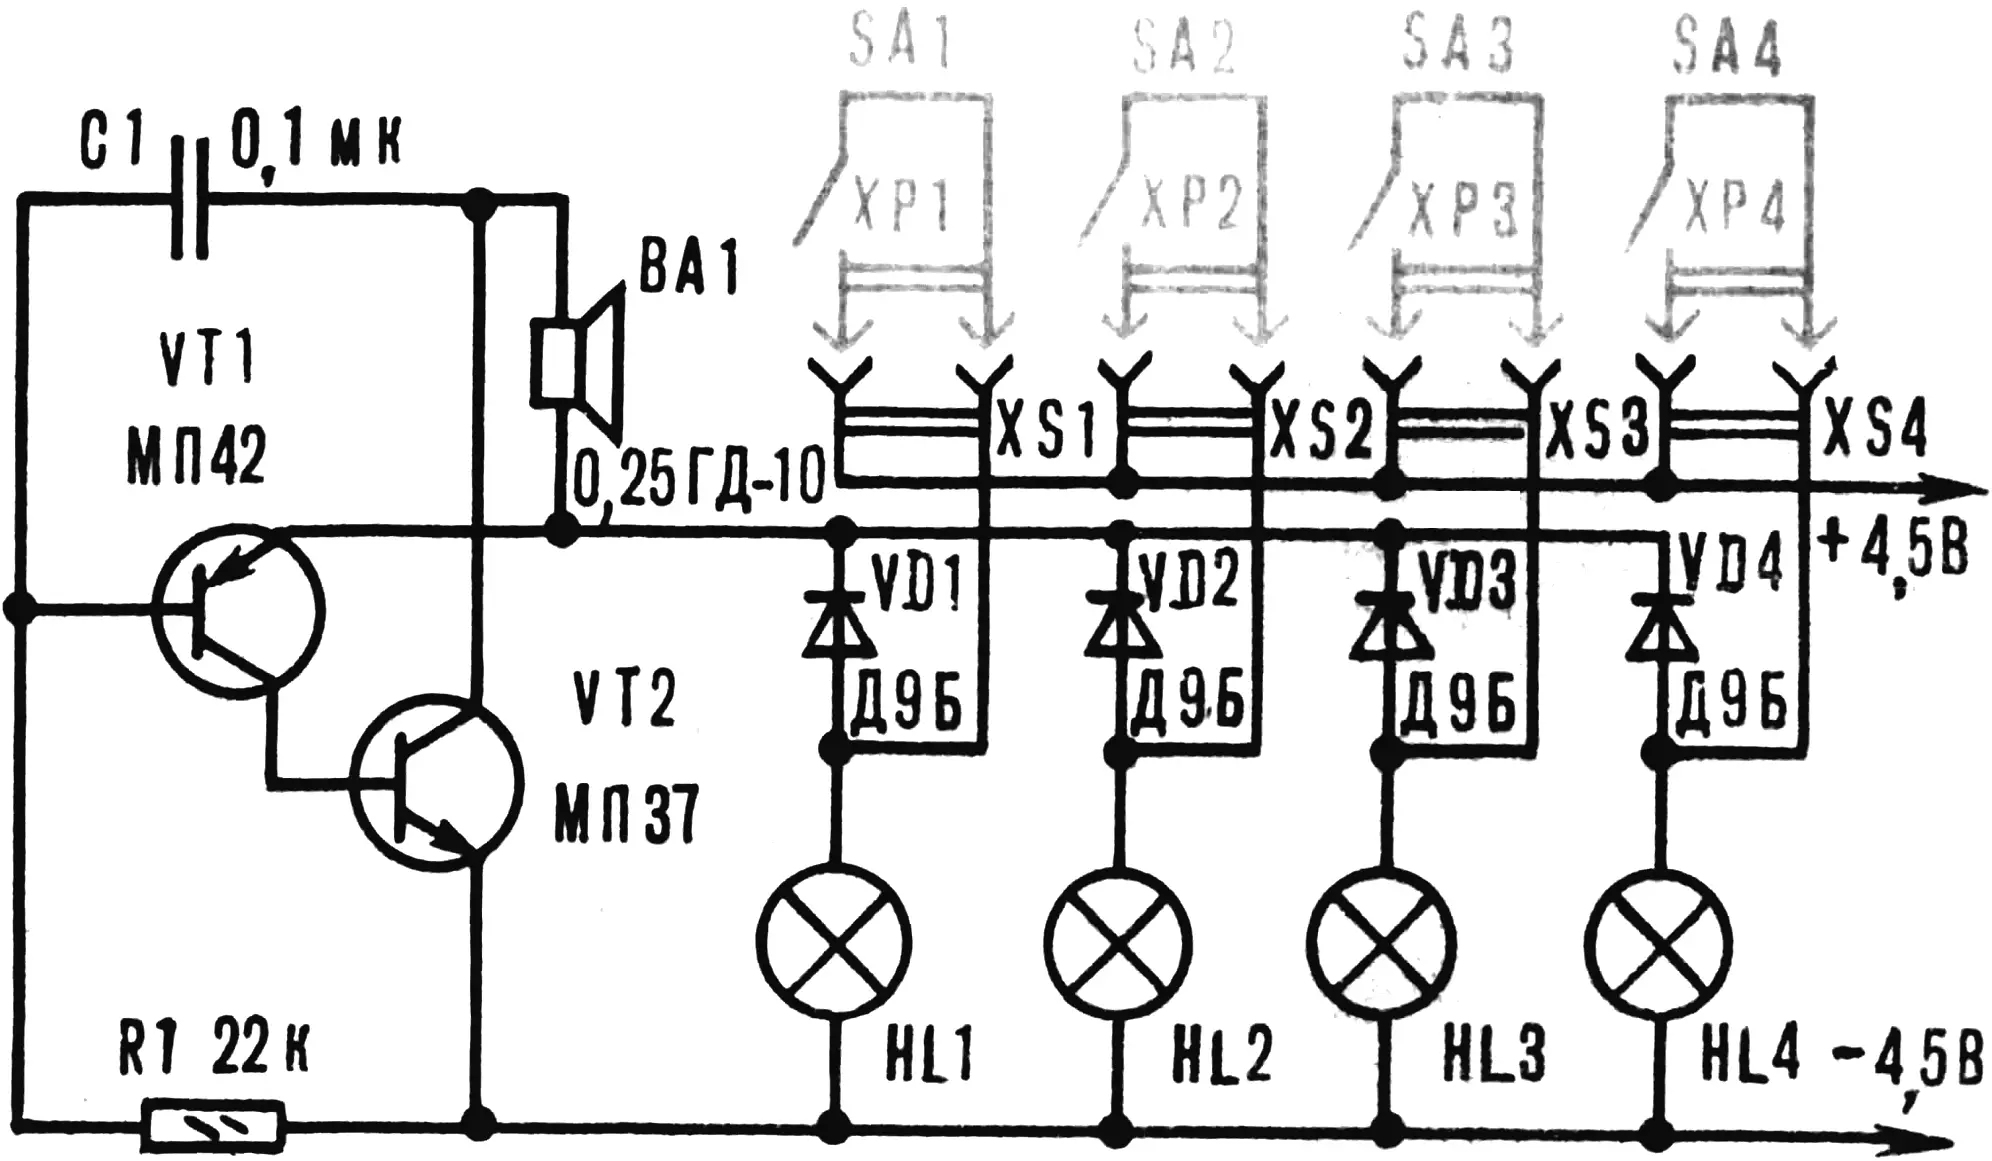
The electrical circuit of the indicator (Fig. 2) is economical, contains no scarce parts, and therefore can be reproduced by any beginner radio amateur. The sound signal generator is built on a well-known circuit with two transistors of different structure: VT1 — any of the MP39 — MP42 series, VT2 — MP35 — MP38, KT315 series; diodes VD1 — VD4 of the D2, D9 type with any letter suffix; resistor — MLT or VS rated at 0.125 W, capacitor — MBM; dynamic head BA1 — of any make rated at 0.1—0.25 W, incandescent lamps HL1 — HL4 at 2.5 V (0.15 A) — from a pocket flashlight; power source — three RC53 cells or a 4.5 V battery; connecting wire MGShV with a cross-section of 0.2 mm2.
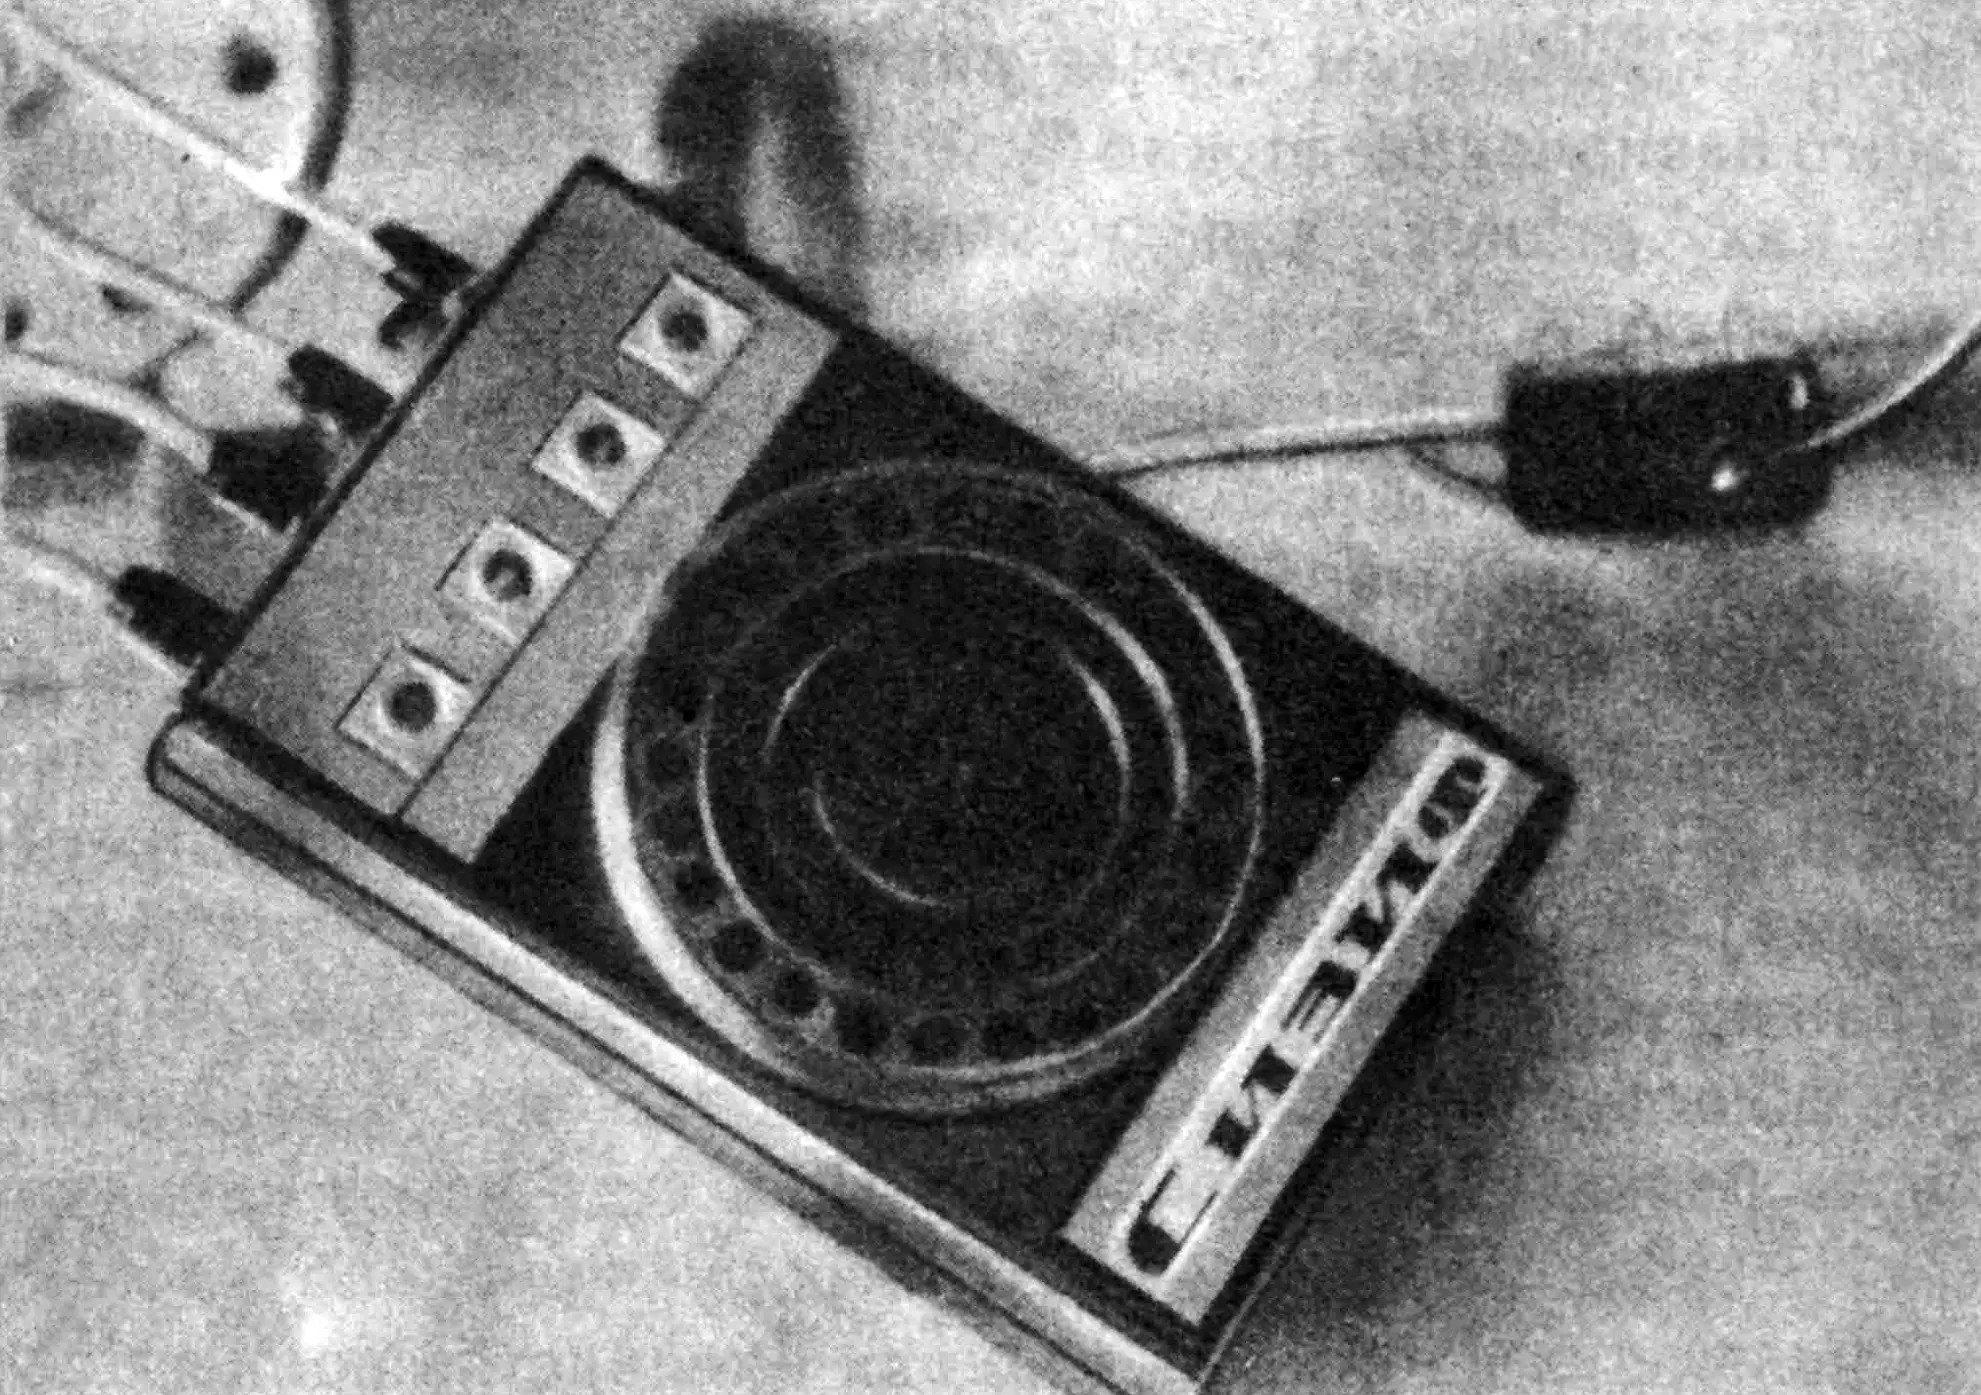
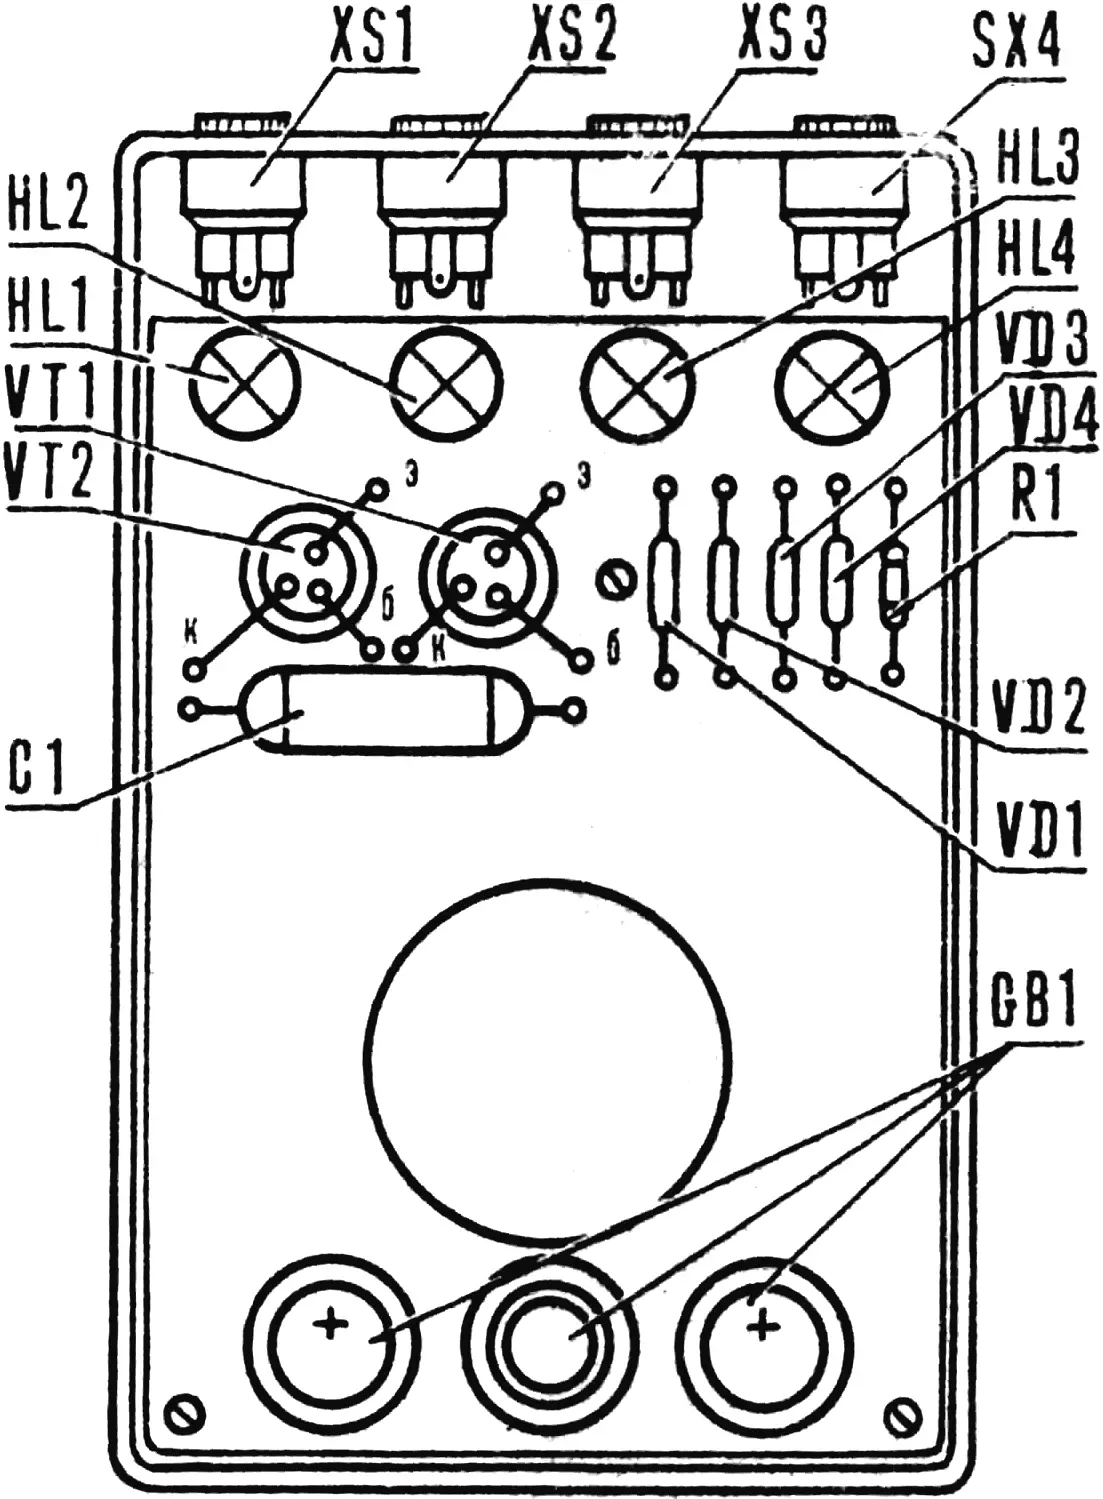
The indicator is assembled in a plastic case measuring 110X68X37 mm, for example, from a pocket radio receiver (see photo). The arrangement of components inside the case is shown in Fig. 3. The dynamic head is attached directly to the cover, in which holes are drilled for sound to pass through. Four more holes are drilled in the cover — opposite the indicator lamps; they are covered on top with transparent overlays made of Plexiglas or polystyrene. To eliminate the influence of light from neighboring lamps, they are isolated with light-tight partitions, for example made of sheet metal or in the form of paper tubes placed over the lamp bulbs.
To reduce the size of the device, all components except the lamps and connectors can be placed in the space under the diffuser of the dynamic head.
It is best to connect the sensors to the indicator through connectors used for connecting compact telephones to transistor radio receivers. When fishing from a boat and through the ice, the connecting wires should be 1.5—3 m long; when fishing from the shore, this length can be increased to 10 m.
The indicator requires no adjustment and, if assembled correctly, starts working immediately. However, the gap between the contact plates of the sensor should be adjusted. It is known that in winter fish take the bait more sluggishly than in summer, and that large fish bite more vigorously than small fish. Based on this, the gap between the contacts is chosen.
«M-K» 8’90, S. MALINOVSKY
Recommend to read
 COMFORT THREE PART
This comfortable chair can make even a novice handyman. Tools required hand saw, hacksaw, planer, chisel hammer, Yes; materials — the cross-bar 65X35 mm and 35X35 mm, round rods (e.g.,... A SMALL RECUMBENT FOR LARGE ROADS
Mini-recumbent, about which speech will go, was born in the Kazan Studio of Edward Stovbunenko — designer of velomobiles and a lover of travel to them. Edward party festivals, parades...
