 The era of universal shortage has prompted us to create the things in the shops it was impossible to find. However, the era of abundance has not stopped this process. Apparently, a modest domestic work is now subject to other laws dictated by market prices or a passion.
Our today’s post we offer readers some of the original fixtures designed not in order to fill their shortage, as before. While it is not necessary to meticulously follow our guidelines and create accurate copies of the proposed developments. It would be better if the above ideas motivate you to independent work.
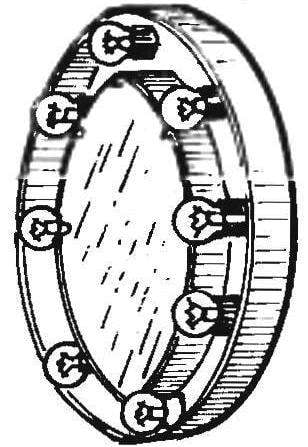
Here is one of these lamps: combination. He is an illuminator, mirror, and Cabinet for perfumes and cosmetics. I must say that this combination in one design will be indispensable for both men (for example. when shaving) and women (when applying makeup).
For the lamp you will need a mirror diameter of 400 mm. If the sizes available will be others, will have to make adjustments.
The housing is glued together from hardboard with a thickness of about 5 mm. First, cut a circle (its diameter must be larger than the mirror, 200 mm), and then two lanes with a width of 100 mm and a length of the first outer wall of the housing, — 1884 mm. second, for internal — 1256 mm.
Strips are rolled in the ring and are joined with plates of the same hardboard. On the outer ring of the strip is inside the ring, on the inside on the outside. The ends of the strips promazyvaetsya with epoxy glue and connected together with the pad are clamped by the clamps. Pre-hardboard is protected by plastic film and between two superimposed plates.
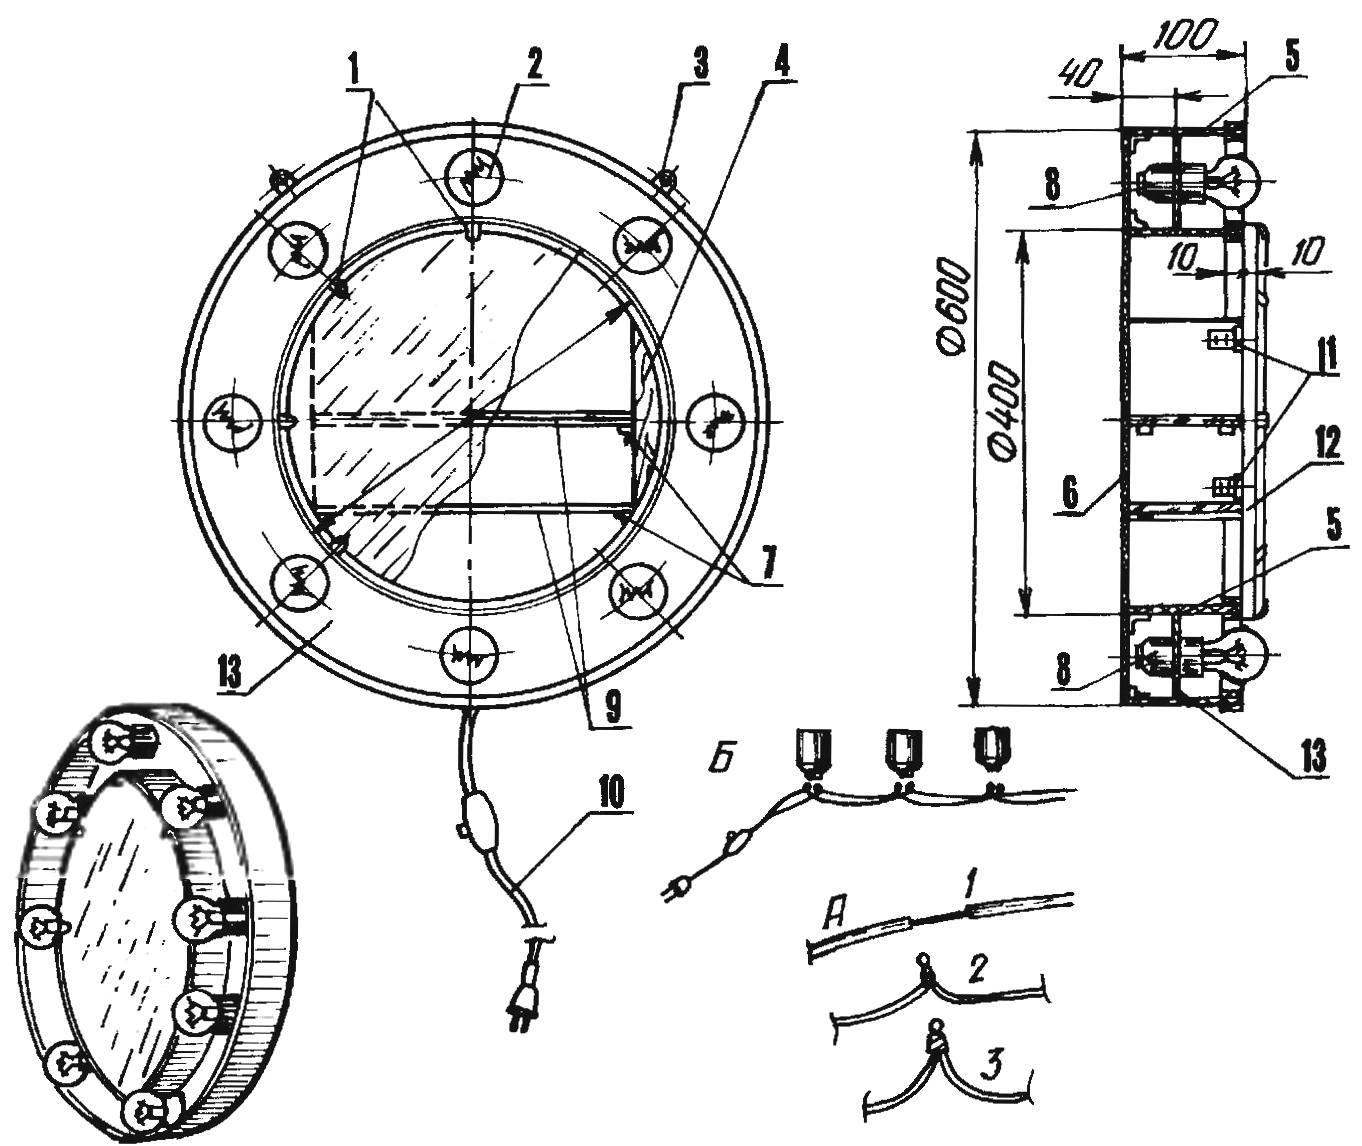
Combo lamp for bathroom or bedroom:
1 — clamps (aluminum strip 1,5×15) 2 — lamp 15…25 W; 3 — loop for the suspension of a lamp; 4 — notched bar (wood); 5 — external and internal housing wall (hardboard s5); 6 — rear panel (hardboard s5); 7 — shelf supports; 8 — lamp sockets; 9 — shelves (glass); 10 — connecting wire through a switch and plug; 11 — furniture hinges; 12 — the bottom mirror (plywood s10); 13 — mounting ring (hardboard s5).
A scheme for mounting “tabs” for parallel wiring of lamps lamp (the numbers show the sequence of operations); B — scheme of connection of the cartridges with the mounting “loops”
Rings are connected with the base by using the same epoxy glue and strips of fiberglass applied to the junction ring from the inside of the box. Edges round boxes are enhanced with strips of hardboard with a width of about 20 mm. For mounting the hinges of the doors of the cupboard and magnetic lock in the box are glued two boards. They also use a plastic shelf supports are attached two glass shelves.
The peripheral part of the boxes intended to contain the illuminator — eight incandescent bulbs (preferably use small krypton or plain, with sociopathy bulb, the so-called “dairy” lamps). To do this, inside the peripheral box is fixed orgalitovoj ring, on which is mounted the lamp sockets. The inner surface of the peripheral boxes pasted wrinkled aluminium foil — this gives a good reflection of light.
The mirror is fixed on a plywood disk with metal clasps; a disc inside vyshkurivaetsya and varnished. To the housing of a door mirror mounted on small hinges.
Casing finish — alkyd enamel suitable for your bathroom color. Of course, previously we have carefully luted the ends and the joints with epoxy putty and proshkurit them.
Especially carefully it is necessary to refer to the electrical wiring. All eight bulbs are connected in parallel to the illuminator, therefore, preferred to use the circuit shown in the drawings. Note also that eight 25-watt bulbs add up to as much as 200 watts, therefore we do not recommend screwing a more powerful light: not only because of the danger of overheating — light would more than enough.
We offer to your attention another homemade lamp that can create the coziness of any area. This is a simple and original lamp. For him, take a stand — it can become a suitable wooden rod, an ordinary duralumin or plastic pole. A good basis is obtained from birch boards, which is sufficient to cut off tiny-teethed saw the rod to the desired length and then sanded the ends and the front side and to cover all surfaces of any furniture Polish.
Floor will also need two or four of the cartridge. It is desirable to choose those that have the mounting flange with two holes for screws. To secure the cartridges on the front, they are completed in pairs and in each pair the diameter of the stand is cut a hole so that can be fixed with screws M4 with nuts.
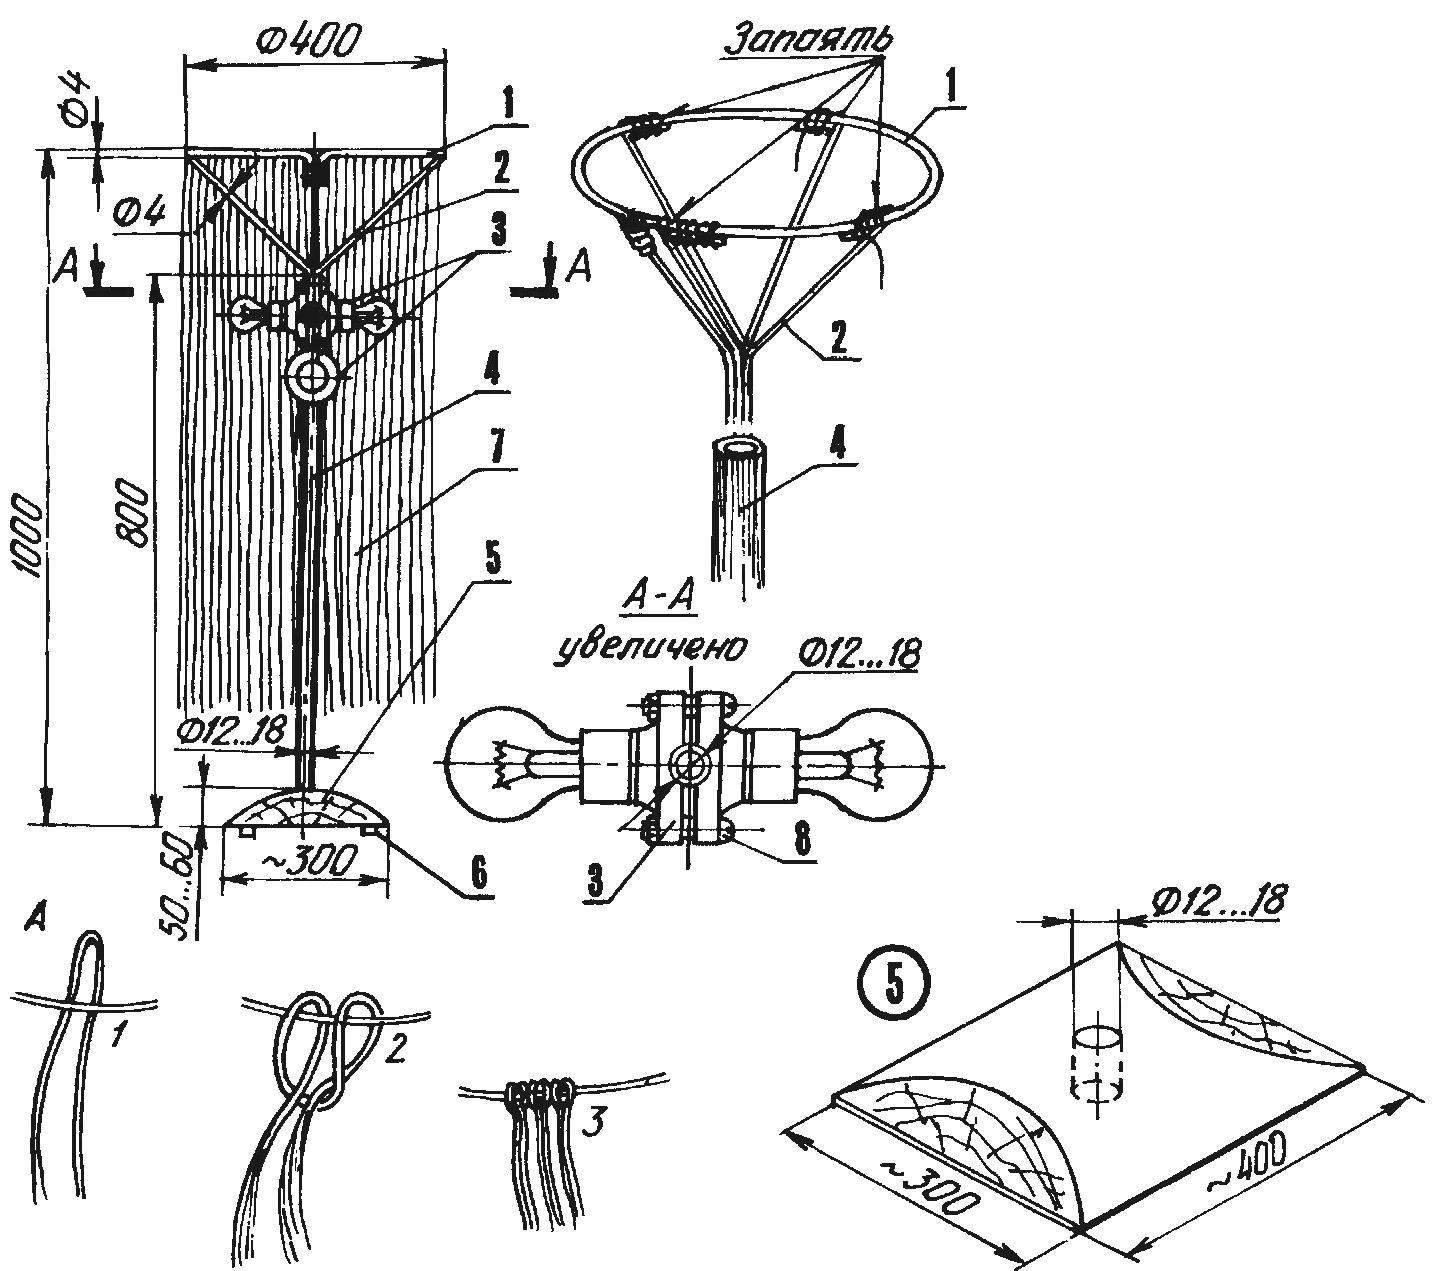
Floor Lamp “Birch”:
1 — Hoop (steel wire Ø3 — 4); 2 — struts (steel wire Ø3 -4); 3 — lamp sockets; 4 — front (ski pole. the handle of a MOP, etc.); 5 — base (birch slab); 6 — leg (rubber disk s5, Ø30); 7 — fringe (dyed twine or rope, colored yarn, iris or soutache); 8 — mount cartridges bulbs (the M4 screws with nuts).
A — attachment a fringe on the Hoop (the numbers show the sequence of operations)
The lampshade of the floor lamp are simple but unusual. It requires a wire Hoop is round or square. Mounted it on the rack four or five wire braces, which are fixed to the strut with epoxy and wrap with wire twist and soldering. As for the actual shade, it replaces the long fringe. It is made of thick colored thread, twine or even dyed clothesline. To secure each of the elements of the fringe on the wrap, set of several colors of thread is folded in half, thrown through a Hoop, a loop is passed a folded end and the resulting loop-noose tightening. After filling in so just wrap fringe trimmed razor-sharp scissors.
The wiring must be carried out in accordance with Fig. The use of two switches (or one two-piece) will allow you to choose the lighting to suit your needs.
And the last not less spectacular lamp-floor lamp with multi directional lights. To make it, you do not need neither to cut nor shave, nor mount the wiring. You only need to purchase photoshop cheap tripod for the silver screen, but in the store — a few lights-“chips”. The combination of these originally different purposes of objects is a convenient, fashionable and not very expensive lighting fixture.
I. GALKIN
Recommend to read
 48 CYLINDER KAWASAKI
A certain enthusiast by the name of Simon Whitlock set out to build not just powerful, but very powerful motorcycle. You can go simple way - to attach to a motorcycle frame any brutal... Double-IZh
When building amateur aerosleds, gliders and hovercraft, the greatest difficulty is usually choosing the right engine. Standard production engines often fail to satisfy home‑builders in...
