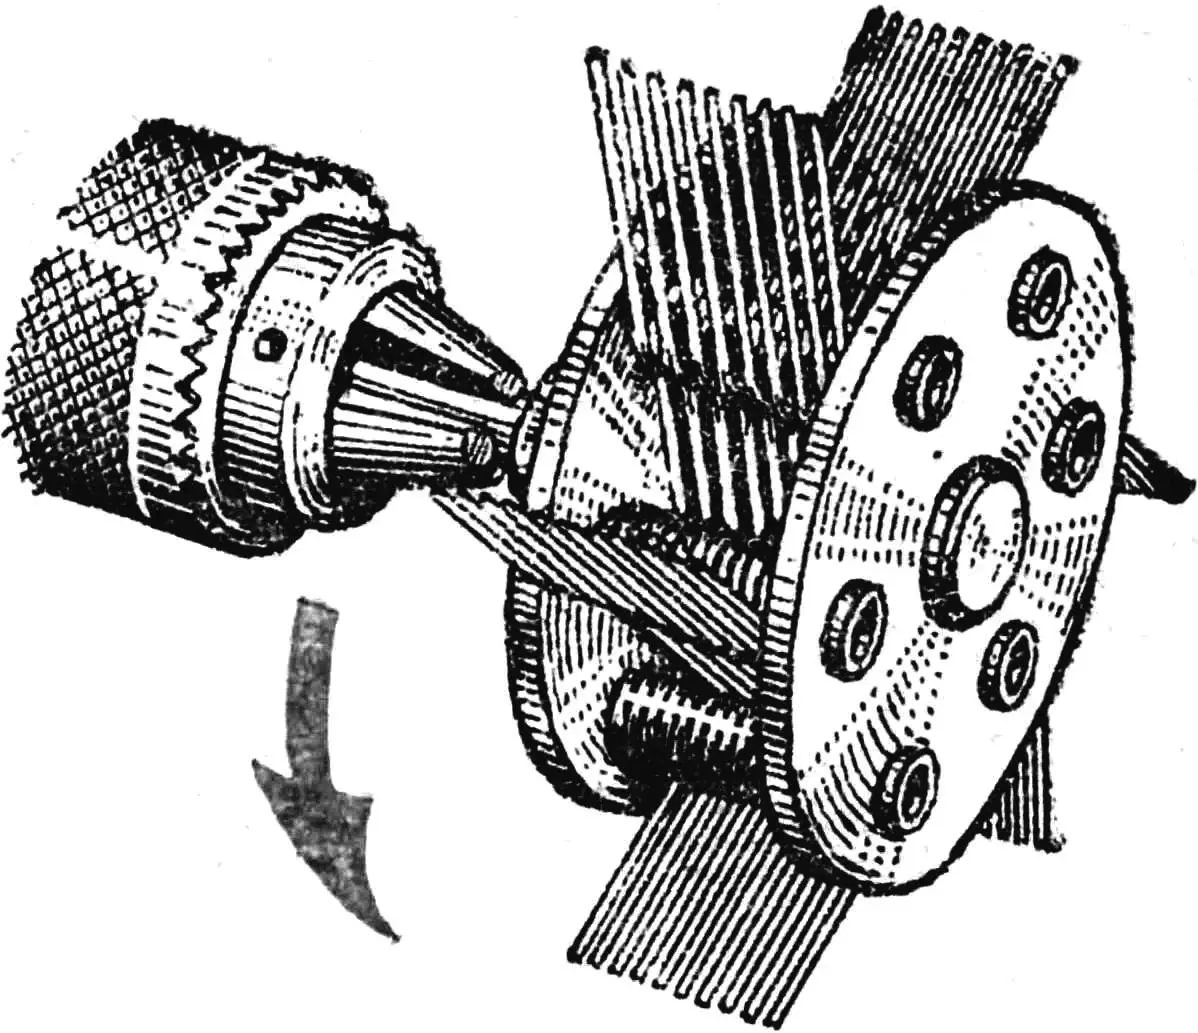
The metal has rusted, the brickwork has dulled over time, the painted surface has lost its look… In all these cases people reach for sandpaper or a wire brush — and stop! Put them aside: that is yesterday’s approach! The lion’s share of tedious, tiring cleaning work should be handed over to a tool — an electric brush.
Half of the mechanism is already in your hands if you have an electric drill. It needs no modification at all. The other half is homemade.
The brush is simple in design (see the drawing): two steel discs are mounted on a shaft — a specially shaped bolt. The seating necks of the bolt are square, so torque is transmitted to the discs reliably. Between them are spacer bushings turned from lengths of steel tube. Each bushing carries a row of freely arranged “bristles” of spring steel wire. The wire is cut into pieces 145—147 mm long and bent so that a loop forms around the bushing. The outer long end of each “bristle” is the working end; the inner one only holds it in the working position. During cleaning, the inner ends press against the bushings ahead of them and give the “bristle” stiffness.
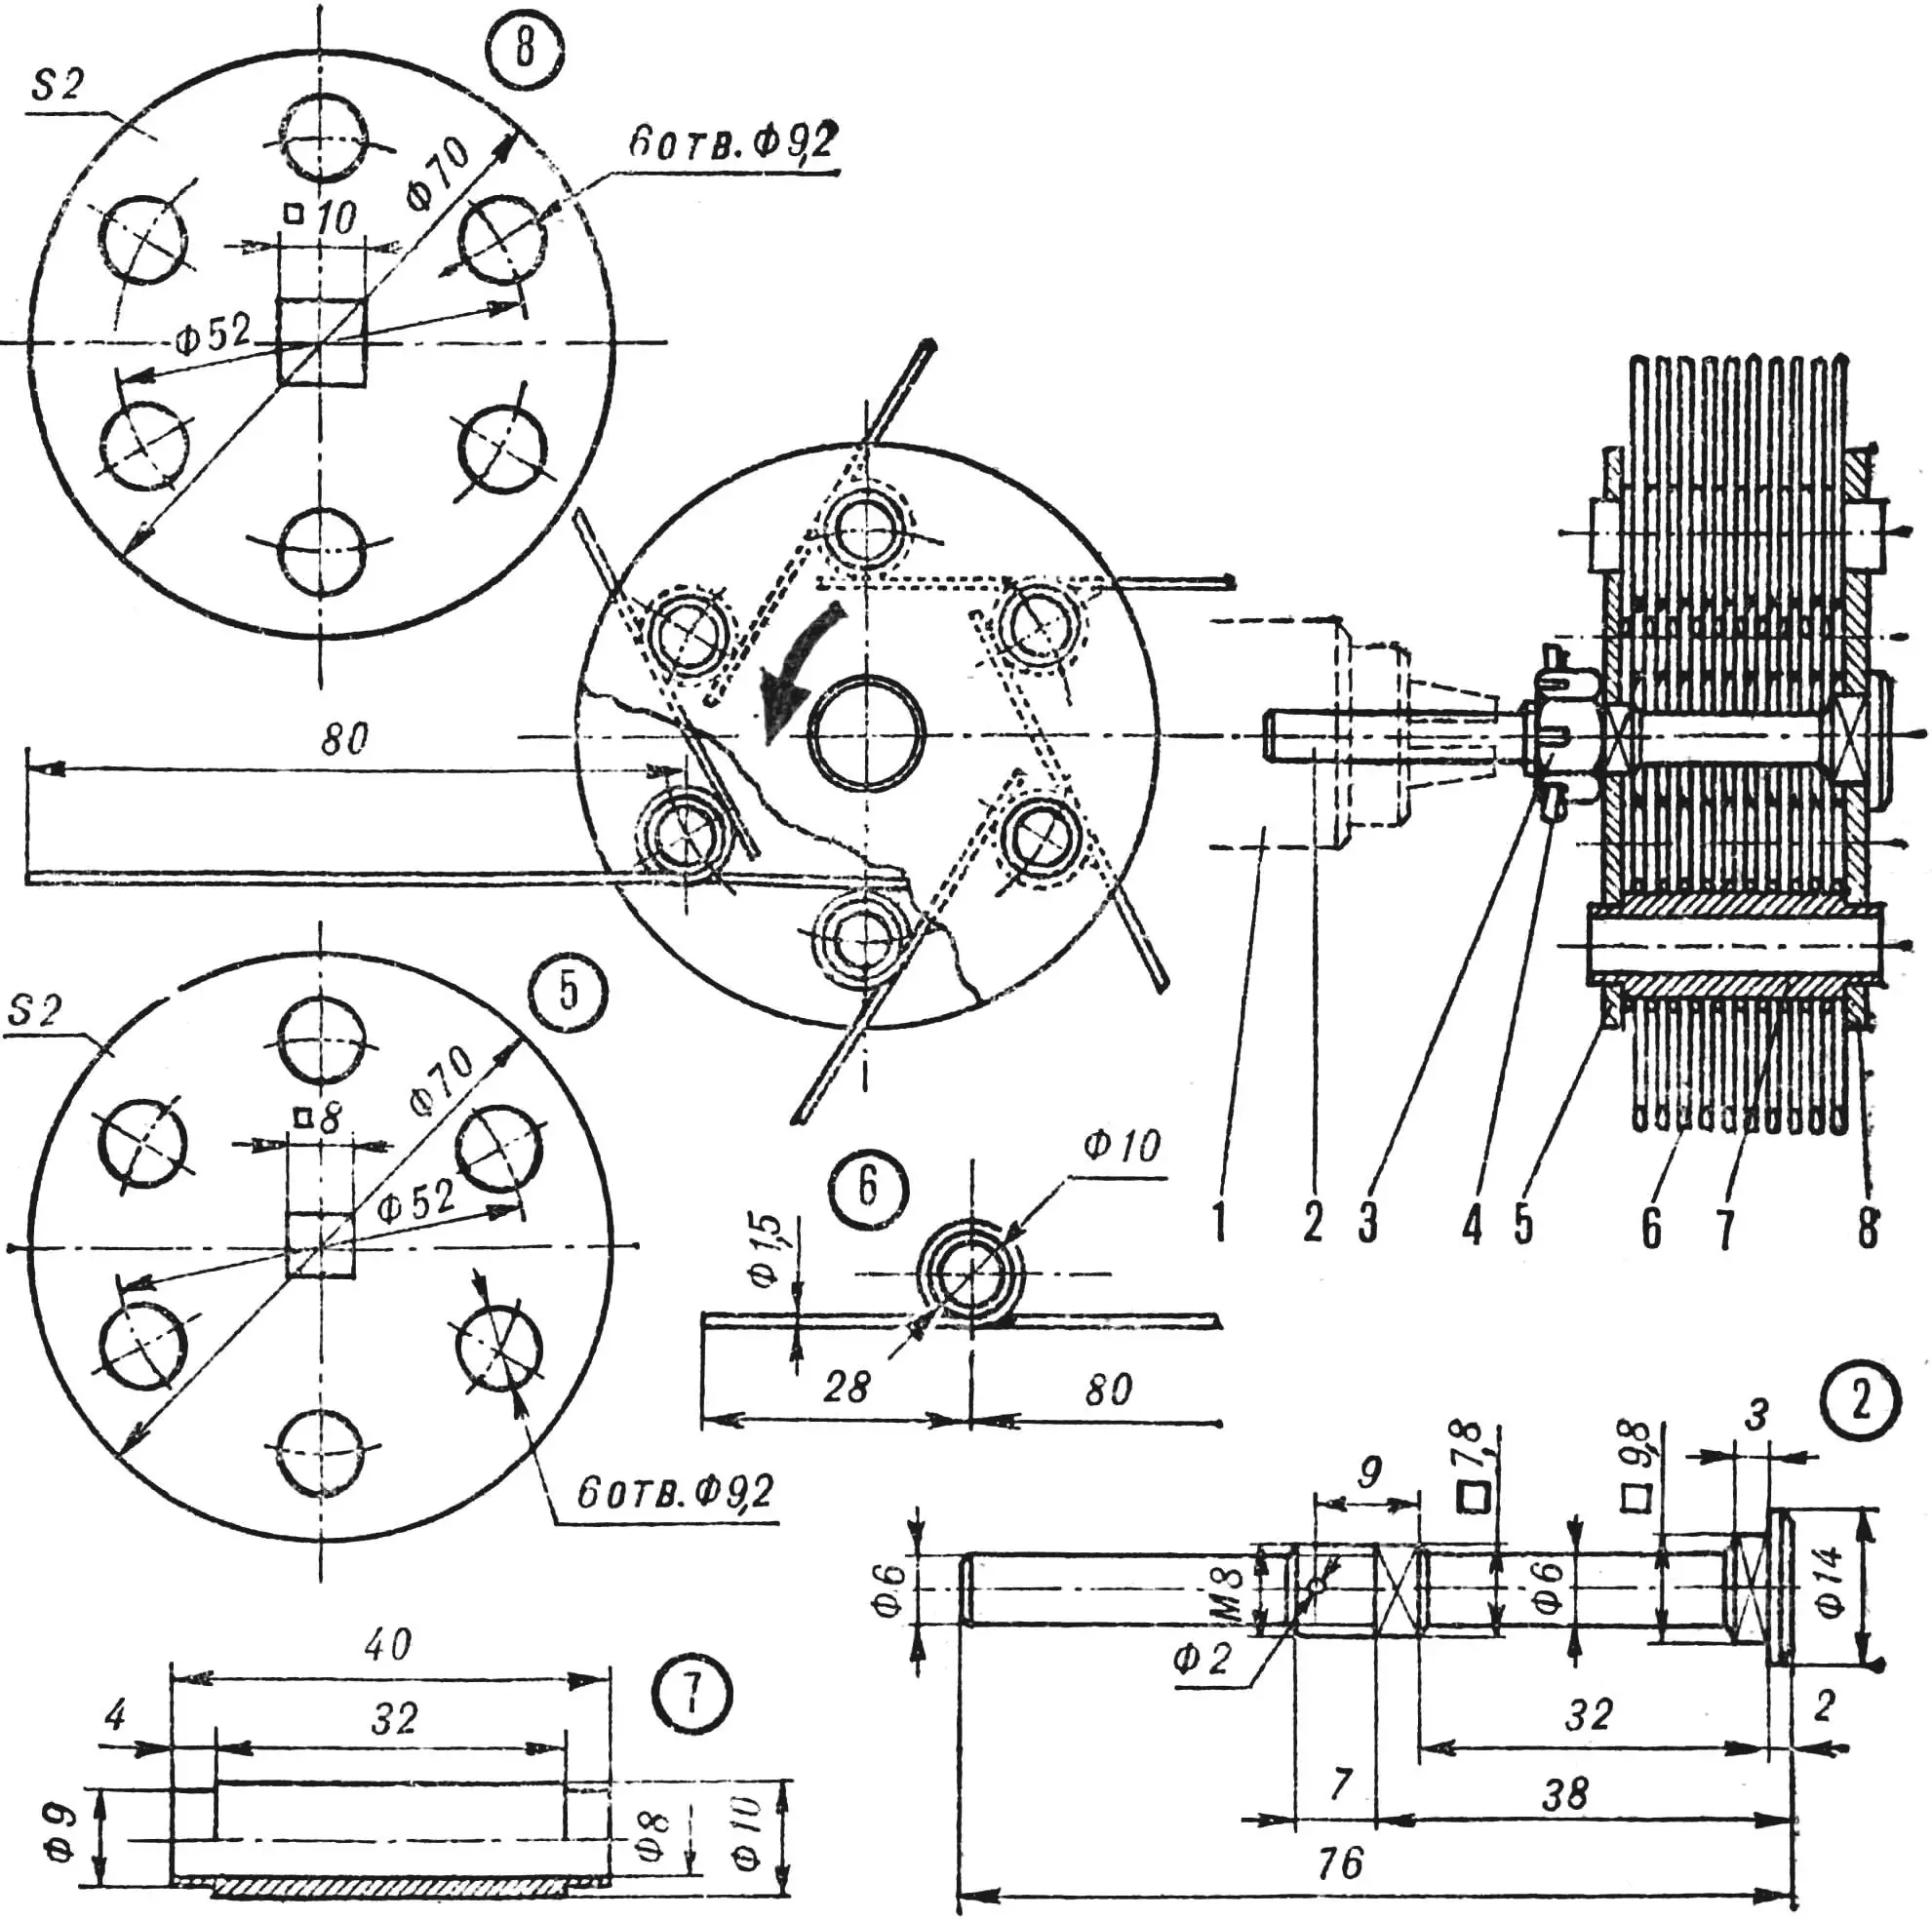
1 — electric drill chuck, 2 — brush shaft, 3 — nut, 4 — cotter pin, 5 — rear disc, 6 — “bristle”, 7 — spacer bushing, 8 — front disc.
It is useful to grind the working ends perpendicular to the axis of the “bristles”; then cleaning quality will be higher.
The tool is assembled in this order: the front disc is fitted onto the bolt, spacer bushings are inserted into its holes, and ten “bristles” are stacked on each bushing. Then the rear disc is fitted and the nut is tightened fully and locked with a cotter pin. The brush is ready for work.
“M-K” 9’81, I. CHARKIN, engineer
Recommend to read
 SUPERPLANES RIVAL-2
Unfortunately, in Russia, still little known very interesting and popular abroad, the subclass of radio-controlled gliders, the name of which in translation from most foreign languages... TRIPOD FOR PETS
Many of those who contain animals in the house or apartment, the familiar pattern when a dog or a cat, licking remains of food from the bowl, rides on the floor of the emptied vessel,...
