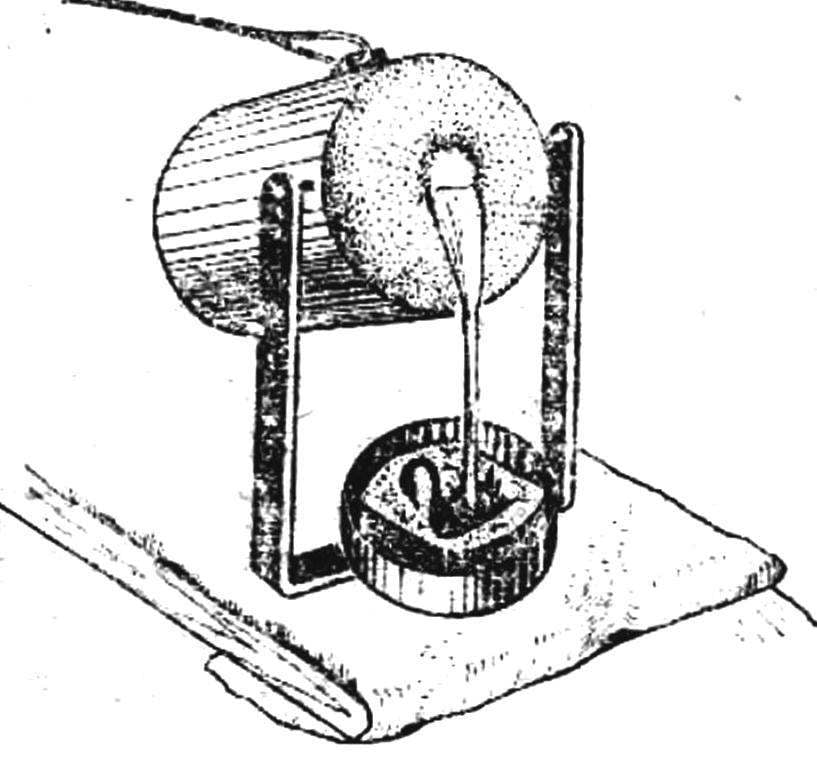
To get started, grease podmodelnuju Board on the sides with a thin layer of vaseline and clamp in the mold. Smooth out the clay, press it to polozeny as a well-oiled model. Next, take gypsum, wetting it with water, carefully stirring at the same time, to make the solution, bringing it to density of liquid sour cream. The initial and subsequent layers of coating applied on the model with a brush, avoiding formation of voids in the corners and the folds, after which the solution is poured to the top of the box. Wait until the plaster hardens. At room temperature this happens the worm for about 15-20 minutes. Turning the flask upside down, remove her podmodelnuju Board: that’s when especially impact the benefits of the split box. Repeat the entire process. If we now remove the flask, disconnect half of the plaster and gently remove the model, then both surfaces will have completed its “footprints” — both moulds. They must dry well: just do it, gradually increasing the heating temperature first hold in the sun or on the radiator, then put in the oven home plate. Here they have to be 3-4 hours at 150-200 degrees.
Then proforma preparing the sprue for pouring the metal and heaving through which when filling out the form is a “waste” of air and gases. To do this, connect the two mold halves and drill 5-6 mm O through the channel in the plane of the connector to the volume of the form, — gate, and to behold the opposite side is heaving a smaller diameter of about 1 mm. Receiving the edge of the gate rassverlivajut to make a funnel. (Remember to remove with a soft brush crumbs of plaster after these operations.)
Before pouring, put the spongy layer of the separation of lubrication and turpentine mastic for flooring — on all contact surfaces as well as in the form itself, put mold halves together and firmly tie them.
Remember that molten metal must be poured in the sprue of a thin continuous stream. Disassemble the mold and remove the mold halves is possible only after the casting is completely cooled.
For the manufacture of flat objects, for example, plates used easier in the preparation method of the so-called bas-relief casting. It differs from the described volume — the fact that the model is “recessed” into the clay podmogilny boards completely, that is, the surface of the upper half is left smooth: latest — plaster — simply superimposed on the model, only touching, covering it (it can be prepared in advance). In the same proforma “open way” — with a knife and cut the sprue and heaving.
Fig. 3. Molded box:
1 — outflow, 2 — locking pin 3 — model 4 — loop of the walls of the flask, 5 — podmogilny Board, 6 — off the hook.
Fig. 4. Ready to drag:
1 — drag, 2 — heaving, 3 — gate 4 — form of the model.
Some tips for processing the extracted shape of the products. They need to quickly cleaned from the remnants of plaster with a metal brush and burrs. The last operation is carried out, where possible, carefully chisel., or clippers with subsequent Stripping with needle files. From particles flux burned-on food, oxide films are released by chemical means: the item is coated in mild (5-15% strength) sulfuric acid solution. Small elements bring engraving graver and stonechats. Polishing is performed with various pastes: for solid metal (brass, Nickel silver, silver), use a paste GOI, Crocus, soft (tin-lead) to tooth powder, stir in the melted paraffin.
To give the finished product “fashion” is now painting under the old silver, old bronze, gold, and, in addition, to better identify the elevation drawings, they are subjected to electrochemical or chemical oxidation. The most common method is treatment with a solution of sulfuric liver, which is produced by “fusing” sulfur and potash in the ratio 1:2.
You can use oil paints, coating them with fixative or varnish for better preservation of the laid layers.
And the last one. Any work on the crucible need only if you disconnect it from the mains. Use canvas gloves, protective goggles or a mask. Download charge start only after complete cooling of the crucible and its dry. In operations with chemical substances observe safety precautions.
A. TALANOV, B. FEDOROV
Recommend to read
 TIMER MODEL “SWAN S-02”
This publication, we discovered in our magazine the best models of the competition "Experiment 78". I hope that our readers are using these materials, prepare an interesting model for... “HOPE” – A RECUMBENT WITH COMFORT
"M-K" can rightfully be considered one of the founders of velomobiles in the country: in its pages appeared in 1976, the description of the first, still largely imperfect muskurahat...
 Soldiers, chess pieces, furniture hardware, original buttons, cufflinks, commemorative badges and medals on the occasion of anniversaries of your friends — only a part of the list of products that you can make yourself, casting. This work is quite even those who have not had a similar experience: it is enough to have imagination, to be neat, and of course, to get simple equipment for home foundry.
