
A dustpan for cleaning up trash—it would seem, what could be simpler. But no, even this elementary product has its problems. Stores sell plastic dustpans (one-piece stamped) and ones with a metal scoop and wooden handle. Neither type is particularly reliable: they break at the bridge where the handle joins the vertical back wall of the scoop. If you accidentally press the dustpan against the floor a bit harder—a crack forms in the plastic, or plastic deformation occurs in the metal bridge. Over time, defects accumulate, and eventually a break occurs.
This problem didn’t pass me by, as it hasn’t many others. After “burying” about a dozen store-bought dustpans, I decided to make my own—strong, reliable, and well-made. The result was a dustpan made of 3 parts: handle, sleeve, and scoop.
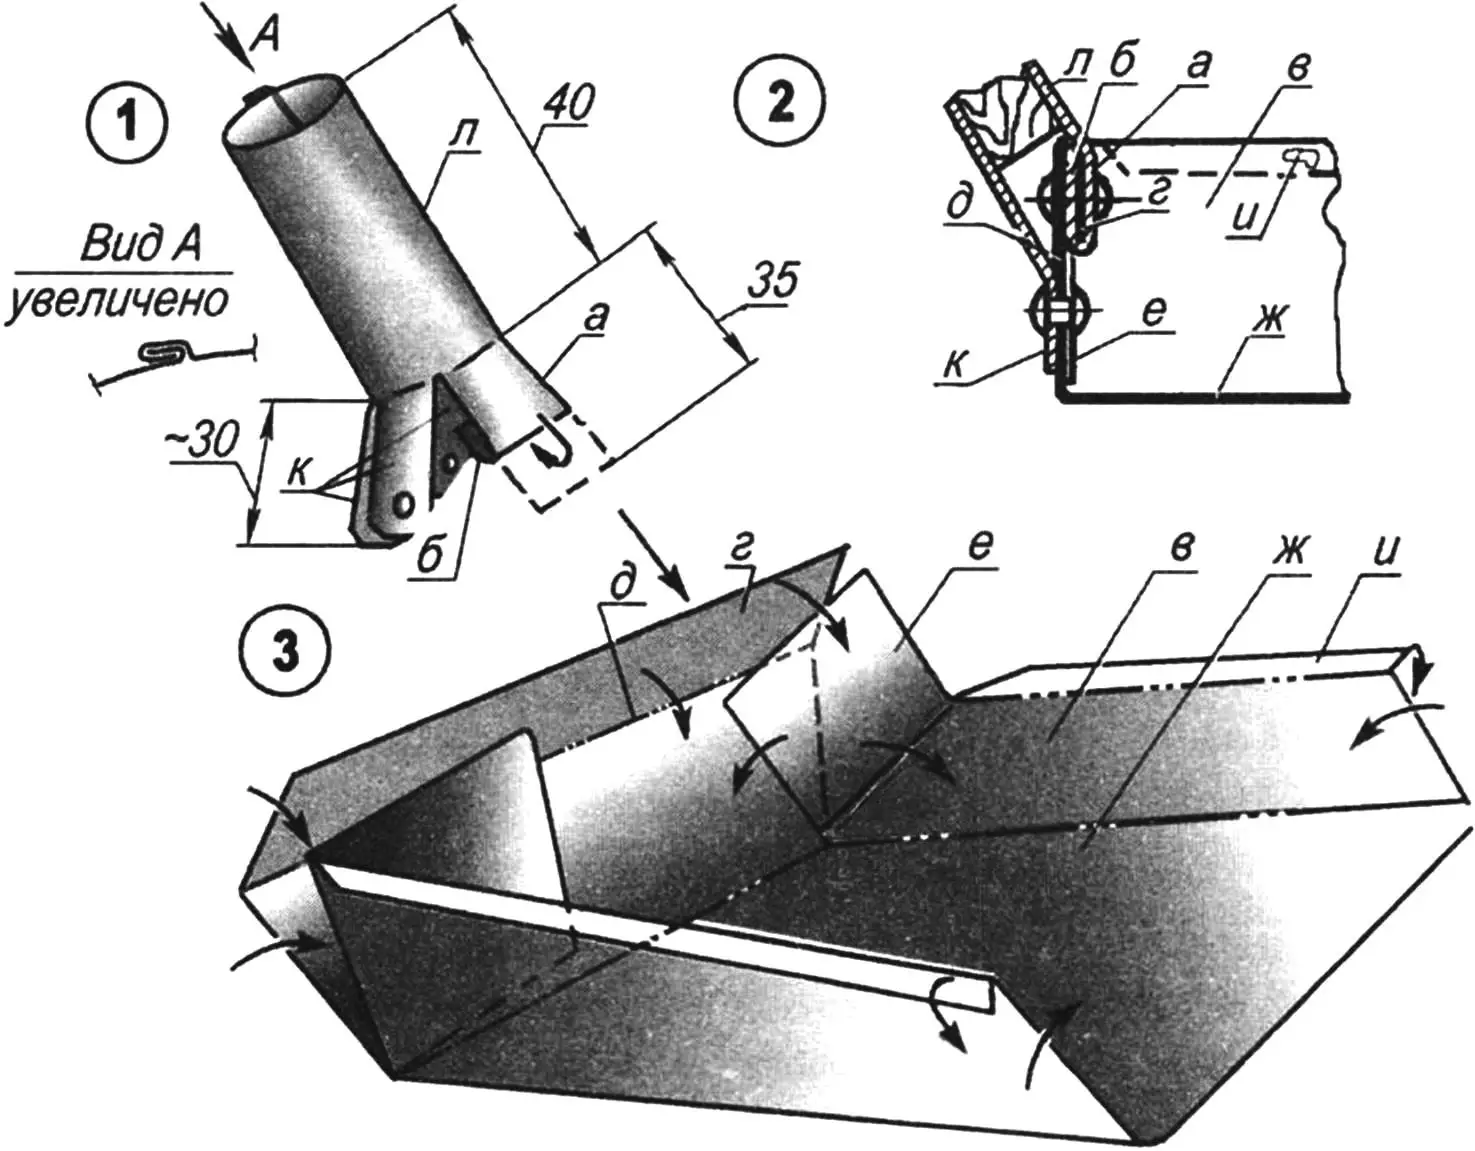
a, b — front leg of sleeve; c — scoop rim; d — lock; e — rear outer wall of scoop; f — rear inner wall of scoop; g — scoop base; h — flanging; i — rear legs of sleeve; j — sleeve body; 1 — sleeve; 2 — assembled dustpan; 3 — scoop forming
The handle is wooden; I turned it from an aspen blank on a lathe. (Though saying “lathe” is a bit grand. I simply have a device in my small home workshop based on an electric drill for turning small wooden parts.) After making it, I sanded it and coated it with furniture varnish. The handle turned out beautiful and comfortable.
The sleeve and scoop were made from 0.5 mm sheet steel with subsequent painting with nitro enamel (or you can use roofing galvanized iron). A thickness of 0.5 mm is optimal: it’s sufficient to provide the necessary rigidity of the entire structure, and on the other hand, allows fairly easy bending operations when forming the parts.
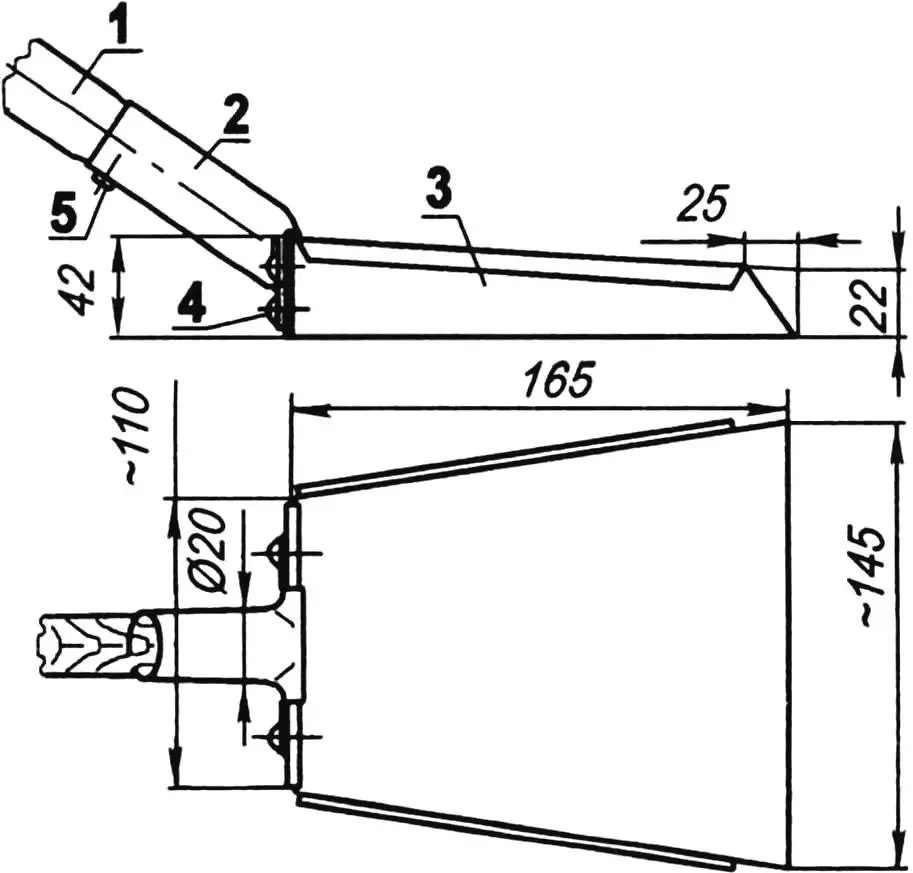
1 — handle (pine, birch, aspen…); 2 — sleeve (steel, sheet s0.5 — 0.6); 3 — scoop (steel, sheet s0.5 — 0.6);
4 — rivet (3 pcs.); 5 — stop (screw 3×10)
To make the sleeve, I used a steel mandrel 20 mm in diameter, with a simple standing seam joint. I cut the lower end of the sleeve for about 35 mm into 4 legs: one (front) approximately 20 mm wide, the others (rear) narrower (10 — 11 mm). These legs play the main role in ensuring the strength and rigidity of the joint between the sleeve and scoop.
The scoop should be made in the following sequence:
— mark the contour and bend lines according to the development drawing and cut the blank from 0.5 mm steel sheet;
— bend the flanges “h” to 180°;
— bend upward the rear inner walls “f” of the scoop approximately 75 — 80°;
— bend the rims “c” perpendicular to the scoop base “g”;
— bend upward the lock “d” preliminarily to 85 — 95°;
— bend the rear outer wall “e” perpendicular to the base, covering the halves of the rear inner wall “f” with the lock “d”;
— insert the front leg “a” of the sleeve under the lock, and the legs “i” outside against the rear wall of the scoop;
— press the lock together with the legs against the rear wall and hold in the compressed position using clamps;
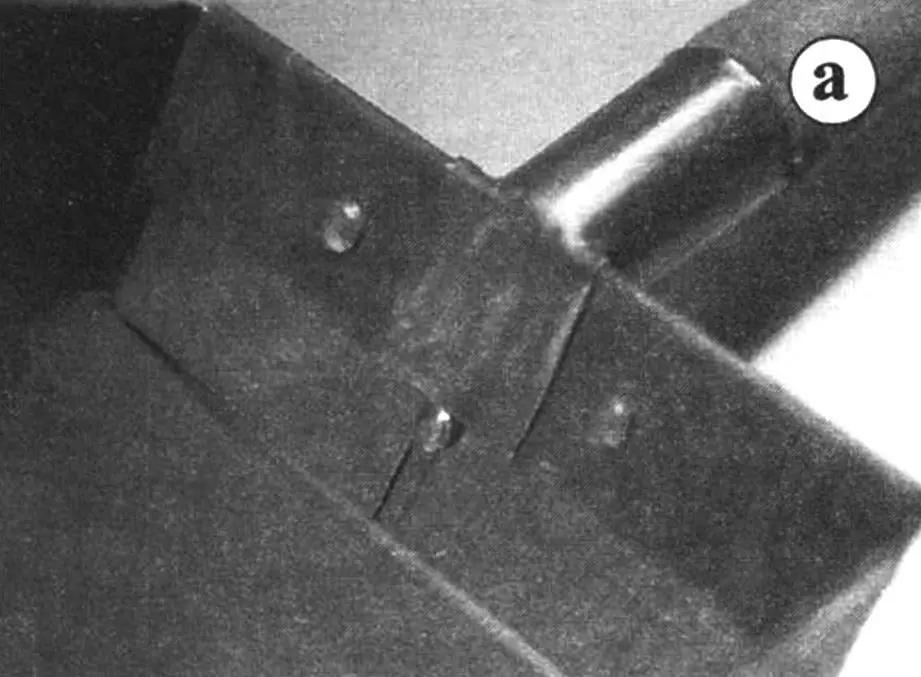
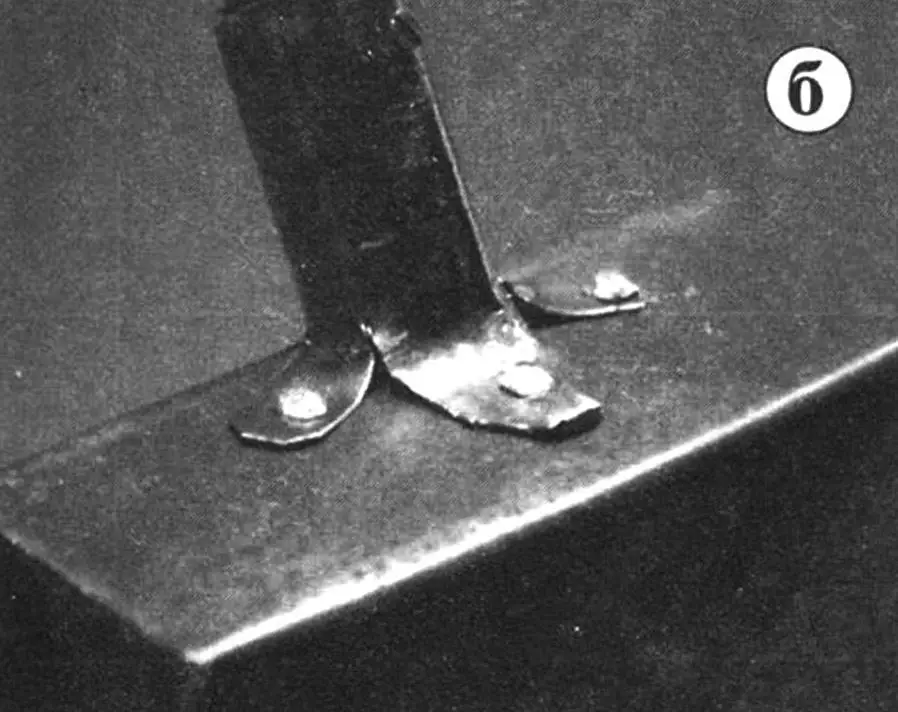
— drill 3 holes in place for rivets and connect the sleeve to the scoop with them.
The sleeve legs, wrapping around the rear wall of the scoop from both sides, ensure the rigidity of the joint and prevent the occurrence of plastic residual deformations here. The result—the necessary strength and durability of the product.
One of the dustpans I made is at the garden plot, and I use it when needed even for earthworks. Store-bought ones would have long since given up under such “harsh” treatment. But this one—alive and well!
«Modelist-Konstruktor» No. 10’2007, L. STEPANOV
Recommend to read
 TUBULAR SHOVEL
Where conventional shovel passes in front of dense soil, this unusual diggers enter the ground like a knife through butter, though the effort inform her foot is almost the same. The... EARLY FIGHTERS D. P. GRIGOROVICH
The car has received the designation IL-400. This first domestic fighter created after the revolution, aroused great interest from other designers, in particular, of D. P. Grigorovich....
