THE FOUNTAIN IN THE ROOM…

THE FOUNTAIN IN THE ROOM...
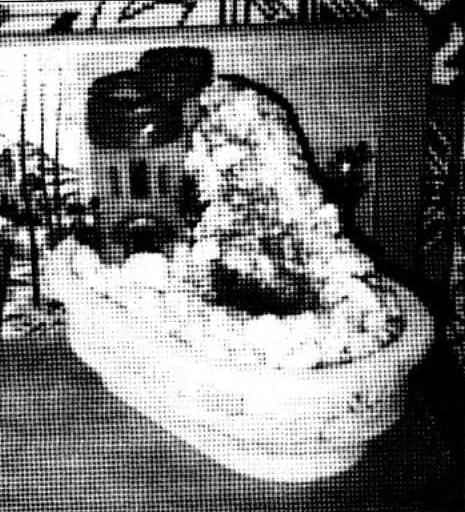
Currently, there are many indoor fountains (KF), designed for interior decoration and humidification of residential and industrial premises. However, the price of these lovely devices, to put it mildly, somewhat exaggerated. Therefore, in the club “Russian craftsmen” (Chelyabinsk) was developed and tested technology of the fountains available and cheap materials. The whole structure of KF is based on a decorative base, inside of which sits the water tank. At its bottom is installed on the suction cups pump. On the output nozzle of the pump mounted discharge hose (flexible tube) coming out through the holes in the cover (the sump) and stand. The return water into the tank through a fitting in the cap and the drain hose.

Due to the fact that KF is interior decoration, and decorations need to be for each individual, there is no sense to give the drawings specific to KF. Using the scheme of constructing and overview of each element of the fountain, you can make an exclusive version of KF.

For pumping water in the original (see photo) used fountain microphone type PF-O a capacity of 250 l/h. The pump can be purchased at any pet store, in the Department of aquarium accessories. Dimensions p f-O (no suction) 65x60x40 mm. as the sleeves can be used a rubber or PVC tube with internal diameter 11 mm (the diameter can be different when using another type of pump). Drain fittings can be the valve from tubeless tires, Bicycle or motorcycle. For them in the lid-pan drilled the appropriate holes, and use the auto valves the thickness of the pallet must not exceed 4 mm. To avoid overflow of the channel of the fountain it is necessary to use two valves (respectively, and two discharge tubes).

As a reason to purchase the fountains used clay bowl diameter from 300 to 800 mm and a height of from 70 to 150 mm. Such a bowl, you can pick up at the store that sells flowers and floral supplies. In a makeshift KF can be used plastic or ceramic basin (see photo), a rectangular box made of lacquered plywood with a wall height of 100 — 150 mm or the same box made up of a rigid sheet of foam.

The water tank in the author’s version is 150x100x90 mm rectangular box with an open top, a glued Plexiglas 4 mm thick. the Size of the box in each case adapted to the size of the base and the stand. If the base is made of ceramics (as pictured), it is possible to do without the tank and place the pump at the bottom of the bowl.

The scheme of the room of the fountain

The scheme of indoor fountain:

1 — base; 2 — water tank: 3 pump; 4— stand; 5-discharge hose (flexible tube); 6 water-mill; 7 — water flow; 8 – drain hose; 9 – nozzle; 10 – cover-drip tray; 11 – bearing pallet


Version of the fountain

Version of the fountain:

1 – base (ceramic capacitance); 2 — a support (clay “lock”); 3 — tray (acrylic); 4 — pump PF-

Cover-tray is cut out of Plexiglas with a thickness of 5 mm (see photo) or glass fiber (as in the original) with a thickness of 3 mm. the Latter variant is more preferable, since at this thickness it is convenient to fix the car valves as drain fittings. When you use a clay bowl as a base (respectively in the absence of capacity) drain fittings with tubes can not be applied to: drain water in this case is a through-hole with a diameter 8 — 10 mm drilled in the lid of the pan near the end of the water flow.

Stand at the authentic version is made from a plastic flower pot (pictured — plastic lock), height depends on the performance of the pump. In a pot, as in the tray, cut a groove for access to the pump and water tanks. In the center of the bottom of the drilled hole for the passage of the pressure hose pump. The hole can be drilled not only at the top of the pot, but in the side, depending on where you need the water outlet. The stand is fastened to the base for flanging pot tre me-with four metal brackets, curved in the form of the letter S. as a stand can be used any plastic containers.

Pan supports are made from segments of the PCB 10 mm thick and fixed to the base with screws (when using clay bowls, you can apply the sealant). The pallet is fastened to the supports with screws or screws; after testing the fountain at all to glue the tray to the supports. Apart from the details, ensure the functioning of the KF must be purchased at the pet store elements of design. As a rule, it is a clay house or a castle, clay slides, artificial vegetation. If you wish, you can purchase a water mill. The house or castle is placed on the stand or near it, and the mill so that the water from the outlet tube fall to the water wheel. Artificial vegetation (trees, shrubs, grass) is placed on the pan to taste. Fastening of design elements is performed by means of silicone sealant. After the pre-placement of design elements proceed to the formation of streambeds. In the original it is made from plaster, painted in three coats of nitro dark brown color. In the formation of the channel is necessary to avoid large amounts of gypsum to avoid cracking. If cracks appeared, they can be repaired with sealant. In the original stream in the form of the letter Z comes down from the top of the stands and meanders, suitable to the drain hole.

After the formation of the channel produces the final fastening of design elements and the Assembly of parts of KF. On open spaces of the fountain using a sealant paste stone dust or river pebbles to close them. KF ready.

Before starting the KF it is necessary to pour in a container of water, preferably distilled; at the bottom of the tank is recommended to put a silver coin or some silver-plated contacts from connectors. Install KF preferably in a place which would have minimized the chance of tipping over. The mode KF — continuous. Once a week you need to control the amount of water in the tank, top up if necessary. Once a month, preferably a water change.

ATTENTION. Do not operate pump when water level below the intake hole, will it bring her down.

S. Hammers, club “Russian craftsmen”, Chelyabinsk

Recommend to read

  • COMPASS — DRILL ASSISTANTCOMPASS — DRILL ASSISTANT
    If you need to drill through wall, out the other side exactly in the right place — use...a compass. Of course, in collaboration with the magnet, which should be put behind the wall...
  • WE CATCH THE MOMENT OF IGNITIONWE CATCH THE MOMENT OF IGNITION
    Motorists know how important it is for diesel internal combustion engines proper installation of the moment of ignition — the ignition spark of the spark fuel in the cylinder before the...