 Tables-books known for a long time and they are invariably in demand since they take up little space. But buy in the store table the right size is not always possible, so often have to rely on their own hands and ingenuity.
The offered table is made from ash. You can use other types of wood, for example cherry or maple, even pine, but the most attractive still ash because of its major textures. It all depends on Your tastes and possibilities.
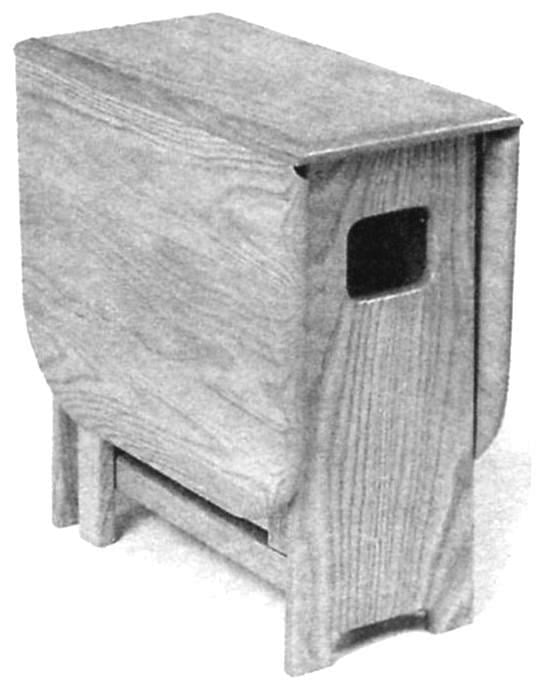
The tabletop consists of a Central fixed part and two hinged “wings” 20 mm thick.
The Central part of the table top mounted on two solid side walls in which the cut Windows used as handles for carrying the table. For rigidity of the whole structure walls are connected with glue four jumpers on the broad spikes that it is necessary to increase the surface bonding. Folding legs are rotated a wooden dowel inserted into holes in the upper and lower crosspieces.
The main feature of the table is the articulation of the inner ends of the wings and the outer ends of the Central portion of the table top. They are contoured so that when the contact portion of the load from the wings is transmitted to the Central part of the countertop, unloading loop. You will have to buy or borrow from friends minitank Freser.

At the heart of any craft is the preparation of the starting materials. Sidewall and the Central part of the countertop can be made from two solid planks with a thickness of 20 mm, and the wings of the three, but it is better to do one, especially because its width does not exceed 225 mm. If You will bet on solid boards, they should withstand up to complete drying, and even better to provide an additional connection on the spikes. The thickness of the planks permits it, but the main thing is to accurately mark the holes for the spikes, so that when the dock is not formed in the ledge. Otherwise, it requires additional processing, including polishing.
Preparing the workpiece the side walls, it is necessary to apply the markup. The grooves for jumpers (workpiece size 25x40x450 mm) can be cut manually, but a better vertical mill, but so that their depth does not exceed 15 mm. If the cutter is not at hand, you can use an 8-mm drill bit and drill out the junk wood and straighten the walls with a chisel.
The Windows in the sidewalls can be done by drilling them in the corners of the holes with a diameter of 14-16 mm. to avoid chipping the wood on the Board is better for markup to drill a hole of small diameter, and then pervym drill, but only to the middle. This should be done on both sides of the Board. Then get a clean edge holes on both sides of the Board. Then with a jigsaw cut out the window. It can be done with a milling cutter. Of course, after each activity, you must clean everything with sandpaper.
The outside of the sidewalls is better to cut on a band saw, and removing superfluous wood, to plane their edges.
For the manufacture of bridges between the side walls no special skills are required to accurately follow the drawing. Properly cut and adjusted to the corresponding holes of the spikes it will fit in them and after drying, the adhesive will not allow to loose the whole structure. Since, as a rule, the spikes and holes are individual, they are, in order to avoid confusion, should be numbered. Additional rigidity to the table give the Central part of the countertop. You can secure it to the studs or buttons, as shown in the photo.

For mounting hinges from the bottom in the Central part of the top of the table is made a recess

Custom hinge with one elongated card attached to the Central portion of the table top

Curved junction of the Central portion of the table top and its “wing”
Before the General Assembly, follows in the jumpers, drill out the slot for the dowel to a depth of 15 mm for folding of the legs and assemble the table “dry”, making the necessary pencil mark.
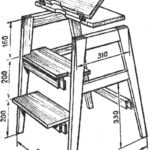
Folding supports consist of legs (blank size 25x40x523 mm) connected with a large jumper with stand (blank size 25x40x380 mm). The legs must be 2 mm shorter sidewalls, so you can clean underneath the Central part of the countertop. To compensate for differences in height, below the “wings” were horizontal, on the bottom they should attach a metal stop area with 2-mm walls. It not only will eliminate the slope, but will serve as a stop for the folding supports. You can, of course, to emphasize wood in the form of the boss, but it’s complicated.
The jumpers connecting the sidewalls, at a distance of 50 mm from the edge of the drill bit 16 mm diameter drill vertical housings dowel.
In the ends of the racks with the two sides: glue the dowels so that they protrude by 15 mm, and treat them with sandpaper, allowing free rotation in sockets.
In the leg and the rack with the router should cut the grooves for the studs of the jumper. However, this will have to do the appropriate metal fixture conductor.
At the ends of the lintel (blank size 20x100x320 mm) saw off the spikes under the grooves on the leg and the rack. You can certainly do without it, securing a jumper with four screws. Work less aesthetically pleasing, but easier.
Dry assemble the folding supports and check their compliance with the drawing. Before gluing parts go by plane or rounds with a cutter with a diameter of 12 mm at their edges. Only after that you can put all the details on the glue, and using the clamps. But in order not to damage the surfaces, do not forget the shims under the jaws of the clamps.
And another tip, before the General Assembly lubricate the dowels with wax. This will reduce the friction in wooden hinges.
Taping and Stripping boards for the table top, proceed to figure it joints the fixed part and the “wings”. This will require a set of paired cutters – one for the formation of the quadrant, one to fillet. Cover the table with a thickness of 20 mm will fit the quadrant, and a fillet with a radius of 16 mm. Quadrant is formed on the edges of the stationary cover treatment with the upper hand.

If possible, install the cutter in the table below as a guide it was convenient to use the ruler. Adjust the height of the cutter so that before the start of the quadrant turned vertical face height of 4 mm.
At the same time mill the joint on a couple of scraps – you will need them as auxiliary units in the subsequent milling of the edges of the countertop around the perimeter, also can use edged boards, which then can be purchased.
A fillet is formed at the edges of the wings treatment with the lower surfaces. Carefully adjust the height of milling cutter and a ruler to be milled afterwards full radius. Several passes will remove most of the excess wood, and then fine-adjust the height of the cutter so that when the fillet will fall on the quadrant, the surface of the Central portion of the table top and the “wings” were in the same plane.
Forming a notched joint, round the corners of the “wings” to any desired radius. Milling the edges of the countertops, made with special cutters, and on the Fraser. Mill more of the opening in the machine table, as part of the body of the mill needs to be under the surface, so to install the cutter necessary to lower the actuator about 10 mm. from the plywood make the annular spacer. Since you have milled across face of fiber, to avoid digging when you exit to the end of the aisle need to push the auxiliary blocks.
To fillet the bottom edge of the cover uses the same cutter as for fillets of other details. Do not forget to clean the mating part.
Attach the wings to the Central part of the top hinge with one long map. Its axis must be at the centre of the fillet radius and quadrant, that is, in this case at a distance of 16 mm from an edge of the fixed cover. With fixed cover long card open loops should reach out and gain a foothold on the wings. That loop worked well, they need to shift in the direction of the wings 0.5 – 0.75 mm so that when they fall, fillet departed from the quadrant and does not touch it.
The hinge loop shall be in an alcove of the Central portion of the table top. Due to this, the axis of the loop is slightly raised above the lower surface of the lid, and when the wings are lowered, the fin fillet is a little higher above the lower edge of the quadrant. Work loop it is better to try on a previously prepared scraps.
Put three cover sections face down on a flat surface. Mark the position of the four hinges. Embed recesses for the hinge and drill pilot holes for screws. Cut screw thread steel screws. In a long card hinges the screws are very close to the edges of the wings, so make sure that the shank of the screw will not break the jumper between holes and edge.
Cap table attached to the crosspieces with four wooden buttons within recesses on the inner sides of the upper bridges. I think this procedure can also be simplified by replacing the buttons, studs, and attach the center section to the sidewalls.
Assembled on the table, face down, with open wings, mark the position of the parts – limiters legs. On the cover guide the axis of symmetry and rotate a collapsible support so that the axis of the leg and the cover are aligned.
Then remove the top and loop. All parts of Atzilut countertops, sand and finish the wood to your taste. Then finally assemble the table, attach a new loop, this time softer bronze screws.
As you can see, the procedure of making the joint quite time-consuming and require not only additional equipment, but skills. Therefore, if you do not impose strict requirements to the table, you can do simply by refusing milling the ends in the places of joints of the Central section of the countertop and its “wings”. It is sufficient for the ordinary hinges, which will not need to do dredging in the Central section of the countertop, but the “wings” will also continue to advocate for its size.


