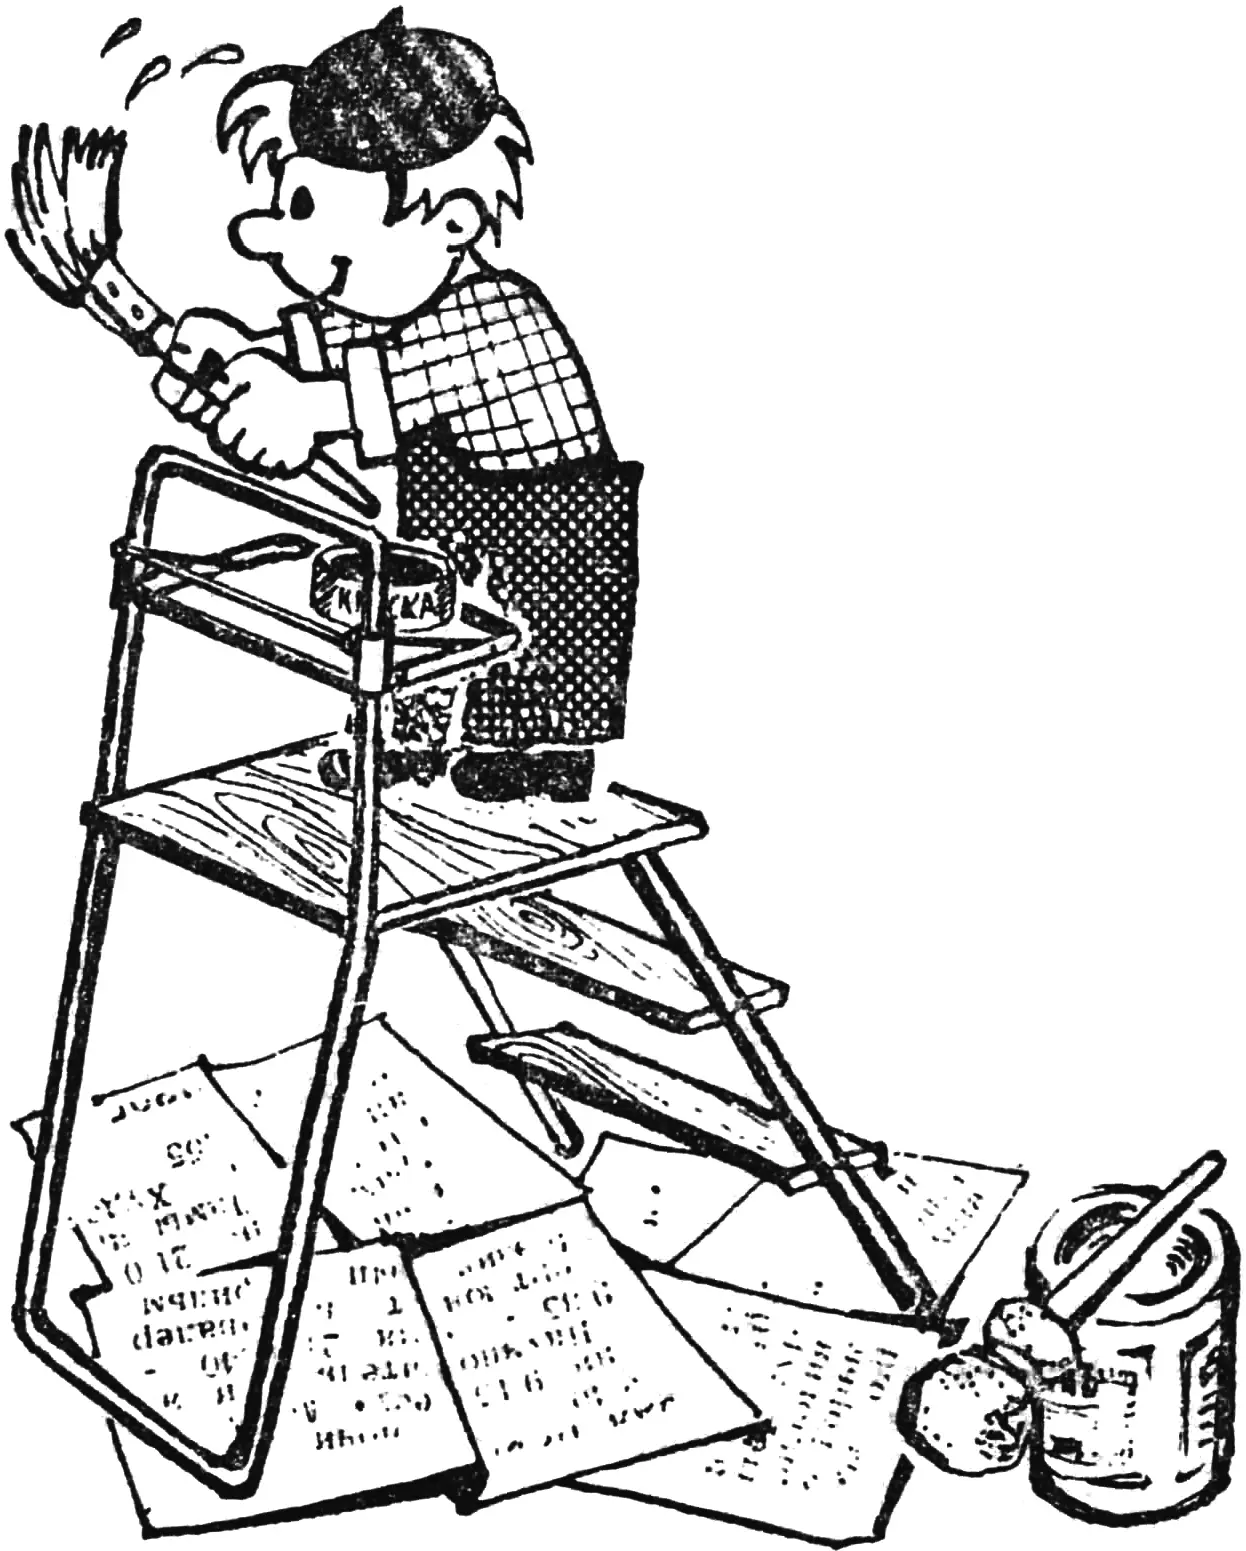
Is it necessary to prove that working on a stepladder becomes much more convenient if the necessary tools are always at hand? For example, on a shelf fitted onto the upper bow of the stepladder. Its design is simple: only six parts, not counting washers and rivets — a tray, two clamps, two hooks, and a rod.
I formed the tray from a metal sheet on a special plywood form measuring 262x237x25 mm. I rounded all corners and edges to a radius of 10 mm (accuracy was checked with a plywood template 4 mm thick). I finished the form surface with a file and sandpaper. In addition, during forming I also used a backing pad — a plywood sheet measuring 245x220x15 mm.
Now about the forming itself. On a blank measuring 305x280x1.5 mm, stepping back 20 mm from the edges, I marked with a scribe the lines along which the form was set; with a radius of 15 mm I marked the tray corners, cut them off, and dulled the sharp edges.
Then I clamped the aluminum sheet between the form and the backing pad in clamps and carefully bent the edges with a mallet. After thorough forming I filed the edges of the resulting tray and drilled four holes Ø 4.2 mm in them; I removed the burrs with a drill of a larger diameter.
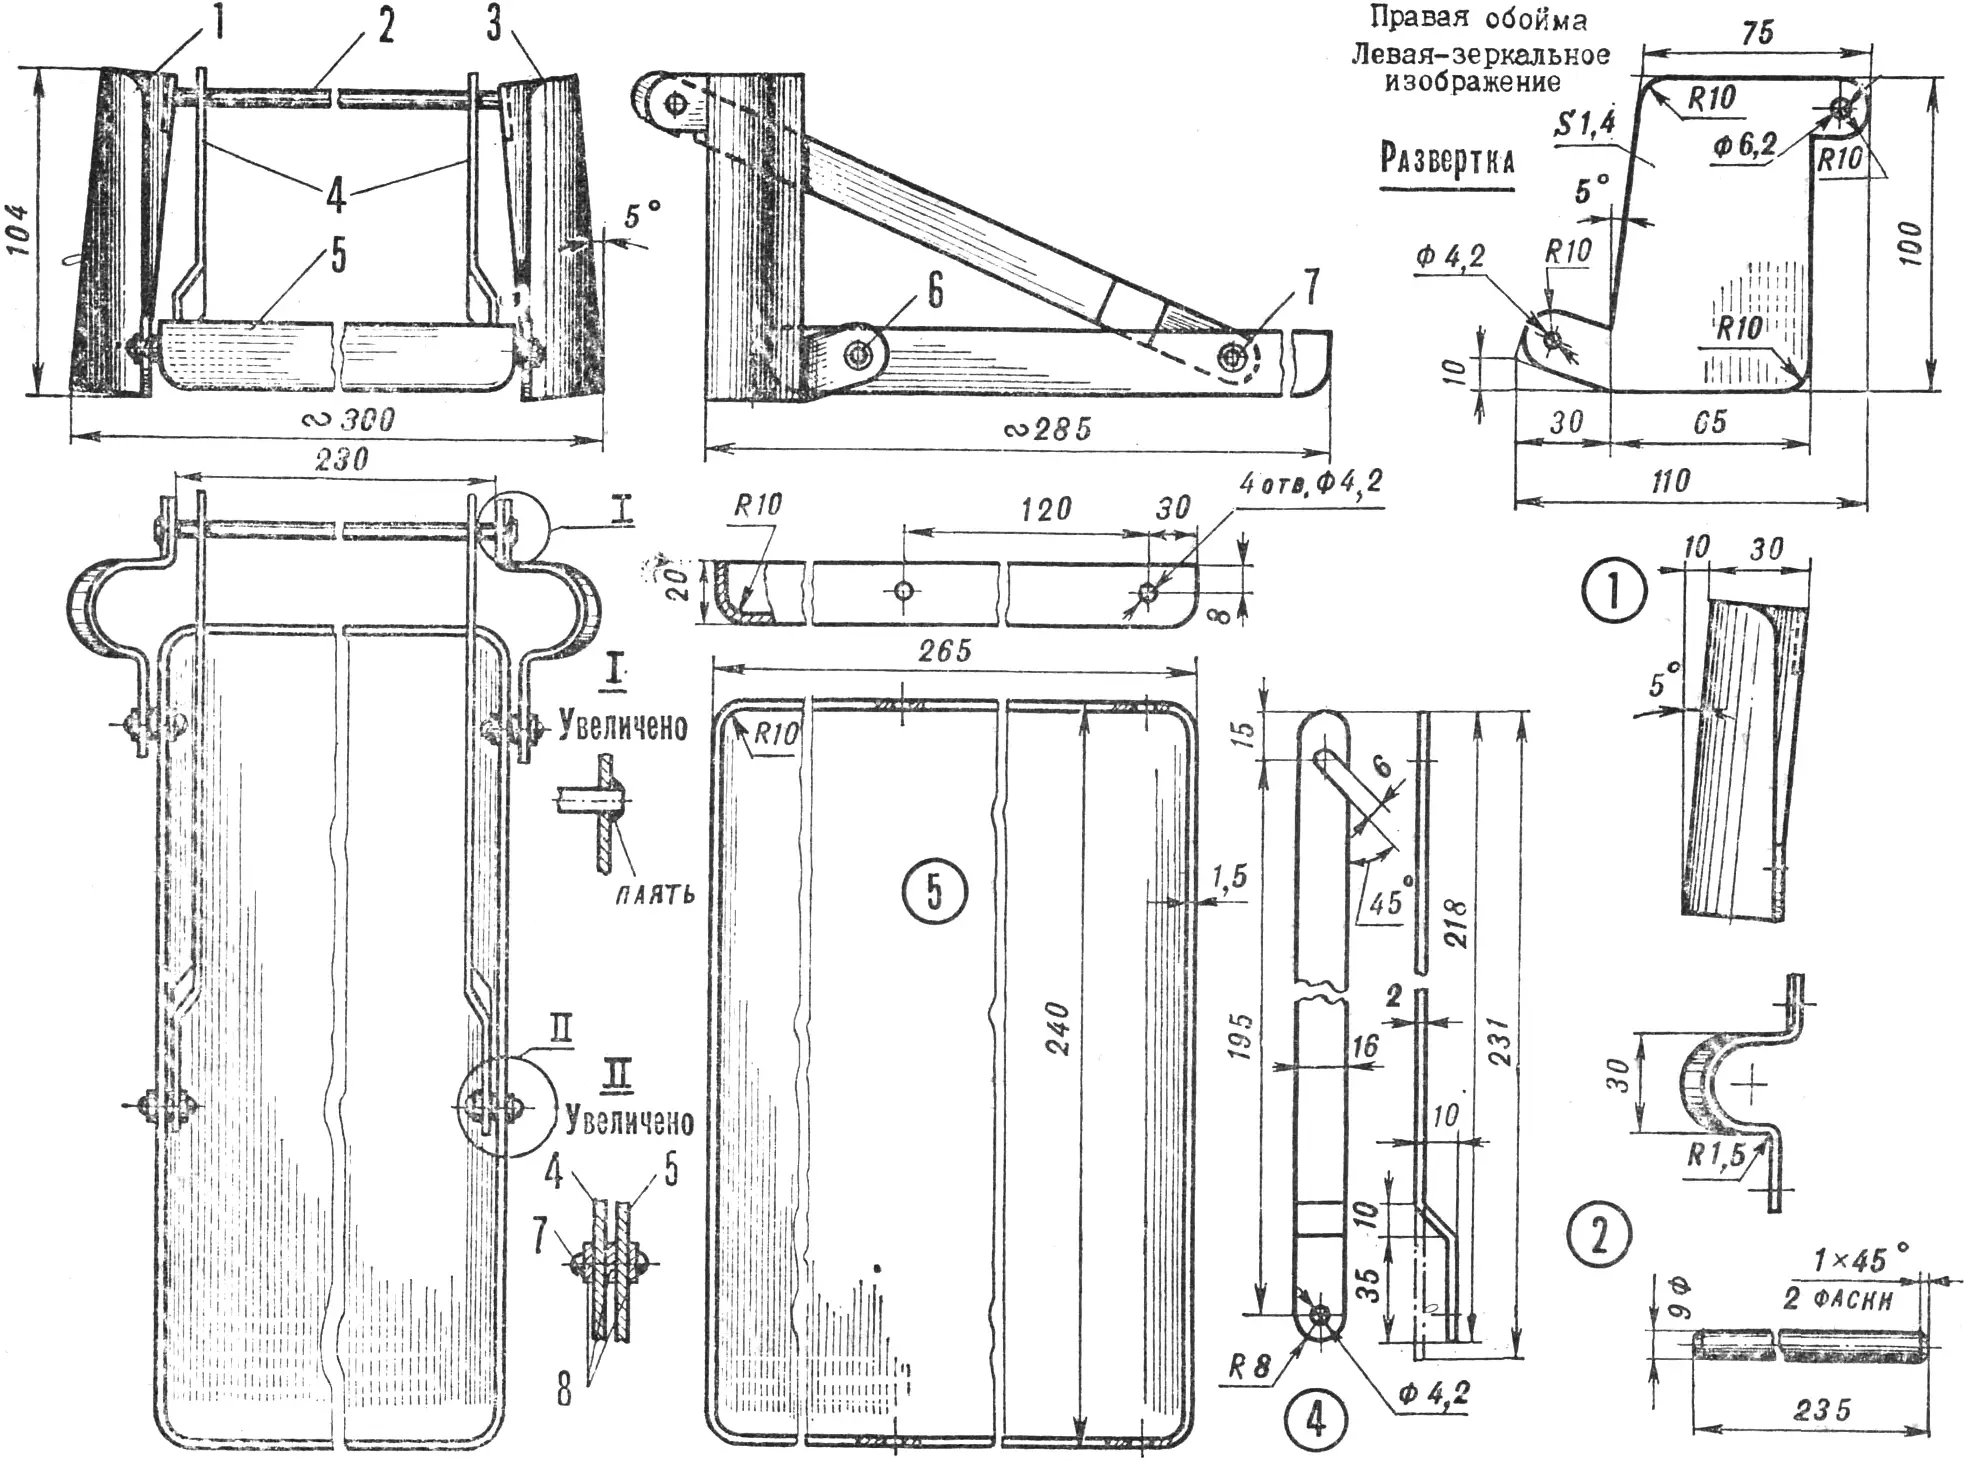
1 — right clamp, 2 — rod, 3 — left clamp, 4 — hooks, 5 — tray, 6, 7 — rivets, 8 — washers.
Next I cut blanks measuring 110×100 mm from a steel sheet 1.4 mm thick, and from them — the clamps: right and left. I also dulled the sharp edges with a file and drilled holes Ø 4.2 and 6.2 mm. Then, in a vise on a rod Ø 27 mm, I bent the clamps: the right one as shown in the drawing, and the left one as a mirror image. Likewise, in the vise, I bent the tabs.
I riveted the clamps to the tray as a hinged joint, using annealed rivets with semicircular heads and six washers — plain bearings (the rivets and washers are steel).
In addition, I connected the clamps with a steel rod Ø 6 and 235 mm long. I tinned both of its ends and soldered them into the holes in the lugs (also previously tinned).
The slip-on hooks are made from one drawing: only the left hook is shown; the right one is bent in the opposite direction. The material for them is metal (a strip 16 mm wide and 2 mm thick). Steel can also be used.
I rounded the ends of the blanks to a radius of 8 mm, drilled holes Ø 4.2 mm in them, and cut slots 6 mm wide at a 45° angle to the side of the hooks.
As with the clamps, I riveted the hooks to the tray as a hinged joint, using the same rivets and washers.
To adjust the shelf, I fitted it by its clamps onto the upper bow of the stepladder, hooked the hooks onto the rod, and slightly bent them — the shelf took a horizontal position. Then I thoroughly washed the finished product in hot soapy water, dried it, and painted it.
“M-K” 8’86, V. KHRYPOV
Recommend to read
 “ETERNAL” FURNITURE
We are accustomed to the fact that the furniture in the house or in the country are made usually from wood or materials on its basis, such as plywood. Wood, according to tradition, are... Mill in the yard
Those who keep livestock and poultry in their household cannot do without grain supplies. Grain can be stored for a long time (I read in one of the magazines that an amphora with wheat...
