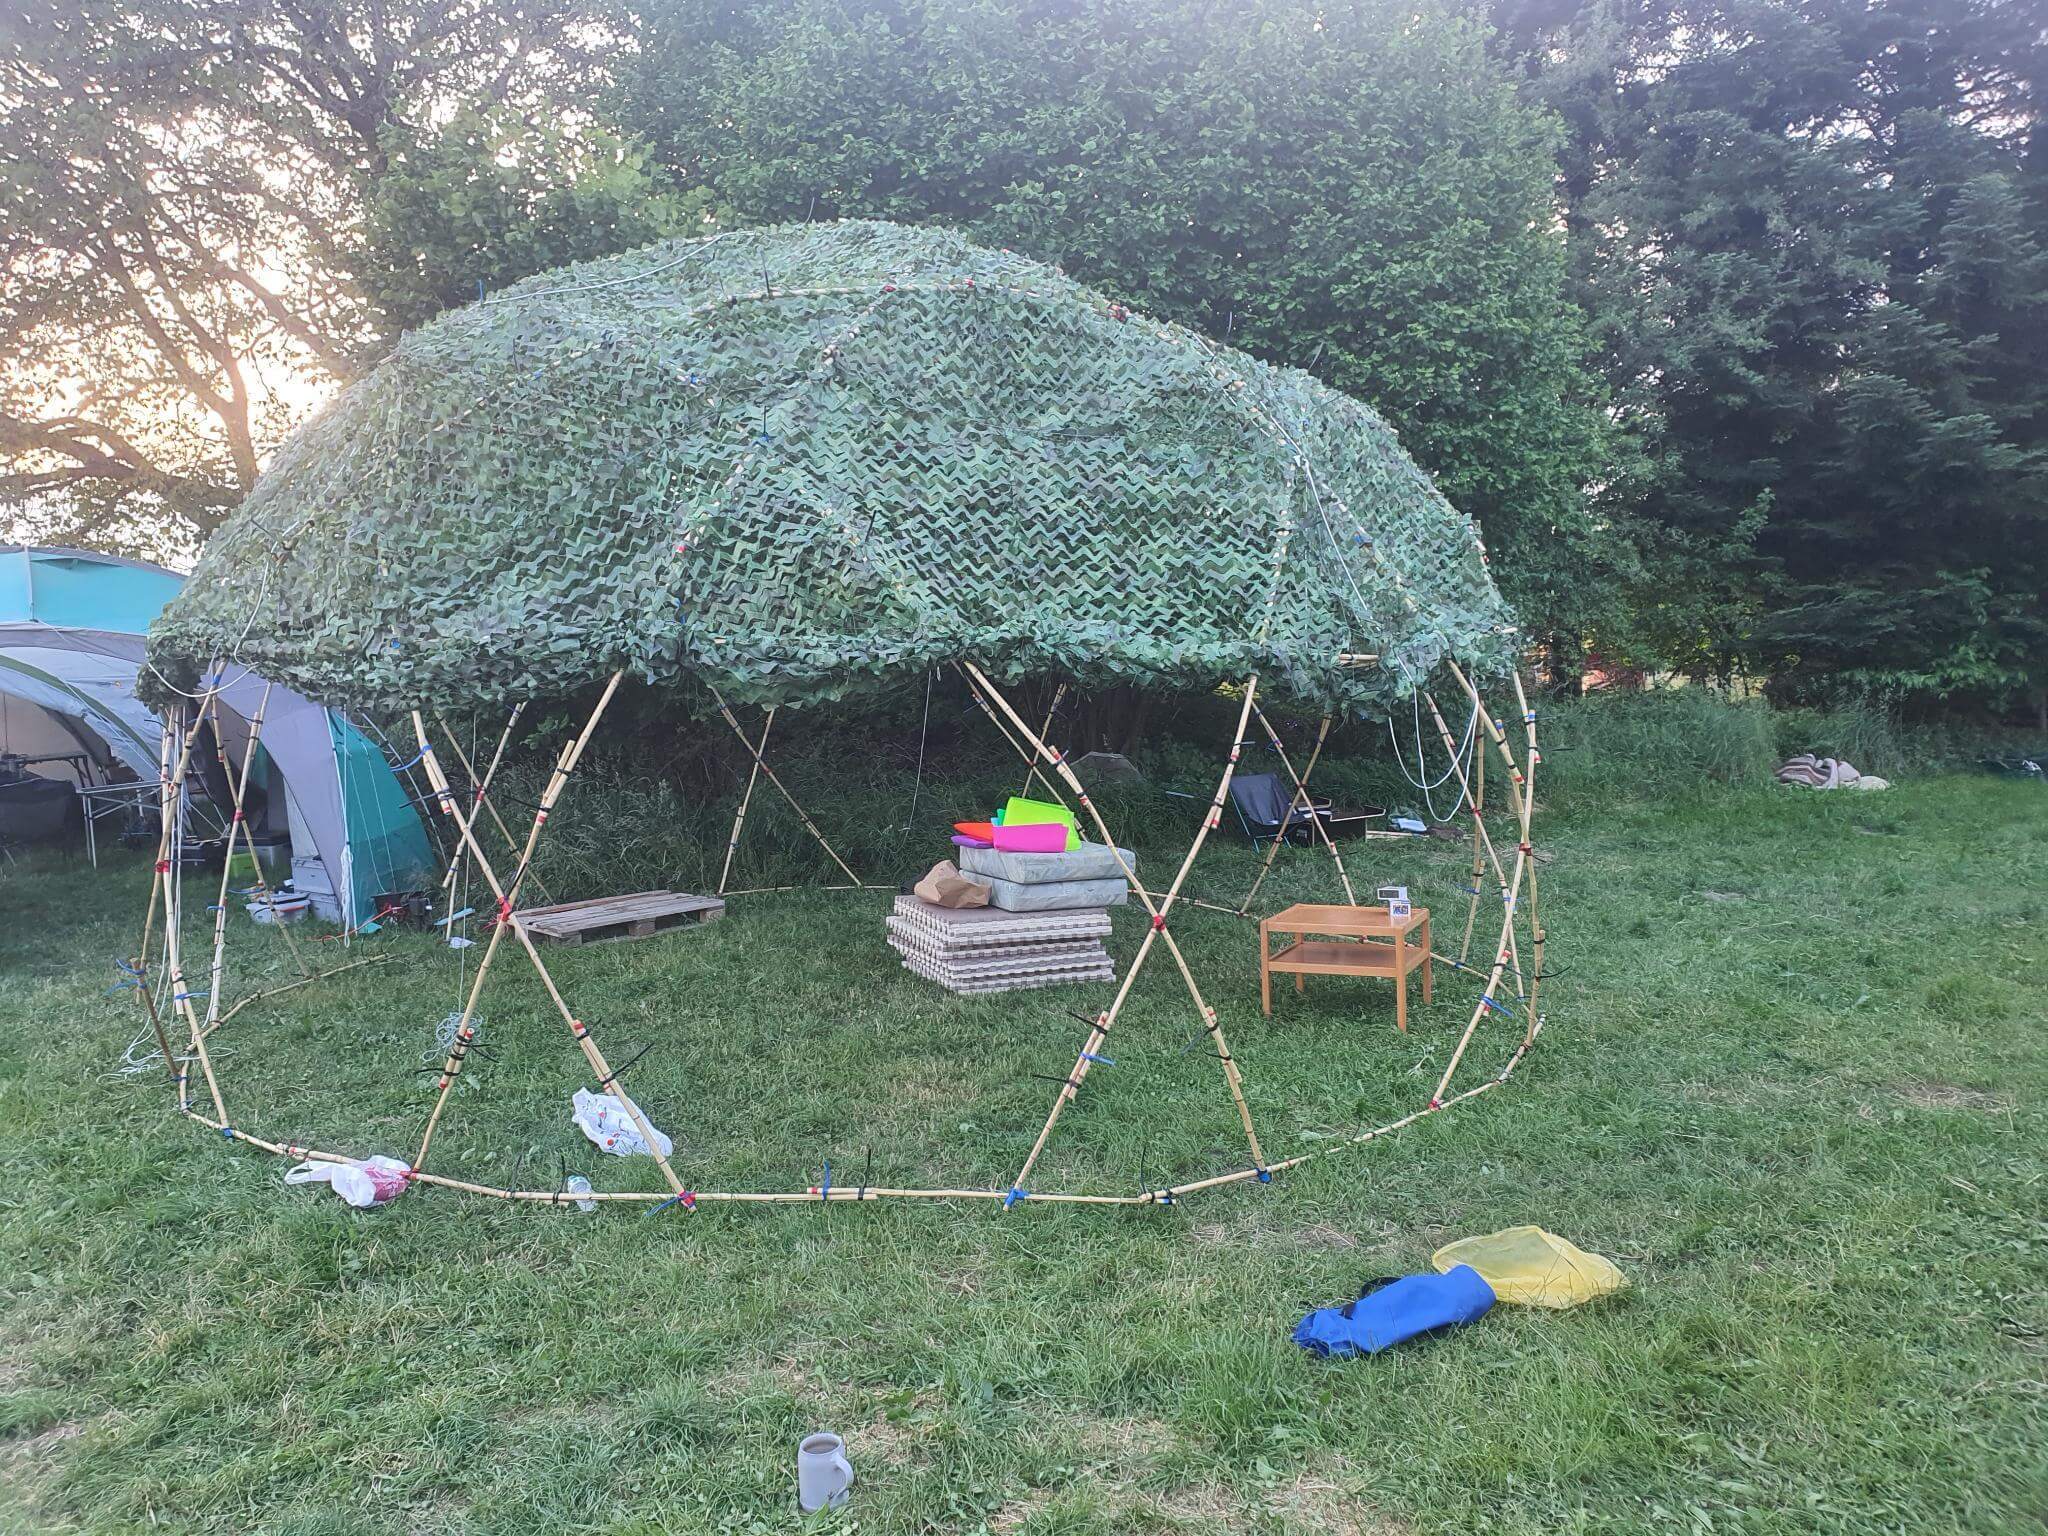
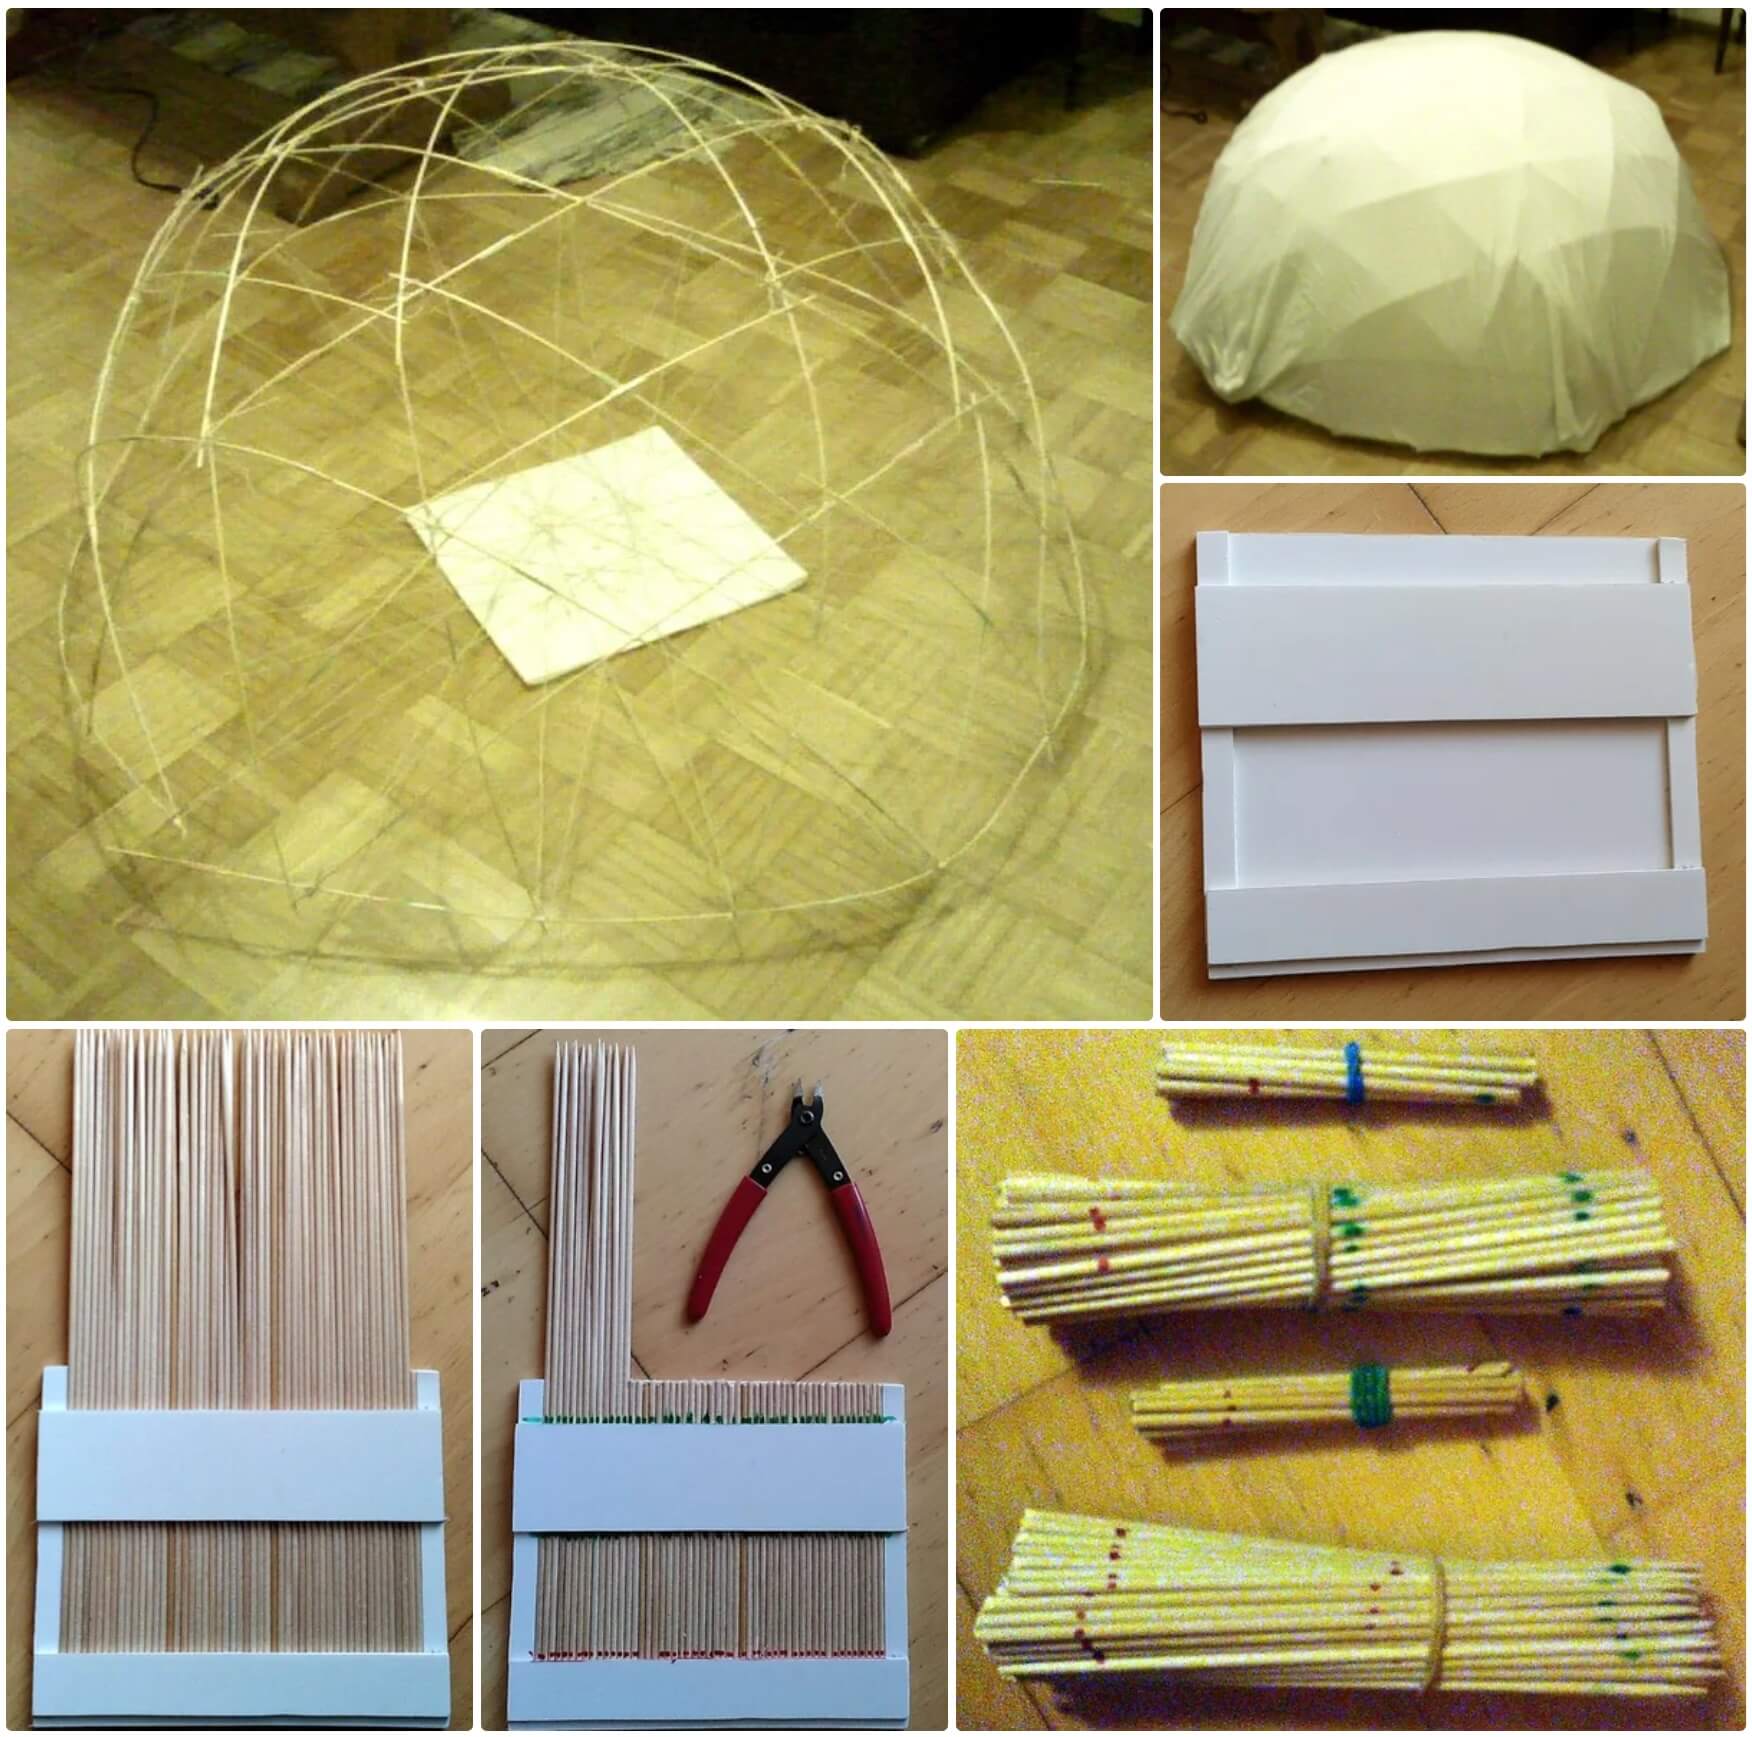
A few years ago I came across plans for creating a bamboo dome, and this idea stuck in my head. No one was building such domes at that time (and even now I have found only two examples using this principle), and I wanted to try. I started with a scale model about a meter in diameter, and over time I was able to build a large dome (6 meters in diameter) for the Burning Man events. This dome proved to be very stable and light weight (weight/size – about 20 kg for a 6 meter diameter dome that fits in two large bags) and very easy to assemble.
Dome assembly diagram
Bamboo grows quickly and is a free material for dome frames. Perhaps you could hang tarpaulin or mosquito netting inside, or stretch stretch fabric over the outside and cover with foam. Tools: pocket knife and rope.
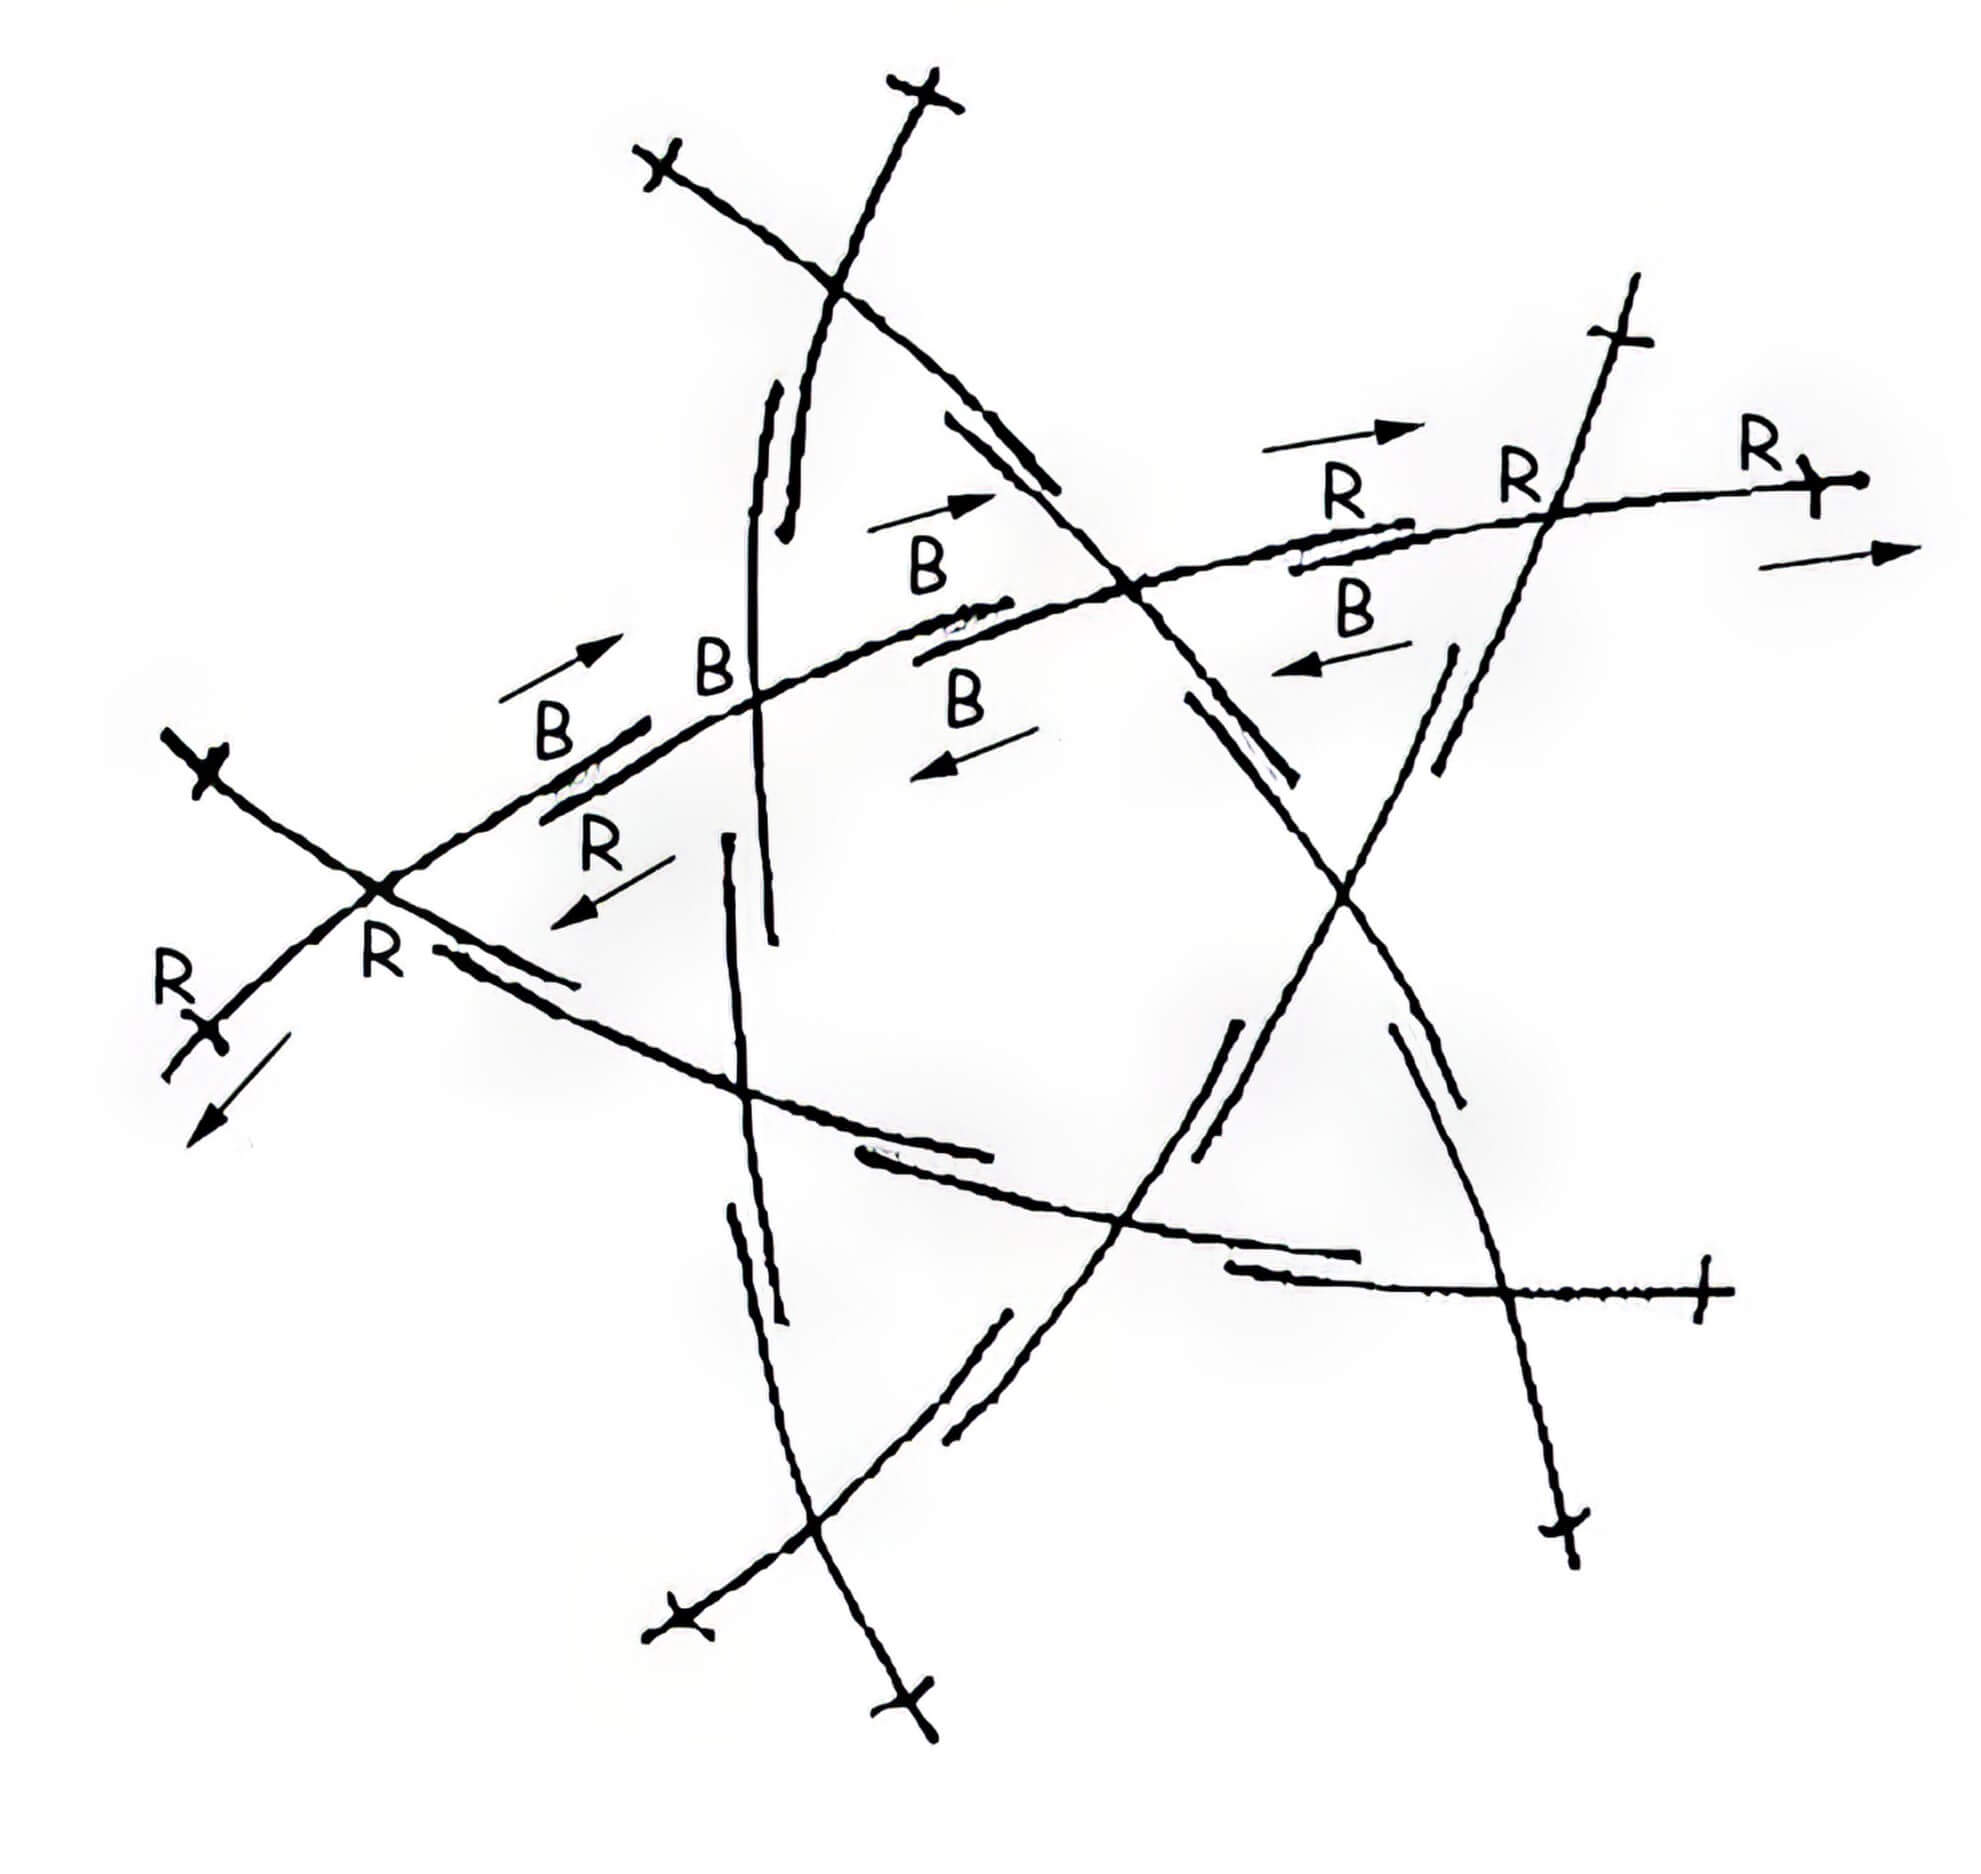
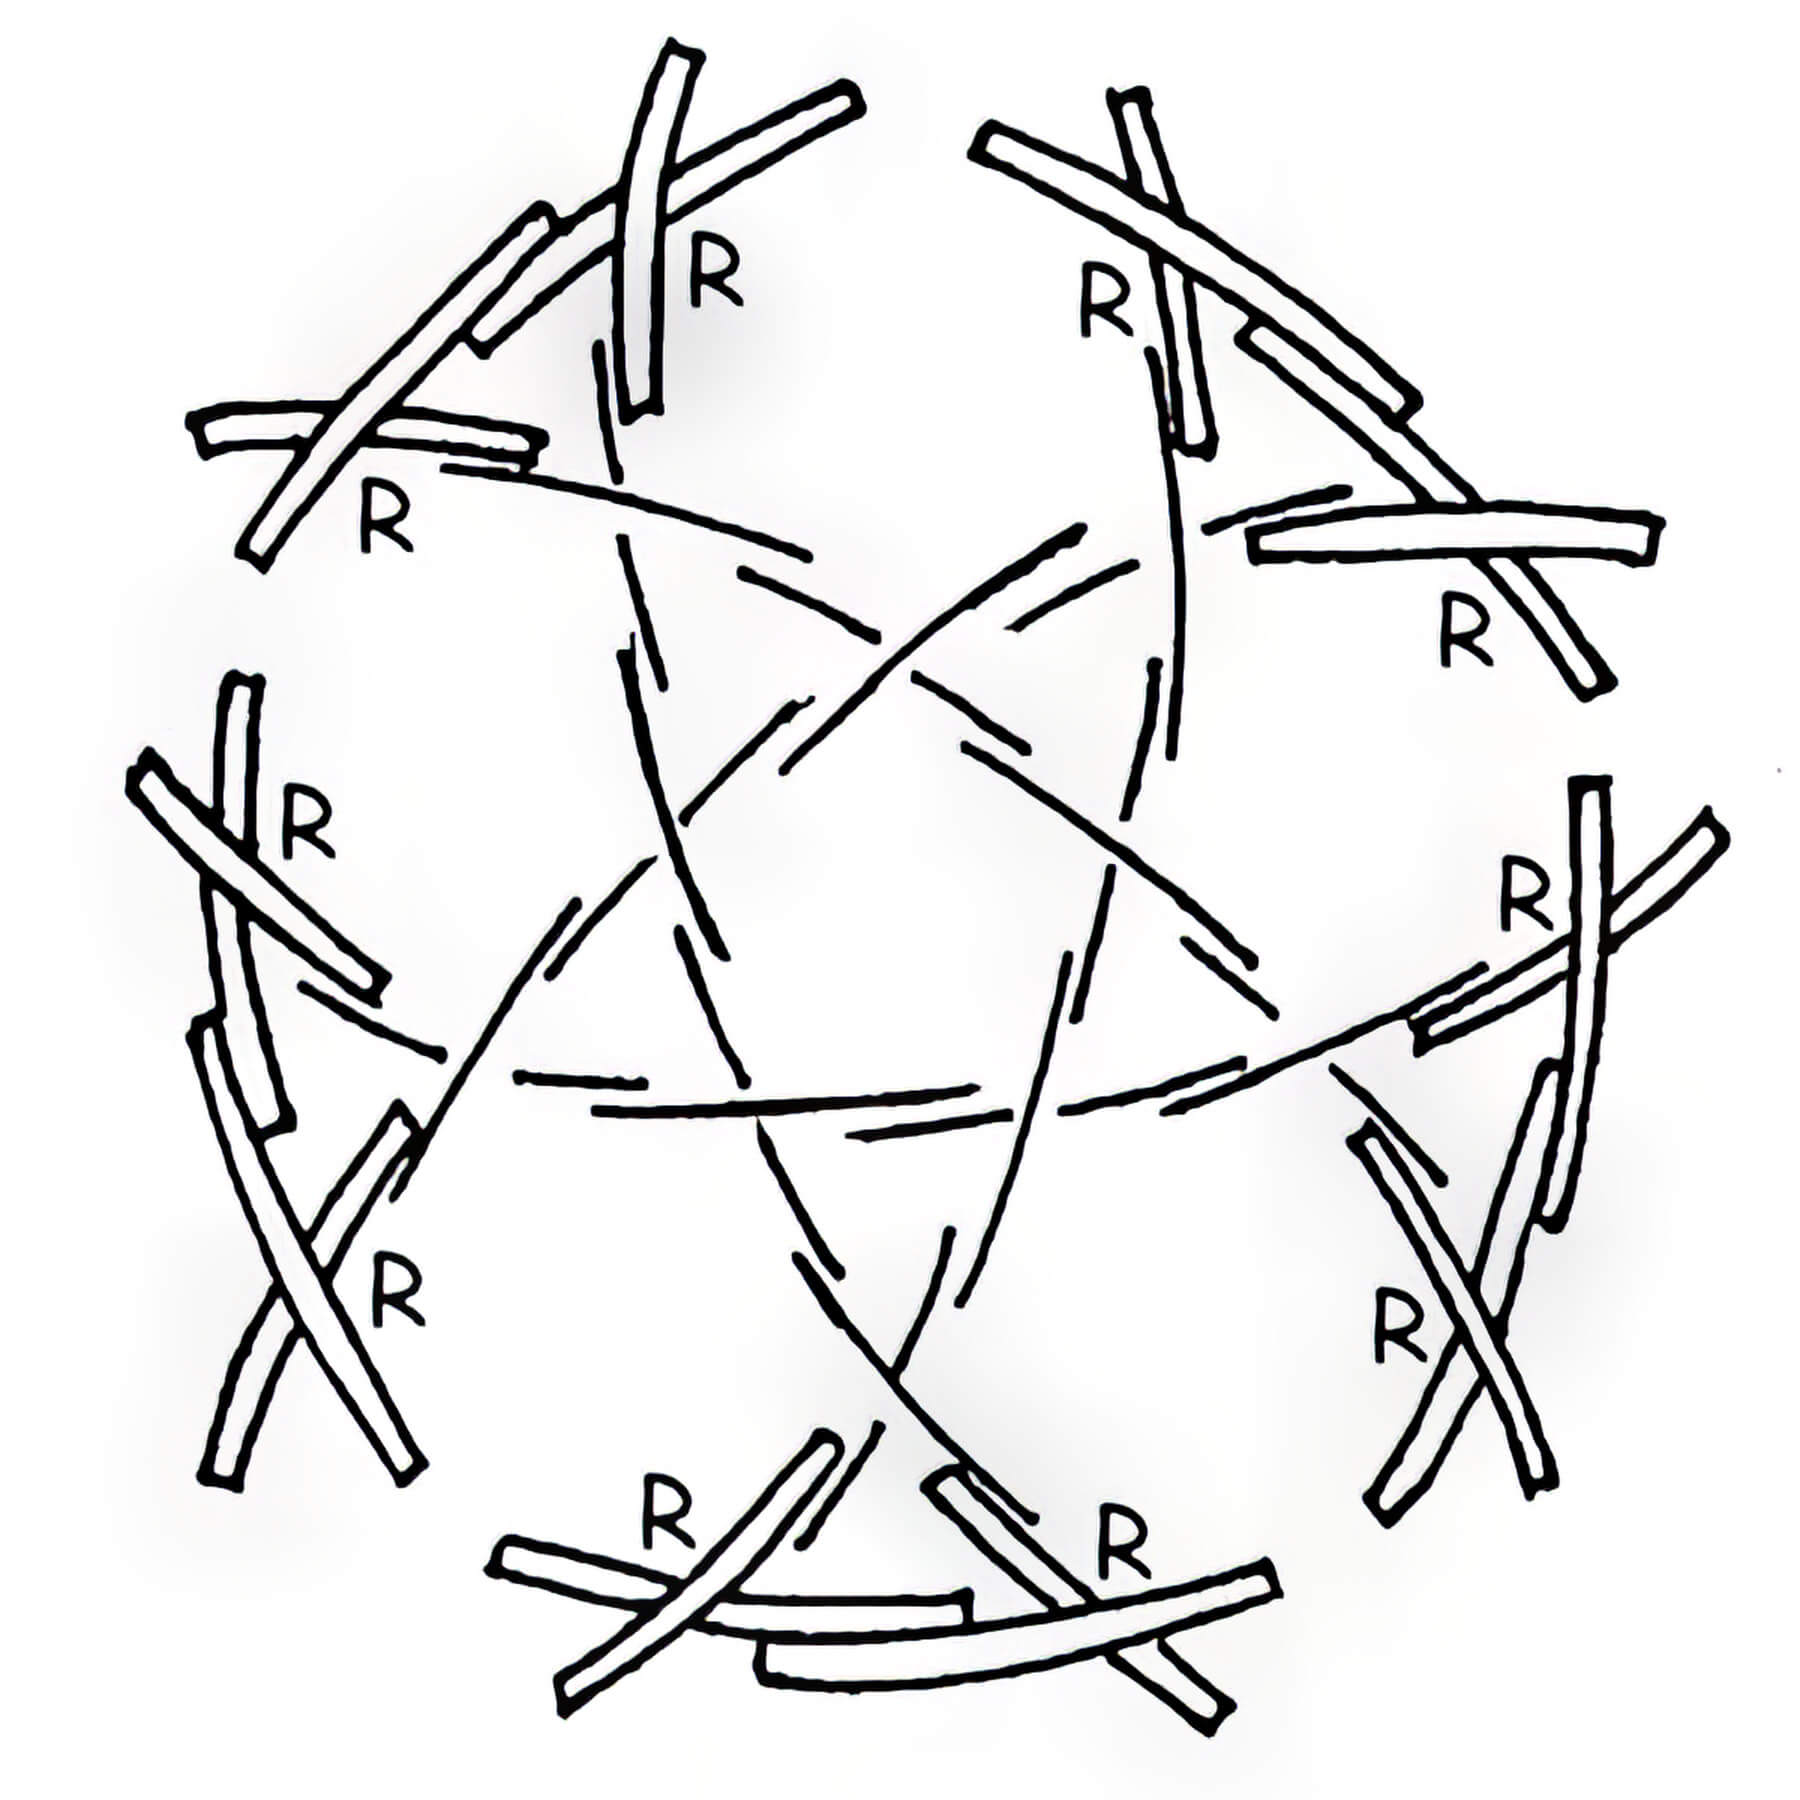
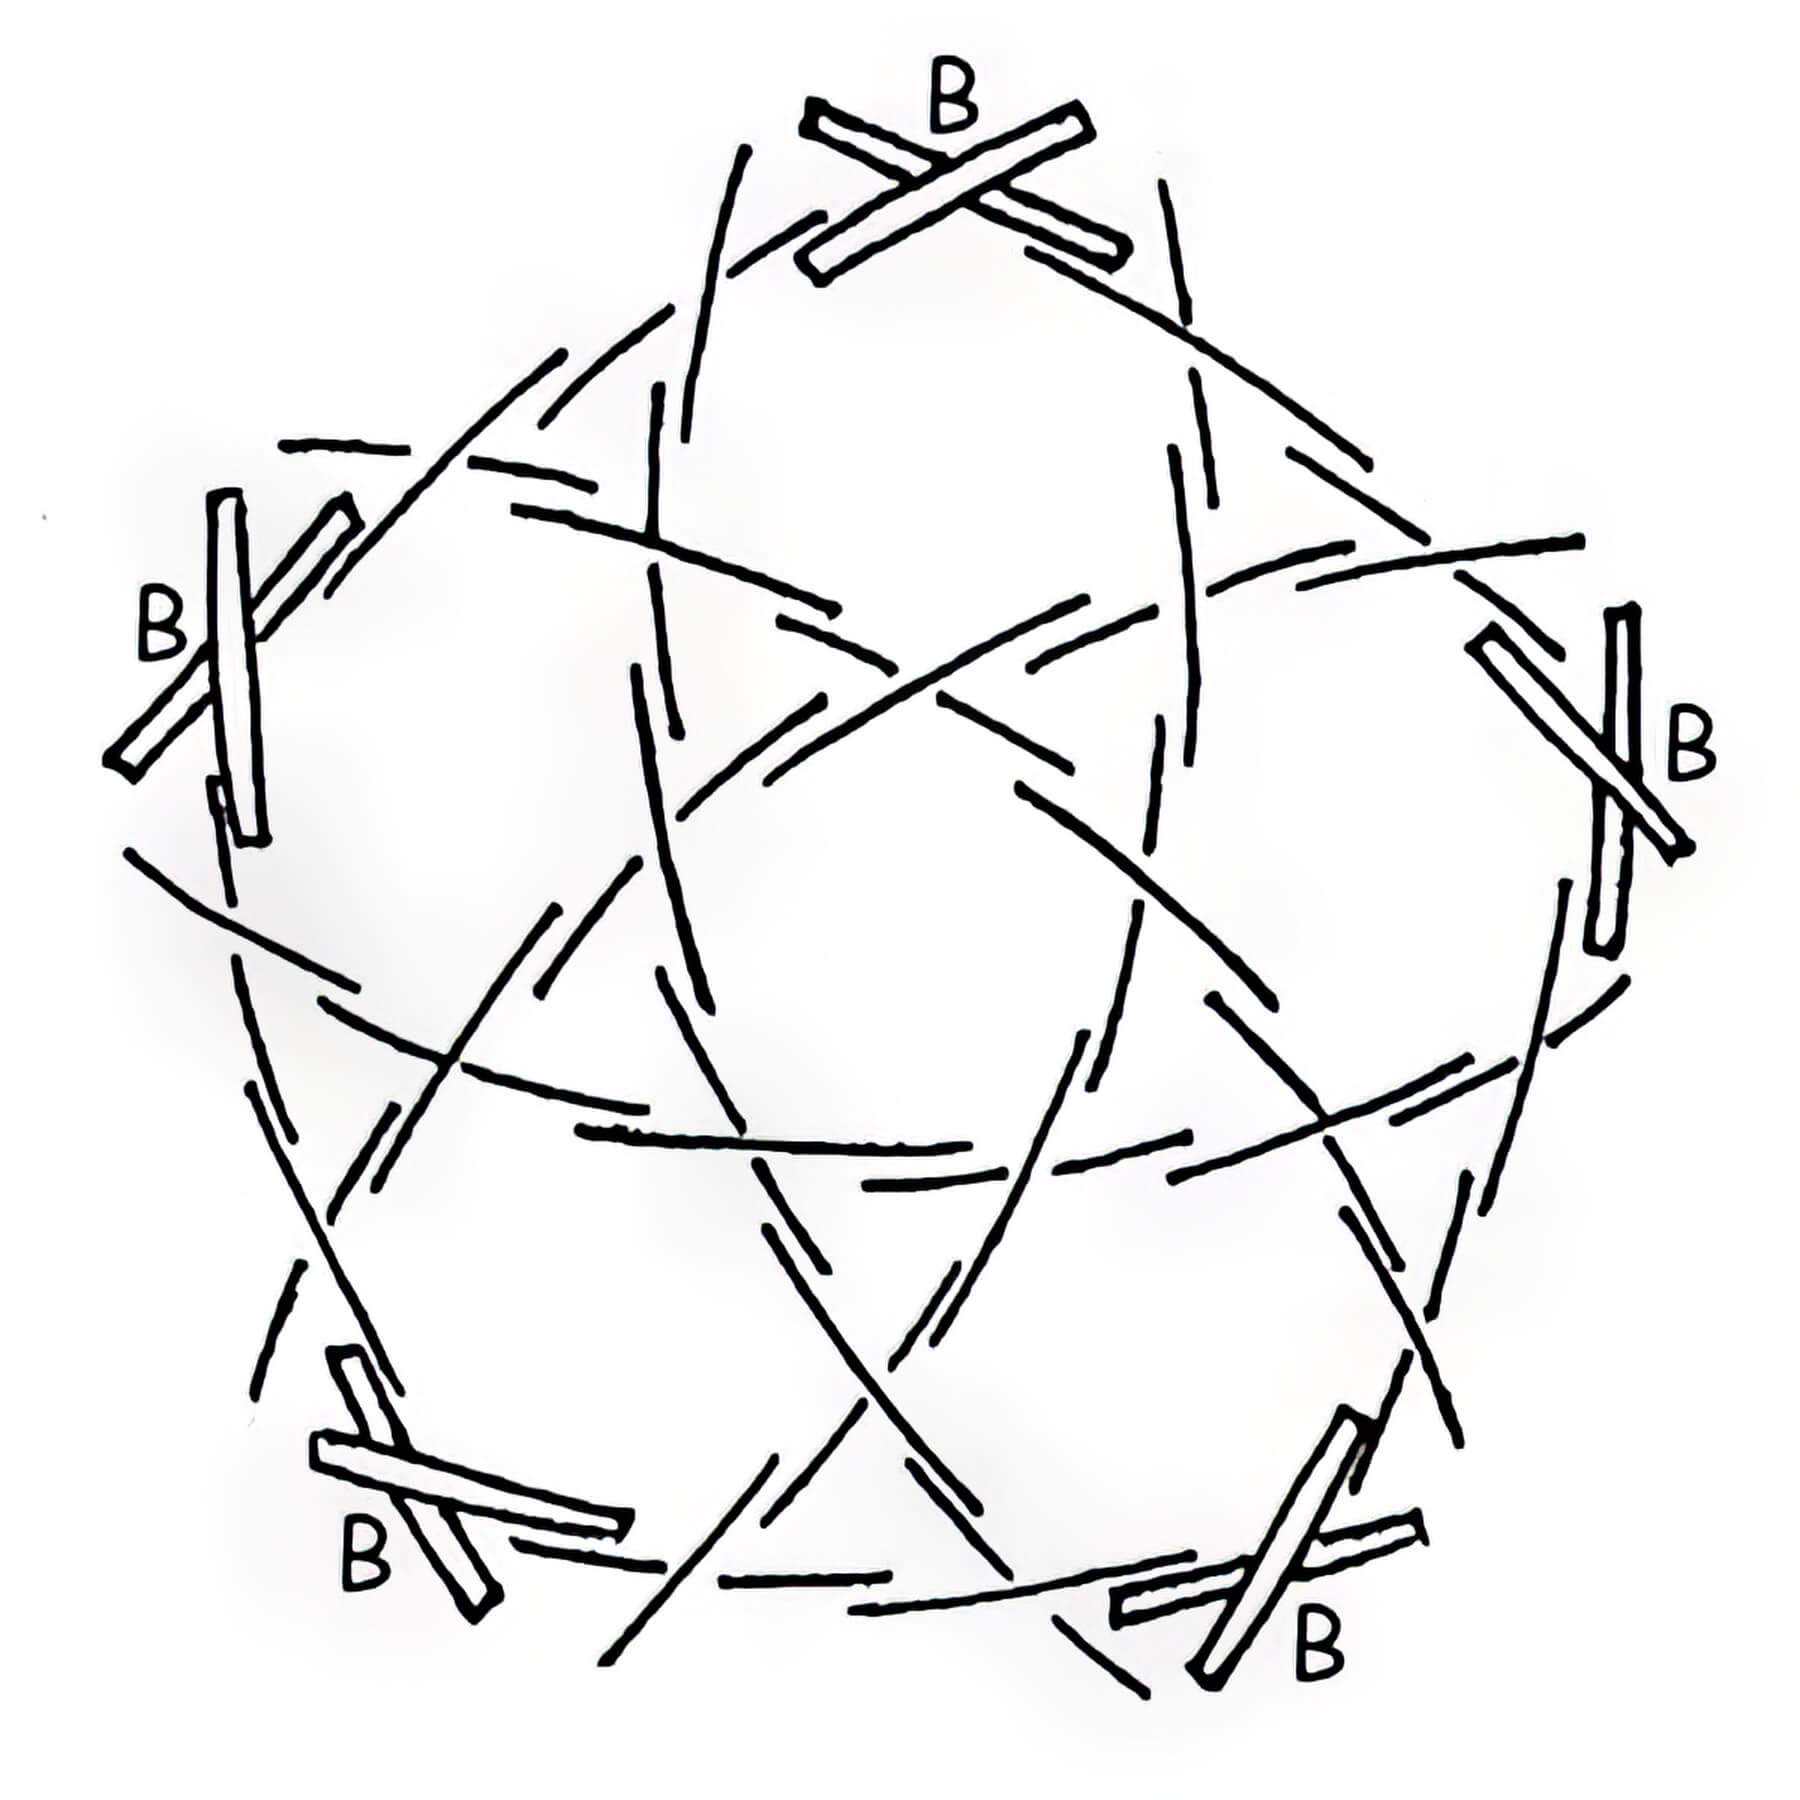
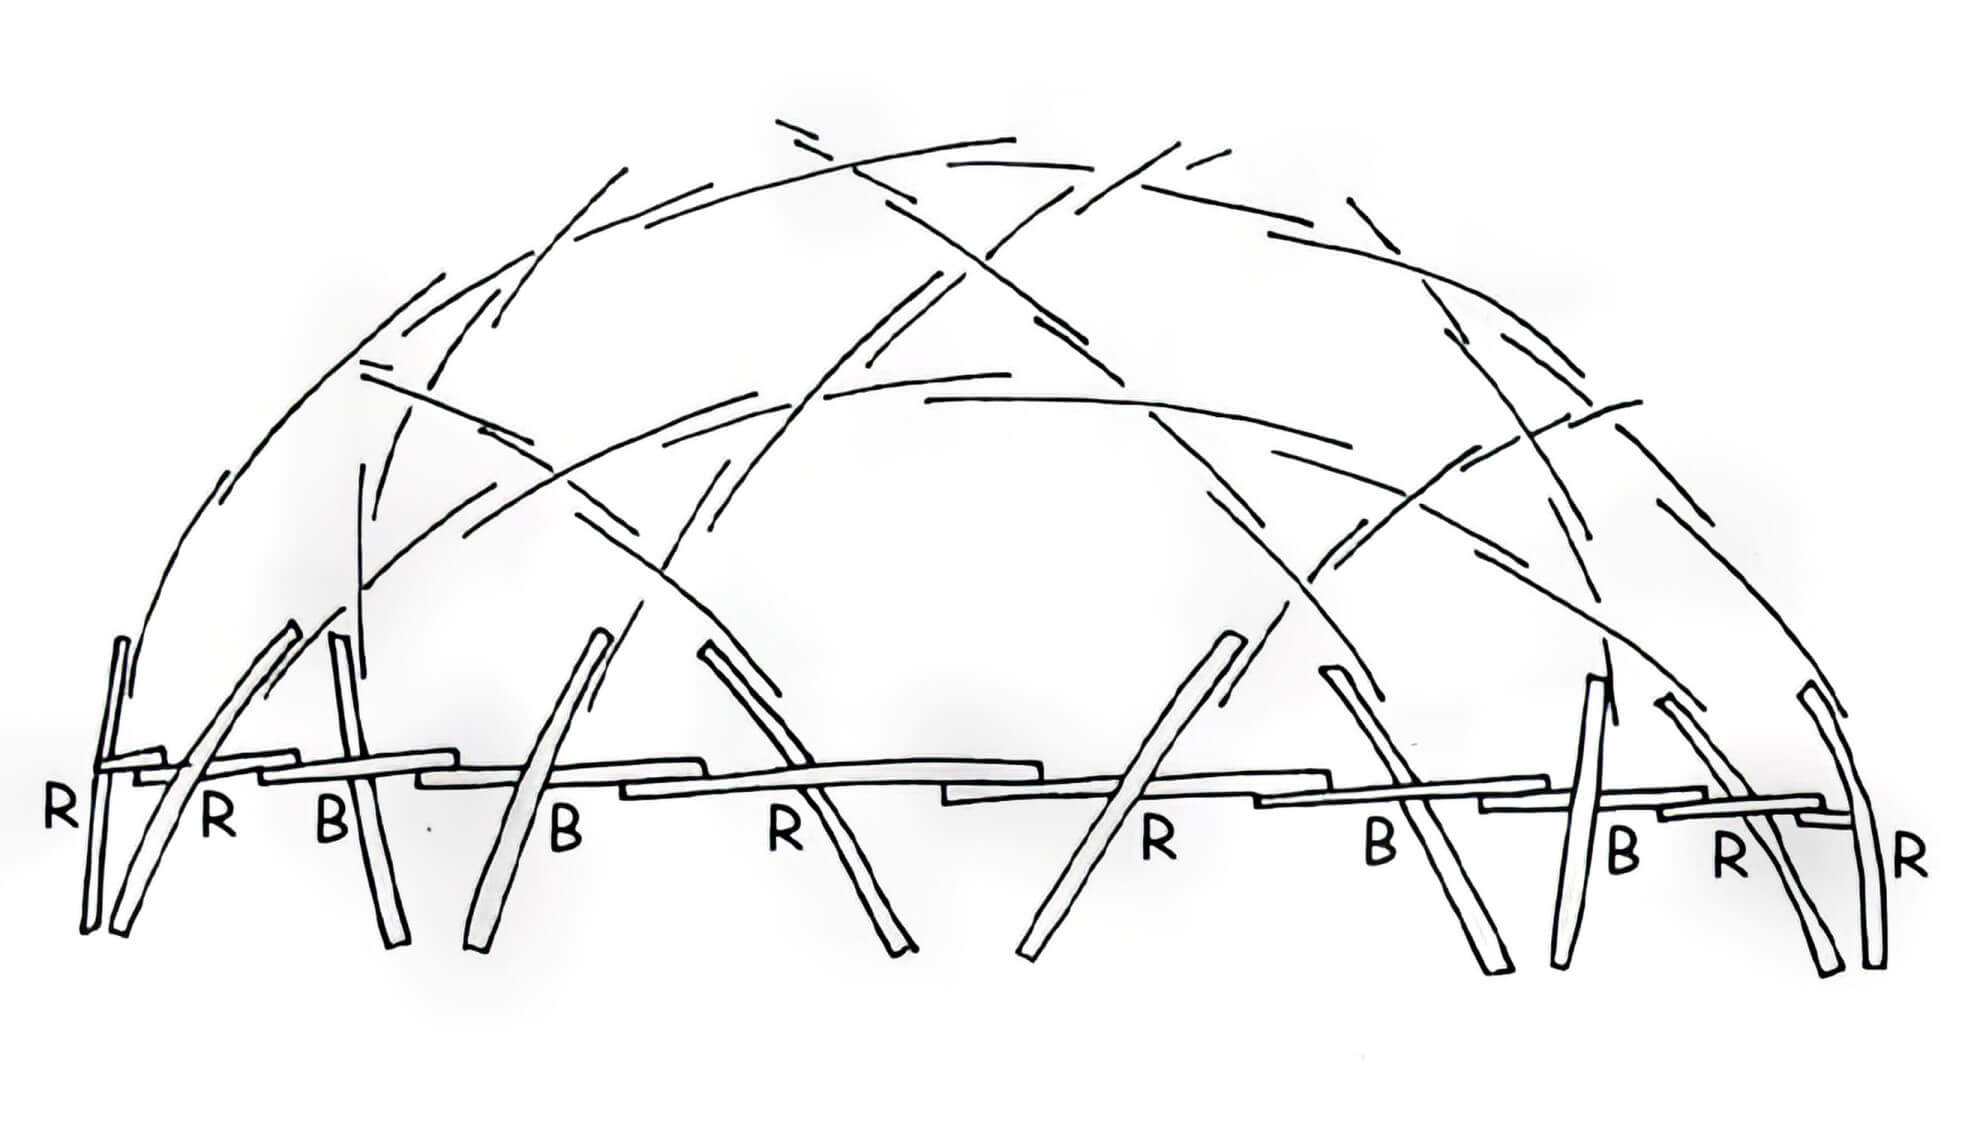
A geodesic dome, as shown in the assembly diagrams, contains two different connections: connection B, which occurs at the vertices of all pentagons, and connection R, which occurs at all other points. The distances between connections are designated as BB, BR or RR. The coefficients of arcs of these lengths are:
- BB = 0.26030616
- BR = 0.31030984
- RR = 0.32636688
For these coefficients, the dome radius is 1.00. To build a dome with a diameter of 22 feet (radius 11 feet), the lengths of the arcs would be as follows:
- BB = 2.86 feet
- BR = 3.41 feet
- RR = 3.59 feet
Cutting and measuring racks
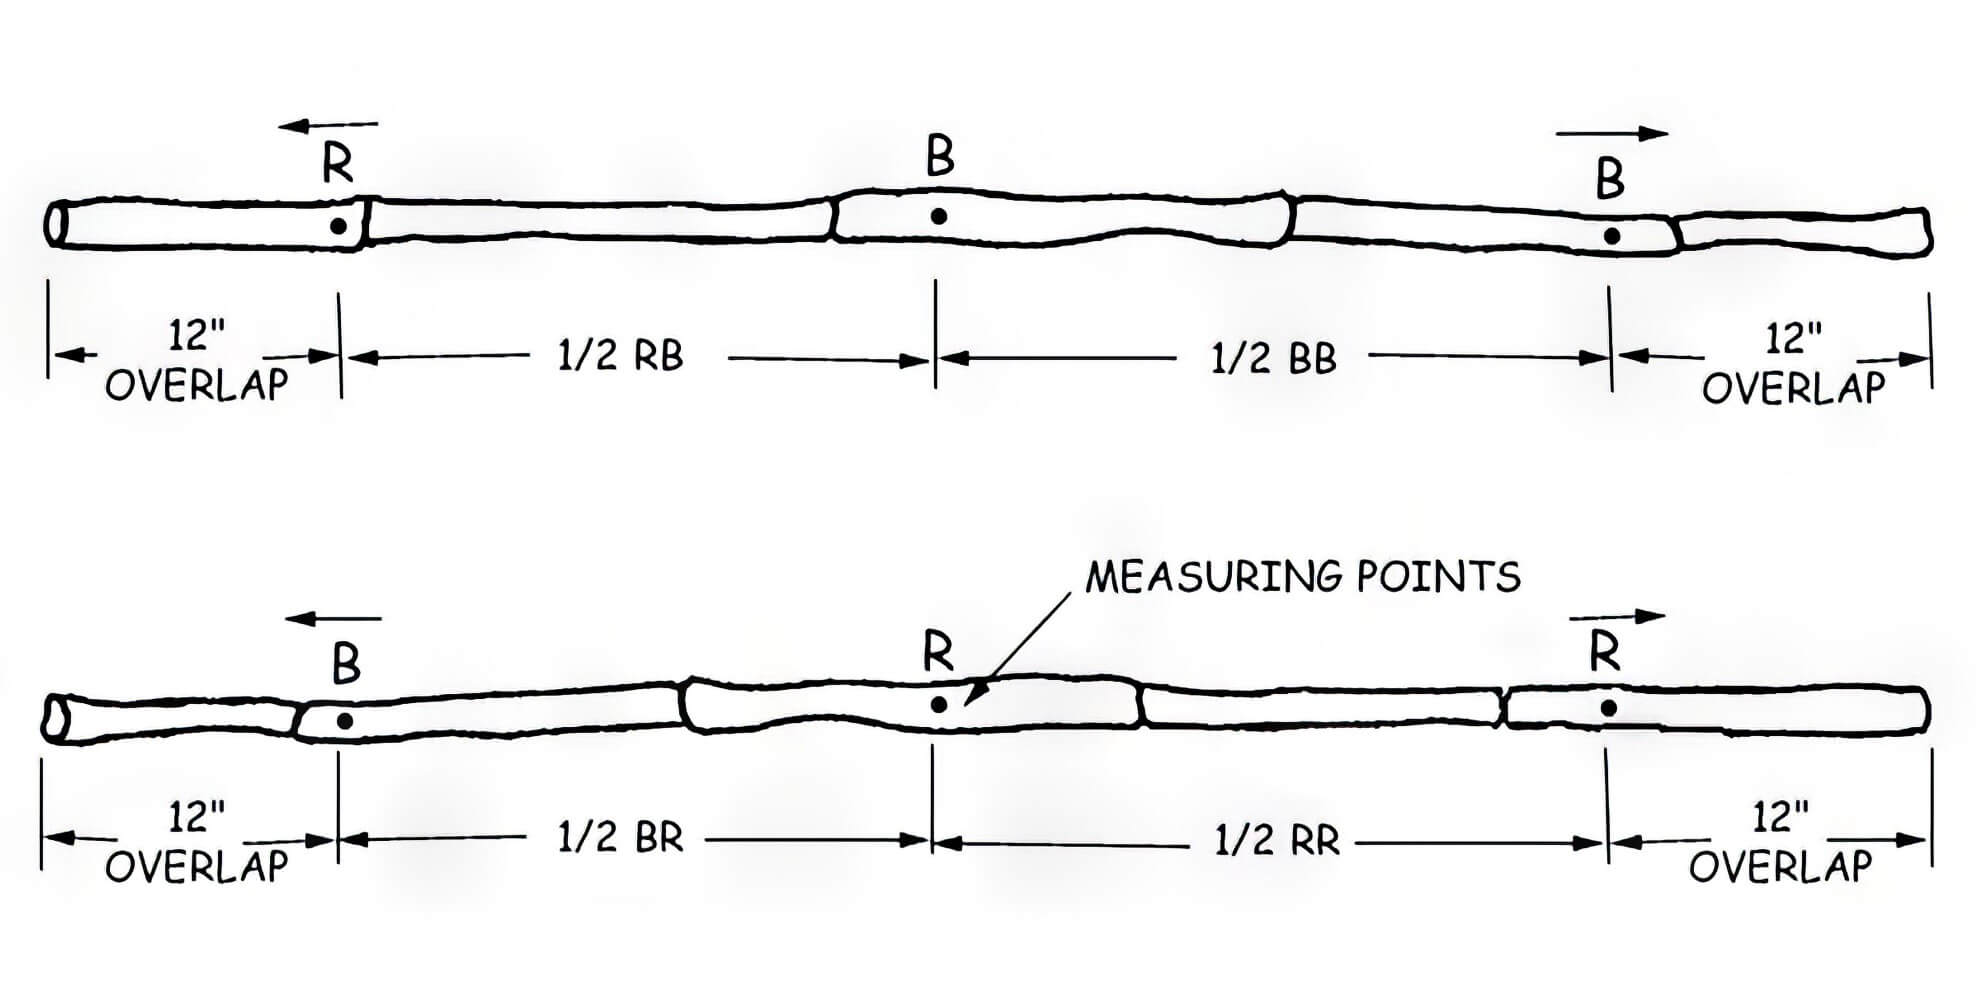
Only two lengths of posts are used.
A 5/8 canopy will require 80 B posts and 90 R posts.
Lines of color can be drawn around the bamboo posts at each measuring point. Use blue for the B points and red for the R points.
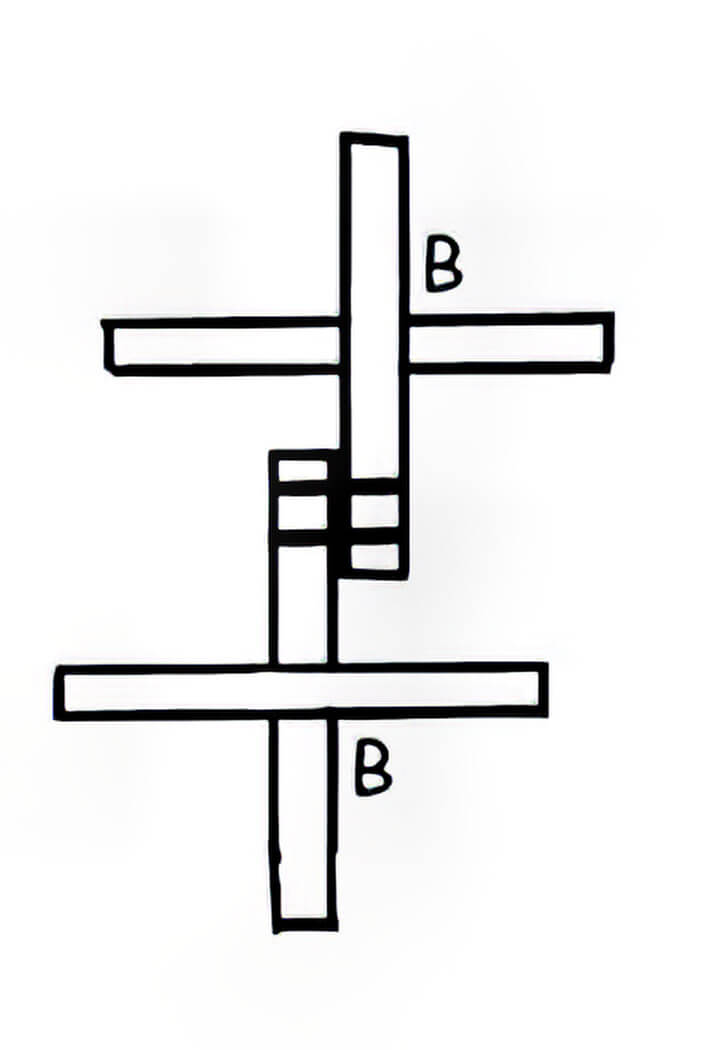
Assembling crosses


Cross B consists of two B posts whose lengths are: 1/2 BB plus 1/2 BR plus 12 inches at each end. The R cross consists of two R posts whose lengths are: 1/2 BR plus 1/2 RR plus 12 inches at each end.
With 12 inches extra at the end of each post, there will be a 24-inch overlap when assembling the crosses.
Bandaging crosses
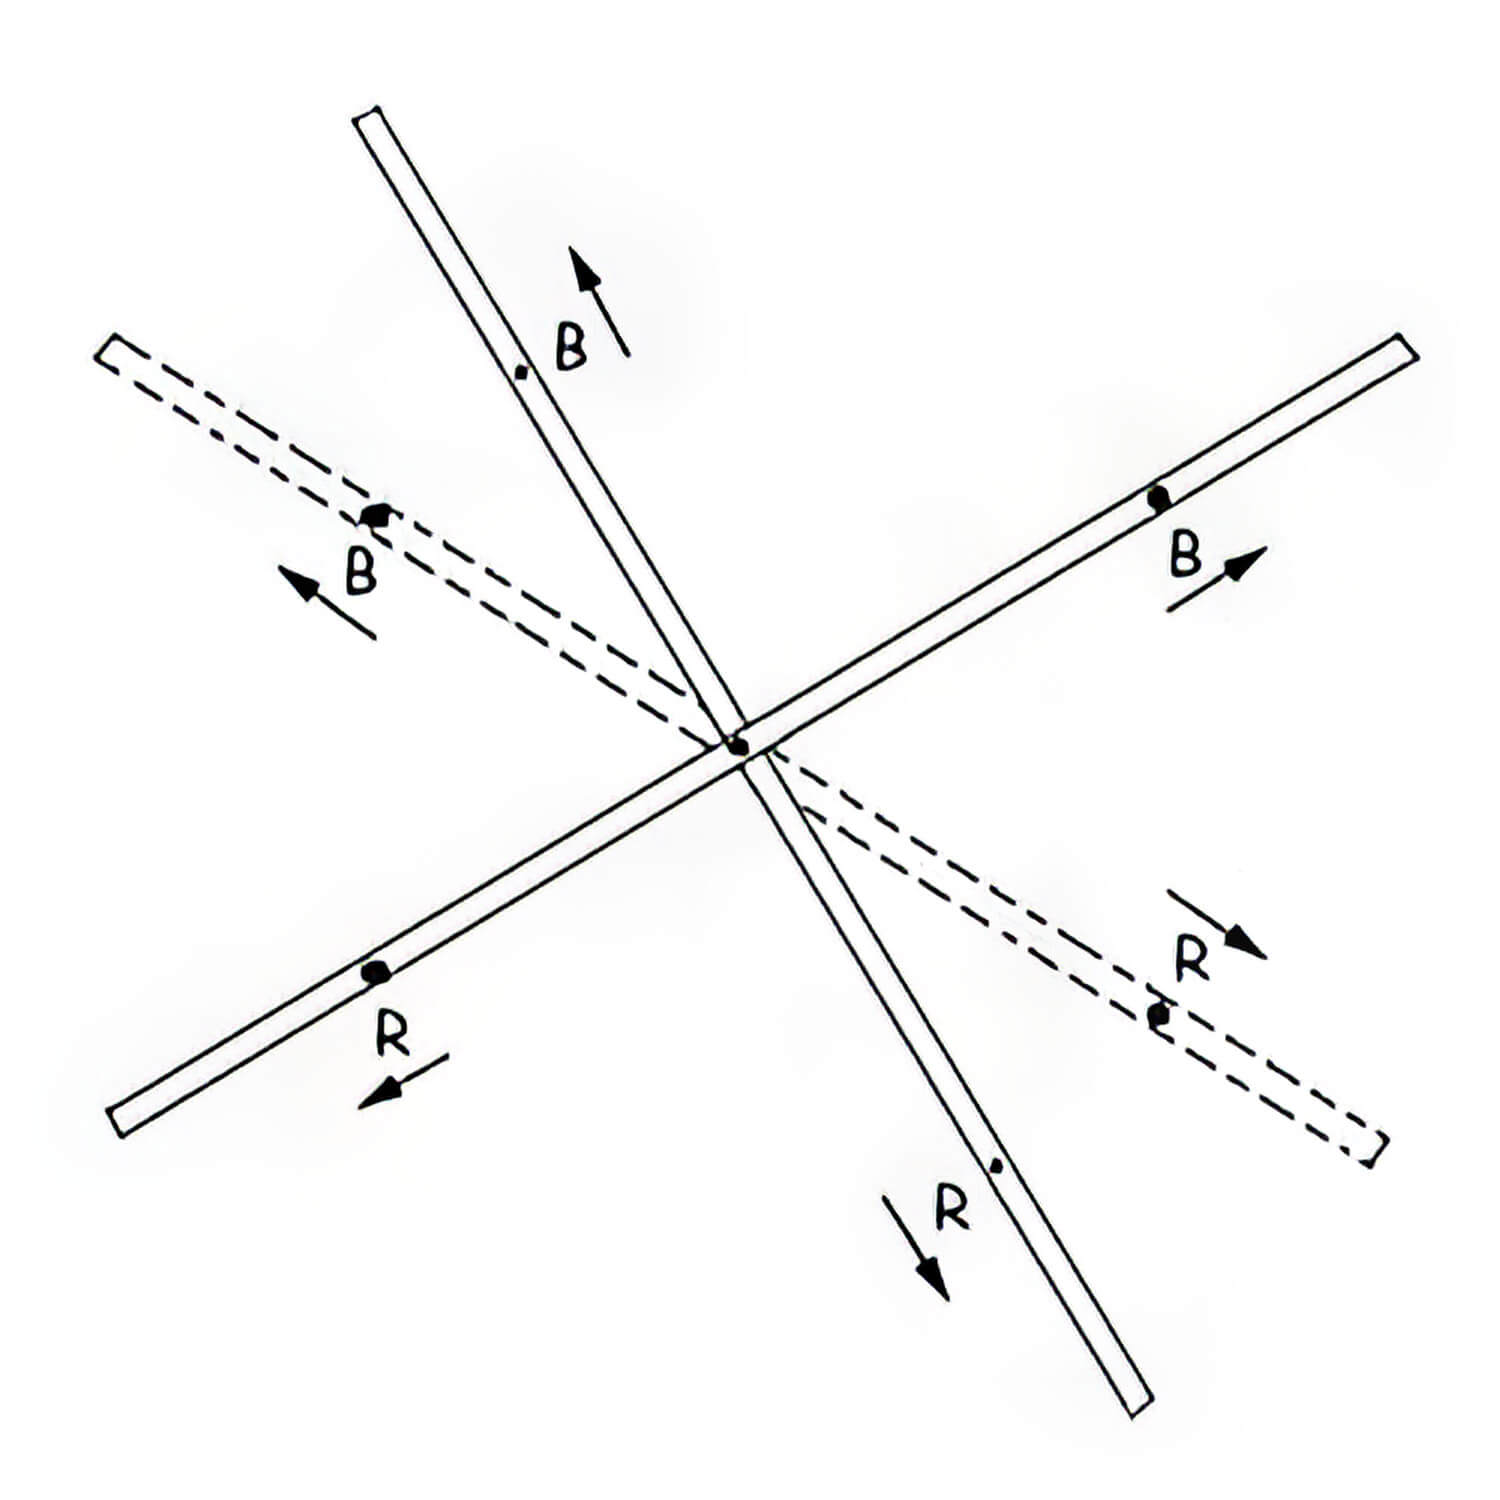
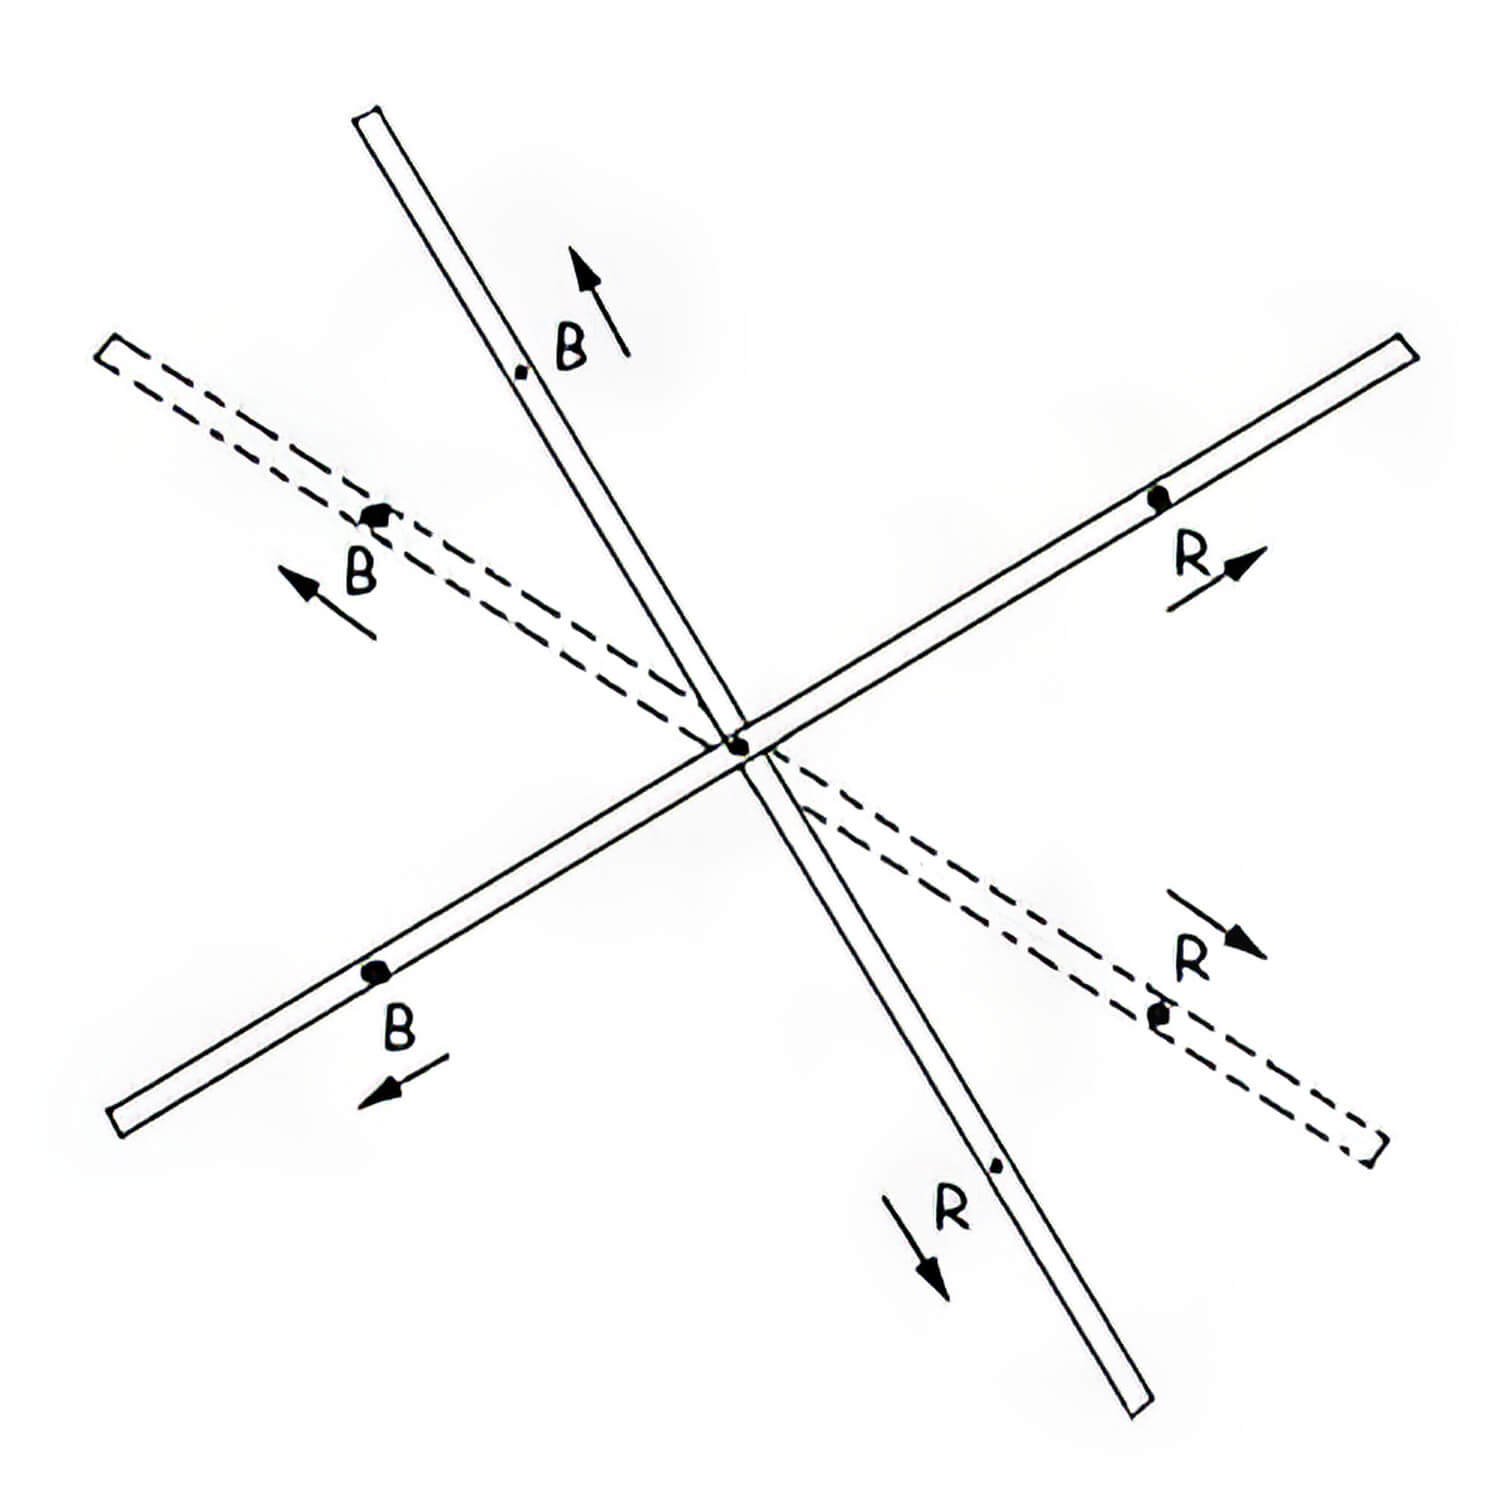
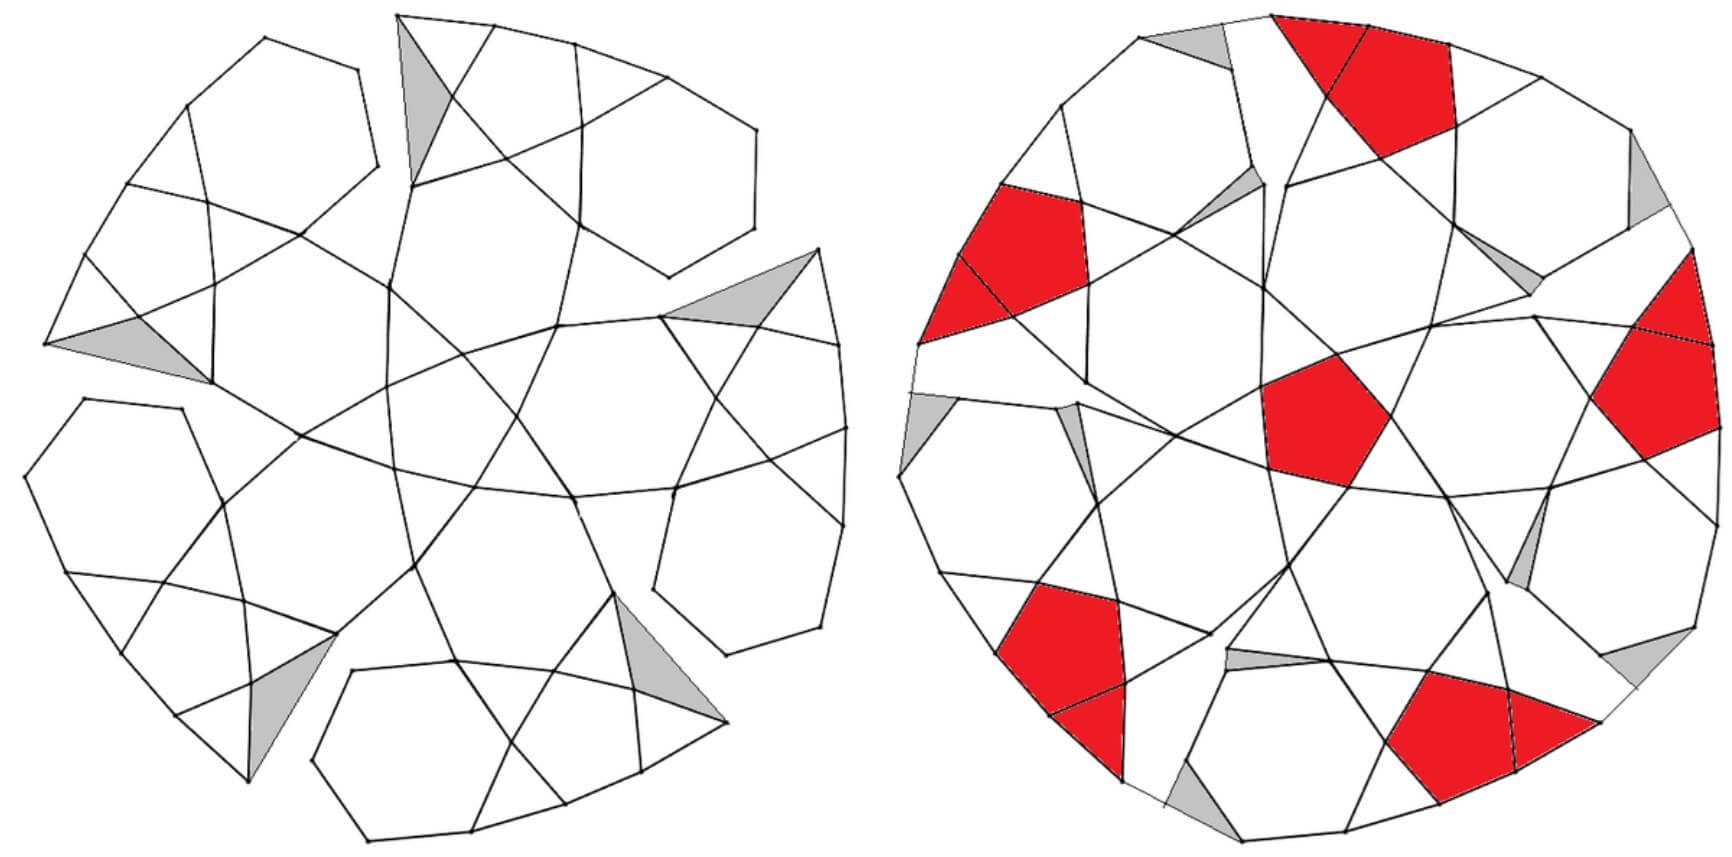
Place the posts at right angles to each other and tie tightly, but not too tightly. As the dome is assembled, the crosses will rotate into the correct position as shown. In all cases, when you look at a cross with acute angles on the sides and obtuse angles on top and bottom, the post that runs from the top right corner to the bottom left always passes over the other post.
Assembly at the first stage
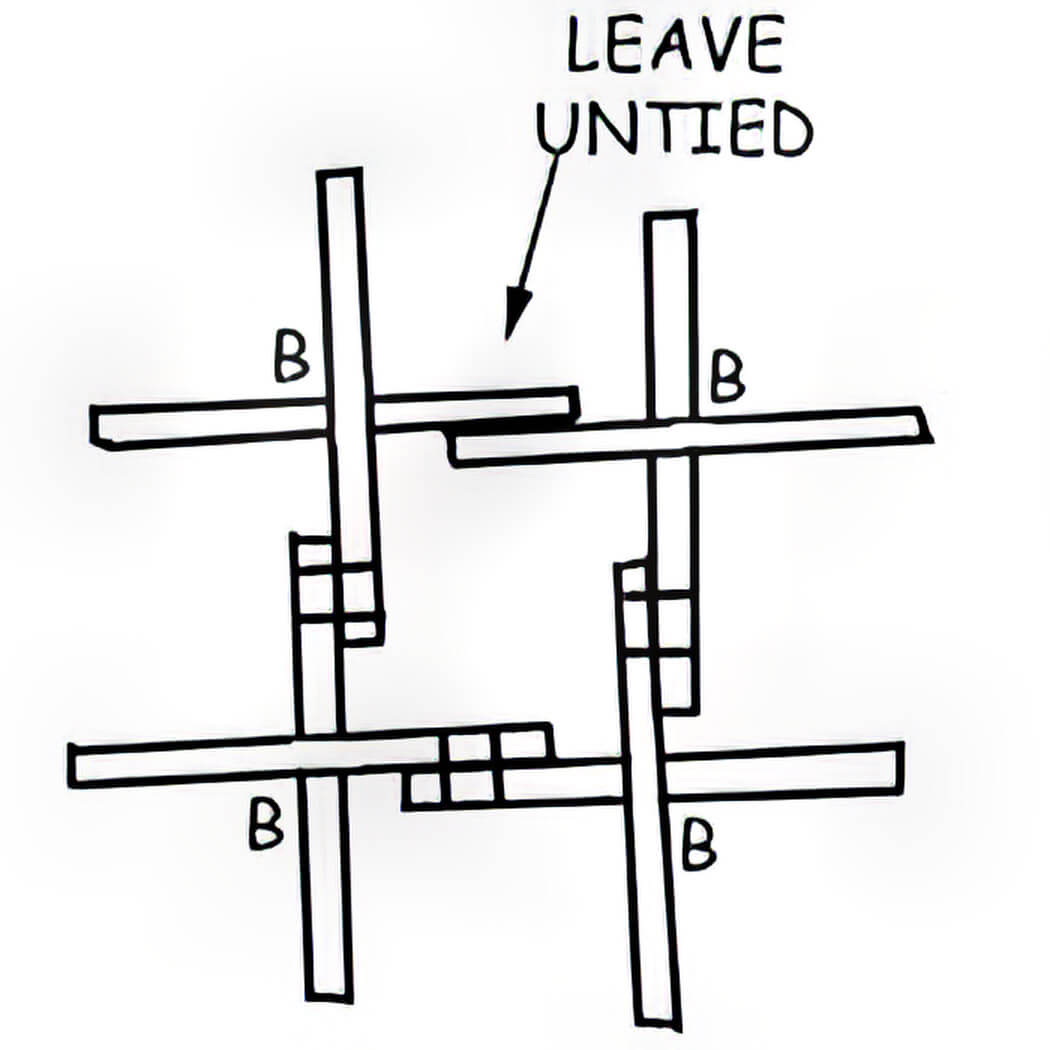
The first step in assembling the dome is to create the pentagons at the top of the dome. This process involves 5 B crosses.
- Step A: Tie two B crosses together as shown in the diagram. Note that the end points of the measurement have the same symbols as the cross to which they are attached.
- Step B: Add two more B crosses in the same manner as shown in Step A.
- Step C: Add a fifth cross B between the unattached legs. In order to insert this cross, all crosses will be rotated to form a regular pentagon.
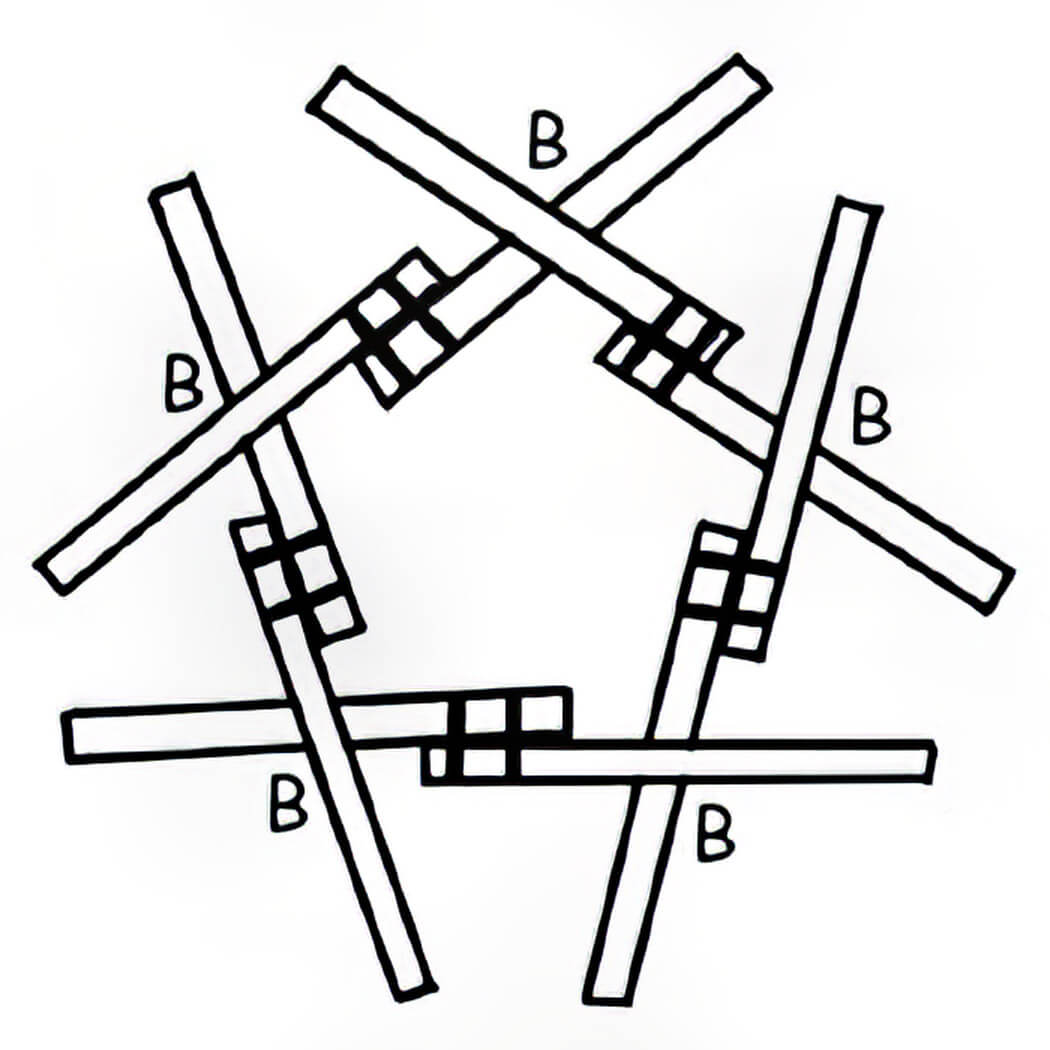
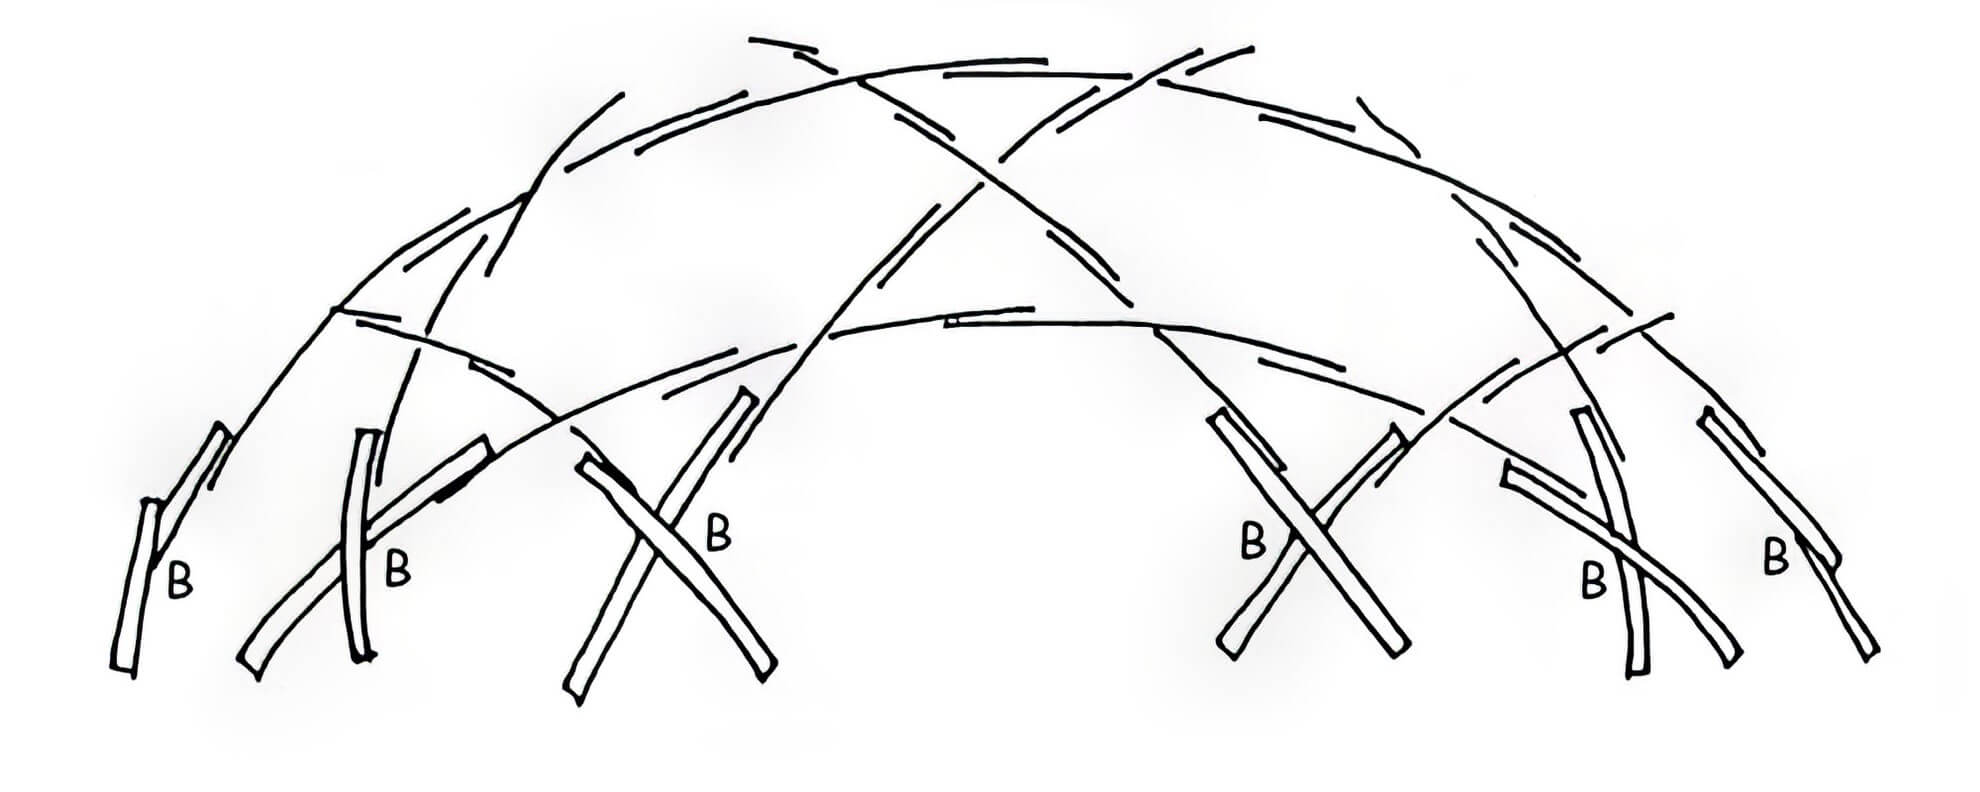
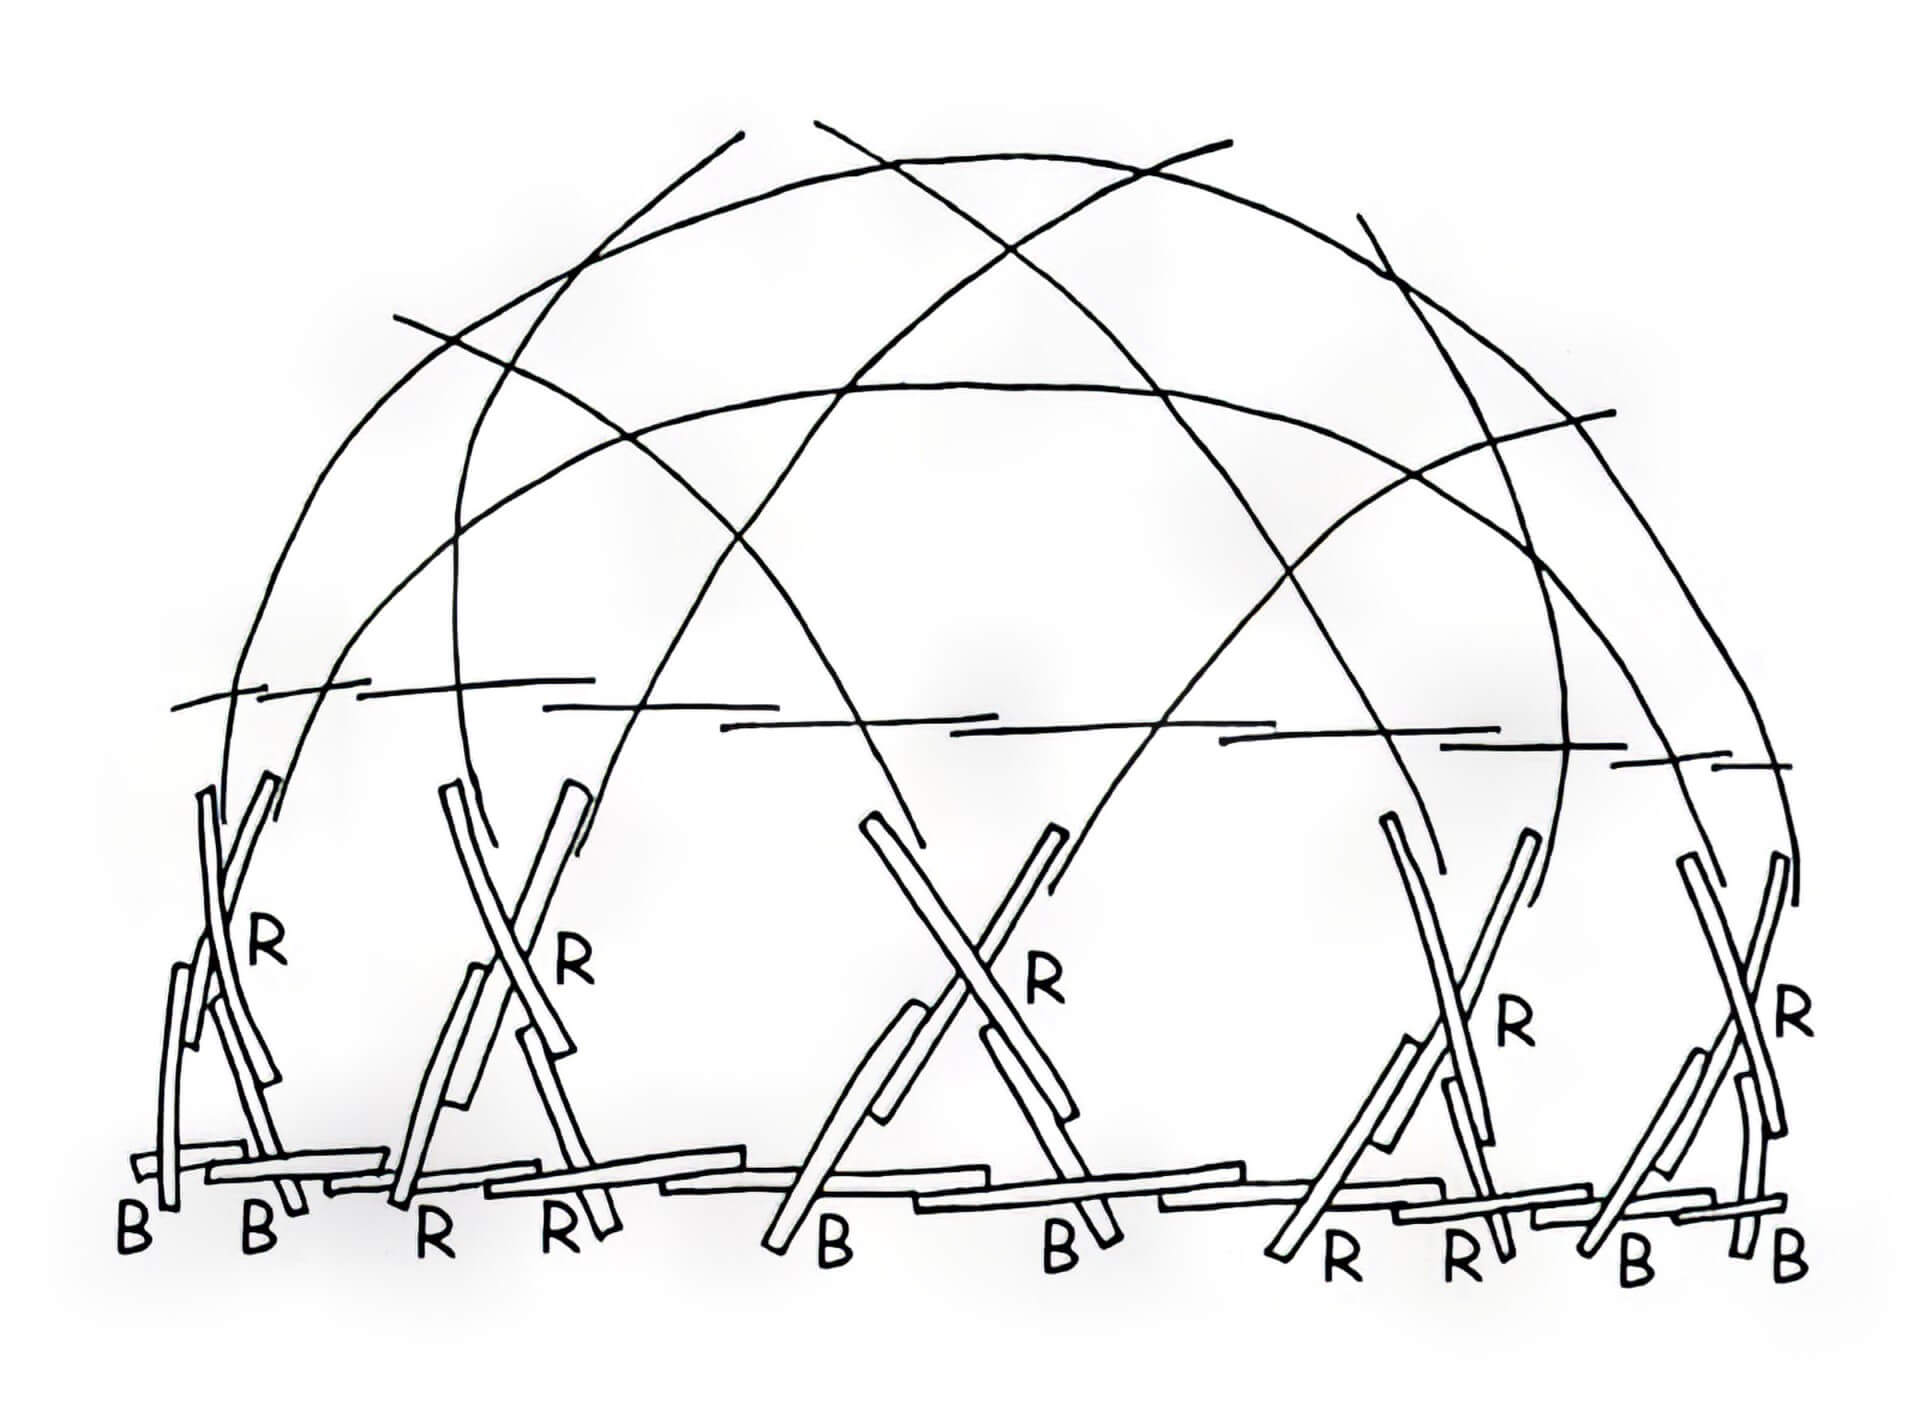
Assembly at the second stage
The second stage consists of closing five triangles around a pentagon. Use five R crosses.
Again, the end points of a measurement always have the same designations as the cross to which they are attached. At this stage the structure will tend to bend. Turn the figure so that it is concave down.
Support
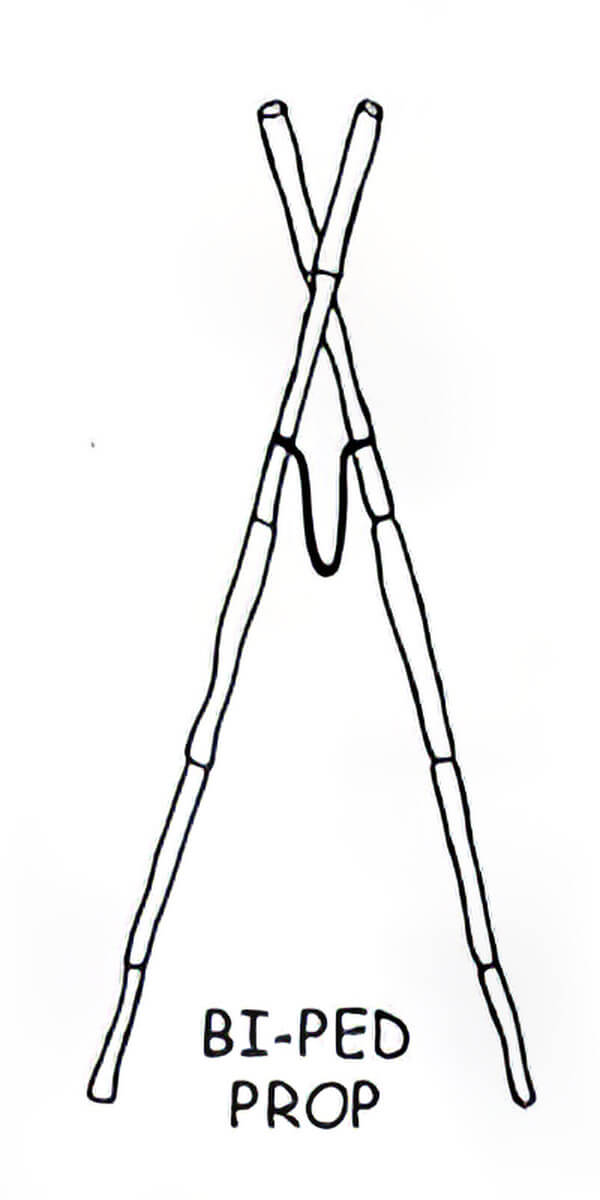
Pick up the assembled piece from the ground to make it easier to add new crosses. Use five bipedal supports. Each support consists of two bamboo sticks about 7 feet long, tied together near the top with a rope about a foot long. These supports will support the dome at equal points from its top; first at the five vertices of the top pentagon, later at the five corresponding points on the top five hexagons.
Assembly at the third stage
For the third step, use ten R crosses as shown.
Assembly at the fourth stage
The fourth stage uses 5 B crosses that close five hexagons.
Assembly at the fifth stage
The fifth stage uses ten B crosses to close ten triangles. Six of the crosses can be seen in the diagram above.
Assembly at the sixth stage
The sixth stage uses ten B crosses and ten R crosses to complete the first horizontal belt. Now we have a 3/8 dome.
Assembly at stages seven and eight
There are two steps required to complete a 5/8 dome. The seventh stage uses ten R crosses, and the eighth stage uses ten R crosses and ten B crosses. On the last twenty crosses, all posts pointing to the ground should be cut 12 inches from the center point of the cross.
Necessary materials
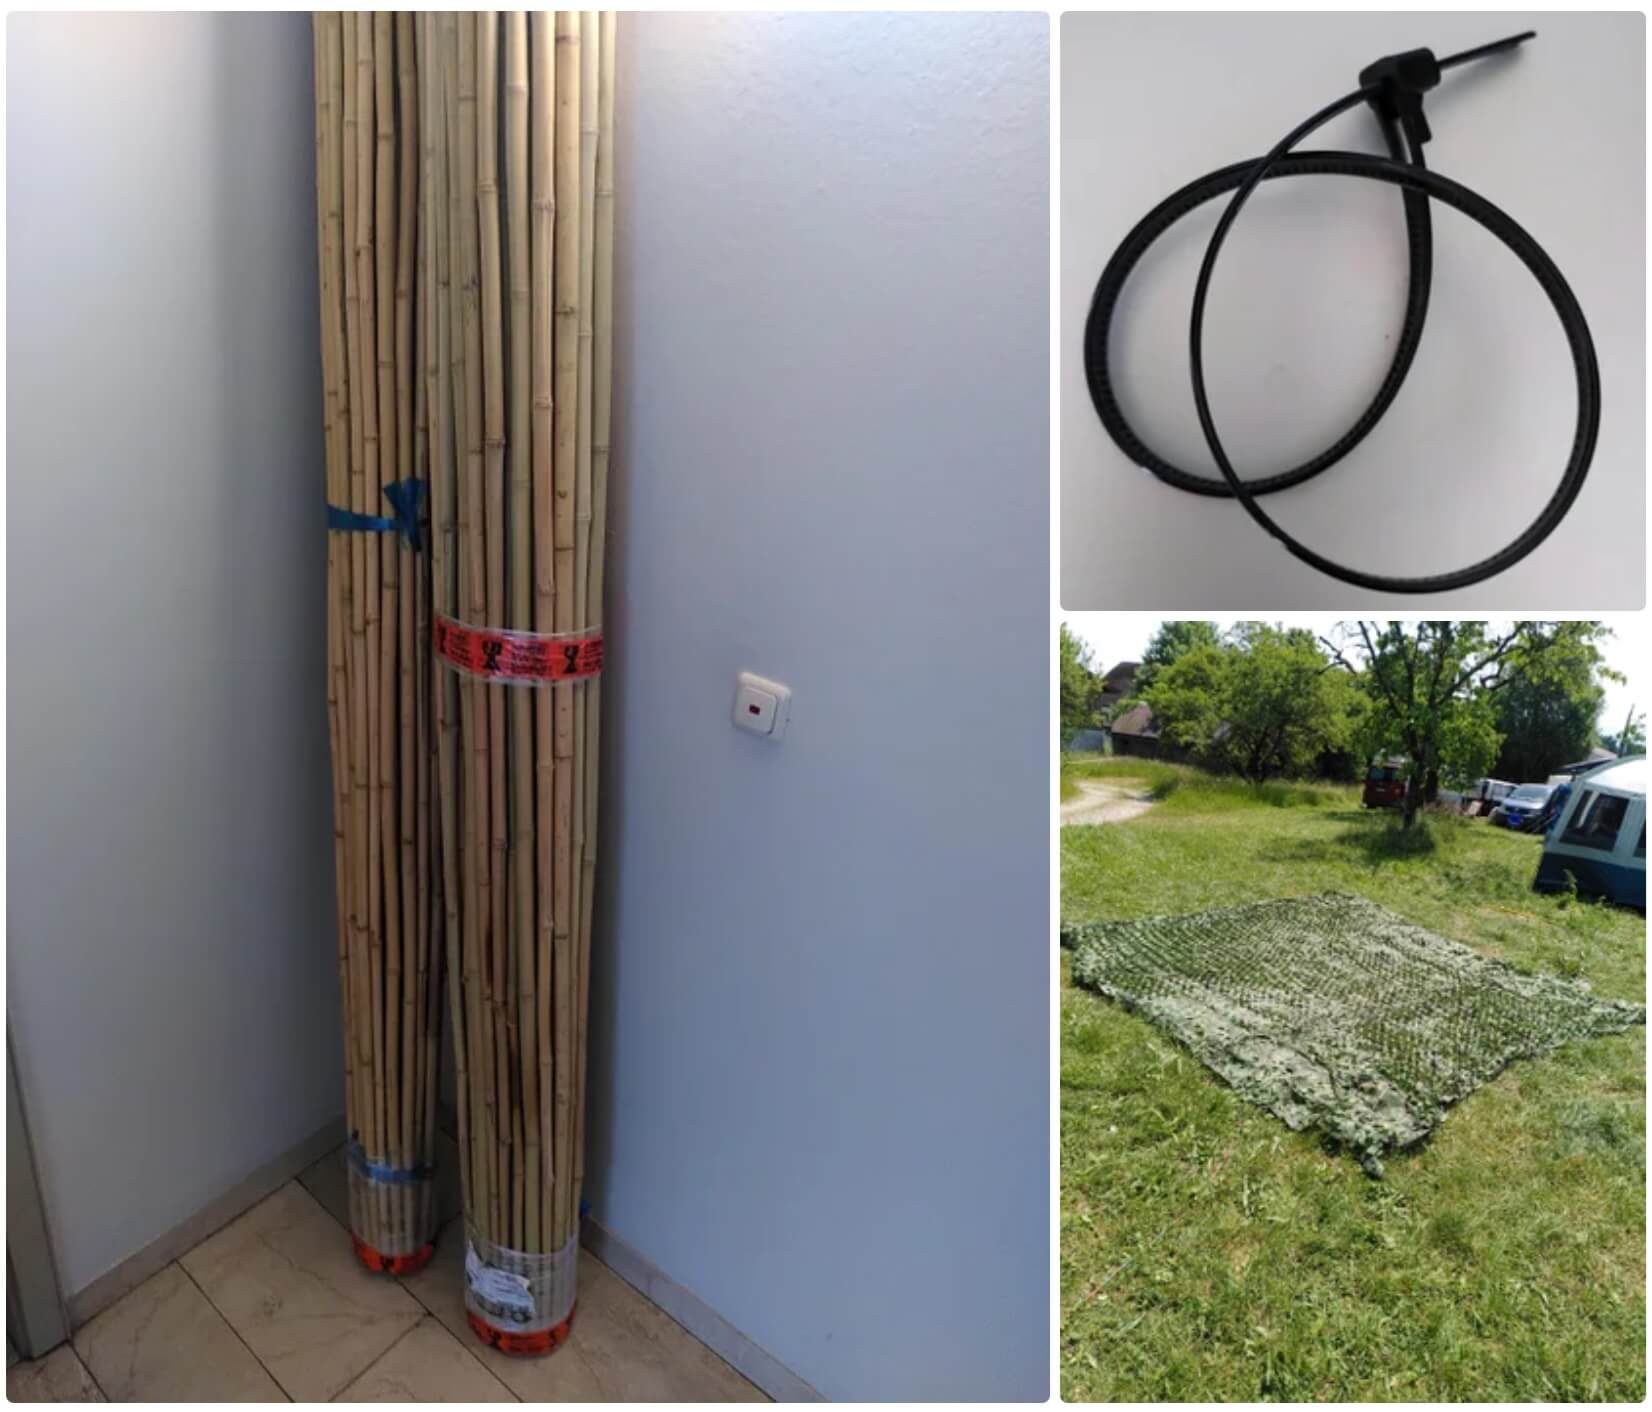
For dome:
- Bamboo (~100 pcs. 240 cm yellow Moso)
- Reusable cable ties (~300 pcs. 350×7.5 mm, designed for 50 kg of tension)
- Red and blue adhesive tape (two rolls of each) for marking bamboo
- 10m rope x2
- Tent pegs (10 pcs. steel, which can be driven in without the risk of bending them)
To cover:
- Camouflage net to cover a circle with a diameter of 10 m (in my case, 1 piece 6×6 m and 3 pieces 4×5 m)
Preparation of materials
All lengths are calculated for 240 cm racks and 15 cm ceiling.
Step 1: Slicing Bamboo
You will need two lengths of posts, named “Blue” and “Red”, their combined length (including the slight overlap at the ends) should be equal to the length of the original posts.
- Cut the bamboo to the required sizes
- You will need 70 x 115 cm (Blue), 80 x 125 cm (Red), 10 x 63 cm (Red/2) and 10 x 61 cm (Blue/2)
- It is recommended to prepare 10 spare long posts of each color. If you started with 100 posts, this will leave a few intact posts that can be used to support/raise the canopy during assembly.
Step 2: Labeling the Bamboo
- Mark the intersection points with a narrow strip of tape of the appropriate color, wrapped twice around the post, and the overlap with the color they indicate.
- The distances (in cm) are as follows:
- (15)R(46)B(38)B(15) for short (Blue) posts
- (15)B(46)R(48)R(15) for long (Red) racks
- For half racks marking:
- ~B(38)R(15) and ~R(48)R(15)
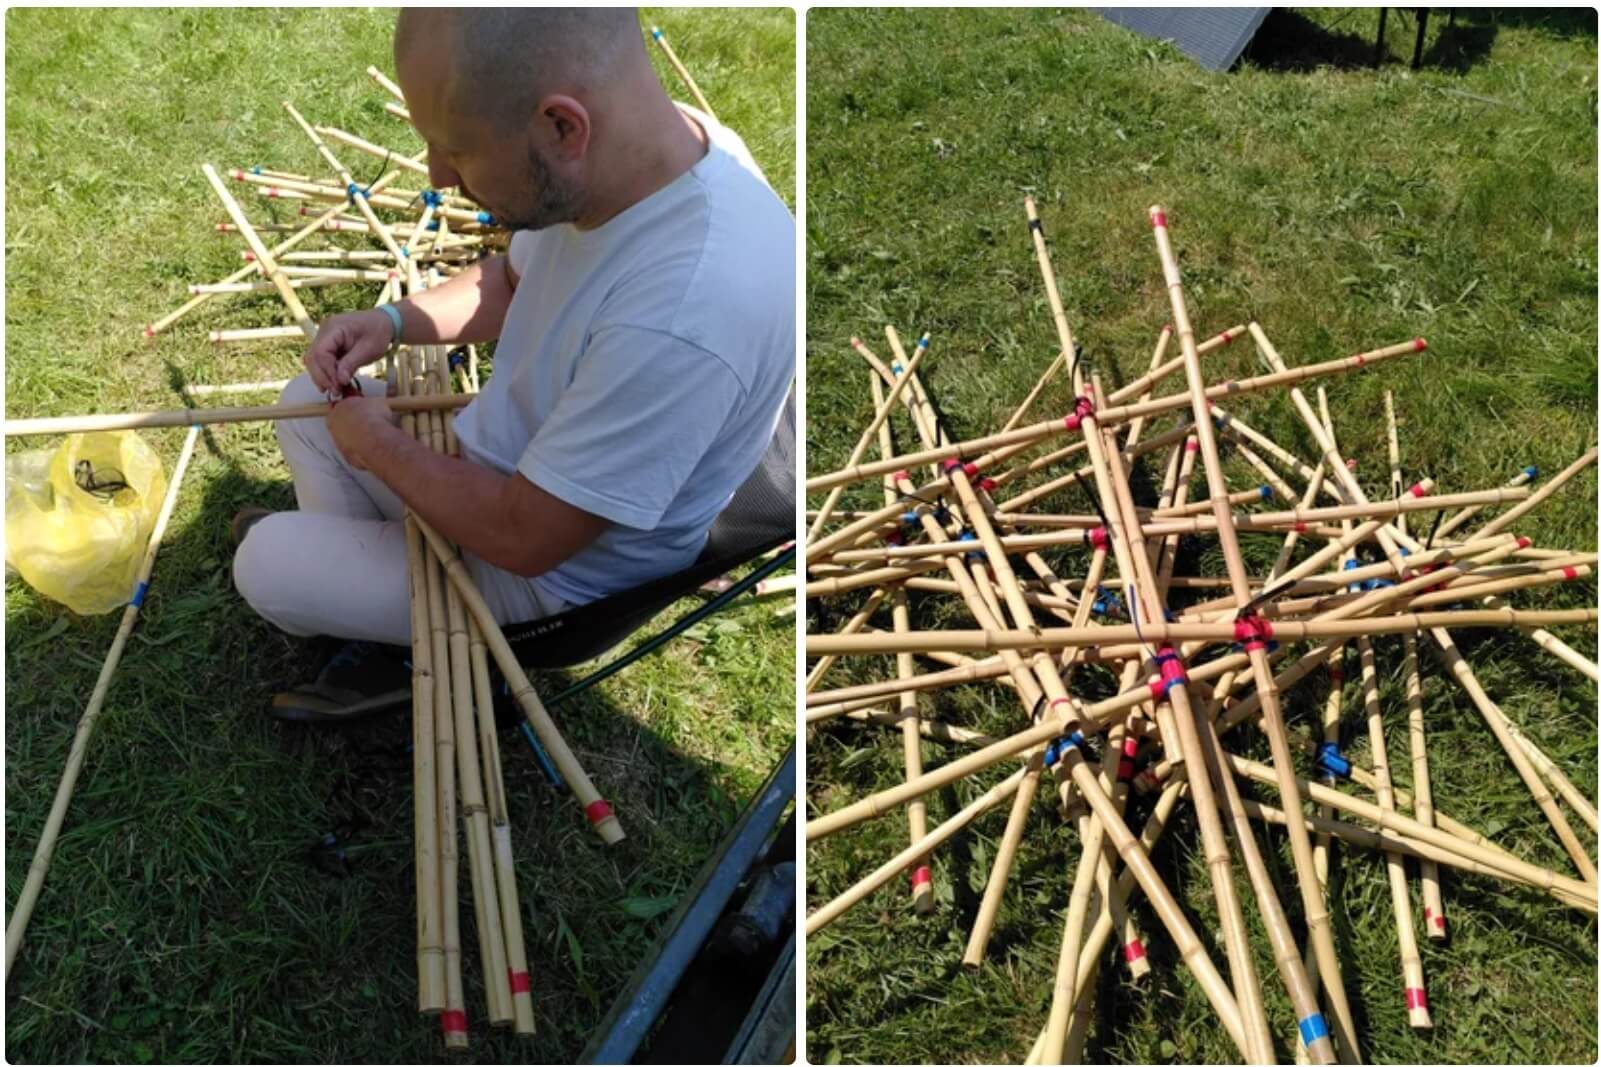
Step 3: Preparing Cable Ties
- Pre-connect the cable ties into a double loop as shown in the photo.
- You will need 280 ties (60 for intersections, 220 for 110 overlaps), it is recommended to prepare enough spares.
Step 4: Preparing the Coating
- You’ll need to cover a 10m diameter circle to drape over a dome of this size (I’ve included the pattern I used).
Dome assembly
It is most convenient to do this with a team of 5 people; in the optimal case, this can be done in a few hours. Only one person needs to understand the entire process; the assembly itself is easily divided into simple, repeatable tasks.
Assembling crosses and tying
- Connect pairs of posts of the same color at the intersection point, starting with the pairs (short + long) of the bottom ring.
- Place the long stand on your knees with the end of the same color as the middle pointing to the right.
- Hang the tie at the intersection mark (middle) with two loops hanging down on either side of the post.
- Pull a post of the same color through two hanging loops (intersecting under the knee post) with the Blue end in front and the Red end in back until the crossing points match.
- Pull the tie tight enough to prevent the posts from sliding freely.
Dome assembly
Crown:
- Tie two Blue Crosses together as shown in the diagram. Note that the measuring points on the ends have the same designations as the cross they are attached to. The studs should always alternate sides on each floor (the diagrams show this, but it’s worth noting).
Second phase:
- Close the five triangles around the pentagon using 5 Red Crosses.
Third stage:
- Use 10 Red Crosses as shown.
Fourth stage:
- Use 5 Blue Crosses to cover five hexagons. At this stage the structure will tend to bend. Turn the figure so that it is concave down.
Fifth stage:
- Use 10 Blue Crosses to cover ten triangles.
Sixth stage:
- Use 10 Blue and 10 Red Crosses to complete the first horizontal belt.
Seventh stage:
- Use 10 Red Crosses.
Eighth stage:
- Use 10 Red and 10 Blue Crosses.
Anchors:
- Pull and tighten a long loop of rope through/around the bottom horizontal ring. Secure the bottom ring to the ground.
Disassembly and transportation
Stage 1: Dividing the dome into two parts
- Disassemble the canopy, starting by separating the ties between steps 6 and 7 (just below the top ring/belt). You will need 5 people to hold the top ring while this is happening and lower the top to the ground to minimize uneven load on the structure and reduce the risk of breakage during disassembly.
Stage 2: Disassembling the lower ring
- Start at the top, loosening the ties and removing the posts as you work your way around the structure.
Stage 3: Disassembling the crown
- As above, continue removing the posts from bottom to top until completely disassembled. It’s best to do this on five sides at once to keep the load even, or use the supports from the assembly step if you still have them.
Mini dome
To build a miniature version of the dome (also great for kids), I used 30cm skewers (cut into 144/156 segments) and dental floss. The resulting dome has a diameter of about 73 cm. The process is the same as for the large dome, except for the covering (you can use a duvet cover for this size).
Conclusion
Building a bamboo canopy is not only an eco-friendly solution, but it is also an amazing way to create a unique and stable shelter that is easy to transport and assemble. Each stage of assembly brings satisfaction from the work done and admiration for the result. Try to build such a dome, and you will understand how simple and interesting it is to create something so unusual and practical!
FAQ
How long does it take to assemble the dome?
- On average, a large dome will take several hours to assemble if you have a team of five people. The mini-dome can be assembled faster.
Can other materials be used instead of bamboo?
- Yes, you can experiment with other lightweight and durable materials, but bamboo remains one of the best options due to its flexibility and durability.
How to protect the dome from rain?
- You can use a continuous cover such as parachute fabric, but this may cause the canopy to warp in high winds. I’m working on creating a waterproof coating that allows the wind to pass through.
How to transport the dome?
- The dome can be easily disassembled into separate parts, which can be packed into two large bags. This makes it convenient for transportation.
Where can such domes be used?
- Domes are great for camping, festivals, garden buildings and even temporary emergency shelters.
Headcase, Munich, Germany
Recommend to read
 Hand scythe
In issue 6 for 2010, Modelist-Konstruktor told about repair and adjustment of a trimmer - a motor or electric scythe. The article is useful . What can I say, this tool is now widely used... SUN PROTECTION
If the solar rays fall on the thermometer, mounted outside window frame, it heats up and shows... its temperature, not the ambient air. To avoid this, protect the thermometer shade...
