 A large variety of schemes and designs of radio controlled raketoplana can be divided into three groups. The first is a classic, airborne with the Elevator control and ailerons. The second scheme, a “frame”. The third aircraft with a V-shaped stabilizer. Of the above schemes interesting is the design of the model rocket glider class Ѕ8Т/R Englishman Michael Francesa, made on a frame with an inverted V-shaped stabilizer, this is due to the lower engine. This design of the tail helps to protect it from fire plume when working MRD. Will tell about this rocket plane more.
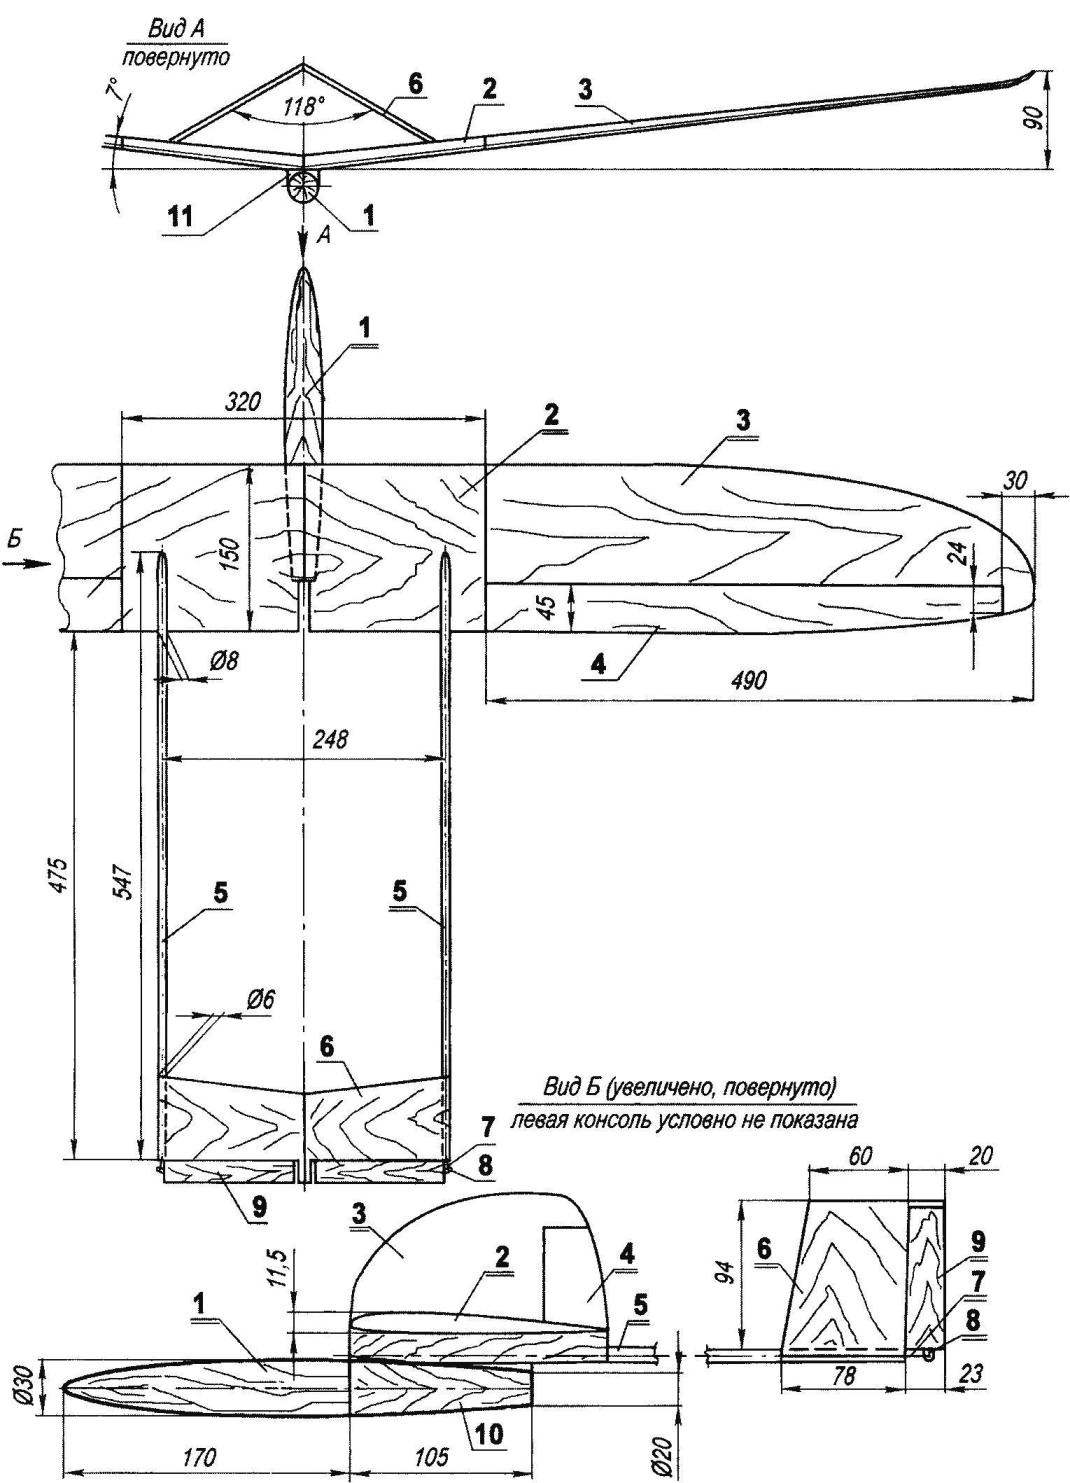
The basis of design — the center section of the wing attached the fuselage bottom. Although the name of this element as a stretch. More suitable—nose. It consists of a container of MRD on the back, and “shells”-of the fairing. For fastening the container to the center section bottom is glued on the pylon — shaped 6-mm plaque molded from fiberglass. The container — ogive shape with a greatest diameter of 30 mm and a length of 105 mm, molded from the carbon fabric. Similarly made and “shells”-fairing. It is removable, to facilitate access to the receiver and actuators, control machines.
The wing is nearly elliptical shape in plan, consists of rectangular wing with a span of 320 mm, a width of 150 mm and two removable consoles scale 490 mm each. The trailing edge of the wing ailerons slightly (21 mm) tapered from the middle. The front edge of the consoles parabolic shape. Ending consoles smoothly sharpened, the length of 30 mm from the edge bent up. The frame of the wing — stacked, consists of two side members. His plating — triple (“sandwich”) of balsa and fiberglass.
Wing profile — S-shape — MACK-DRELA, maximum thickness 11.5 mm (on the center). Ailerons — almost across the span of the consoles are mounted to the rear spar. Console attached to the center two pins, and the joints are Packed with tape.
The tail Assembly is mounted on two tapered tubular beams with a length of 547 mm, formed of four layers of carbon fabric with a thickness of 0.03 mm with the largest diameter of 8 mm. beams are Mounted on top of the center section, the distance between them (axes) — 248 mm. This work is done in the stocks. In it, glue the tail.
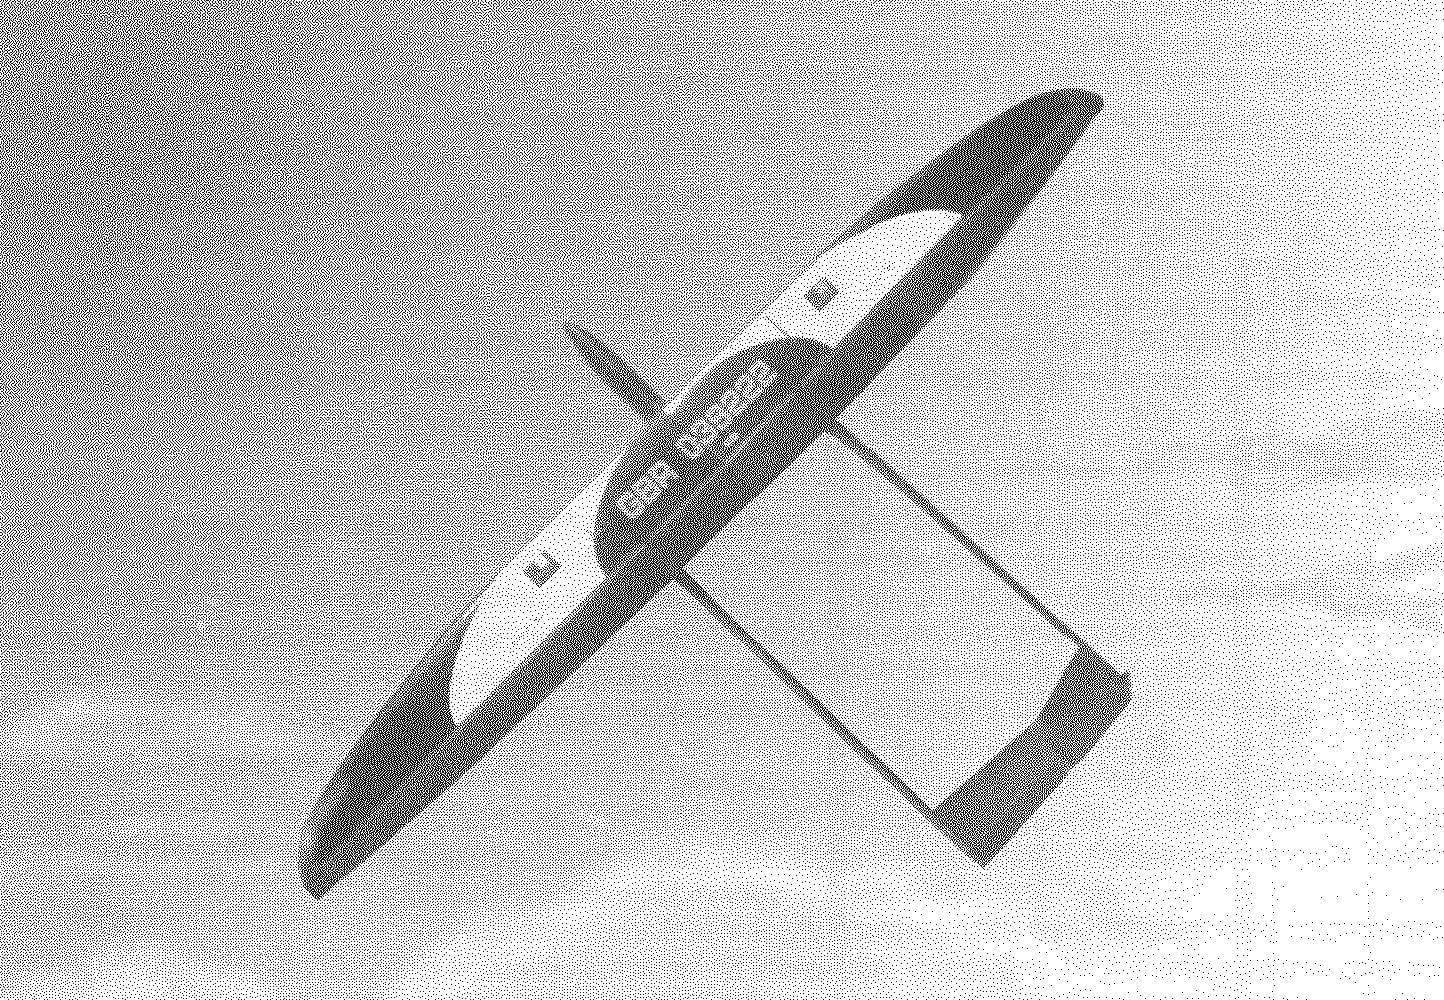
Model rocket modeling class Ѕ8Е/R Michael Frances (England) — winner of the world championship 2006:
1 —”shells”-fairing; 2 — wing; 3 — console wing; 4 — Aileron; 5 — tail beam; 6 — stabilizer; 7 — thrust; 8 — horn; 9 — Elevator; 10 — the case of MRD; 11 — pole
Empennage a V-shaped inverted stabilizer with elevators, the profile is symmetrical, the apex angle is 118 degrees. Stabilizer glued two balsa of platinic thickness of 2 mm. the Surface of the stabilizer is reinforced with platinu. Hinge control surfaces (elevons) — plastic hinges, control horns — made of fiberglass. Pull on the handlebars are inside the beams. On the rocket five servos weighing 5 grams.
Model (or wing) painted in bright colors: red, white, and dark blue alkyd enamels.
The launch mass of the rocket is 250 g.
PAINTING THE MODELS
After assembling the model the surface should be prepared for painting. If the surface has potholes, fill them nitro or epoxy putty. The latter makes sense to be on their own, mixed with any powder filler, for example small wood chips, alabaster or starch. After drying, the puttied places should be sanded flush with the model surface. The model is then carefully primed is best for this purpose suitable enamel is to apply it with a soft brush with a width of 5-10 mm or spray. However, in our time, emalit fall into the hands of the Modeler infrequently, but it is quite possible to replace a parquet varnish.
After drying, the lb model is polished with waterproof sandpaper using soapy water or kerosene, after which she covered with another layer of soil and sand once more with fine sandpaper. The result of this work on the surface of the model should not be areas that are not protected by a layer of soil.
The model is then by spray or airbrush cover so-called processing layer of white nitroenamels (NC-11, NC-25) or enamel. Blown in should be a thin uniform layer, providing a clear manifestation of the previously not observed surface defects. Defective parts are puttied and re-proskurivska with soapy water or kerosene, after which the model is covered with another dark layer of white necrocracy. After drying, the model is carefully polished fine waterproof sandpaper.
Before painting you should degrease the surface of the model carefully to wipe her soaked with gasoline, soft (lint-free) cloth.
Before painting the model it is recommended to think in advance and to represent its schema, and also to prepare the tape for isolation, separation boundaries and the application of markings.
From a safety point of “painting” work should be done outdoors or in a fume hood. Paints for finishing the model makes sense to prepare in advance, checking and mixing the appropriate colors.
With the multi color paint you should follow the rule — from light to dark. It is unacceptable to apply a light paint after applying a darker — the latter invariably emerge through the lighter layer.
After painting the model is dried for at least 24 hours. Then the lower surface is sealed with tape in accordance with the scheme and similarly blown paint the main (top) background. At the junction of colors the paint layer should be very thin in order to avoid sharp steps.
To blur the transition a blown lead with the so-called undermining of duct tape — it is in places of transition colors slightly (length 2-4 mm) undermine. It is a kind of gradual transition of the primary colors. Similarly, you can apply camouflage paint.
V. ROZHKOV
Recommend to read
 REFRESH… FLASHLIGHT
If the flashlight is to strengthen the tin bracket with a motor from a child's toy, the axis of which is planted miniature celluloid propeller, and connect the motor to the battery of a... BATH WITH A SAMOVAR
Bath anciently considered one of the most effective "preventative care" for the human body. Since time immemorial are popular and are being built in some places even today the simplest...
