RUN — THROW

RUN — THROWThrowing gliders enjoy enduring popularity among modelers — both beginners and experienced. The fact that these miniature models have performance more solid aircraft — they are capable of when you start hand to gain a height of over 20 m, hold steady to the “terms” and sometimes too far from the start.

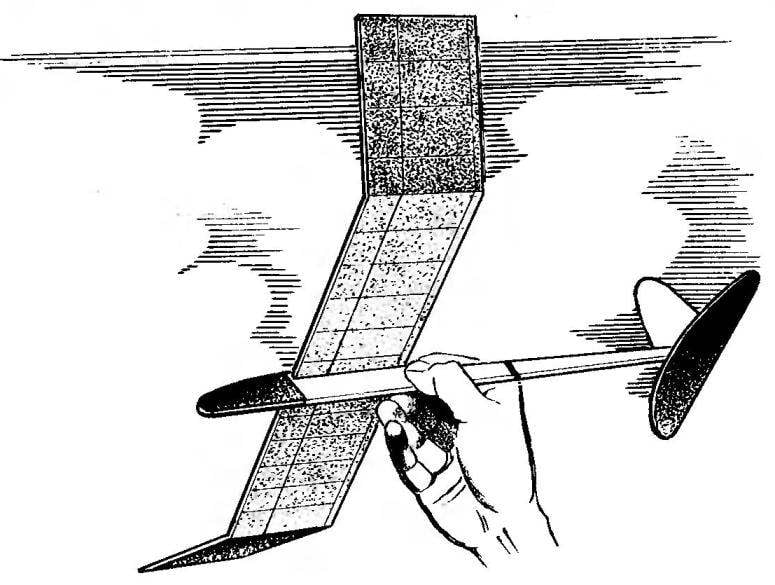
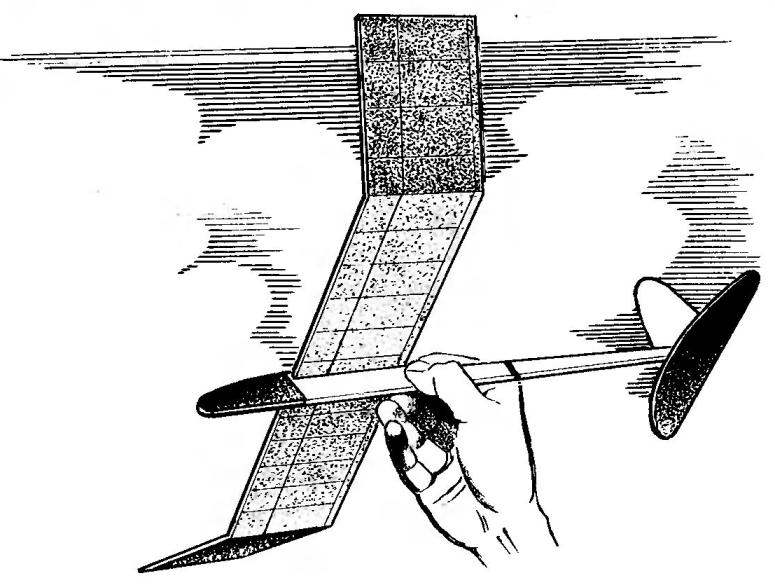
Classic throwing gliders have celebarty design, however, is currently more common models with a stacked wing. It is often the balsa is replaced with composite materials on the basis of brand PS foam, veneer, fiberglass and epoxy resin.

 
Today we want to acquaint readers with the description of the design is very “volatile” throwing glider, prepared using materials from the Czech magazine “Modelarz and model”. I want to warn readers that this model can be built on any technology and of any material — the only important respect anovich data alignment and geometry of the airframe.
The fuselage of the model is cut from solid balsa wood with a thickness of 5 mm. from the Bottom to the fuselage attached strengthening — pine trim section 5×2 mm. In the head part of the fuselage is cut a hole for a centering weight.
 
The WING is stacked, consisting of a center section and two consoles. And the center section and the console going from normal (2 mm thick) and reinforced (thickness 3 mm) balsa ribs, upper and lower spars (pine slats 5×3 mm) and pine (10×3 mm rake) and front (rack 5×5 mm) of edges. The Central part of the wing is sheathed with balsa 1.5 mm thick. the lower surface of the right wing near the plane of symmetry of the airframe is reinforced with triangular plywood plate with thickness of 1 mm under the index finger of the athlete.
Geometric scheme of throwing the glider
 
The geometric scheme of throwing the glider.
 
Design of throwing the glider
 
Design throwing a glider:
 
1 — the front edge of the wing; 2 — shelf lower spar; 3,12 — rib reinforced console; 4 — shelf side member top; 5 — edge console rear; 6 — rib console; 7 — edge of center back; 8 — keel; 9 — strengthening of the fuselage; 10 — edge of center back; 11 — strengthening of the console and the center section; 13 — rib reinforced center section; 14 — fuselage; 15 — a lining; 16 — load centering; 17 — edge console front; 18 — rib of the center section; 19 — pad (only on the right wing); 20 — a lining of the Central part of the wing; 21 control; 22 — regiment of the spar console, bottom; 23 — shelf of the spar console, top; 24 — wing.

 
Wing design
 
Wing design:
 
A 1.5 — gain (balsa s1,5); 2, 6, 13 — reinforced ribs (balsa es); 3, 7 — rib (balsa s2); 4 — flange front (pine, battens 5×5); 8 — a lining (balsa s1,5); 9 —longitudinal, console, lower (pine, rack 5×3); 10 — spar upper console (pine, rack 5×3); —pad (plywood s1); 12 — the edge of the center section, the rear (pine, rail 10×3); 14 — edge console rear (pine, rail 10×3); 15 — sheathing wing; 16 — shelf center section top (pine, rack 5×3); 17 — center of the lower shelf (pine, rack 5×3).
 

Obshiaga wing is made of thin Mylar film using glue BF-2 and electric iron. In a pinch you can paste over the wing of tracing paper or tissue paper with the surface finish of Amalita and nitroenamels.
 
The wing fit to the fuselage with epoxy glue.
 
STABILIZER and fin — all-balsa, of the plates in the thickness of 1-1,5 mm. Stabilizer priblijaetsa epoxy to the bottom of the fuselage section, and the keel in the vertical slot.
 
Alignment models is carried out using pieces of tin or lead, is laid in a hole in the head part of the airframe. When the center of gravity coincides with the point on the wing, corresponding to 34% of chord, pieces of tin or lead alloys and the weight is fixed in the hole with a pair of pads made of birch veneer or plywood with a thickness of 1 mm.
The model is adjusted for soaring through the bend with a diameter of 20 m. With this adjustment of the model parameters proizvoditsya by folding the rear part of the stabilizer and fin. Keep in mind, if after a throw the model goes into a dive, it means that the center of gravity moved forward, in the pitch model, is clearly behind the aerodynamic focus of the wing of the glider. When you debug the model the main thing — to achieve a smooth transition of its trajectory from the ascent to the planning or soaring.
 
So the flight time is maximized, it is necessary to learn the correct execution of the throw. As a rule, the throw is carried out (with the advanced short takeoff) simultaneous sharp movements of arms, hands and, most importantly, the index finger of the right hand.

Recommend to read

  • “HOPE” – A RECUMBENT WITH COMFORT“HOPE” – A RECUMBENT WITH COMFORT
    "M-K" can rightfully be considered one of the founders of velomobiles in the country: in its pages appeared in 1976, the description of the first, still largely imperfect muskurahat...
  • THE “GUARD” DOORSTHE “GUARD” DOORS
    The scheme is simple electronic guard device published the magazine "Funkamateur" (GDR). Across the doors of the protected object stretched thin wire. Until he is whole, the tension on...