 This original door for interiors is not difficult to manufacture, and apparently makes a very good impression. It consists of stick framing, assembled in the classical way — in spike. Such an Assembly can present some challenges for beginners, but it is preferred to provide strength and durability. In extreme cases, the piping can be connected to plug-in round thorns: but in both cases, using wood glue or PVA.
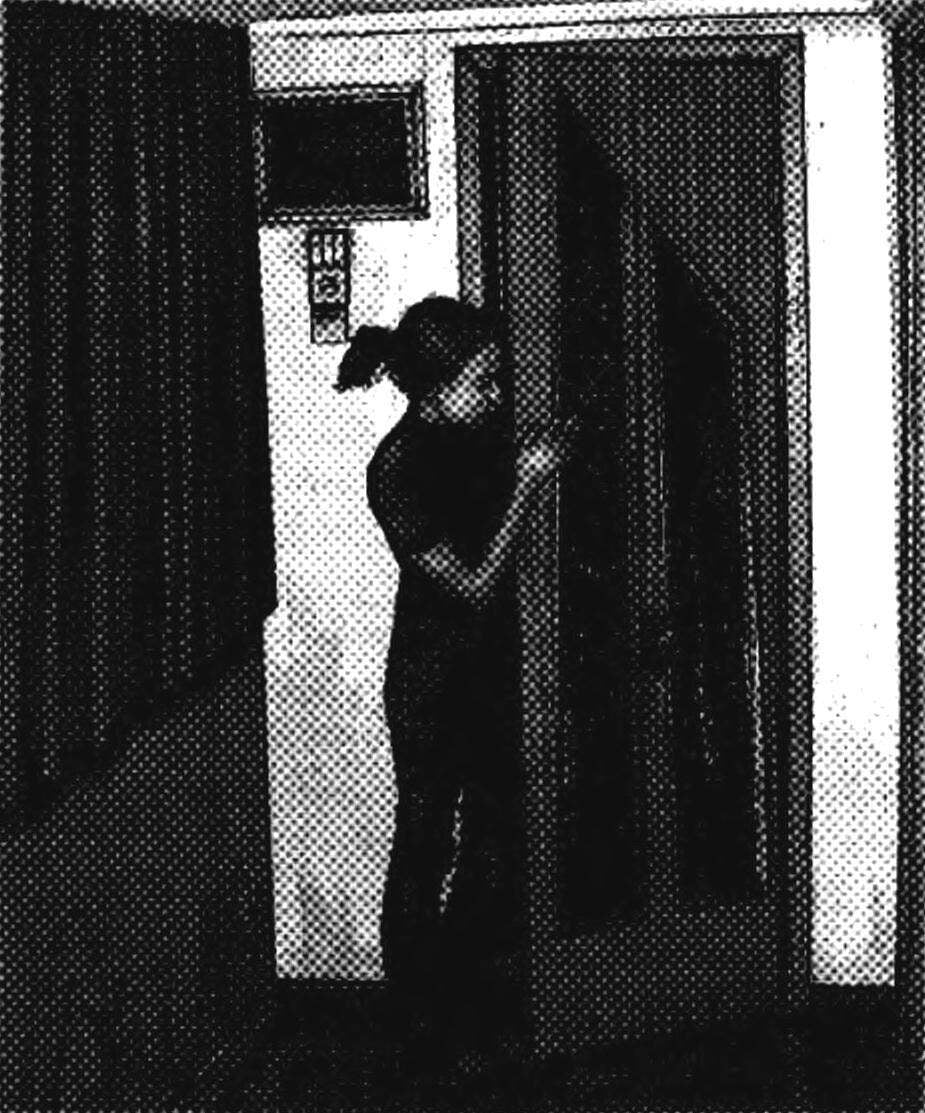
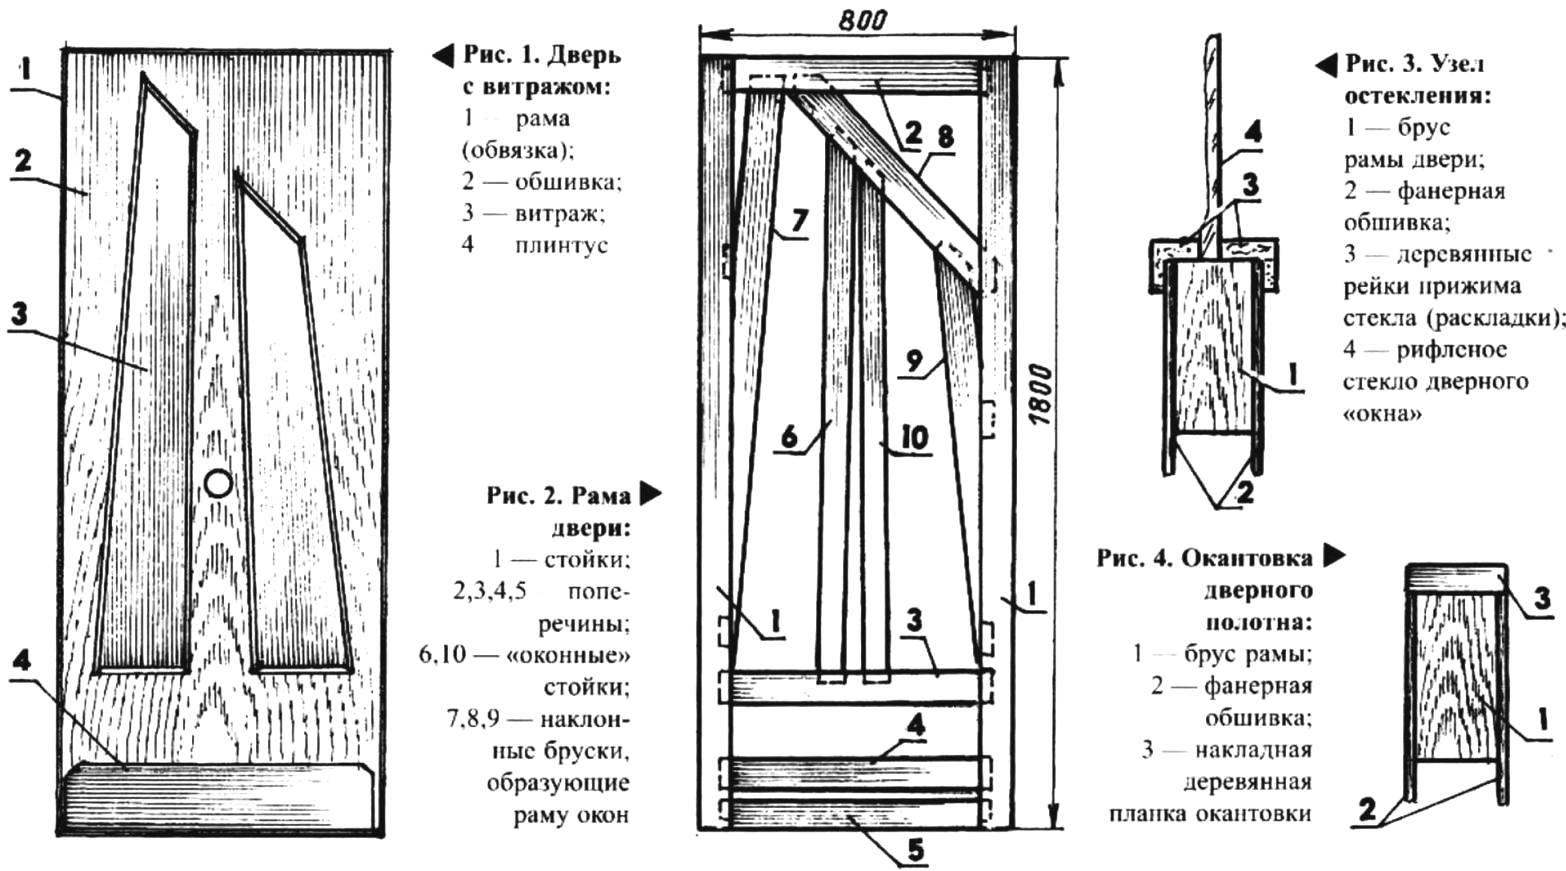
The resulting door frame with both sides sheathed with sheets of plywood or hardboard. The middle part of the door has original decorative Windows which are filled with patterned glass.
Frame
It consists of two vertical posts 1, the length of which determines the overall height of the door, and four horizontal crossbars, respectively, 2, 3, 4 and 5. These elements are made of sticks of well dried wood with a cross-section of 70×30 mm. For racks with a chisel should choose the slots with a width of 10 mm, located at mid-thickness of the bar (so on both sides of the groove remains at 10 mm thickness of wood).
Grooves, which are designed for notching the cross bars 2 and 5, less than the width of the crossbars; all other sockets correspond exactly to the width of the crossbars.
Extreme cross-members 2 and 5 have a width of 100 mm and the spikes at their ends by 20 mm, whereby the shoulder is formed, which provides a rigid support bars.
In the upper crossmember 2, in the left part, bottom out two notches for the inclined bars 7 and 8. The layout of these slots should correspond to the direction of the above bars. Cross member 4 serves as a reinforcement of the lower cross member 5, with the difference that the spikes on it cover the whole width. Between these crossbars there is a gap of 10 mm. cross Both strengthen the plinth (shown in General form). The cross-beams 3 and 4 are identical, but the first is provided with two grooves on the mid-length for notching the uprights 6 and 10, one of which is slightly tilted (this should be taken into account in the selection of slots).
The coupler 8 is inclined at an angle of 45° relative to the rack 1. The markup for this block is performed on collected roughly harness. The spikes must conform to the nests, which are selected for them in bars 1 and 2 In the bottom edge of the sloping screed is provided, the grooves for “the window” stands 6, 9 and 10. Note that the cross section of these bars 9 equally — 70×30 mm; their upper ends trimmed at an angle of about 45°.
Inclined bars Windows 7 and 9 are manufactured with a chamfer on one side for better connections to the uprights 1. Each of them cut one spike on the end and two at the sides. When assembling, first put the spike on the end of the bar, and then inserted into the grooves of the side spikes.
Finally the door is going to the glue (carpenter’s or PVA); the thorns should enter into the grooves with little effort. At the time of solidification of the glue frame doors must be tied with rope or wire, with spacers in places of possible damage to wooden parts. You must, of course, previously to ensure that the frame is not warped and is a single plane.
Plating frame
Once the frame is ready, proceed to the sheathing with sheets of plywood or hardboard, forming a front and a rear plane door. These panels are simply glued to the harness without the use of nails that were visible. Nevertheless, due to the fact that the leaves are only glued, it is necessary to observe all precautions that the connection was reliable.
The sheet is placed on the floor or other absolutely flat surface, then it overlaps the door frame and mark the places which must be applied the glue. A second sheet is prepared in the same way. Next marked place on the plywood and frame are covered by a layer of glue, and the final Assembly: the leaves are pressed tightly (under load or clamps).
The drying time of the adhesive to ensure a tight fit of the contact surfaces, as the press can be used, for example, sand bags. In order not to bend the top sheet of plywood, it is necessary to impose on him the hardboard or other sheet of plywood. After the glue is completely seize, start to trim the excess plywood, protruding beyond the framing of the door (the blend sheets have, in any case, exceed the dimensions of the frame.
Cut off is fine teeth saw, to prevent chipping and cracking; then made a sweep of the faces with emery paper or decorative edging them with thin flat slats.
Baseboard (invoice bottom panel) is made of boards with a thickness of 20 mm, a width of 200 mm. Its length is slightly less than the width of the door. The plinth is attached to the cross members 4 and 5, with nails or screws with semicircular heads. If you have the opportunity to do on the top face zhelobkova profile the plinth will look nicer; you can simply have a chamfer on three sides of the Board.
Insert glass
Mount patterned or colored glass made using wooden slats-layouts, l-shaped or triangular cross-section (such Reiki or baguette available for sale).
Glass clamp layouts on both sides. It is necessary to achieve a tight pinching a fairly heavy glass to eliminate rattling.
First exterior layout. They are glued and nailed. After the glue has dried you can insert the glass. You need to lay the putty: when strong pressure it condenses and fills the gaps between the slats and the glass. You can press the pickup directly to the glass, but better still to put them under the putty.
Additional decorative strips 40×10 mm section overlap and are nailed on the edges of the door trim forming framing plywood sheets. Hinges, locks and handles are installed in the usual way; then the door surface is carefully polished and coated with lacquer or enamel.
Recommend to read
 “Sokol-2” — conqueror of Dombay
The best delta glider of amateur construction that took part in the «Dombai Peaks» competition in 1978 was recognized as the «Sokol-2». Its creator was V. D. Mikhailov, a Master of Sport... AND IN THE ATTIC AND IN THE GARDEN
In country conditions, especially if it novostroyka and life has not adjusted, the proposed construction will be as necessary as it is universal. Workable quickly and easily, she...
