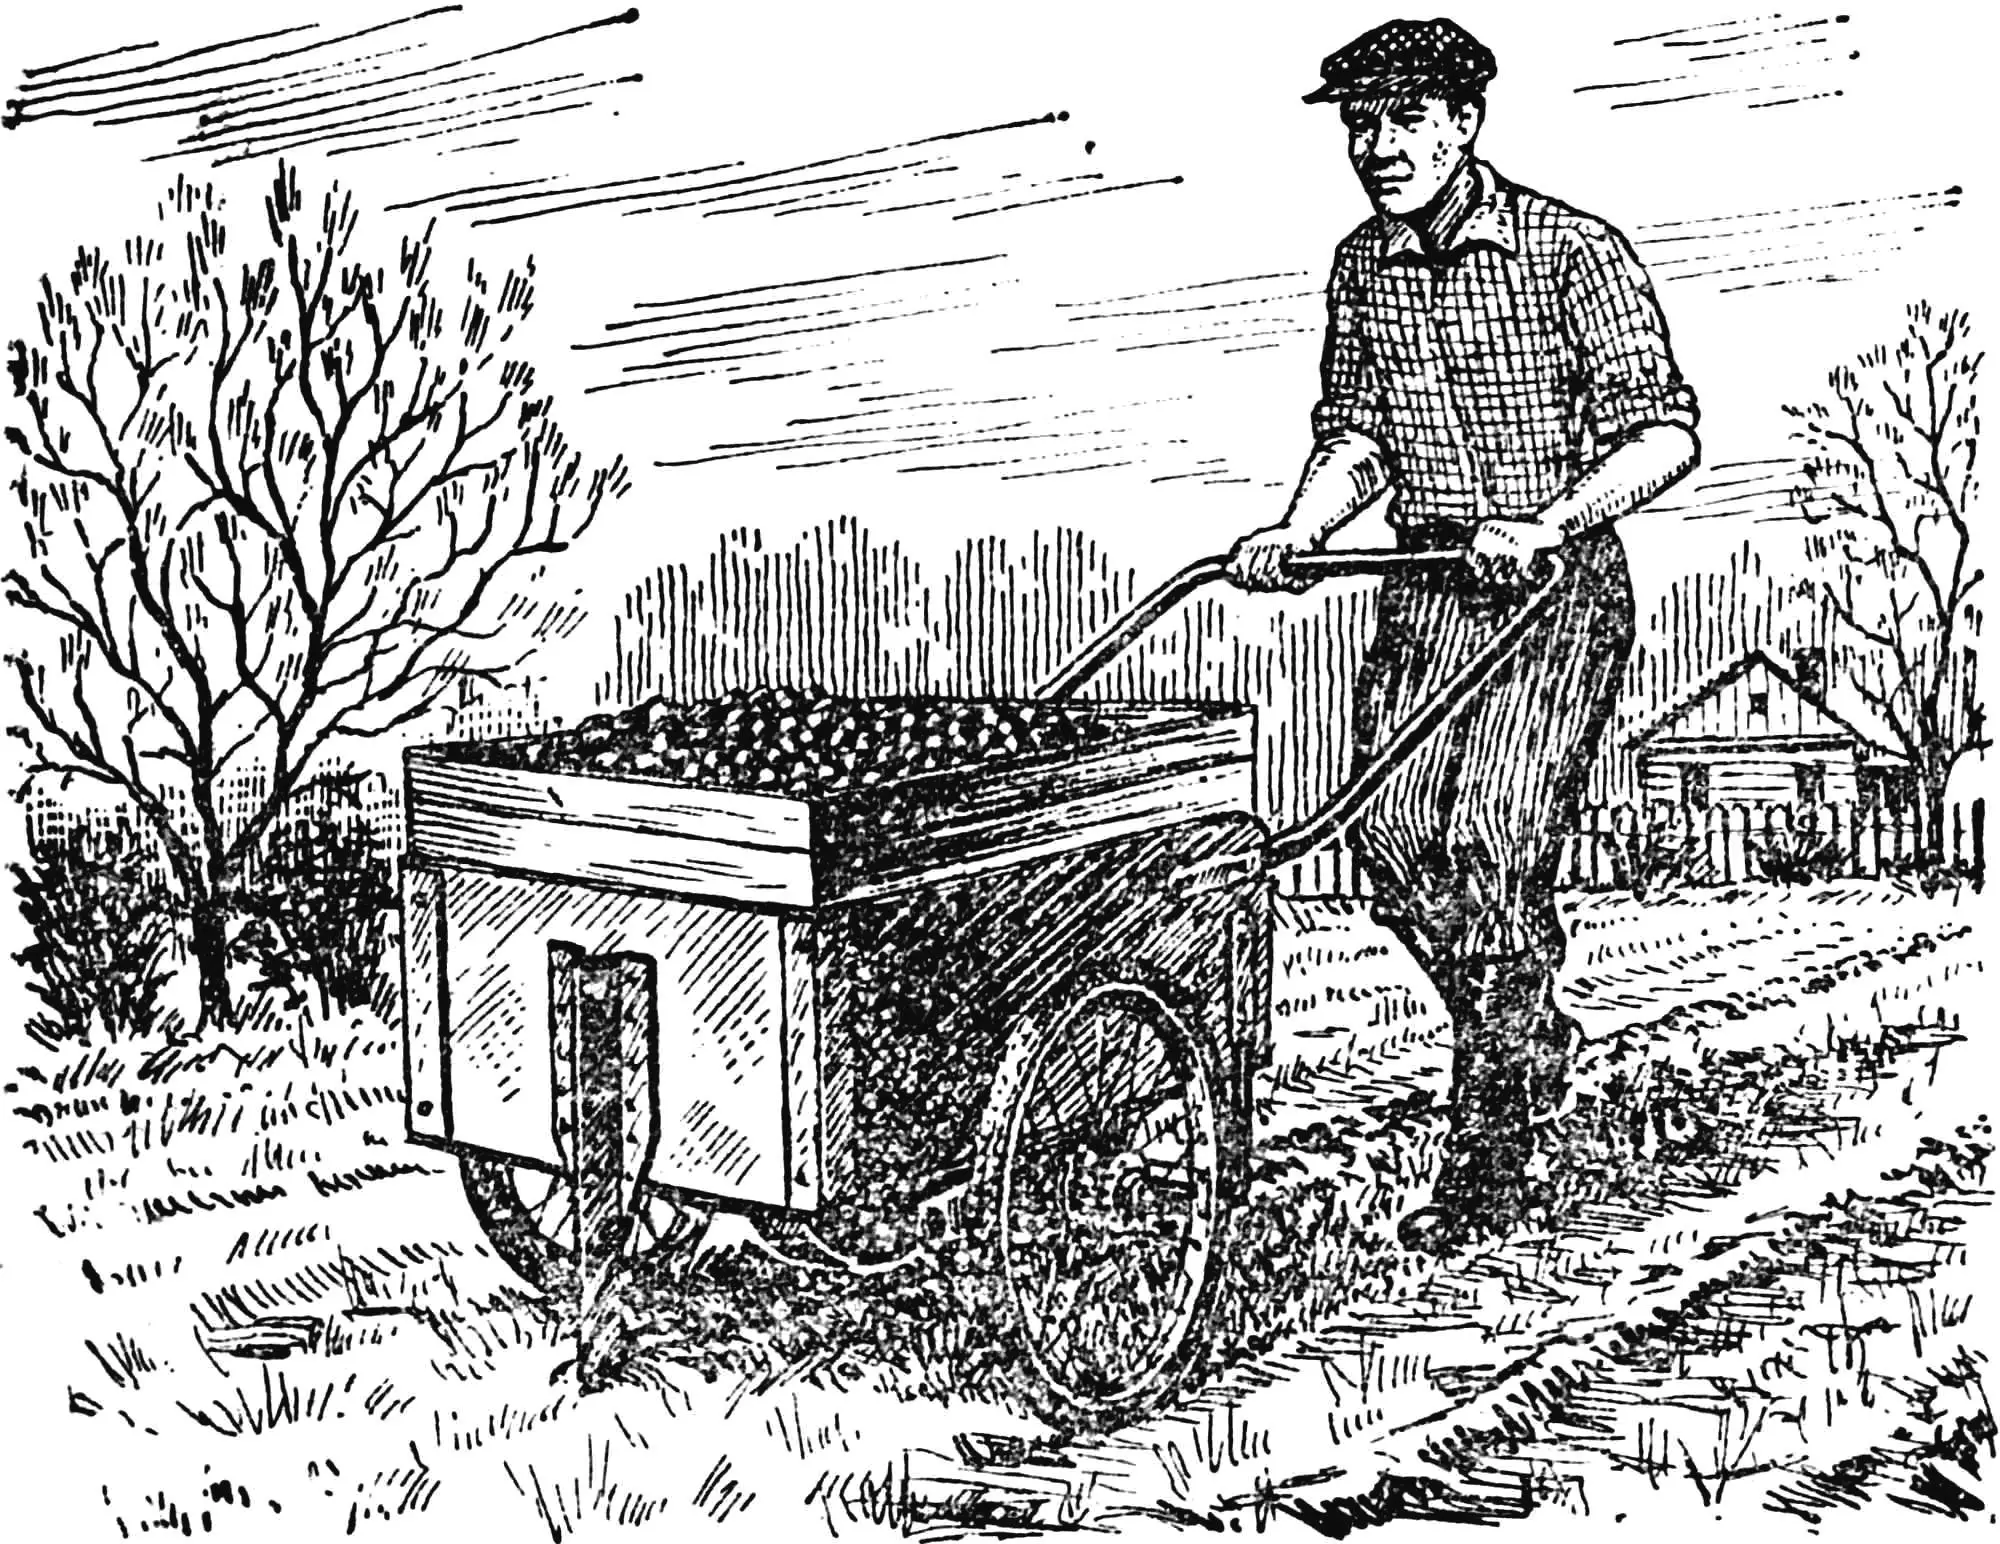
A garden cart with a wide, spacious box and grids for extending the sides is convenient for a wide variety of garden and homestead work. However, everyone who works with soil primarily digs, plants, and sows.
It turns out that the cart can easily be adapted to perform these functions: you can assemble a combine harvester based on it that combines a whole range of various operations. Of course, you’ll get a motorless unit designed only for your own strength.
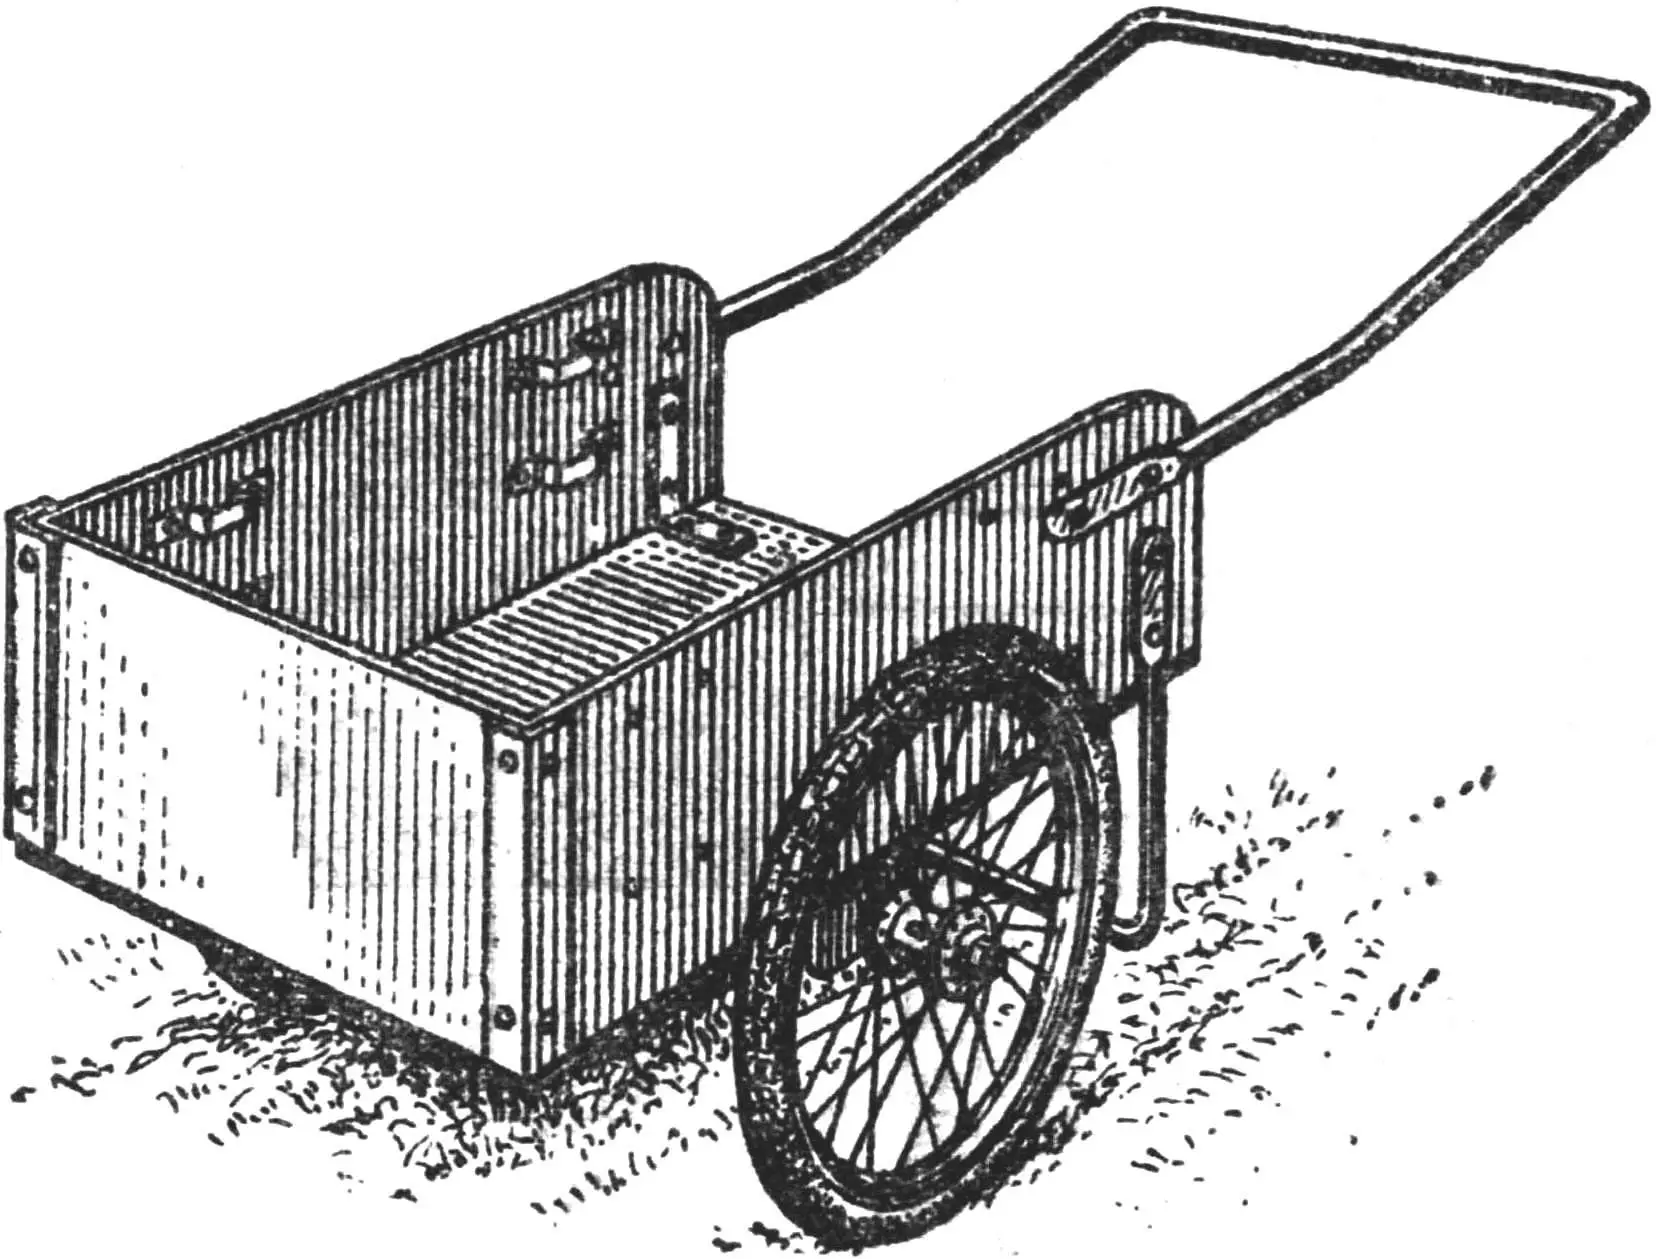
THE GARDEN CART AS IT IS
The only part you won’t need to make when building a garden cart is the wheels: it’s better to use bicycle or motorcycle wheels; depending on the type of wheels, the hub and axle of the appropriate diameter are selected. The rest of the parts will have to be made yourself. However, the only thing that might cause you difficulty is cutting more threads than usual on the ends of the axle.
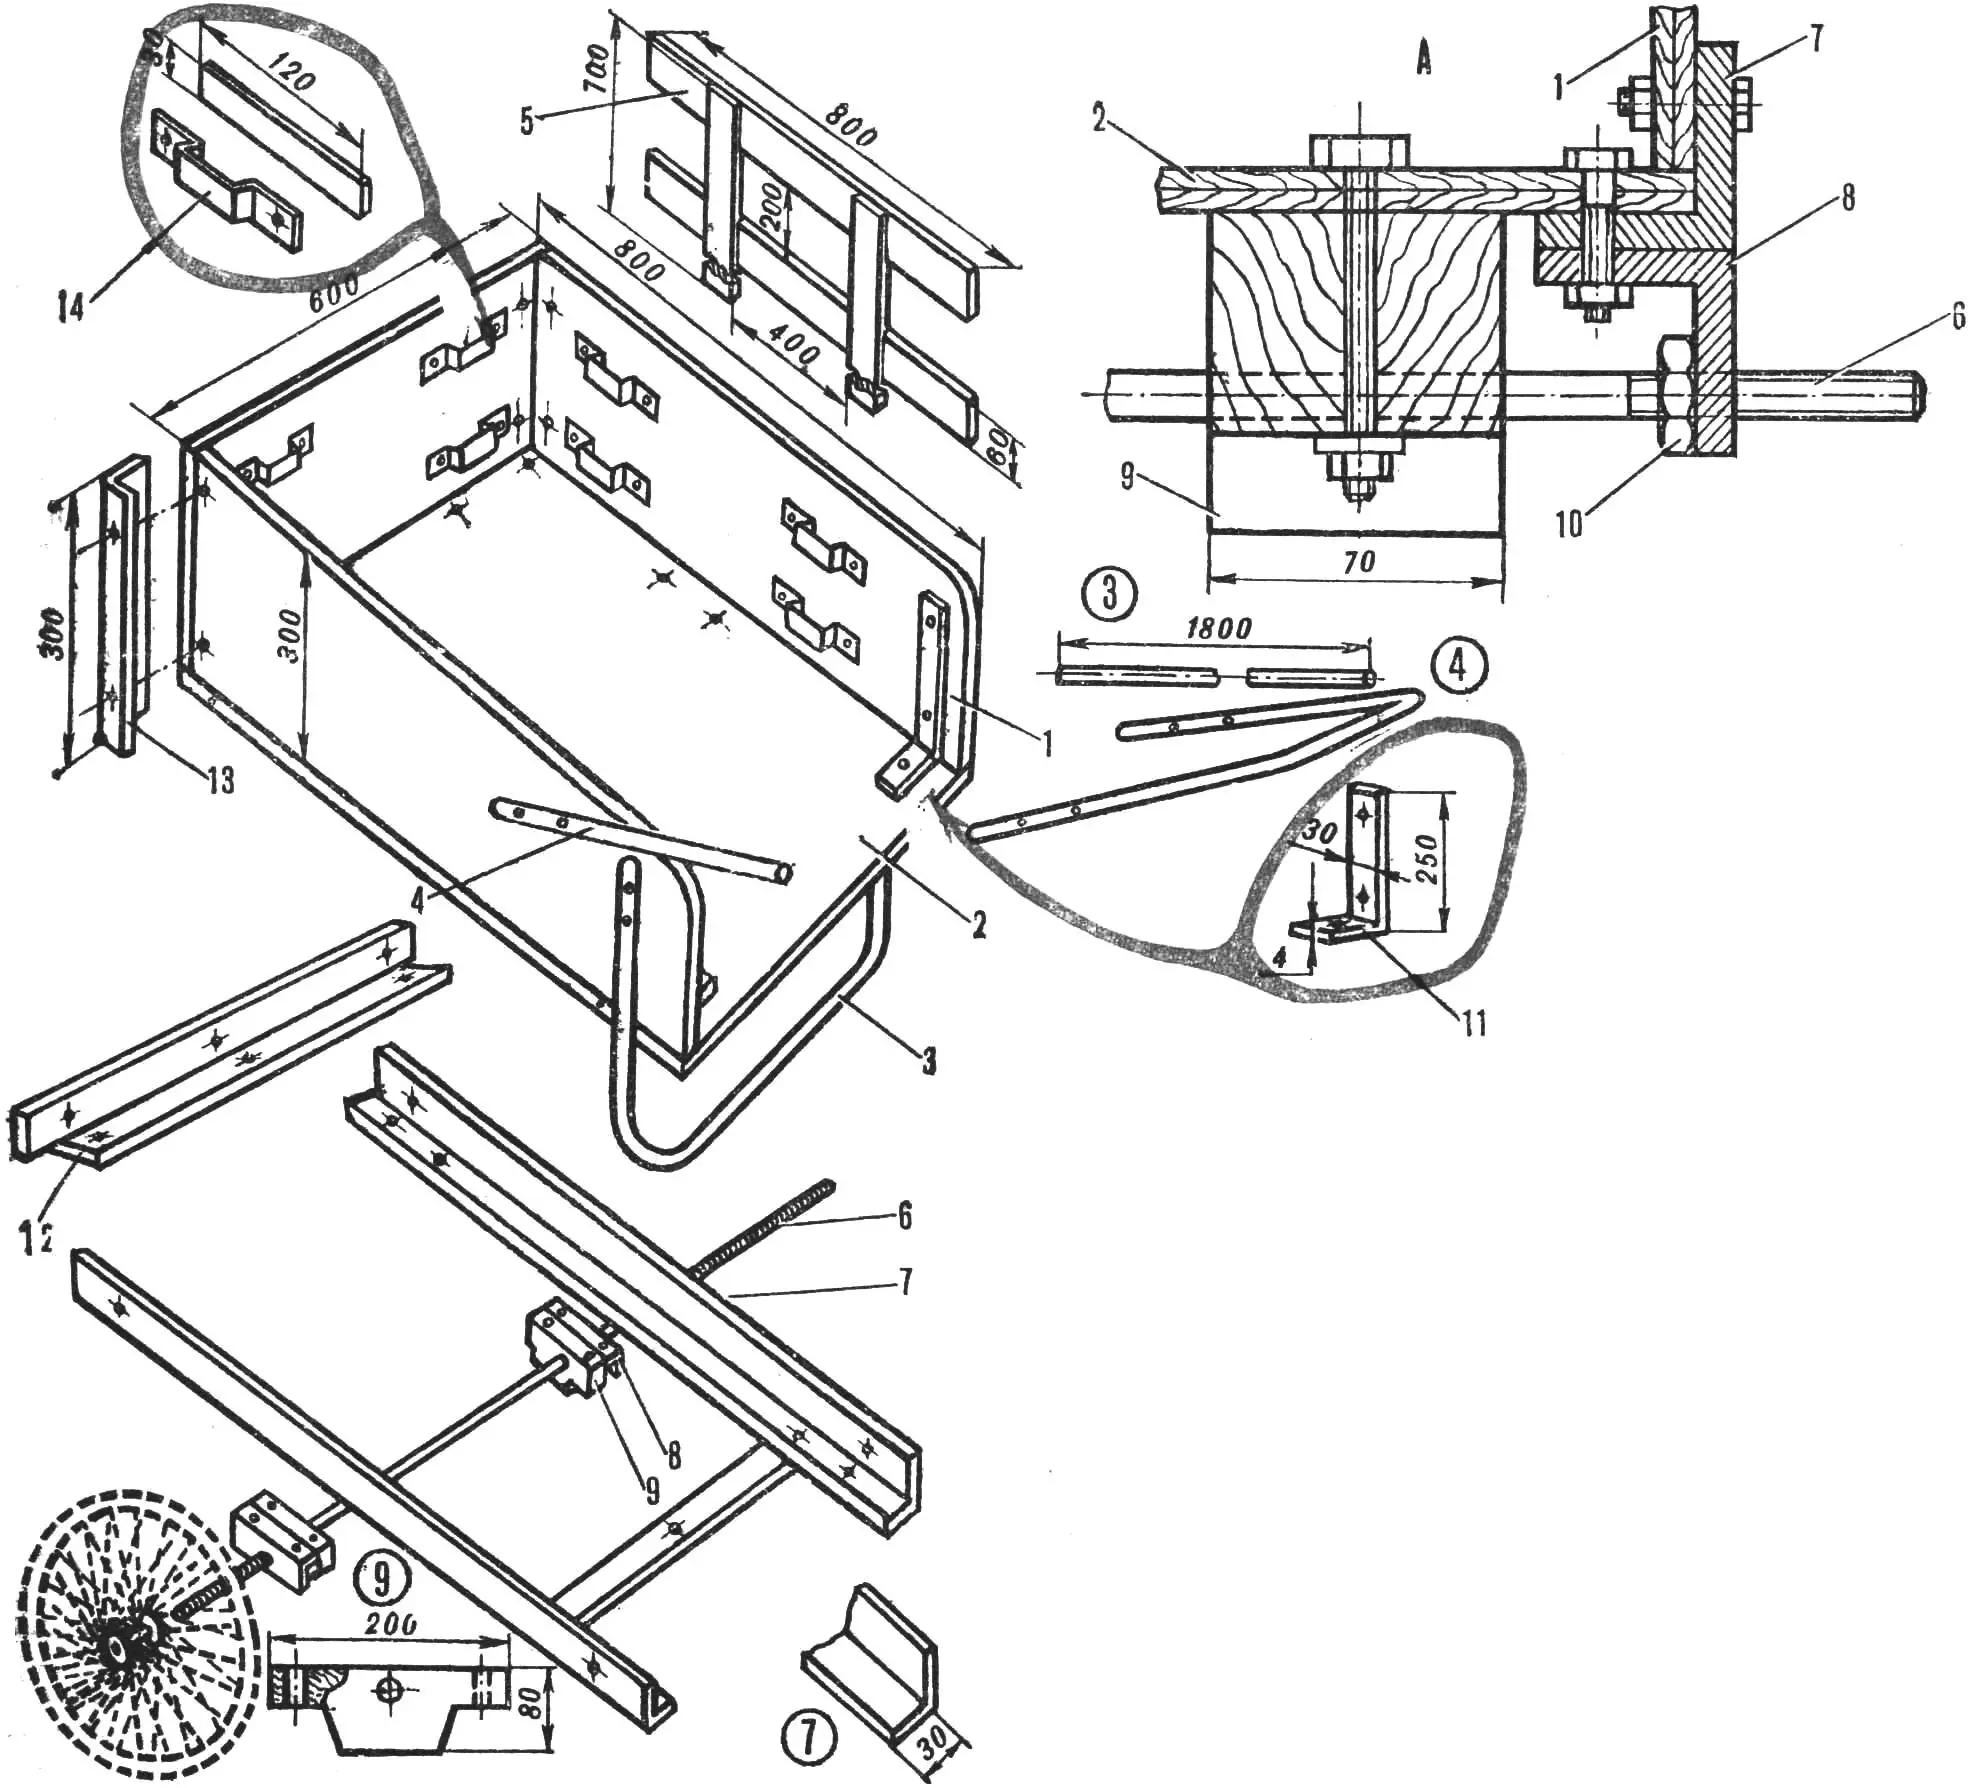
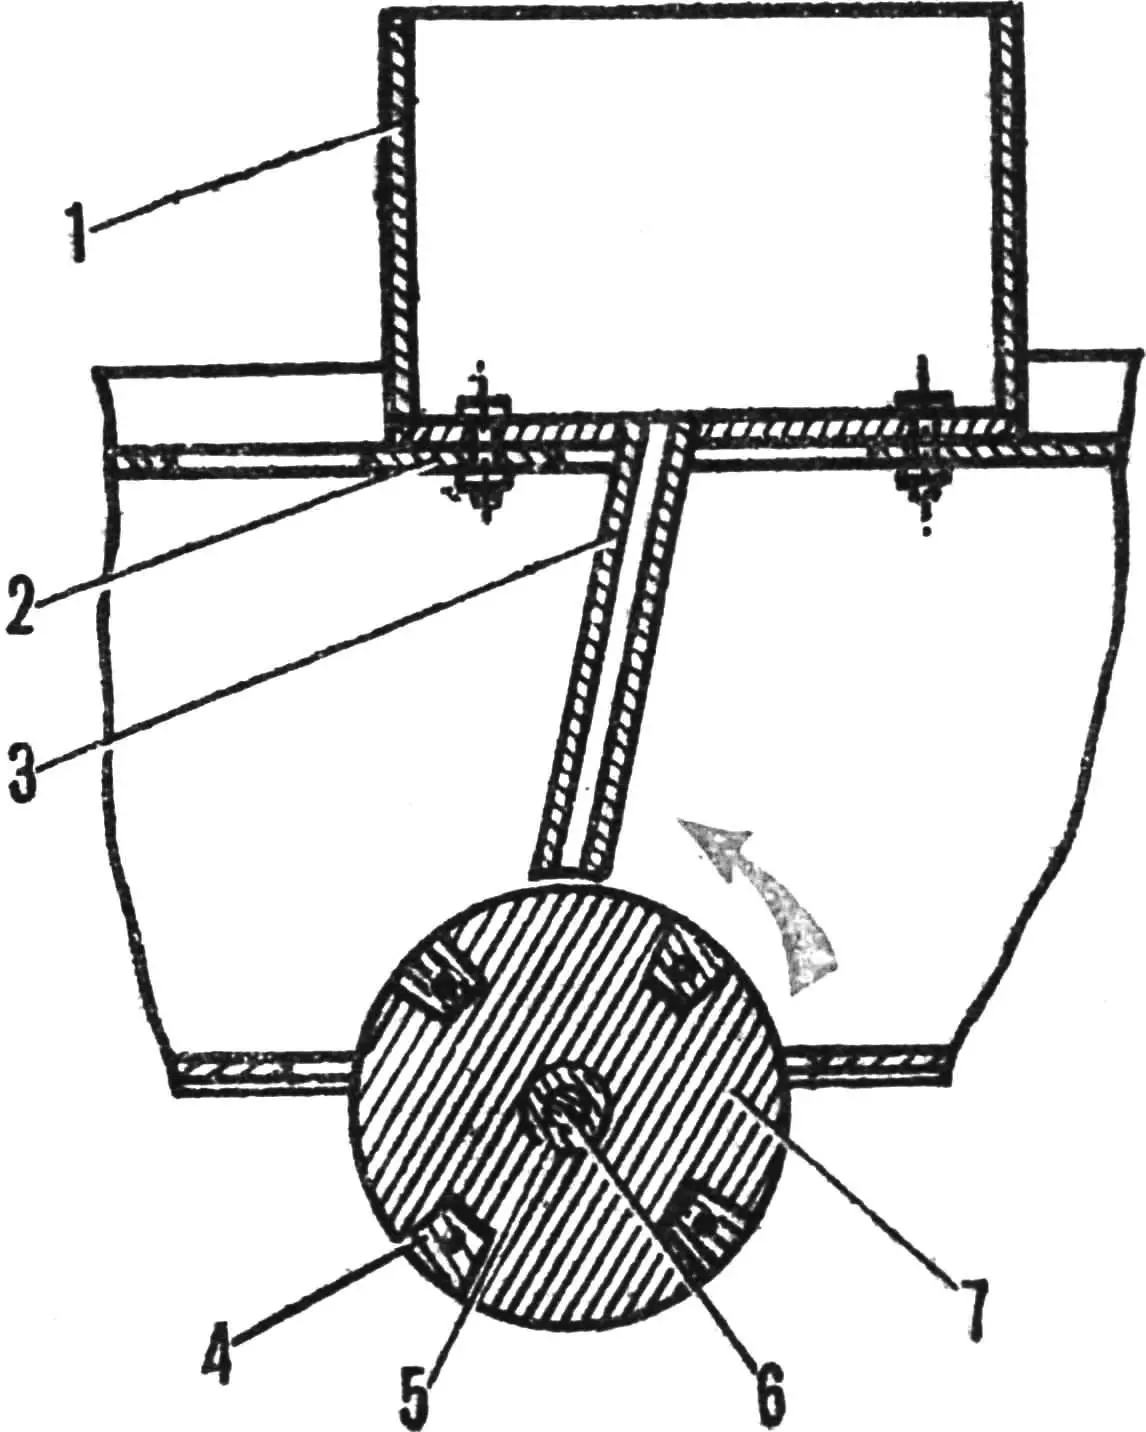
1 — box side, 2 — box bottom, 3 — stand, 4 — handle, 5 — side grid, 6 — cart axle, 7 — longitudinal angle, 8 — angle bracket, 9 — support block, 10 — fixing nut, 11 — stiffening angle, 12 — transverse angle, 13 — wall mounting angle, 14 — bracket; A — box mounting unit on the frame.
The cart box is first assembled from thick plywood, preferably waterproof. For greater strength, its sides and bottom are fastened with metal angles placed around the perimeter of the bottom. The box is attached to the cart axle using supporting wooden blocks and angle brackets: displacement along it is prevented by limiting nuts. The handle and stand are bent from tubes of the same diameter.
When assembling, don’t forget to first place the blocks on the axle, fasten them to the box bottom, screw the fixing nut onto the axle until it stops, and then put on the angle bracket.
When working, it’s often necessary to increase the height of the sides — to extend them. In such cases, use grids made of wooden blocks; vertical posts are inserted into sockets on the box walls. The socket brackets are bent from narrow metal strips and fastened with bolts to the inner walls of the box: four to each (fig. 1).
POTATO PLANTER
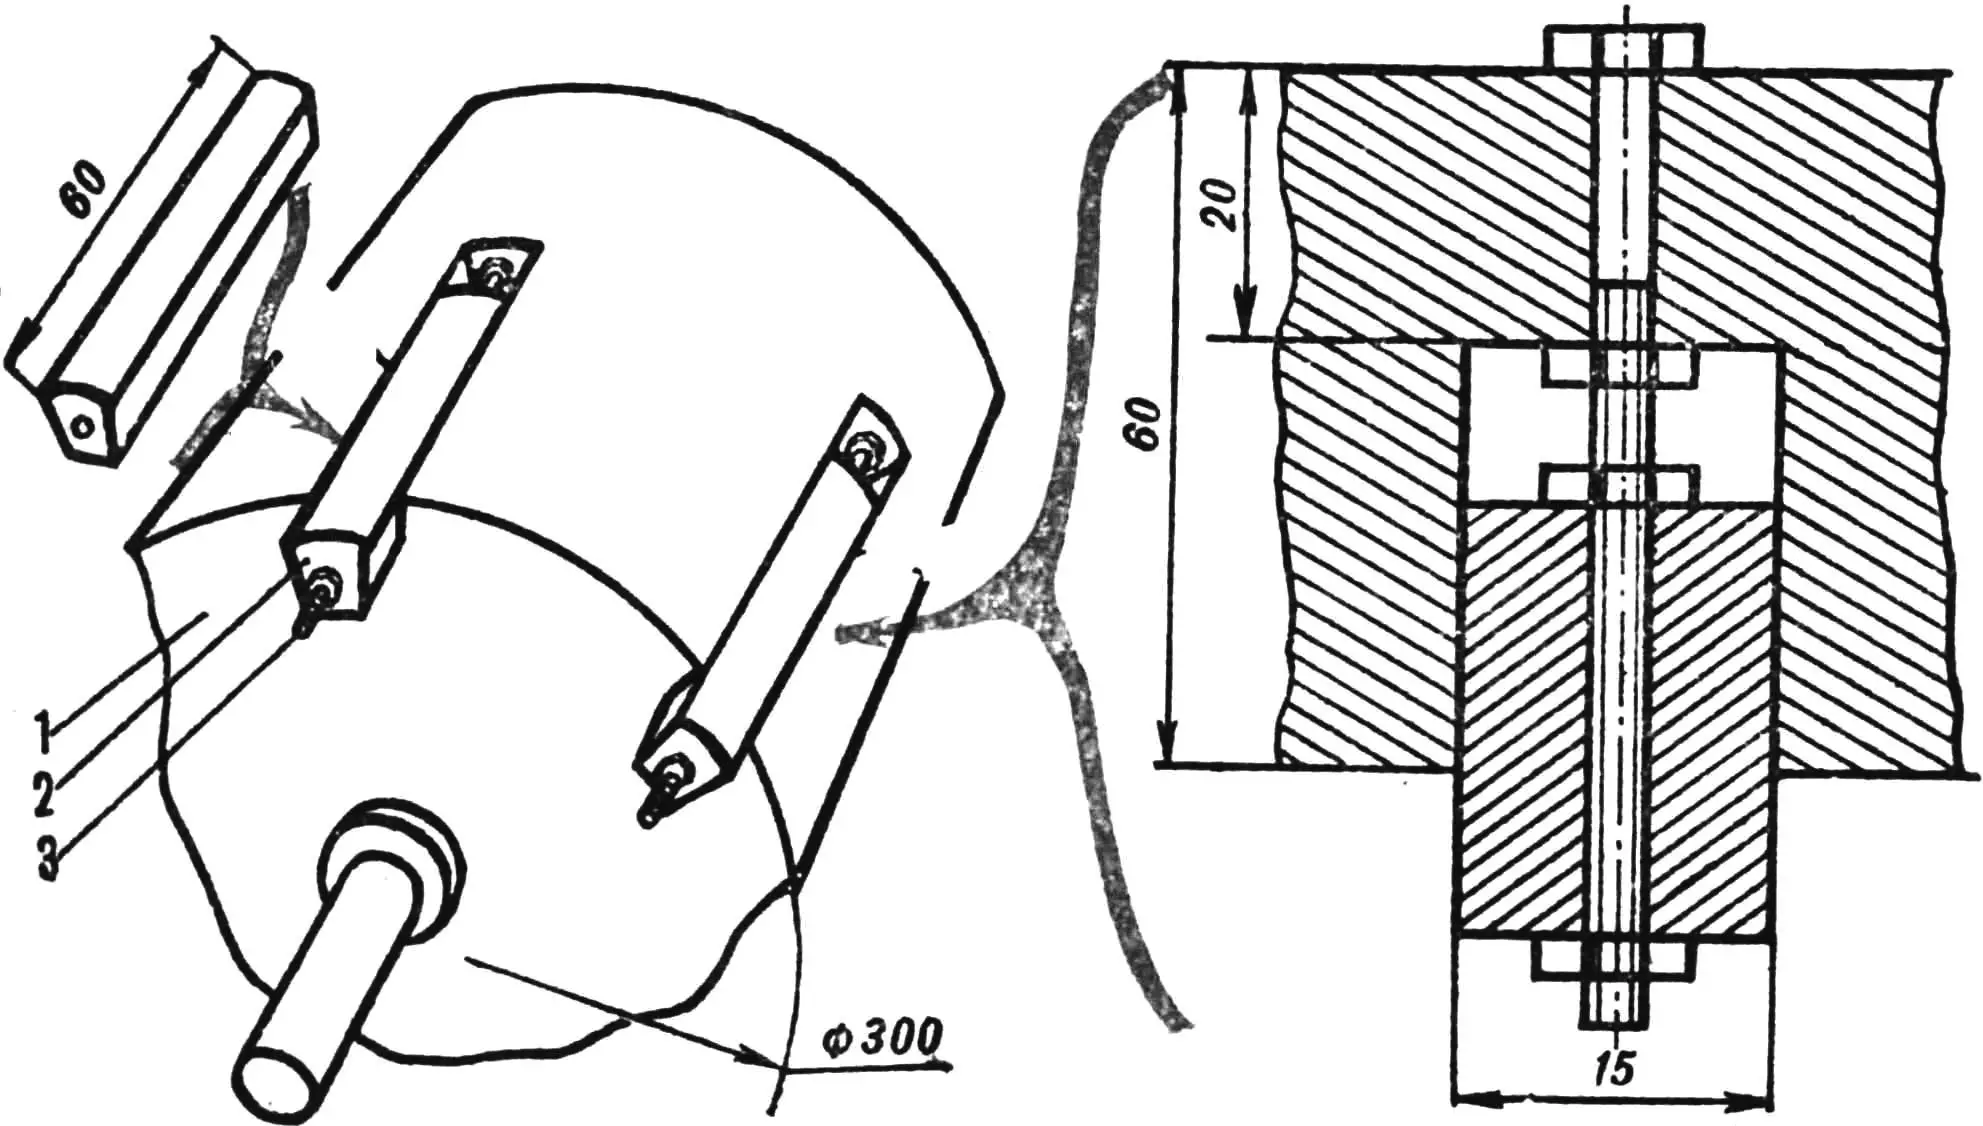
Using additional devices, it’s not difficult to make the cart plant, for example, potatoes. To do this, you need to make a capturing drum and a hopper (fig. 2), and also remove part of the box bottom. That’s why it’s better to assemble the bottom from three longitudinal strips; the middle one is removed, and a drum is placed on the cart axle in its place. It should have pockets — cut sectors that will capture the tubers. The size of the pockets and their number depend on the size of the tubers and the planting interval: they are adjusted using insert pads (it’s even more convenient to have replaceable drums).
For quick drum replacement, two grooves are made in them — transverse and radial. A thrust plate with a hole for a screw is inserted into the first — the cart axle should have a threaded recess, the screw is installed through the radial groove.
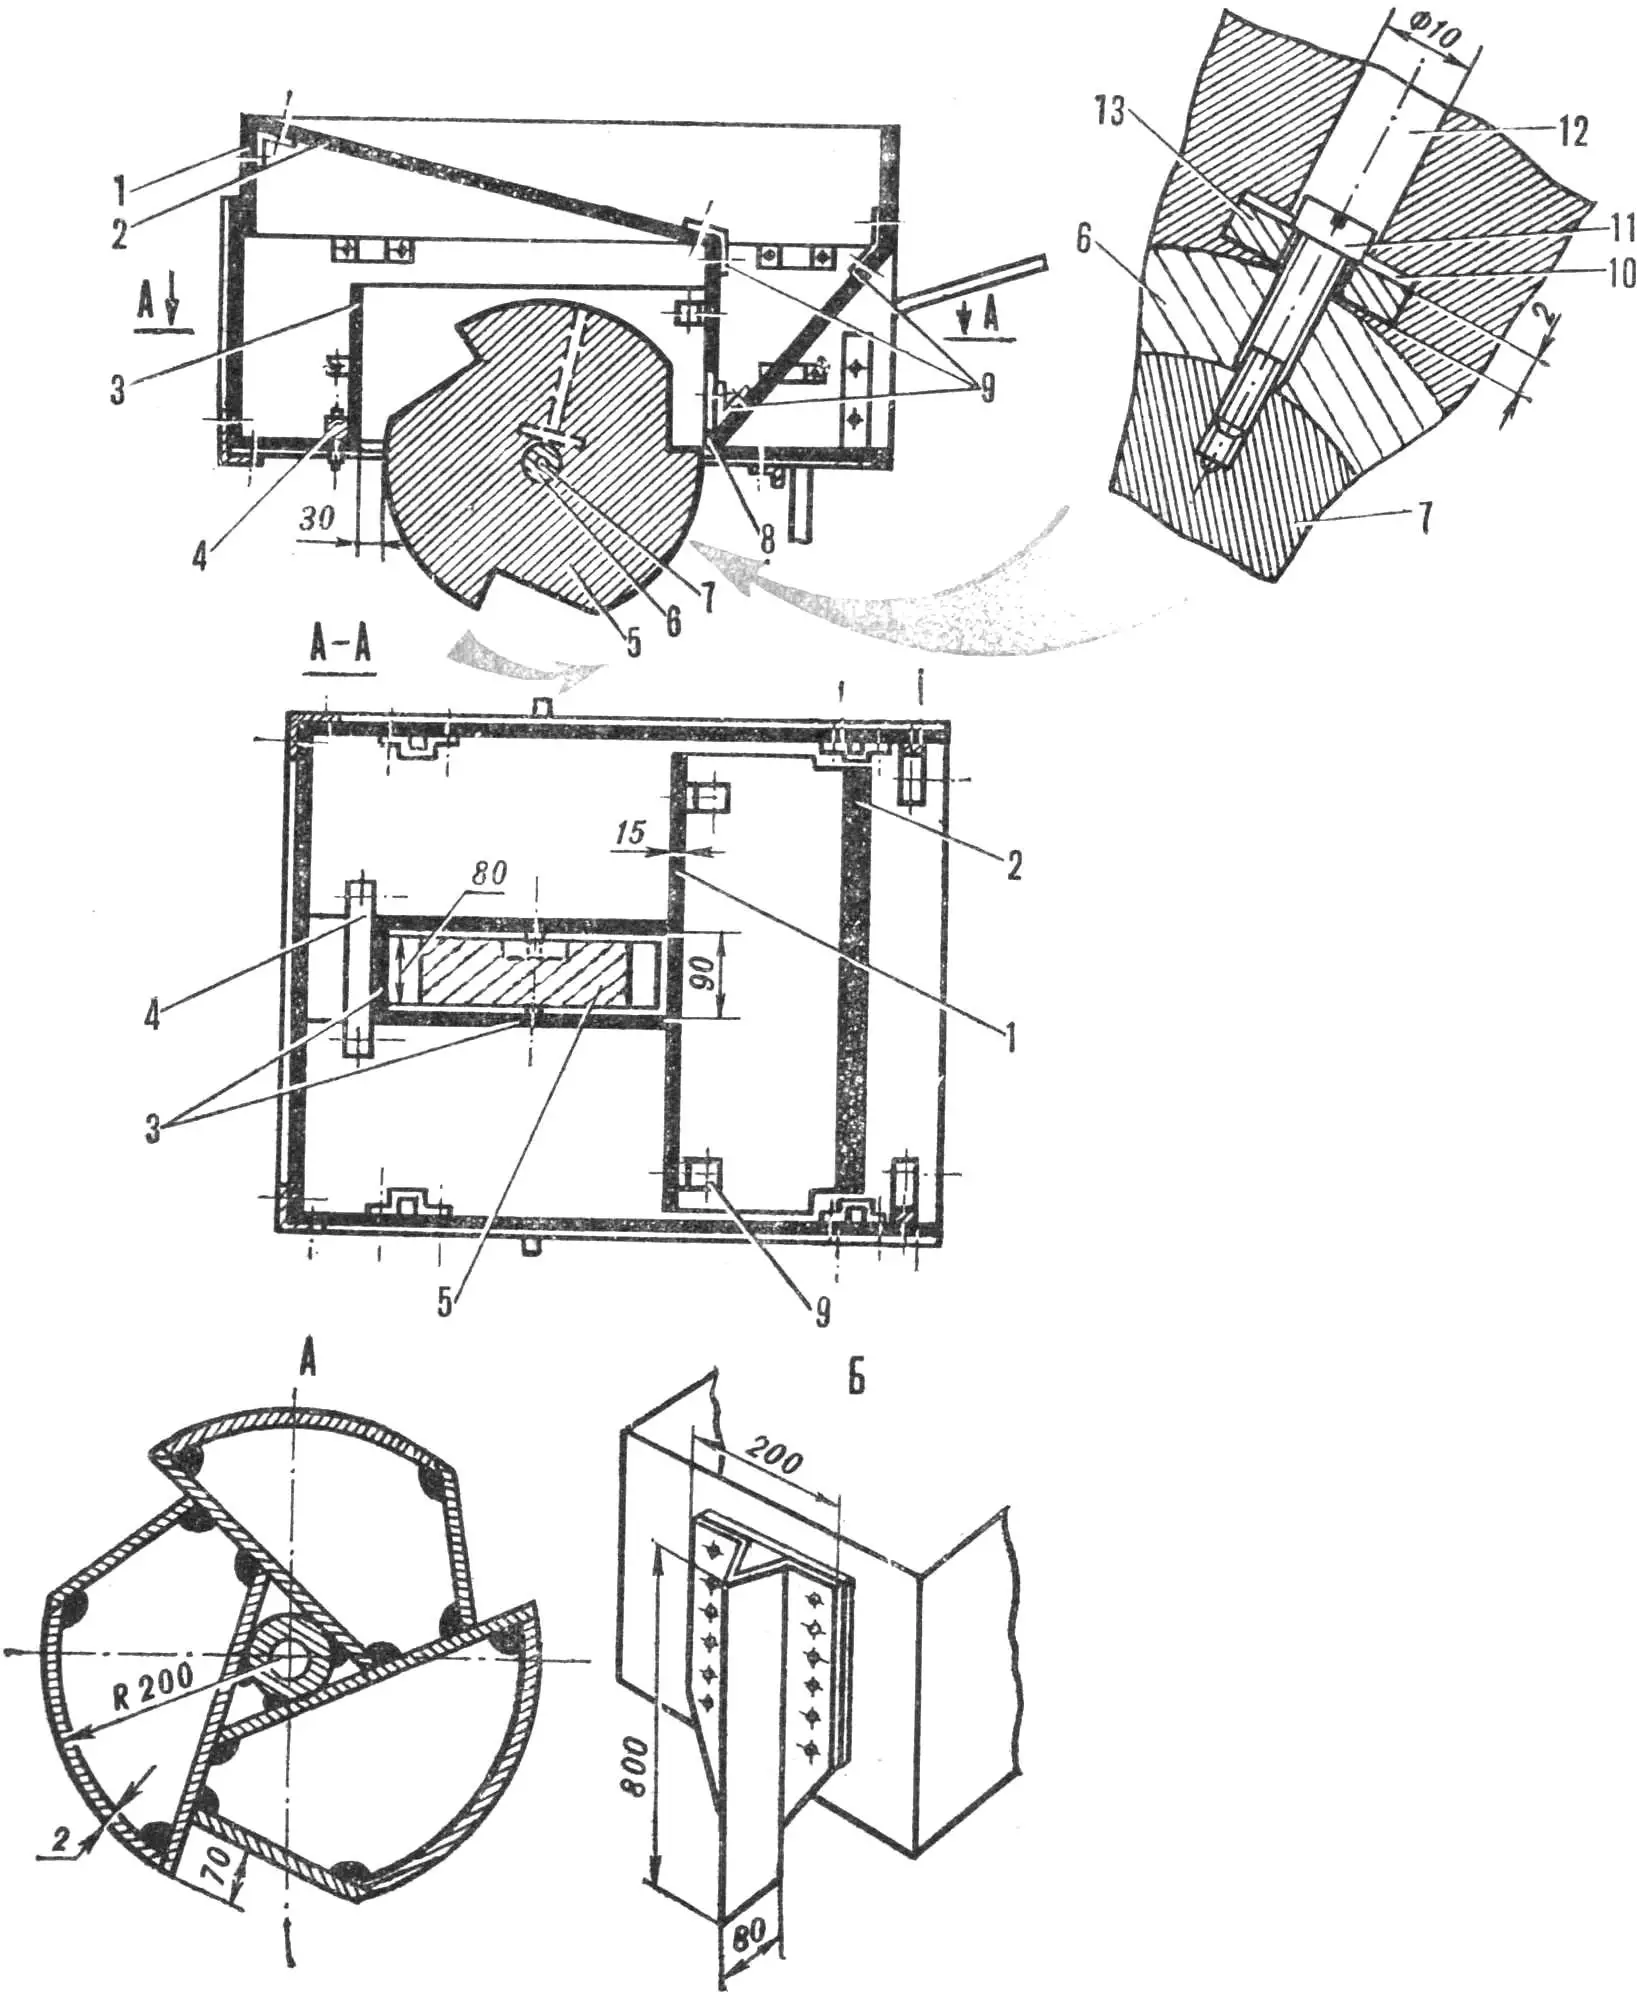
1 — hopper wall, 2 — inclined hopper bottom, 3 — guide compartment, 4 — thrust block, 5 — drum, 6 — axle hub, 7 — cart axle, 8 — receiving window, 9 — mounting angles, 10 — transverse drum groove, 11 — mounting bolt, 12 — radial drum groove, 13 — drum thrust plate; A — welded drum construction; B — moldboard installation on the cart.
Make the capturing drum from wood. It can also be of welded construction (see fig. 2A).
For better feeding of tubers into the drum pockets, the hopper is made with an inclined shaped bottom. In its lower part there is a receiving window that limits the flow of tubers. And so that they don’t roll out of the pockets and fall exactly into the furrow, it’s necessary to install guide walls made of plywood with a height slightly greater than the drum radius; in front they are held by a low block screwed to the box bottom.
The bottom, hopper walls, and guides are fastened with metal angles.
INSTEAD OF A PLOW
This garden cart can also be used for digging soil. Of course, there’s no need to make a plow out of it or install plowshares. We’re talking about a simple angle moldboard that plows a furrow in soil already prepared for sowing. The moldboard is bent from a 2 mm thick metal sheet and attached to the front wall of the box; the furrow depth is adjusted by the height of the moldboard lift. When the cart moves, it spreads the soil, throwing it to both sides, so the lower — angle — part of the moldboard should not end in a point (fig. 2 B).
FROM IT, A SEEDER
The cart is also suitable for sowing seeds (fig. 3). For this, you’ll need to install a different drum and a different hopper. The pockets for seeds will have a different configuration from the previous one, and they’ll need to be made somewhat differently: a through transverse hole is drilled in the intended pocket location, then part of the sector is cut out, a tie bolt or stud is inserted, and the nuts are tightened. Thus, the cut part — let’s call it the pocket’s adjusting sector — can move along the stud, changing the pocket volume (fig. 4): it will depend on the size and number of seeds that should be sown in the furrow, in each hole. The drum mounting on the axle — same as for the potato planter.
1 — seed hopper, 2 — hopper grid, 3 — guide tube, 4 — pocket adjusting sector, 5 — axle hub, 6 — cart axle, 7 — drum.
The grain hopper — from any available container, a hole is cut in its bottom and a guide tube made of tin is attached. It should come as close as possible to the drum surface so that seeds cannot spill through the gap. The hopper is installed on a grid resting on the box brackets.
1 — drum, 2 — pocket adjusting sector, 3 — tie bolt with nuts.
With shallow sowing depth and well-cultivated soil, the cart can also “cover” the seeds. For this, a metal chain (not too heavy, of course) is fastened with bolts under the box bottom. Dragging along the plowed field, it will rake soil into the furrow and cover it.
Now our garden cart will plow the furrow, neatly lay seeds in it at intervals, and cover them with soil.
V. TALANOV
Recommend to read
 SHARPEN A HAMMER…
Working in the garden or in the garden with a blunt instrument — only a waste of time and effort. And to make the shovel or hoe sharp — requires grindstone. However, I succeeded without... GARDEN ON THE WINDOWSILL
Those who are engaged in home hydroponics and growing seedlings or herbs on the windowsill, suggest of plastic bottles to make excellent vessels for growing greens. ...
