
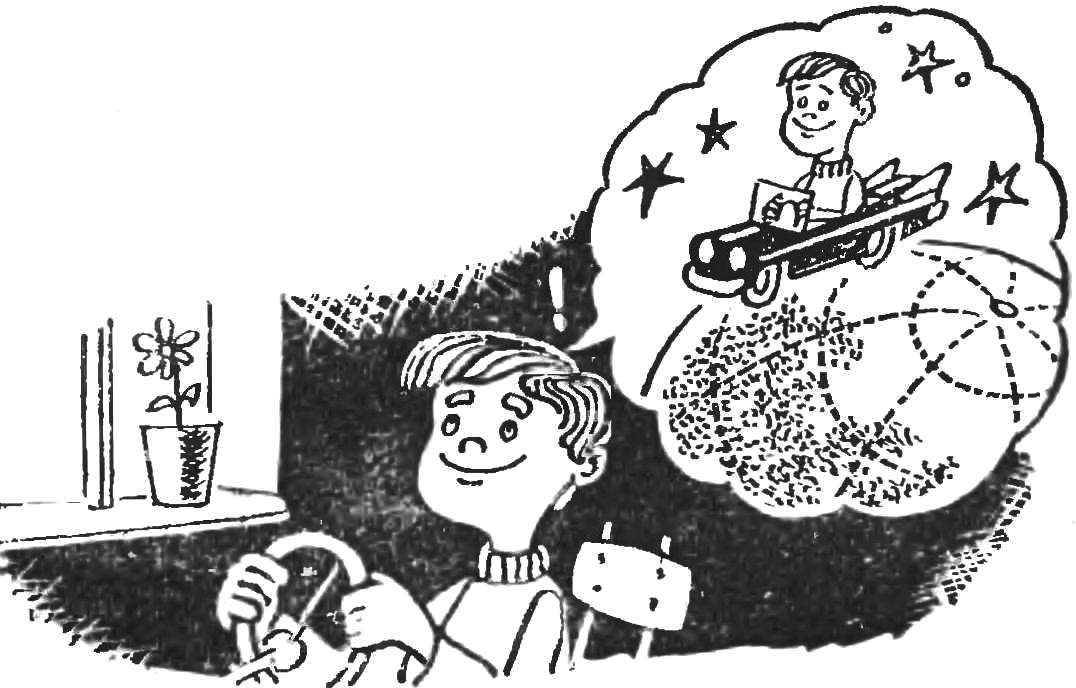
 That night Serge went to bed early, not capricious and did not ask to read the book. He immediately closed his eyes and sniffed carefully. But when the house is all quiet, Seryozha got up, put on Slippers and my pajamas, quietly slipped in the door.
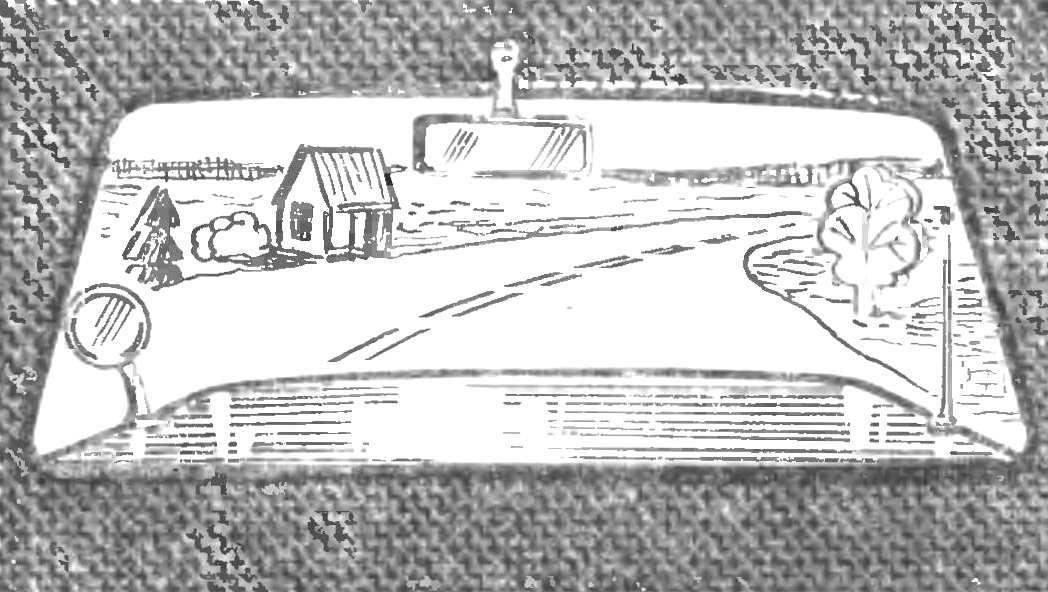
“Dark… But nothing, just to get to the helm. Yeah, there he is.” Sergei reached out, found her hard button and bright headlights came out of the darkness a familiar road with bushes on the roadside, bright white dividing strip in the middle of the highway. Sergei listened. All is quiet. Carefully turn the motor on, slightly pressed foot to the gas pedal, and now the road rushed towards him. Flashed the houses, some bushes, a dark silhouette slipped and disappeared, a lone truck.
Serezha was fun. He even “stepped on” the gas, the motor smoothly and powerfully roared, as if also glad speed. But what is it? They come to a fork. Left? Right? Serge darted. Instead of throttle, the foot involuntarily pressed pedal, the road swerved to the side, immediately there was a crash, a bright flash illuminated the firmament, and all was enveloped in total darkness…
…Then Serge felt someone lifting him up and puts in a warm bed. Light up the night light, and Serge saw a father.
— You again for trainer?
Yes, dear readers, all these events took place in an ordinary Moscow apartment.
Car there is, of course, was not, but in one of the rooms was not quite normal for home decor device — a driving simulator built by me for my son.
I think that this simple setup could be of interest for the equipment of children’s centres and areas of traffic safety.
The driving simulator — Electromechanical device that includes all the basic elements allowing to drive: steering wheel, gas pedal, the power button lights and some other subsidiary bodies.
The kinematics of the driving simulator, in General, is simple. It uses the principle of conversion of motion, i.e. the kinematics is constructed so that the moving observer, and the roadbed.
The device and interaction of the basic units shown h are explained in figure 1.
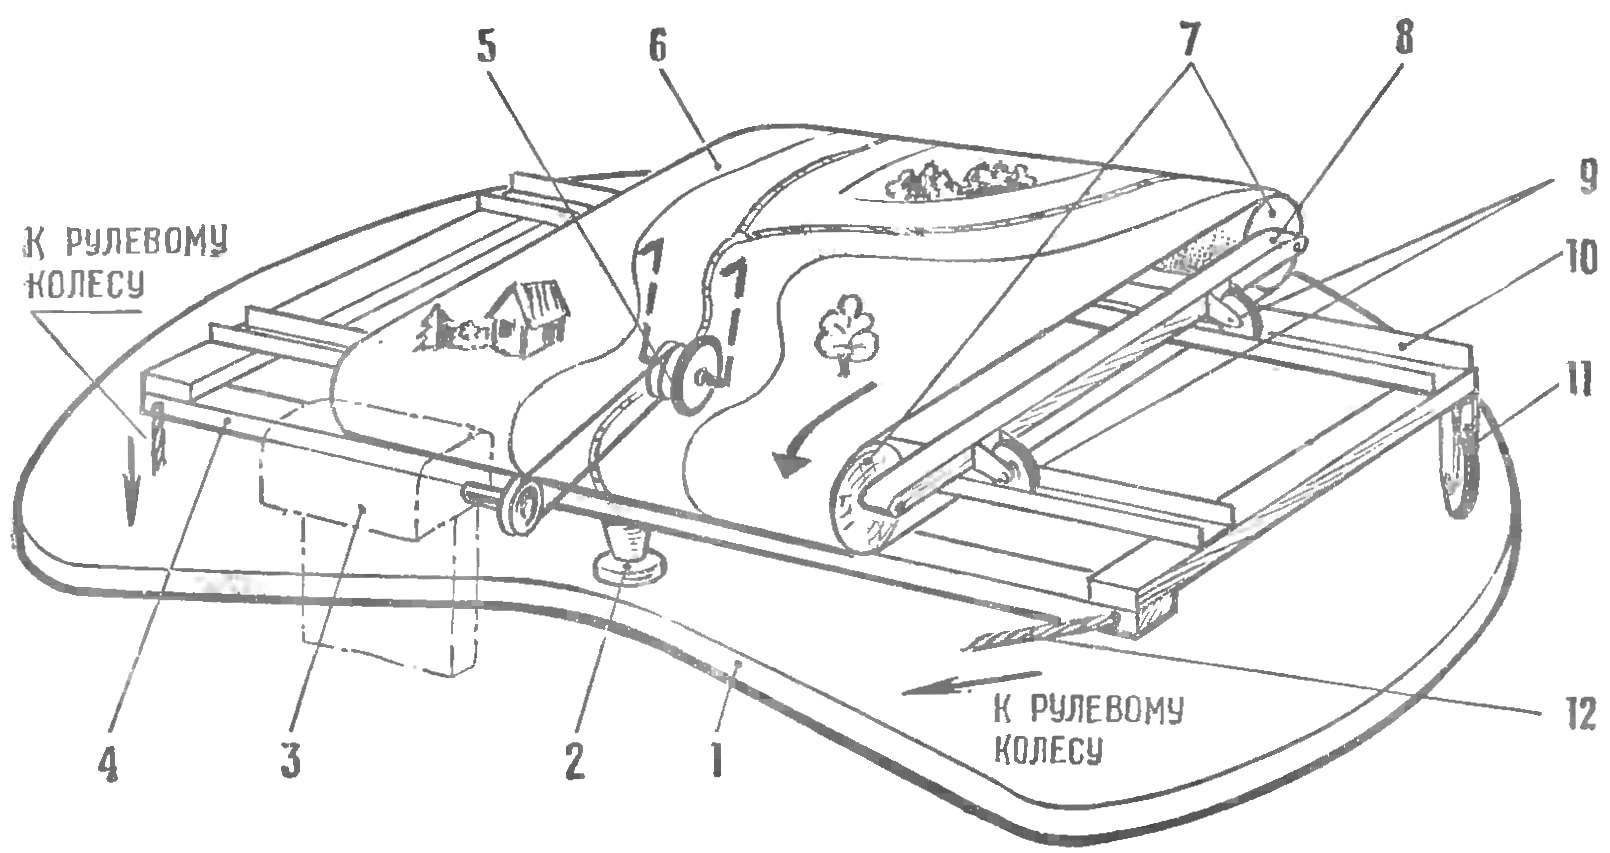
Fig. 1. Device of auto-simulator:
The driving simulator includes a base 1, which by means of a hinge 2 and the support rollers 11 are connected to rotary frame 4. The latter is mounted on two guide rail 10; them on the rollers 9 can be moved frame 8 on which is fixed two pulleys 7 with a tight endless rubber tape 6 caused by the contour of the roadway. The pulley 7 and a belt 6 driven by a friction clutch 5. He, in turn, is rotated by a motor 3 through the rubber pasik. Frame 4 can be rotated around the hinge 2 on the rollers 11 a steering wheel connected to the frame by wires 12.
The motor shaft through the rubber pasik rotates the clutch, and that, in turn, moves the tape with a picture of her darling. The “driver” of the feeling of the drive. For the case of “direct road” the axis of the clutch coincides with the axis of the pivot joint. But they come to a fork. You turn the steering wheel, moving the frame with pulleys around the hinge. The clutch becomes at an angle to the axis of the rubber tape and rewinding, starting to move it along with the pulleys and the frame rails but to the right or left. The clutch will follow the line that you have set out to turn.
Now about the design. Base driving simulator is a sheet of plywood with a thickness of 10-12 mm. revolving frame is going to glue beech strips with cross-section 20X20 mm. Guide rails are made of plastic W-profiles, used most commonly in sideboards, bookcases. The rollers on which the frame is moved on rails, are selected from any toy or child’s set of “Designer”. The frame supporting the pulleys, also going from beech slats 20X20 mm. the Pulleys can make from strips of duralumin tubes with an outer Ø 50-60 mm and a length of about 300 mm. of Rubber tape to a thickness of 0.5 mm, simulating the road surface, is mounted over the pulleys with a slight interference fit. When applied to the tape turns and forks in the road should be taken into account that the angle should not be greater than the angle which can move the rotary frame otherwise you run the risk of “not fit to turn.”
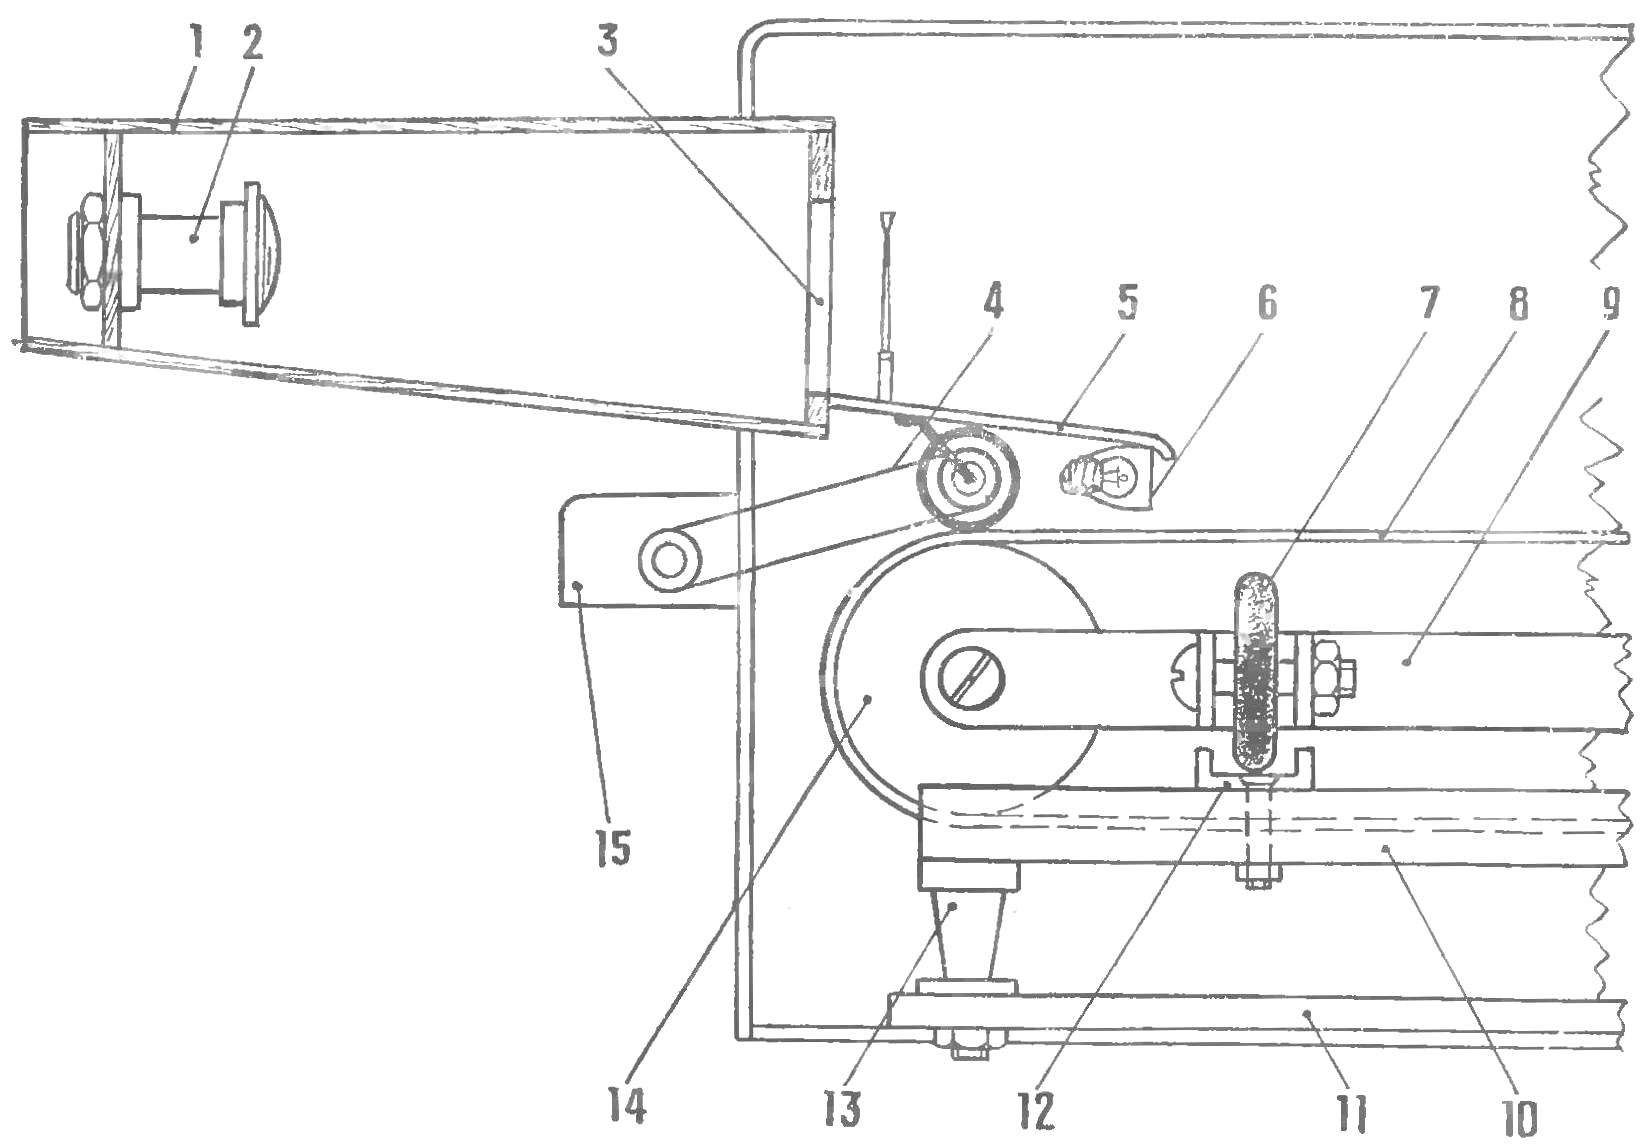
Fig. 2. The design of the driving simulator:
1 — tube, 2 — door “eye”, 3 — windscreen 4 — rubber pasik, a 5 “cowl”, — 6 “lights”, 7 — roller, 8 — rubber-tape, 9 — frame, 10 — the turning frame, 11 — base, 12–guide rail 13, the hinge 14 pulley 15, the motor from the sewing machine.
The effect of presence is created in the following way. To the front wall of the casing of the driving simulator is attached to the tube, having the form of a truncated pyramid and is made of plywood with a thickness of 4-5 mm. In the small base of the pyramid drilled two holes in the 60-70 mm apart (approximately the distance between the eyes of the observer). In these holes are inserted two door “peephole”. In the big the base of the tube cut a hole having the shape of a car windshield. The tube inside is painted with Matt black paint or black ink. In front of the “windshield” attached “bonnet” of tinplate or aluminum, painted in any color. For greater reliability in the “hood” a good idea to strengthen the wire is “antenna” and the rear-view mirror.
The role of the “engine” performs the motor from the sewing machine sold complete with foot dimmer, which in the driving simulator is the “gas pedal”.
Making “roads” is entirely dependent on your imagination. We can only give some recommendations. Along the “road” look good greenery: grass, shrub, trees, and houses. All this can be done from scraps of foam and glue to the rubber tape.
The inner surface of the casing of the driving simulator is painted pale blue Matt paint is better latex. Inside are one or two incandescent bulbs, and they should be placed so that the sunlight does not Shine into the eyes of “the driver”.
For “drive” at night under the hood strengthened two “lights” — light bulb of the flashlight with tin reflectors.
On the road there are many accidents. Here’s how you can simulate one of them: along the roadside “highway” glue strips of brass or copper foil with a thickness of 0.1 mm and a width of 3-4 mm. In size “bonnet” strengthen two brass brush on each side. When hitting brush on the foil strip, which, as you know, means a ditch, closes an electrical circuit. Works simple lock, which turns off the motor, headlight, backlight lamp “sky” and includes a dark red PhotoLight — alarm signal.
That’s all. Of course, a lot will depend on your ingenuity and resourcefulness. But with careful execution of the driving simulator it will help you and your friends to develop driving skills, will be an interesting ride.
I. EVSTRATOV, design engineer
Recommend to read
 BIKE
BIKE
Morning gymnastics, running, lignite winter and summer Hiking trips, Cycling is an effective means of health promotion. However, the bike largely depends on St of road traffic, the... THE HUNT FOR HEAT
Drafts — no. In the preparation of housing for the winter the first step in city apartments is the sealing of Windows and doors. The simplest solution for Windows is pozatykat cracks and...
