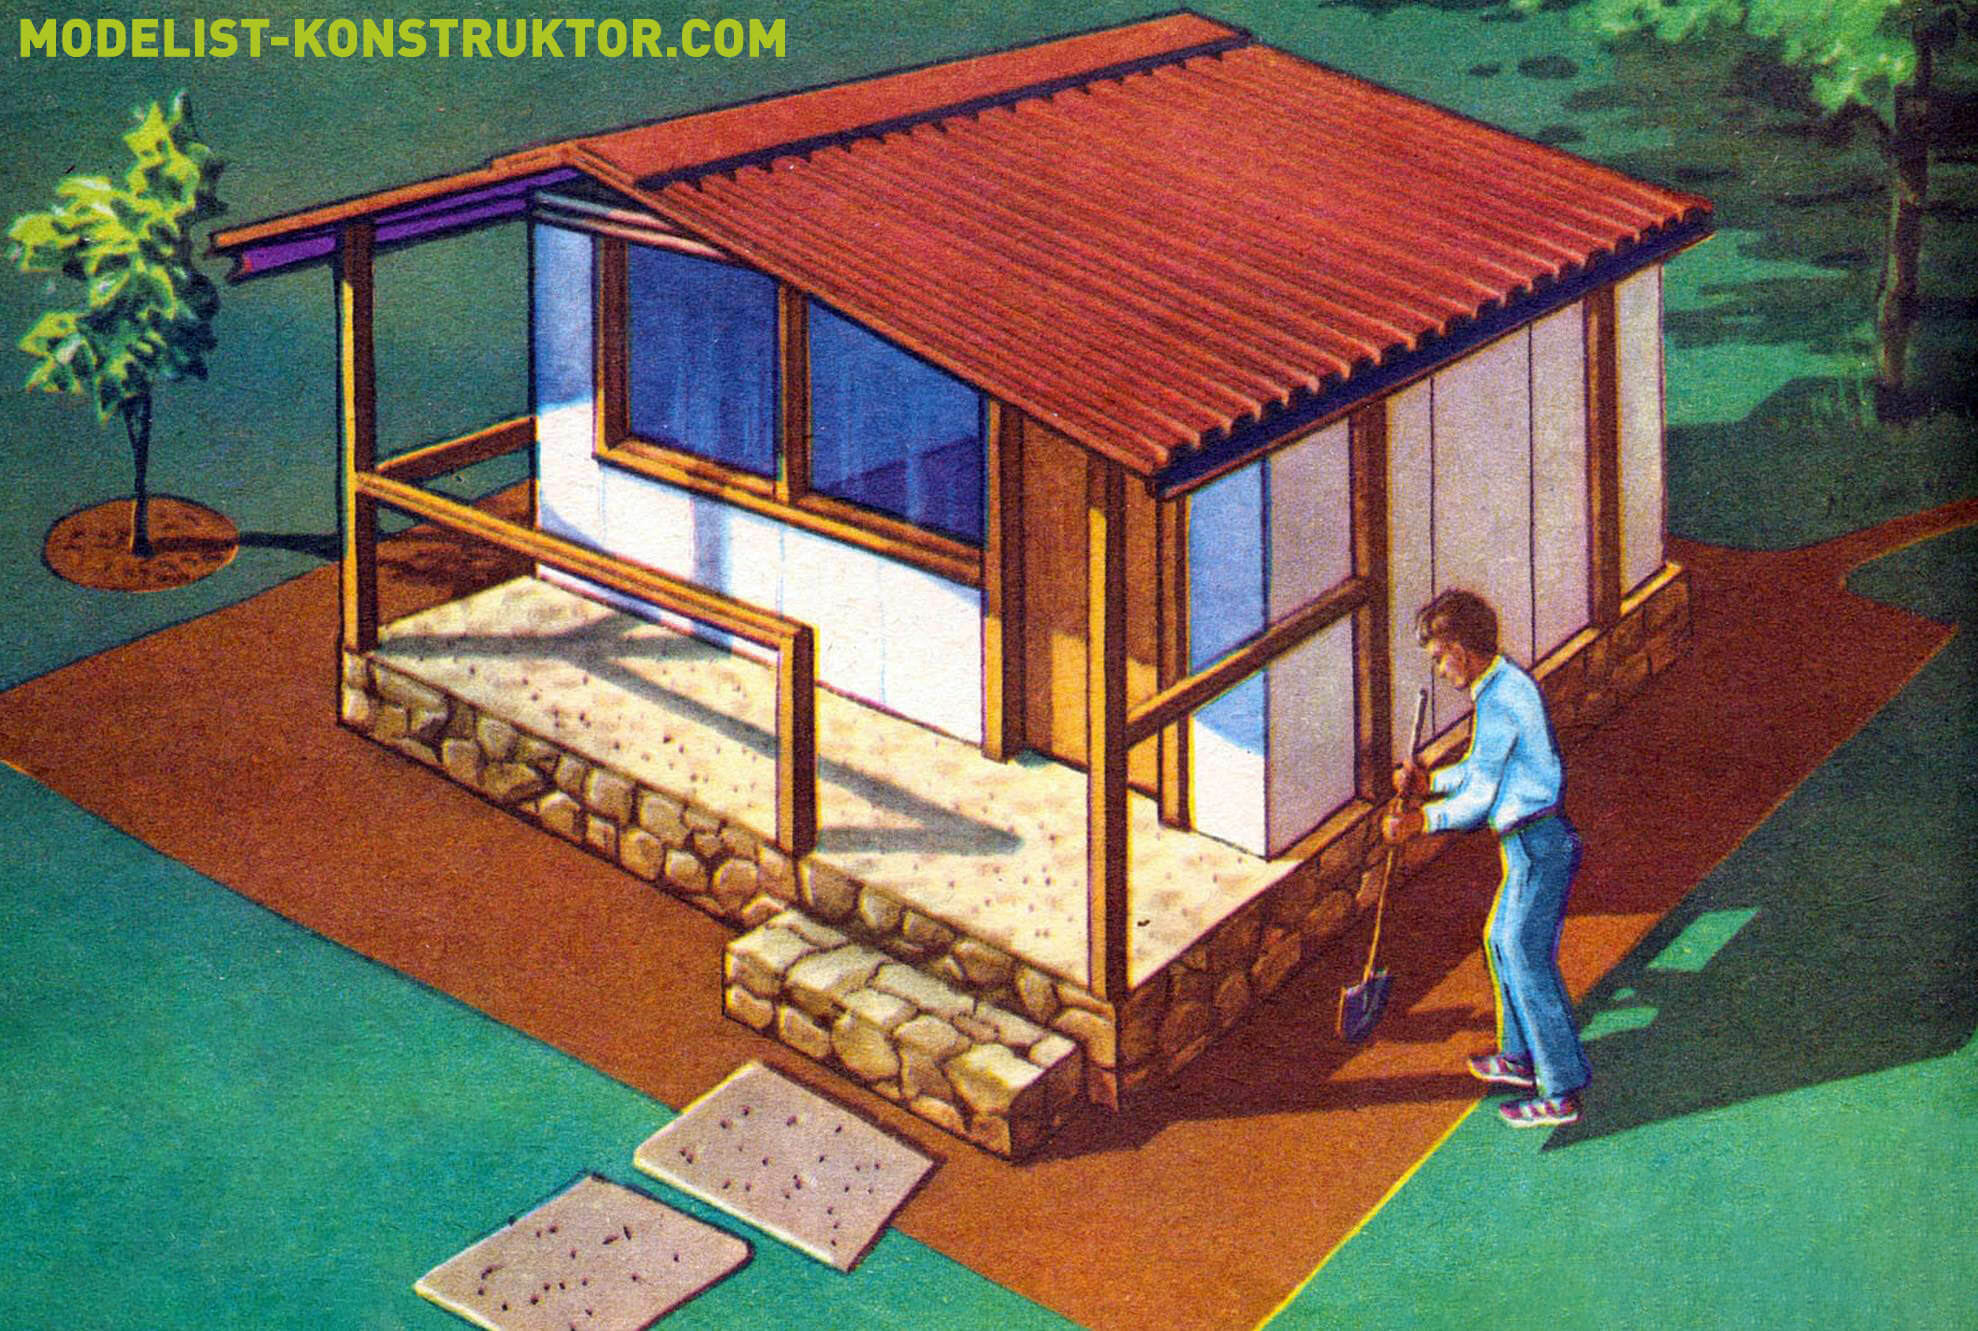
“What kind of terem-teremok is this? It’s not low, not high…” The dimensions of the house are indeed small, but, looking at the adjacent descriptions and diagrams, you will see that it has everything necessary. But, as they say, there are options: from the simplest ones depicted in the adjacent drawings to a quite comfortable yet uncomplicated “carriage layout” construction, which we also introduce to you today. Such a summer bungalow is offered for self-construction by the Bulgarian magazine “Naprai sam.”

Is it easy to build a house? Anyone who has ever faced this problem will say: it’s not easy. And of course, they would be right if we were talking about a multi-story house with basements, a garage, terraces, bay windows, etc. But let’s not talk about a large house – without the help of professionals, you won’t be able to build it. Let’s assess our capabilities in building a small bungalow. Many people need such a house, and you can quickly build it yourself with good organization and the help of family and friends, while minimizing the use of machinery.

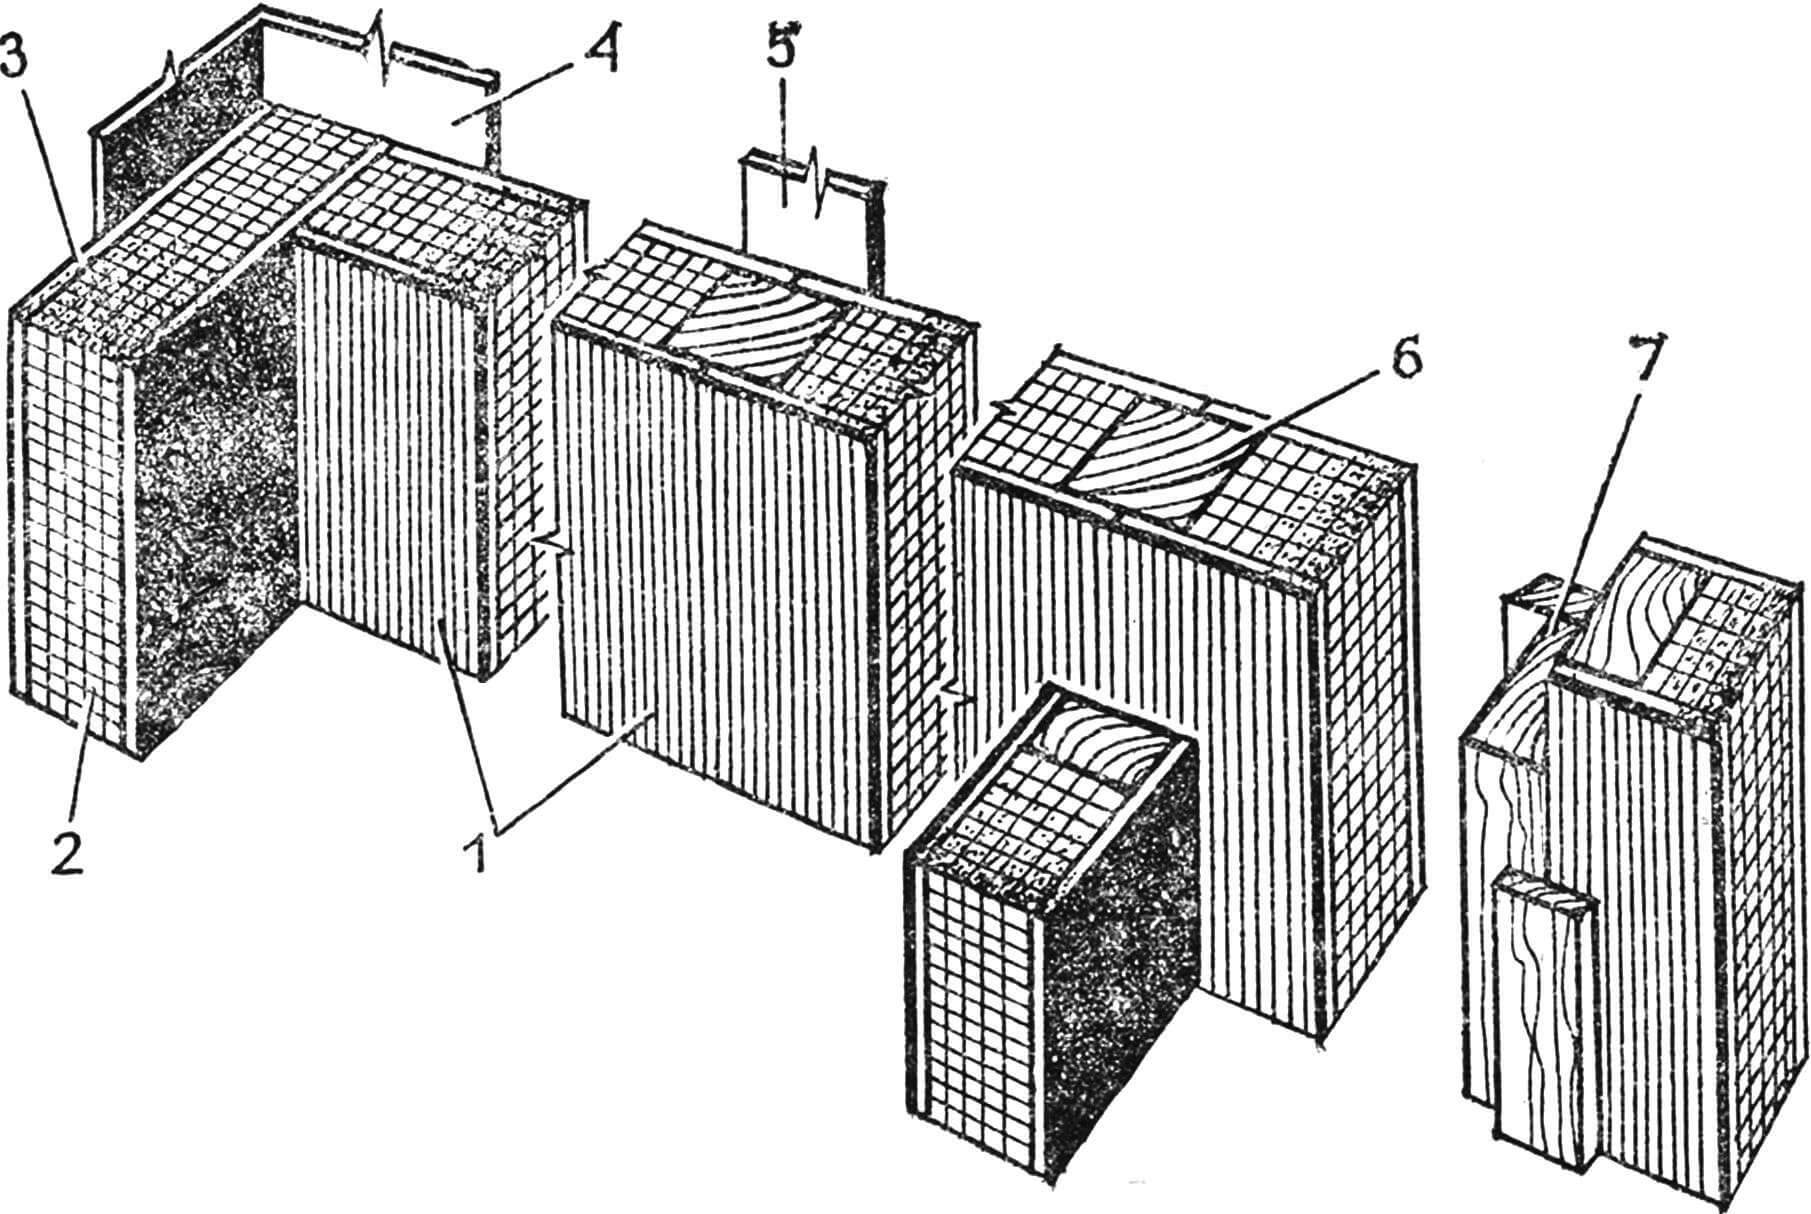
1 — foundation-base, 2 — column of the supporting frame, 3 — roof frame, 4 — longitudinal roof profiles, 5 — wall panel, 6 — ceiling panel, 7 — sloping roof ribs.
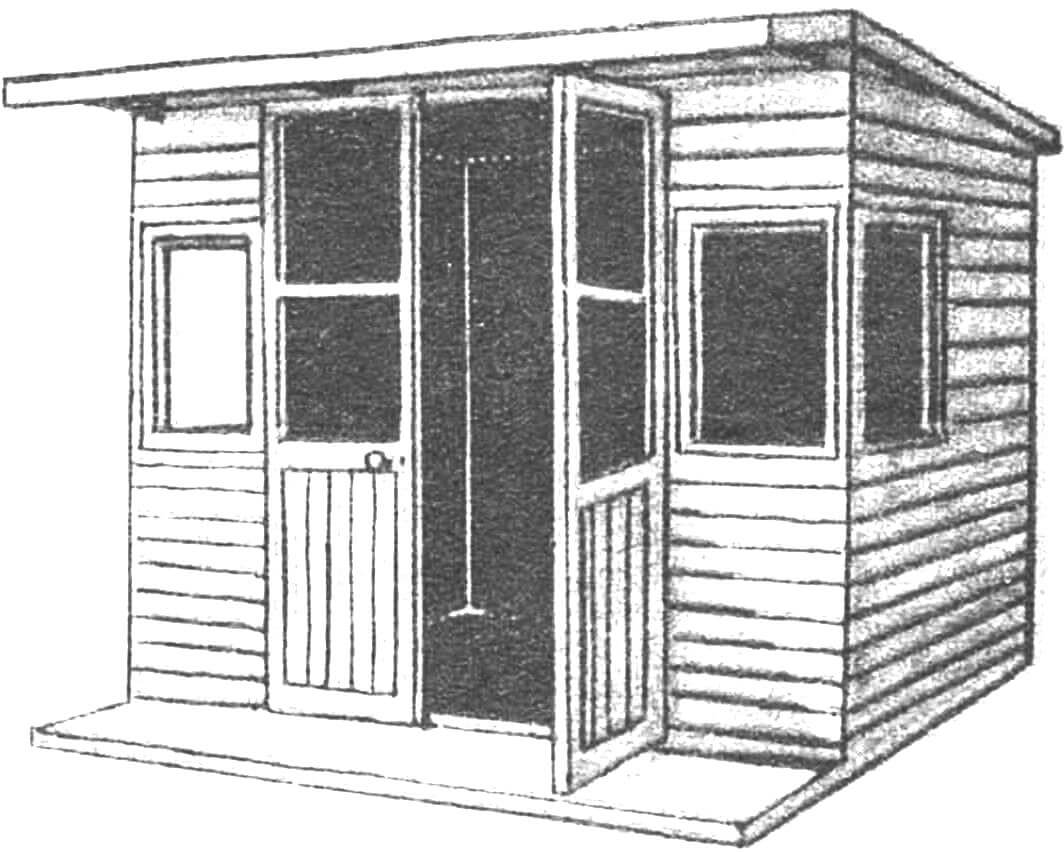
The option (Fig. 1), which we will consider, offers an optimal solution on a minimal built-up area – about 27 m². With careful execution, it will become quite comfortable housing and at the same time will be sufficiently beautiful and modern.
FOUNDATION CONSTRUCTION
At the beginning of the work, you need to mark the exact dimensions of the building on the site, that is, determine all the angles and construction lines of the bungalow. In our case, we are talking about a rectangle with sides of 5.80X4.65 m. Its perimeter is marked with pegs at the corners, between which a rope is stretched. A right angle is obtained if we measure 3 and 4 m on the legs, and 5 m on the hypotenuse.
Now it’s time to start digging the foundation pit. First, the top layer of soil is removed. This soil, rich in humus, can be used rationally in the garden. If the plot has a flat surface, then in general, the digging is finished; and when working on a slope, you will have to continue until you level the area to a size of 5 by 6 m.
Now it’s time to proceed with the actual foundation. When the site is relatively flat and firm soil is not deep, it is more reasonable to lay a reinforced concrete cushion. If the plot has a slope, it is more practical to lay concrete with transverse strips, increasing in height; these strips can also be made of stone.
For weak platform walls, a wooden formwork is used for the foundation; it is not needed for dense soil. The cement consumption is from 200 to 250 kg per 1 m3 of finished mortar. Adding stones (concrete) reduces the amount of required cement, speeding up the work. The stone base is made by placing large flat stones, filling the gaps tightly with cement mortar.
Once the bungalow foundation is completed, you need to wait for a few days before removing the formwork. If the house will be used only for utility purposes, insulation is not necessary, but for residential construction, it is essential. In the first case, the foundation is simpler: it consists of a layer of concrete with a light filler (perlite, expanded clay) with a thickness of 10-15 cm, which is laid on the concrete cushion; on it, a waterproofing layer of two sheets of roofing material connected with hot bitumen is laid using cement paste.
ASSEMBLING THE FRAME
From this point, we can start building the house – first the frame, then the walls and ceiling, and finally the roof.
The bungalow frame is made of metal, assembled from pipes or profiles. It is better to connect its parts by welding, although bolted connections (think of metal garages) are also acceptable if carefully executed and reinforced at the corners with additional gussets.
Do not disregard the “wooden” option. The strongest frame for the house is assembled from six metal columns supporting the roof; four of them serve as supports for the bungalow walls. The columns are welded to metal planks pre-laid in the foundation and embedded “with whiskers.” After that, around the walls’ perimeter, a metal angle is laid on the plate. The ends are cut at a 45° angle and welded to the posts. This operation is repeated with the upper profile, which is also attached to the columns. Another set of such angles creates a frame for the ceiling.
Before starting the wall cladding, it is advisable to cover the metal parts with anti-corrosion mastics or lead paint.
In our case, the walls of the house will not be load-bearing. Therefore, any available material with good thermal insulation properties and easy processing can be suitable for cladding the sides of the house. Porous materials in the form of boards are suitable for better protection of the house from the cold. For external cladding, fiberglass sheets would be optimal in terms of strength and moisture resistance; for internal cladding, dry plaster. The latter can be painted or covered with wallpaper. Orgalit and plywood are also suitable for internal surfaces. Asbestos cement sheets are suitable for both external and internal walls and ceilings.
WALL INSTALLATION
Usually, two methods are used for assembling wall elements and framing the “box” of a bungalow.
The first method is to pre-manufacture sandwich panels measuring 2.8 meters and 3 meters (their width will depend on the format of the covering sheet). The inner layer can form a groove into which a load-bearing wooden beam will later fit. These beams will become the main connecting elements of the wall parts to the frame.
1 — inner cladding sheet, 2 — insulation layer, 3 — outer cladding, 4, 5 — corner and junction finish of cladding, 6 — load-bearing beam of the panel, 7 — finish of the door or window frame.
Cladding can also be done by the “layered assembly” method. Wooden beams are attached to metal profiles at a distance of 0.8 meters from each other, and flat sheet panels are mounted on them using screws. Insulation is attached to the latter, and finally, outer sheets are nailed on. The beams should be of the same size, determined by the thickness of the filler. In our case, this layer has a thickness of 4 cm, and for greater wall strength, it is increased to 6 cm. The ceiling is made using the same methods.
For thin walls, modern double window and door frames are most suitable. They easily fit into the openings between the beams and are attached to them. A small tip: to avoid unnecessary gaps, install the corresponding frames directly during the wall assembly, rather than leaving this task for later.
Options for solving the facade of a bungalow are shown in the main image and figure 1.
AND A “COLD” ROOF CAN BE WARM TOO
All that remains is to install the roof. The proposed option chooses a solution called a “cold roof.” Such a roof is slightly raised above the ceiling, which itself provides insulation, and a lightweight roofing material is laid on top for waterproofing. This method has several advantages, especially in summer: direct sunlight heats only the roof. Importantly, if necessary, the roof can be easily replaced.
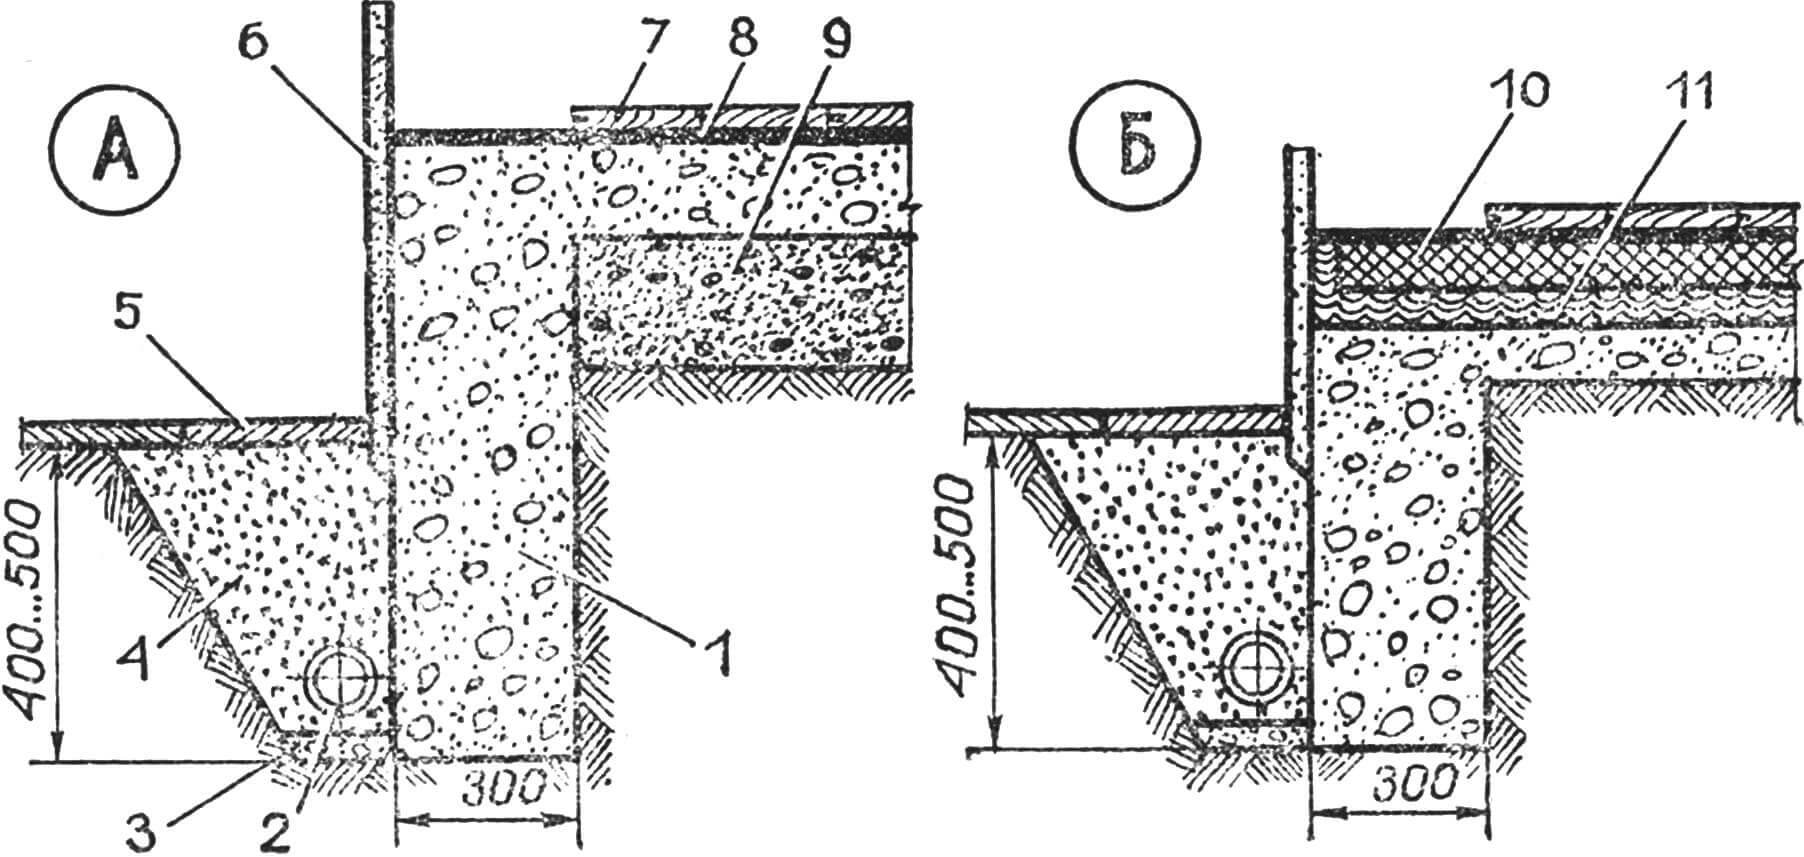
1 — lightweight concrete, 2 — drainage pipe, 3 — cement bed, 4 — sand fill, 5, 6 — splash plates, 7 — wooden decking, 8 — layer of hardboard or roofing felt, 9 — lightweight concrete cushion, 10 — layer of cement, 11 — thermal and waterproofing insulation.
The foundation of the roof structure is a metal frame made of standard profiles, with the ridge of the roof raised by 30-40 cm and the sloping ribs extending beyond the columns by 60-70 cm. The latter are fastened with struts and longitudinal profiles, forming front and rear canopies. The number of ribs depends on the roofing material: sheet iron, slate, corrugated plastic.
The roofing fixation must be sufficiently robust. Don’t forget to paint all metal parts with tar and cover the beams with sheet metal. There is no need for gutters and downspouts because the structure is not very tall: water will drain directly onto the ground.
“CLEAN” FINISH
Completing the work is the flooring. The most versatile options are plastic or ceramic tiles, linoleum, which can be laid in both living spaces and on the terrace. Wooden planks are also suitable, but they need to be raised by 70-80 mm.
If the house is on a steep slope, it is necessary to install a parapet on the terrace. Decorative structures made of ordinary metal mesh, secured in an angle frame, can enhance the bungalow style. To protect against corrosion, it is essential to paint all metal parts with oil-based paint.
Various aluminum profiles are commonly available for covering exterior gaps between panels; additionally, they enhance the overall appearance of the house.
Electrical wiring is necessary for the bungalow. Wiring is done externally along the walls, following safety rules. Plumbing is also installed.
SLAVCHO ATANASOV, architect, Bulgaria
Recommend to read
 “Wasp” — the first all-metal one
What is the microplane "Wasp" created by Kronstadt craftsmen? At first glance, it seems there is nothing new in it. A strut-braced high-wing monoplane, a scheme that has become the most... Winter steed
Old people humorously recall fun rides down snowy slopes on primitive sleds — bowl-shaped rounds made from frozen wet hay in old sieves. Or noisy descents "in a small heap" on ordinary...
