
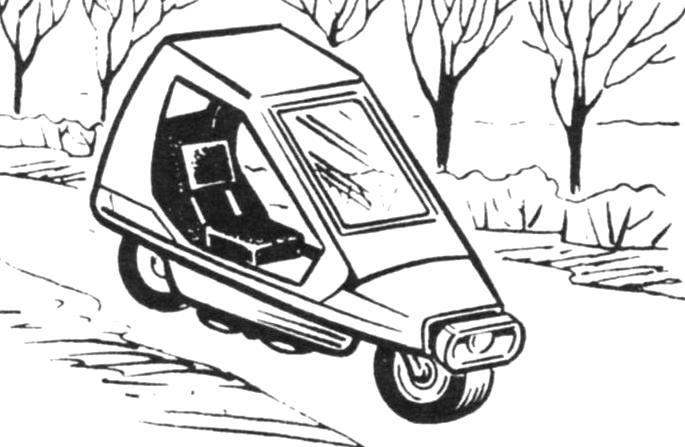
 Motorbike and car – the cars are different. First and foremost, by the level of comfort. Is it possible to combine the advantages of two-wheeled transport with the convenience of the car? It turns out that you can. And these two-wheeled machines – autoroller or motomobile sometimes meet on the streets. One of designs offer you to do it yourself.
This vehicle is a scooter with an engine displacement of about 50cm3, which, unlike traditional two-wheeled machines lightweight plastic body with a hinged back the top part of the seat, almost like a car, and two additional wheel that can be raised and lowered like the gear on the plane.
Let’s get to work. Let’s start with the frame. It is clear that without a welding machine not to do. Need steel pipe with an outside diameter of 34 mm and a wall thickness of 2.5 mm, the pipe diameter of 22 mm (the same wall), and front forks from any brand moped or scooter. The frame is designed for wheels from mini-mokik Riga production, but will fit from the same scooter. It is necessary to have on hand also sheet steel with a thickness of about 2.5 mm.
First draw the frame in full size. This will allow, focusing on drawing, correctly and accurately cut parts, and finally to identify the main dimensions of the elements.
As can be seen from the drawings, the frame of autoroller – spinal and consists of a welded twin-tube L-shaped spar, performing both the role of the fork of the rear wheel. To each of the tubes is welded by steel plate 4 mm thick with longitudinal grooves below the axis. Grooves recommend you to do after installation of plates it will help to do the job more precisely.
Now mate the back wheel with the tubes of the frame, tighten the nuts on the axes and think about where will be the locations of the bend. While bending the tube at a slight angle to fill it with sand is not necessary – enough to take the pipe Bender. After the mutual fit of the pipe in two or three points are joined by welding.
Next, install the wheel into the front fork and fix it on a floor of wooden slats in the position shown in the figure. In the same way install the spar frame with a rear wheel. The spar thus temporarily secure the steering column soft copper wire. Carefully check the installation of the wheels – they should be strictly in one plane. If everything is correct, tack the spar to the steering column by welding at two or three points. After the final adjustment of all welding joints are thoroughly cooked. In front of the connection of the spar to the column is enhanced by the cut of a steel plate gussets.
The rear bracket of the engine mount cut out and bent from sheet steel with a thickness of 3 mm. this is Done in place: first, from cardboard cut out a template and only after it the fitting is blank metal. As well and adjust the front bracket.
After processing, the bracket attached to the engine and install it with wire to the frame. This will also require a thorough check of correctness of installation – the axis of the cylinder of the engine must be located strictly in the plane of symmetry of the frame, and the area under the carb needs to be strictly horizontal. After tacking the brackets, the last test and the final welding, which is produced when removing the engine.
The base of the frame prepared. It remains to attach the crossmember tube, which is the pivot bearing of the additional wheels, as well as a small support platform for mounting the driver’s seat. All. The frame is assembled!
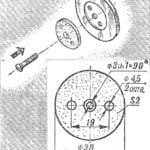
For axes of the additional wheels need to pick up a tube of such external diameter that would allow it to easily rotate in the pivoting bearing. If you find it will not fit the pipe or rod of smaller diameter, and to compensate for the gap, use rings cut from a plastic hose. They are good bearings.
The front chassis made of steel tube with an external diameter of 22 mm. To one of its ends welded to the sleeve, the other machined from a steel rod axle. On the left rack is fixed by welding the cut steel rod with a diameter of about 10 mm with threaded plastic handle. This lever chassis.
Additional wheels must have a secure hold in the released and retracted position. The mechanism here is not too complicated, and the device is recommended to think independently.
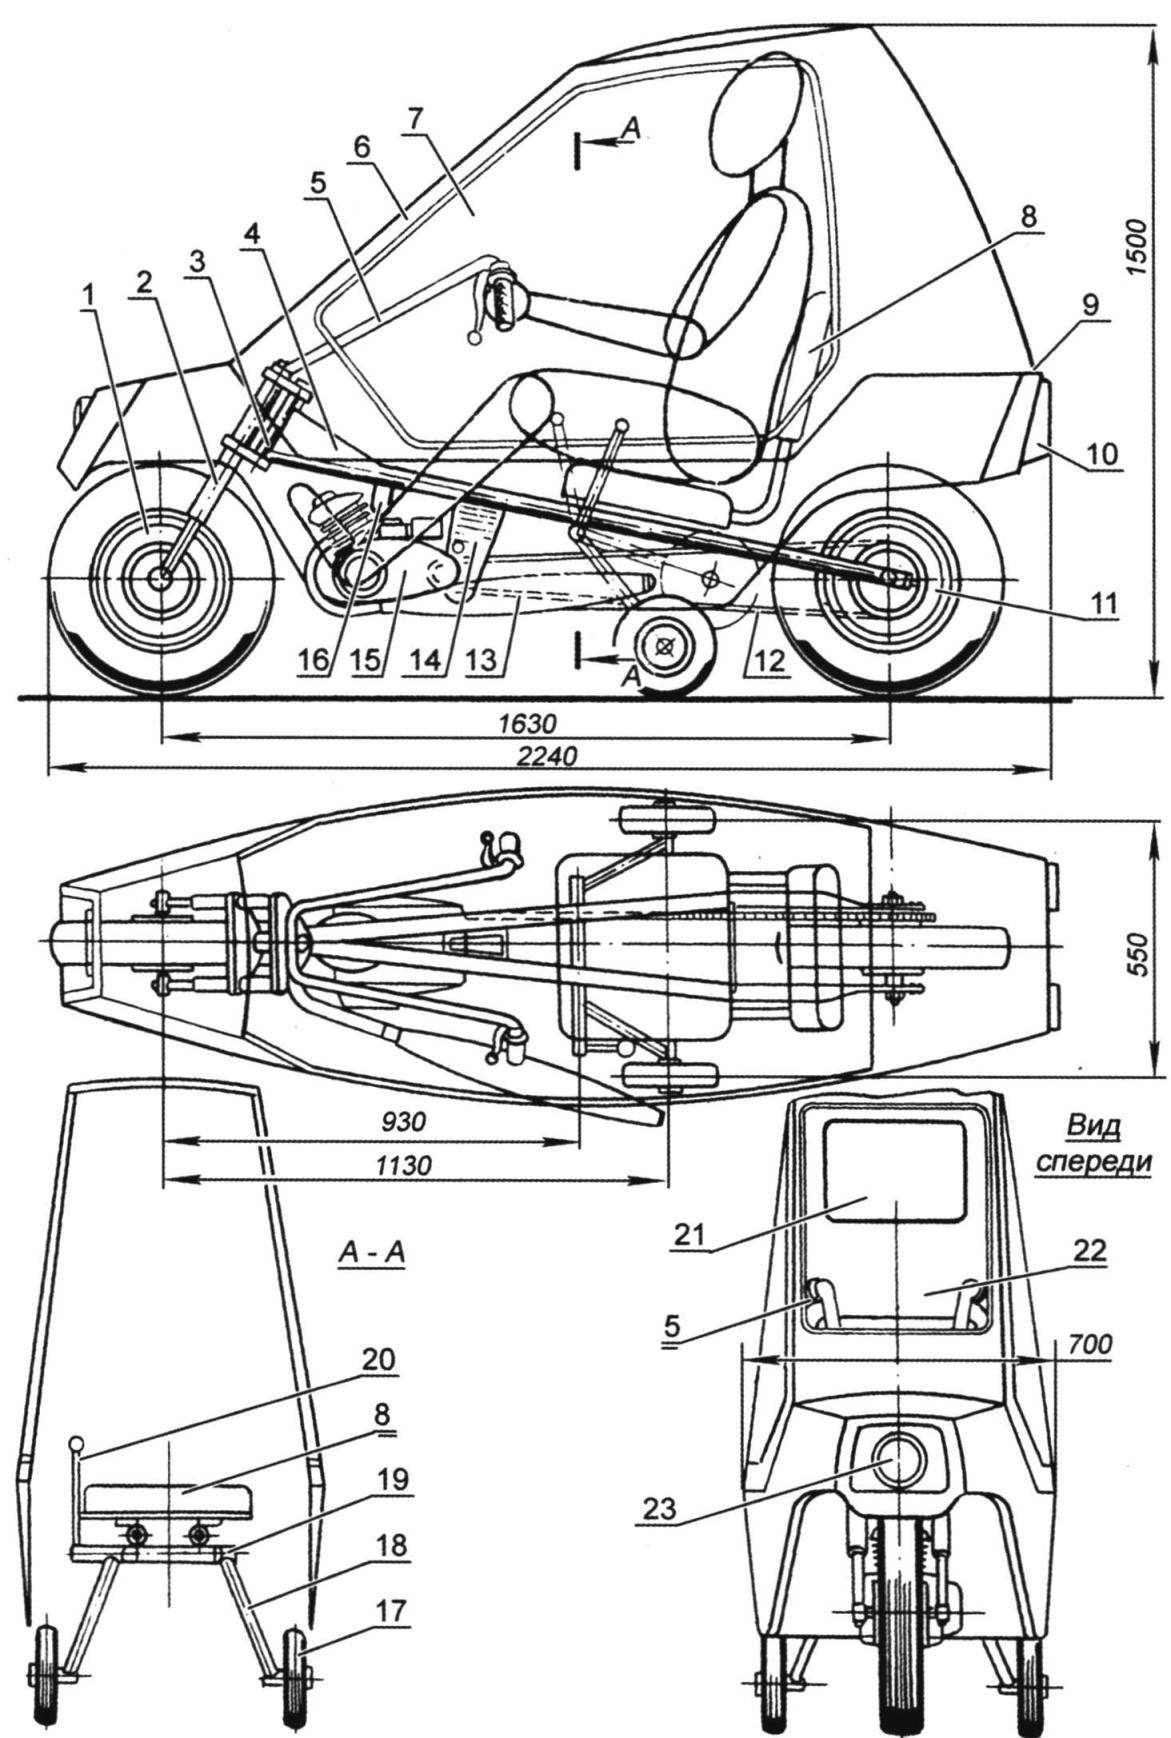
The layout of autoroller:
1 – front wheel (from mini-mokik or scooter); 2 – fork of the front wheel (of a motor scooter of any brand); 3 – steering column frame; 4 – reinforcing the gusset plate sheet steel 2.5 mm thick; 5 – wheel (mini-mokik); 6 – folding glazed part of the body – “light”; 7 – block glass (Mylar film); 8 – driver’s seat (the upper part of the metal chair, covered with foam rubber and artificial leather); 9 – hinge flip top case (“light”); 10 – tail lights and brake lights (lights from a motorcycle or scooter); 11 – rear wheel (from mini-mokik or sclera); 12 – Bush roller chain (assembled from the regular motorbike chain); 13 – silencer (from moped any brand); 14 – rear bracket engine mounts (light is bended from steel sheet with a thickness of 3 mm); 15 – engine (type W-58 or W-62); 16 is the front mounting bracket of the engine (has a bend of steel strip thickness 3 mm); 17 – lateral support wheel; 18 – front chassis (pipe diameter 22 mm); 19 – hinge rotation of the supporting wheels; 20 – lever release and cleaning wheel; 21 rear window (Mylar film); 22 – front window (Mylar foil); 23 – headlight (from a moped any brand)
Wheels for the chassis – from a child’s Bicycle. It is desirable that it was a rubberized “quilted” or wheels with solid rubber (but not plastic) tire diameter up to 200 mm.
Autoroller fuel tank – a plastic or aluminum canister with a capacity of 5 liters. It is equipped with a standard motorcycle fuel tap with sediment bowl and set to the rear of the body. In the tube canisters must be drilled drainage hole.
Body – plastic. However, the frame should be collected from the wooden slats of cross section 20×20 mm.
The lower part of the body like the hull of small vessels. First, the slats collected the elements of a set of cross, and after installation in accordance with drawing pristykovyvayas longitudinal slats. Then the frame is sheathed. I suggest to use plastic for lining kitchen furniture (found at hardware stores). Gluing of the frame and the covering are made on epoxy glue. If you do not find the plastic, do not worry. Acceptable sheathing of thin (3 mm) plywood or even hardboard of the same thickness. There are other options.
The upper part of the body is done it seems. A glazing made of transparent film that modelers use for covering model aircraft. In accordance with the size of window openings take a frame of wooden laths with cross-section 10×20 mm With spacers. Further, the frame applied to the film, cut along the outline with an allowance of 20 mm. thereafter, the film tuck and glued to the frame with glue BF-2. The junction iron electric iron controller which is set to “silk”. Now the frame can be installed in a window opening, attracted the screws.
Your window, of course, at first would not be very nice – vtoruyu to pull hard Mylar complicated. Use the iron – set the regulator to the position “cotton” or “canvas” and iron Dacron. It will tighten and straighten.
Final trim is simple. If the veneer is plastic enough to luted the joints with epoxy putty (you can make one from epoxy glue and talc) and color – first nitrogenatom, and then nitroenamels. If the body is sheathed with plywood or hardboard, preferably after leveling the surface of the filler to paste over it with a layer of fiberglass in epoxy resin and paint.
Special attention – to the control system. It differs a little from moidoscopy. On the steering wheel, borrowed from the mini-mokik Riga production, mounted throttle, front brake lever (right side) and clutch lever (left). If the engine is designed for manual switch gear, set it on the steering wheel to the left.
The starter engine needs work. In the simplest case, the lever kick-starter is moving on the splined shaft so that it was easy to press a leg, sitting in the driver’s seat. And more rope starter. On the splined shaft pulley set with a wound two or three turns of the nylon cord. The free end of the cord is withdrawn to a convenient place to start your left hand and provide a handle in the form of an inverted T.
And last on control – lever to retract the landing gear. It is most convenient to place it under the left hand of the driver. A brake pedal which actuates the pads the rear wheel is under your right foot.
Out recommend, not installing the top of the cab -“light.” Sit back in the driver’s seat (of course, the chassis must be released), install the gear lever in neutral position and a triggering device to start the engine. Warm up, start driving – first on first gear, then second. Chassis remove only when you feel that autoroller sustainable. Of course, to drive additional wheels will initially be unusual, but this skill is easily produced.
In the operation of autoroller remember that the engine is cooled worse than the mopeds. So make sure that the hole in the housing for cooling the cylinder was located in the alcove of the front wheel right up against the cylinder, and its dimensions was more of a cylinder. If the cooling will be ineffective and the engine starts to overheat, have to smash his head on forced cooling. Make it not too difficult. It is necessary to remove from the motor’s right crankcase cover and flywheel, the generator rotor to attach the aluminum blades centrifugal fan. Cover-duct it is possible to bend aluminum sheet or applied to the wall of cloth and epoxy on the blank foam, putty plasticine or window putty netgateway.
I. EVSTRATOV, engineer
Recommend to read
 SOCKET — LOCK
To keep the inquisitive child" from dangerous "experience" with an electric shock will help a simple device. In textolite disc Ø 38 mm and a thickness of 2 mm drilled Central hole Ø 3 mm... FROM THE CLOUD — IN FAUCET
Almost every rural or suburban home on the corner, under the gutters is a barrel for collecting rainwater. This, of course, the easiest option, but if m only! Remember: around this place...
