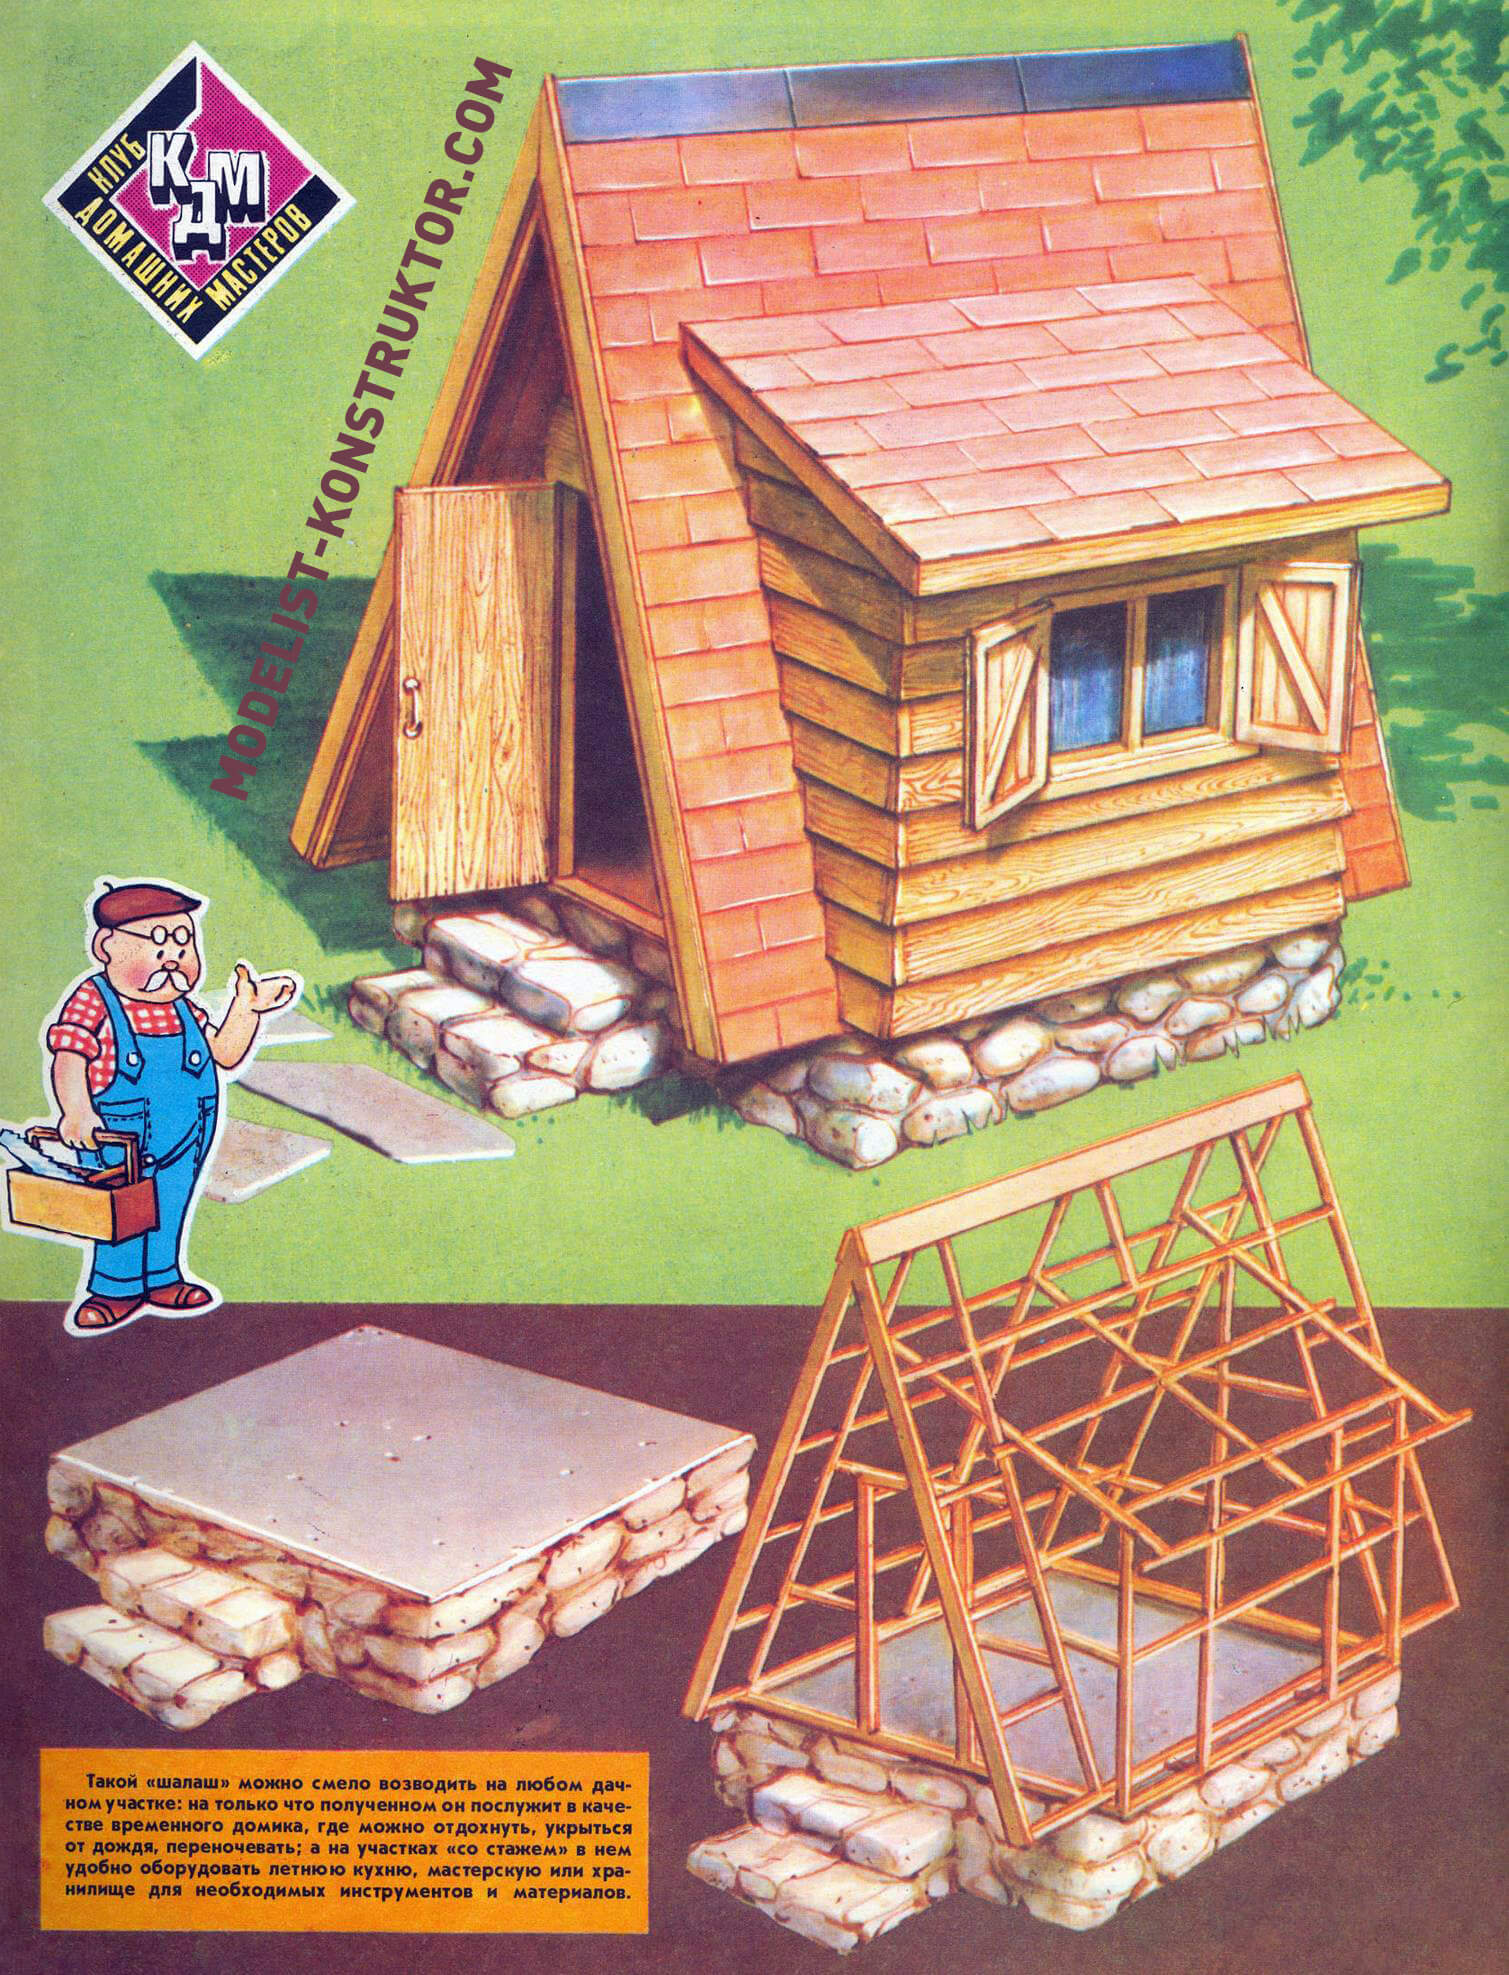
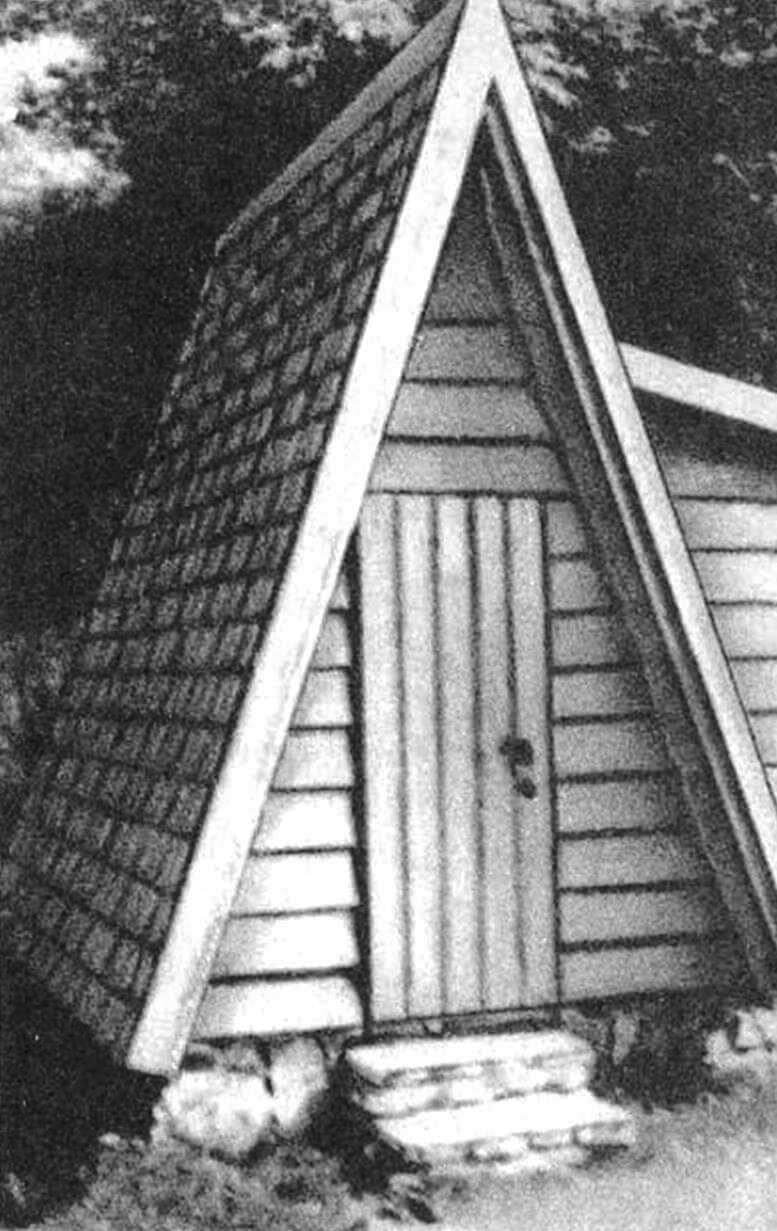
The mini-house, which we will tell you about now, fits perfectly into any garden plot. If necessary, it can become the main or temporary shelter for you and your family (if you are building another large house). It is also suitable as a storage room for carpentry and plumbing tools, garden supplies. The construction of the “hut” will take a total of several days – of course, if all the materials for its construction are at hand.
FOUNDATION
This small wooden house will require an area of only 2X2 m. The foundation (foundation) for it is laid from concrete and stones laid on a level surface.
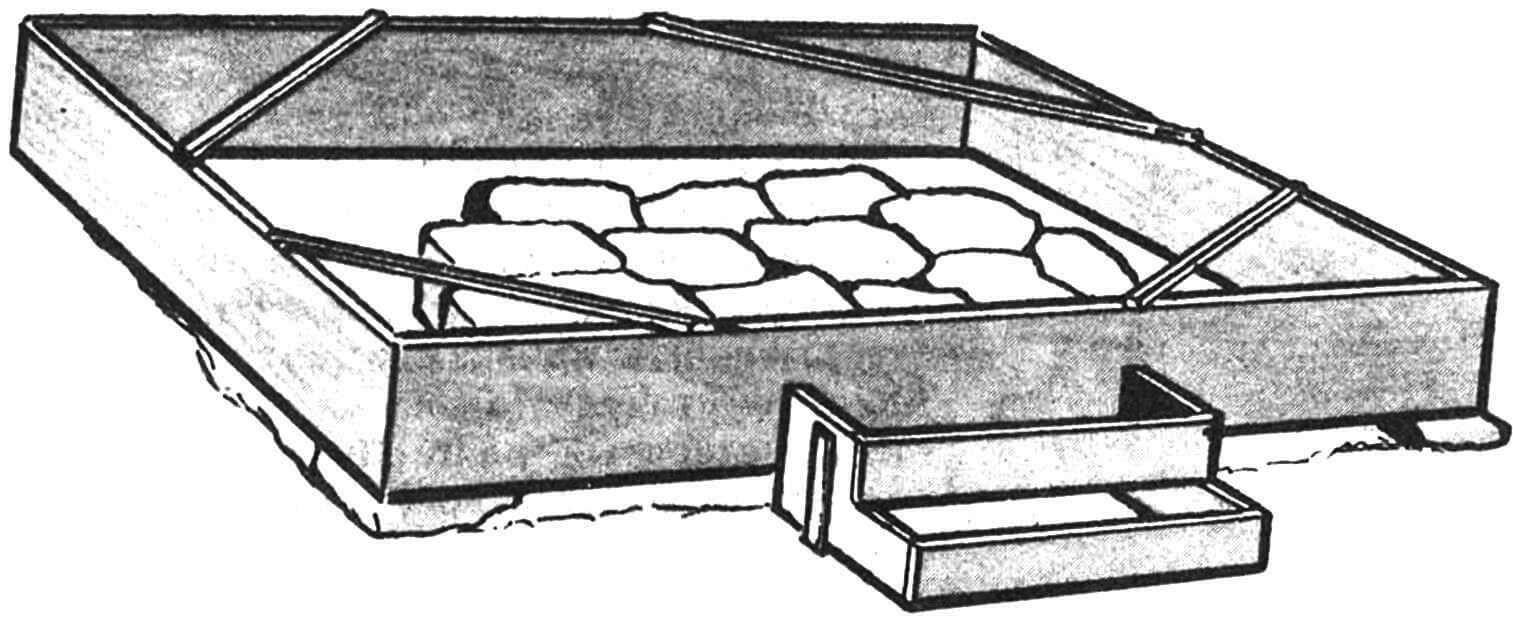
The height of the foundation from ground level is 0.3 m. First, a frame of two-meter boards is installed on the prepared site, the upper plane of which must be strictly horizontal. From the sides, the frame on the site is strengthened with stones and slats. The formwork for the porch is attached to it. Stones or old bricks (for example, from some destroyed building) are placed at the base of the foundation, and it is advisable to place the largest of them on the sides. The space between them is filled with cement mortar, which then forms the entire horizontal plane of the base.
It is better to lay out the porch from natural stone in a rectangular shape, filling the gaps with cement mortar.
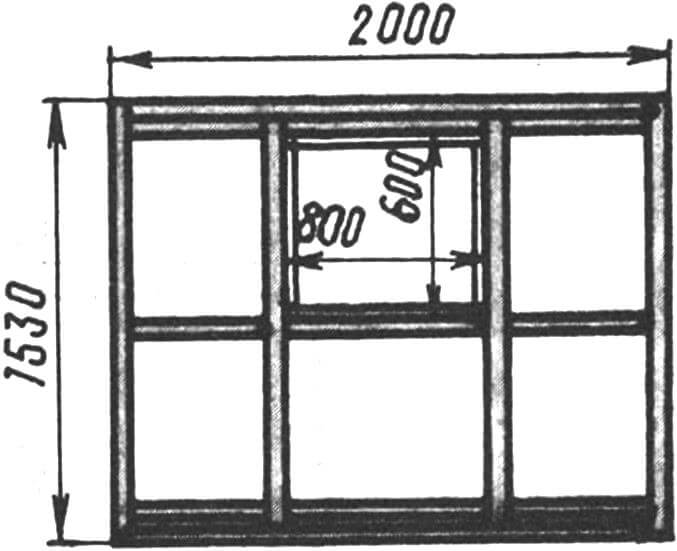
FRAME “SHUT”
The house itself is made of bars and boards. If the “hut” will be used as a temporary or storage room, the dimensions of the door and its shape will have to be changed. In this case, the doorway can be located in a side extension (the height of which should be increased), and the window opening can be made on the front or rear facade.
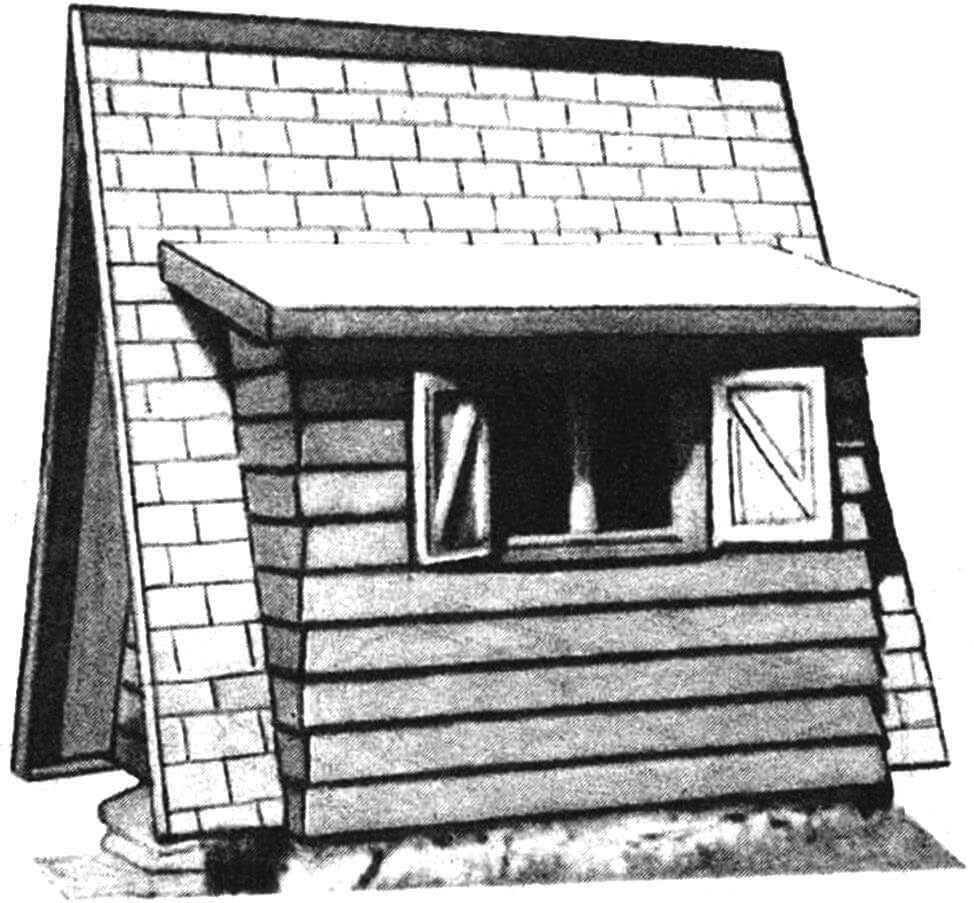
While the concrete is setting (several days), start making the wooden frame of the house and extension. On the south side of the “hut” there is a door, on the east there is an extension and a window opening. The sides of the house (“overhangs”) protrude beyond the base of the house by 0.4 m on both sides.
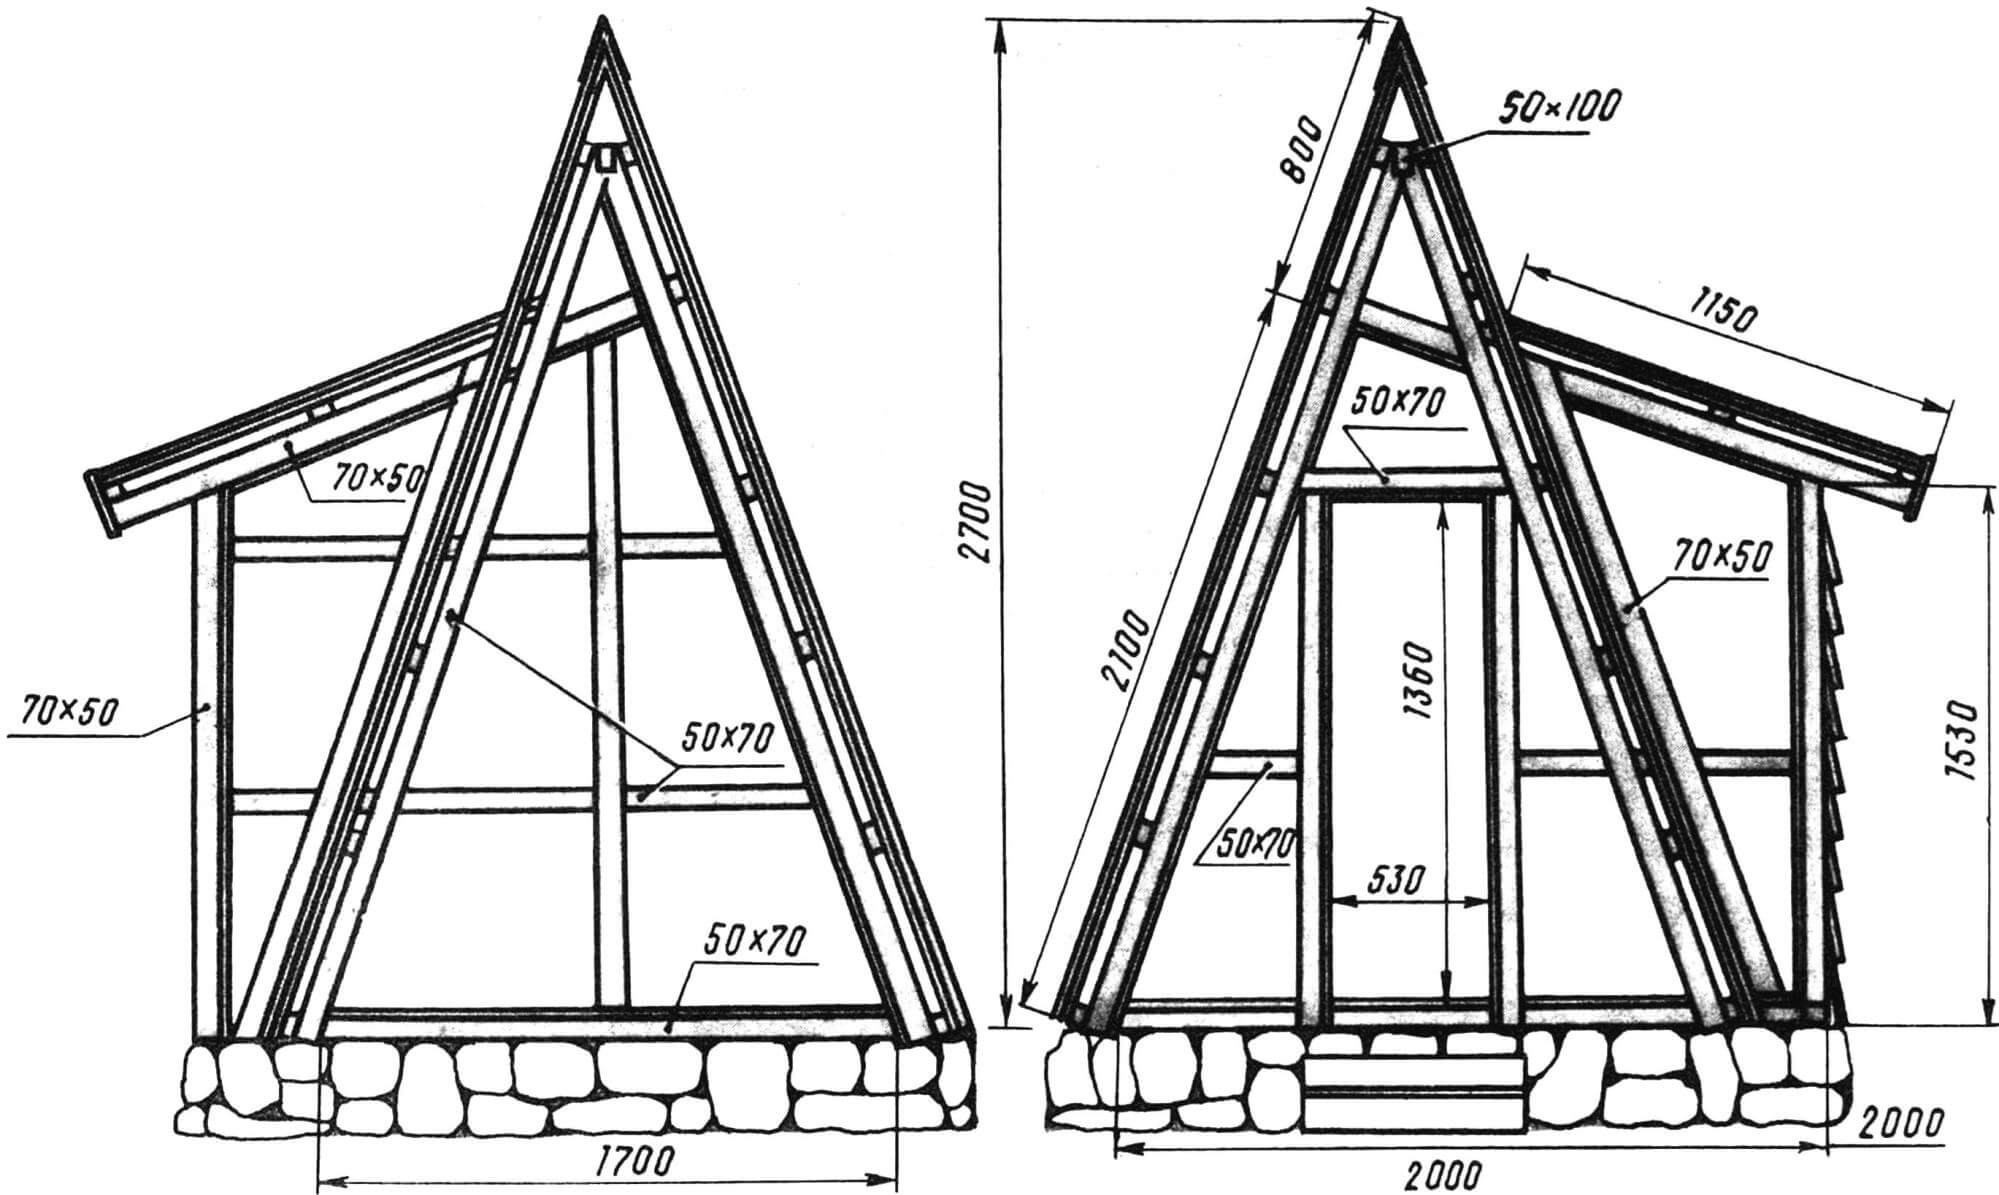
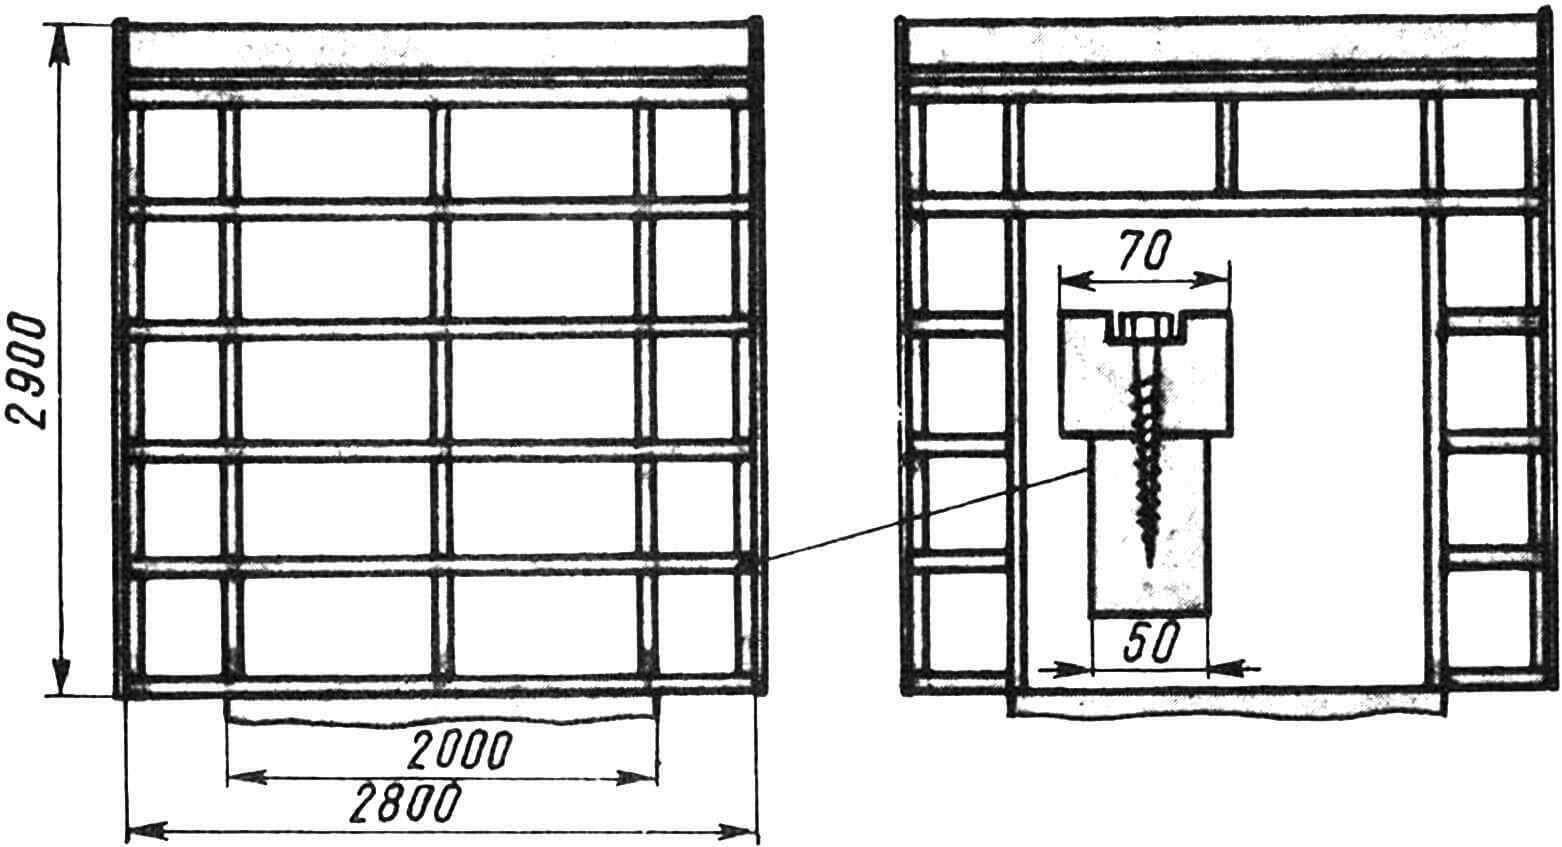
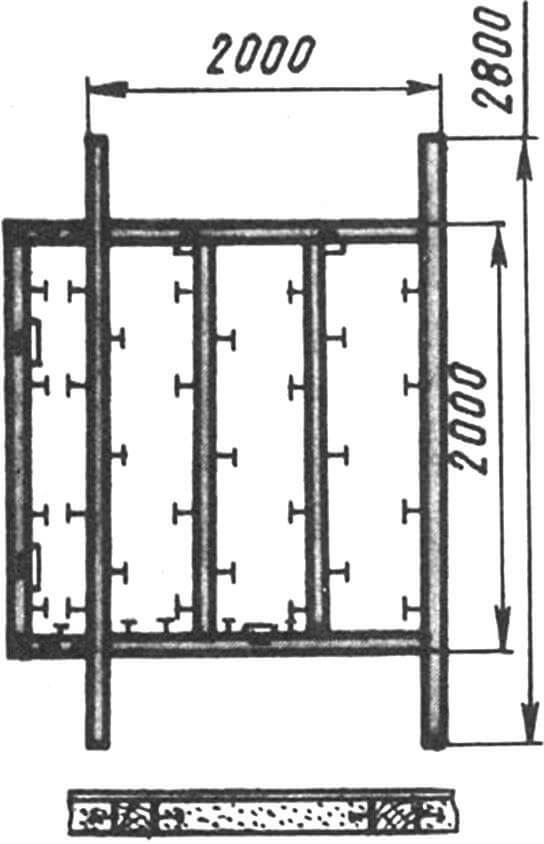
The main frame of the “hut” and the frame of the extension are assembled from bars with a section of 50X70 mm. Please note that if in the picture there is a size of 70X50 near the block, this means that the 70 mm side is “looking” at us; in the same pictures where the size 50X70 is indicated, the 50 mm side “looks” at us.
The frame bars are connected to each other with screws and nails. The tenon connection (like the mortise) is used only when connecting them to the base frame. The latter is buried in the concrete of the foundation. The frame bars are connected to each other with screws. Nails are driven into the sides of the bars (approximately every 0.5 m): thanks to them, the frame buried in the concrete will be more firmly connected to the foundation. The two side frames are connected to each other using a steel plate measuring 50×100 mm at the roof ridge.
The sidewalls and the extension are connected to each other (in addition to the tie on the roof ridge) by three bars.
WOODEN COVERING “SHUT”
The frame of the house is covered with boards both outside and inside. The floor is also made of boards nailed to the joists. It is best to cover the inside of the house with clapboard, chipboard or fiberboard or plywood. The cracks in the door and window openings are also sealed with boards, cut at an angle of 45° at the joints.
The front facade of the house (south side with the door), the extension with the window and the rear facade have the same cladding – overlapping boards, overlapping each other by approximately 20 mm.
The sides (which also double as the roof) and the roof of the extension have the same cladding. These can be PVC tiles, usually used to cover the floor (with or without a pattern); plates cut from linoleum (baseless), or, finally, roofing felt. The rain sheathing should be glued and its edges secured with slats and nails. In this way, the facades of the house and extensions will not only be reliably protected from the weather, but will also look beautiful.
The roof ridge should be covered with a bent aluminum or galvanized steel strip.
Before construction begins, the frame slats must be impregnated with the Senezh composition. It is best to stain and varnish interior finishing boards. If you use plywood, chipboard or fiberboard, the walls should be painted. The outside of the “hut” is covered with stain, drying oil (in two steps) and oil paint or varnish.
Based on materials from the magazine “EZERMESTER” (Hungary)
Recommend to read
 SOLARIUM FOR CUCUMBERS
The third year of the Soviet people are working on implementing the Food program of the USSR adopted the may (1982) CPSU Central Committee Plenum. And not only adults. A contribution to... THE DREAM OF BATHERS
Oven-stove for baths, which will be discussed below, the list was designed and built by me. Prior to this was construction of a camp bath, "badger valley" with a simple stove type...
