No matter how good a tool or even a machine a home craftsman has, drilling a hole accurately or machining a workpiece properly while holding it with pliers, let alone in one’s hands, is frankly impossible. That is why any home workshop, even a beginner’s, includes a vise. True, this useful device is not always exactly what is needed—especially when high dimensional accuracy, strict parallelism or perpendicularity of part surfaces, and the like are required.
So I decided to make a vise, so to speak, to my own design. I built them and have been using them for about ten years. Their appearance is now rather spoiled by rough handling, but they still perform their function reliably and I am satisfied with them. I would therefore like to share their design with the magazine’s readers.
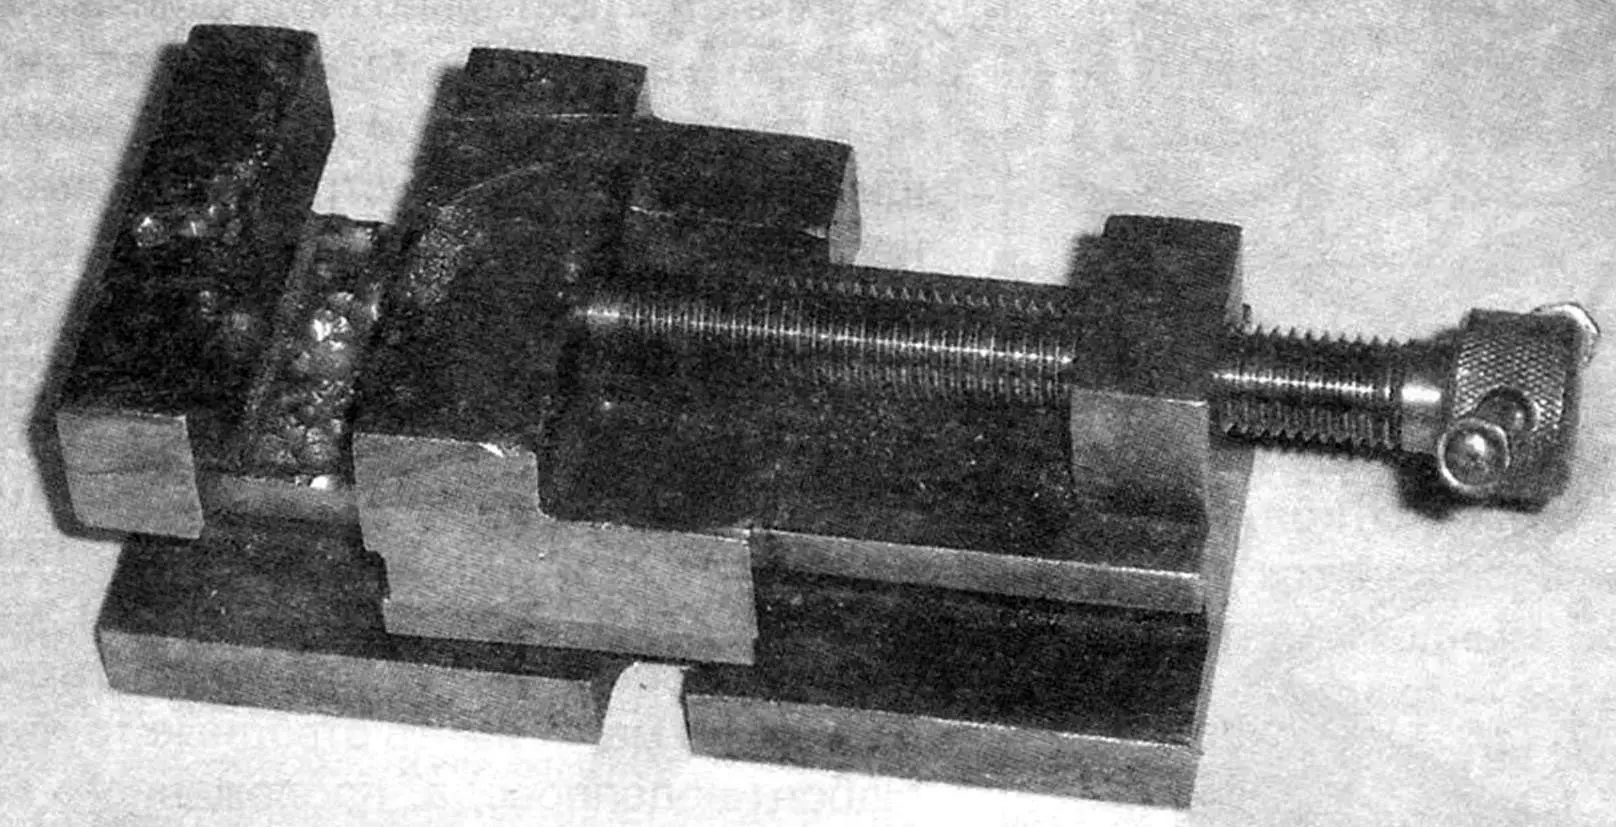
Before describing the device, I should note that I am giving a slightly different version than the one in the photograph. The proposed design is simpler to make but no less functional. This applies especially to the movable jaw. Using the vise showed that this part was unnecessarily complex and can be simplified considerably without losing reliability or practicality.
In design my vise is a screw-type parallel vise. It is largely based on machine (bench) vises. The main difference from similar factory-made devices is, of course, its compact size. At the same time it has fairly large flat jaws (strictly parallel to each other) and a substantial support area for workpieces, which is strictly perpendicular to the vertical planes of the jaws.
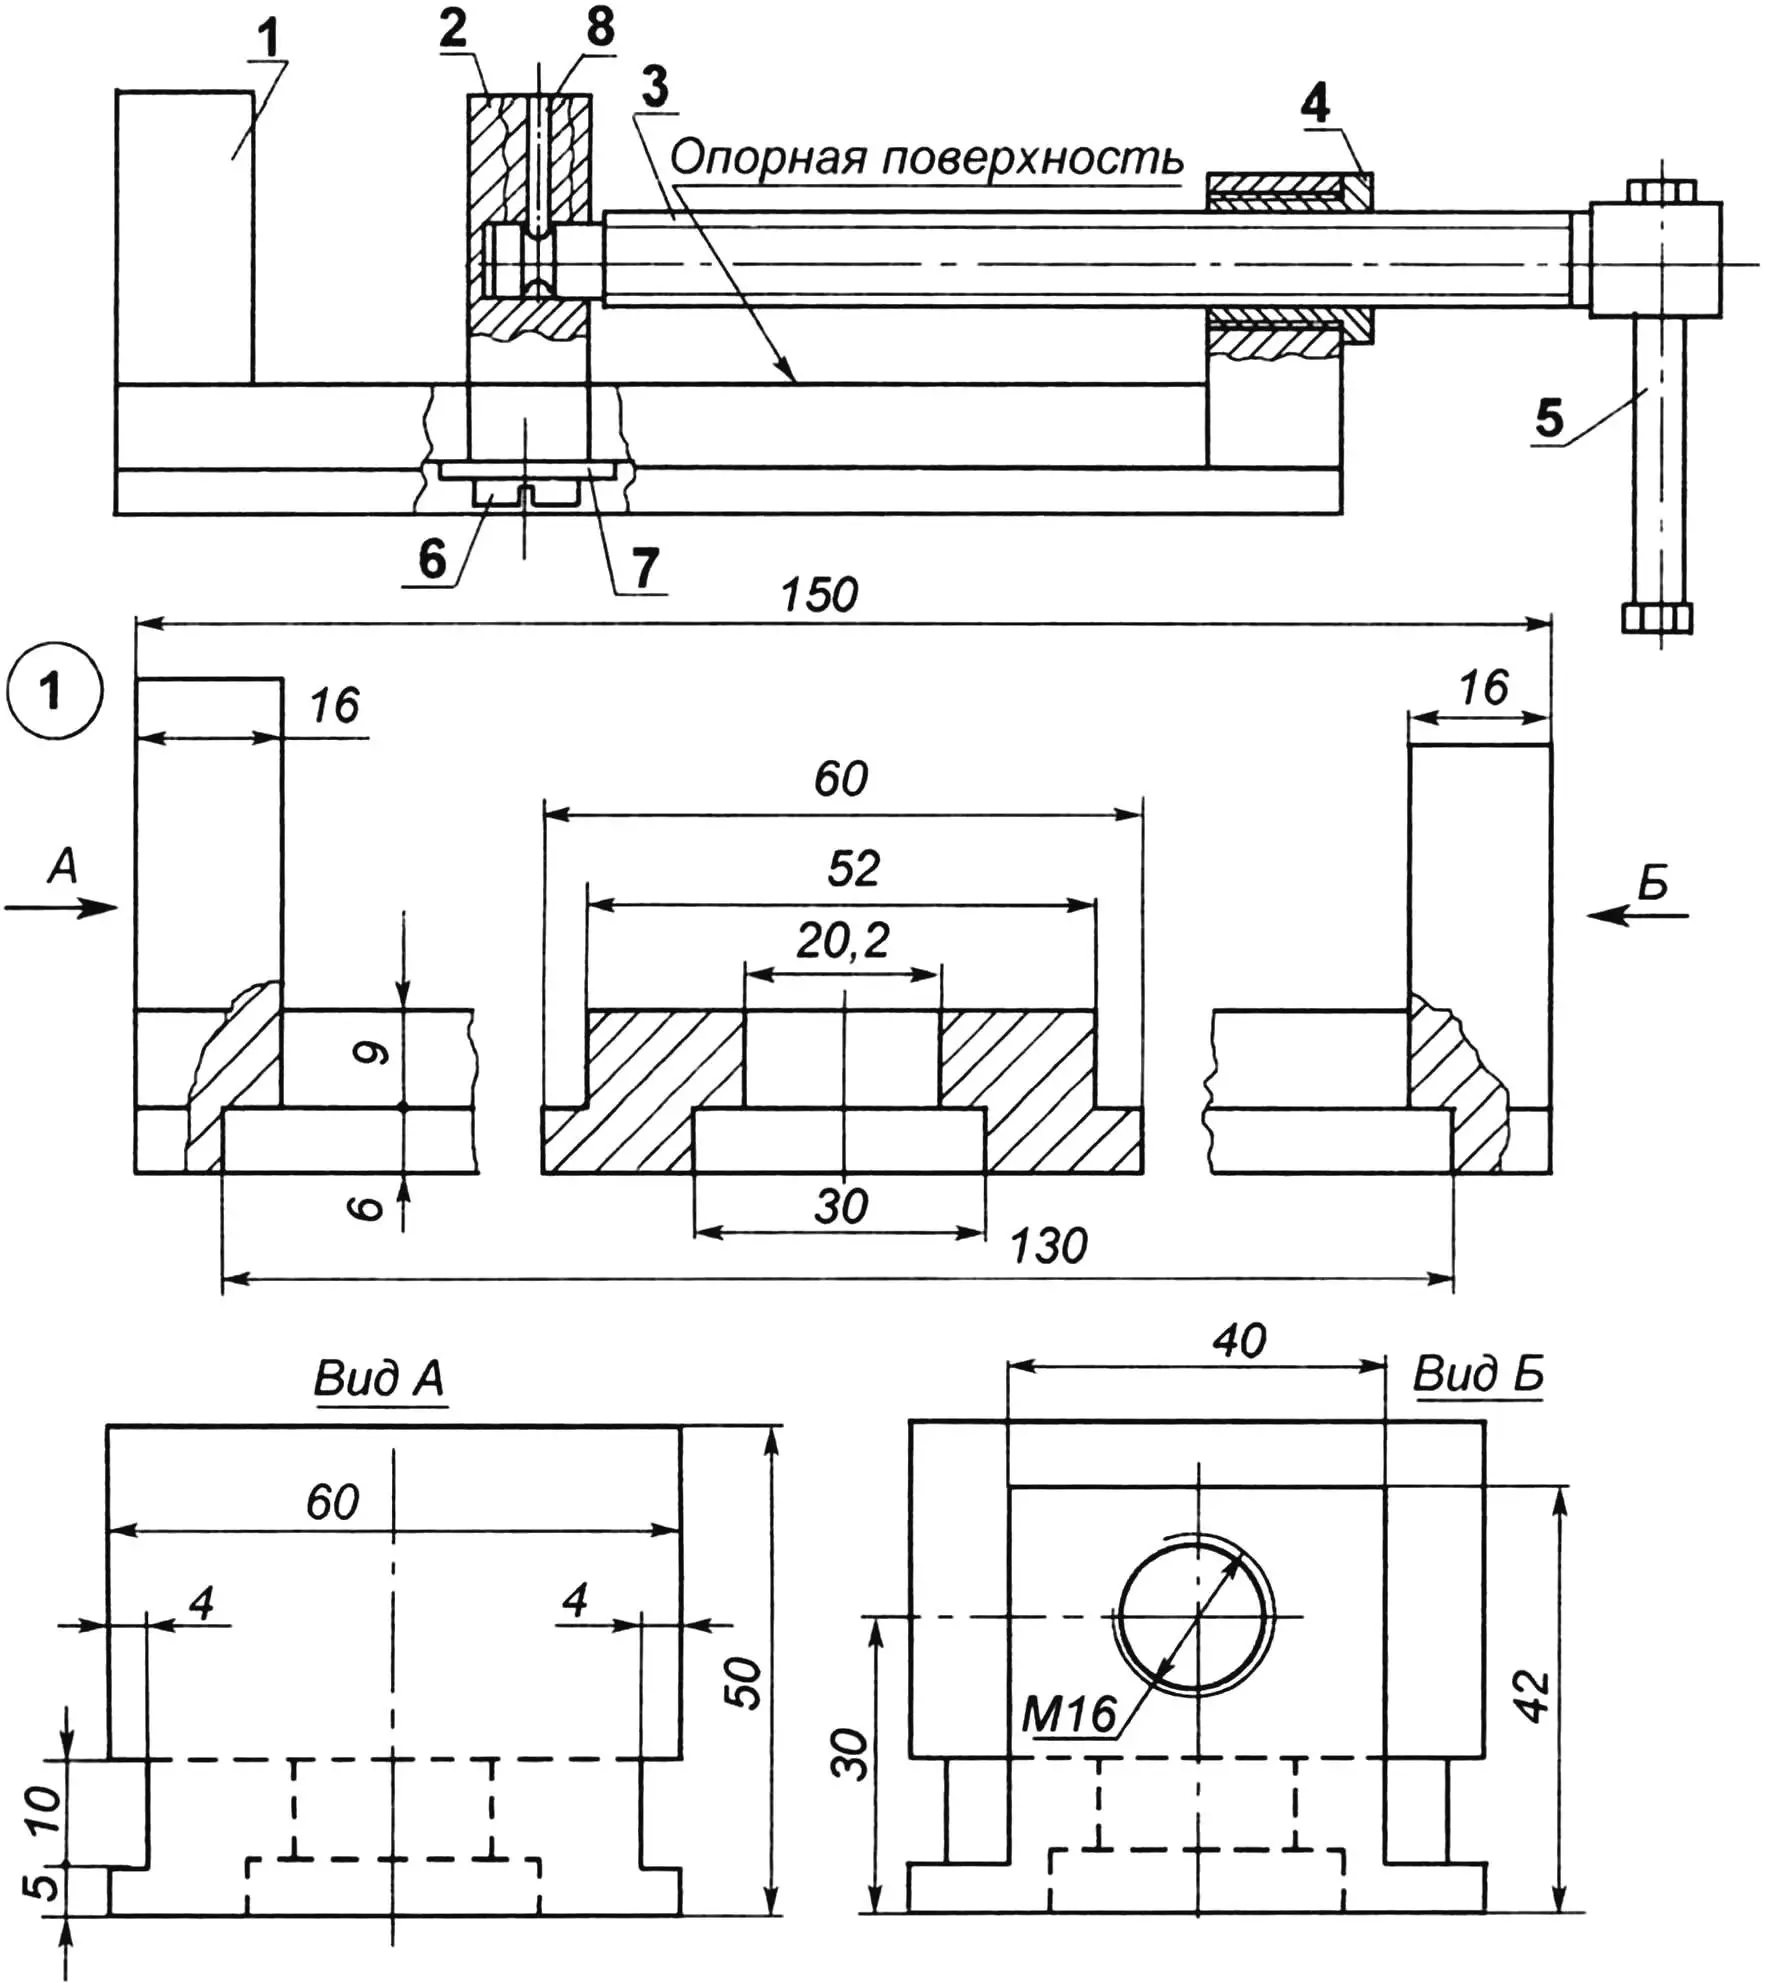
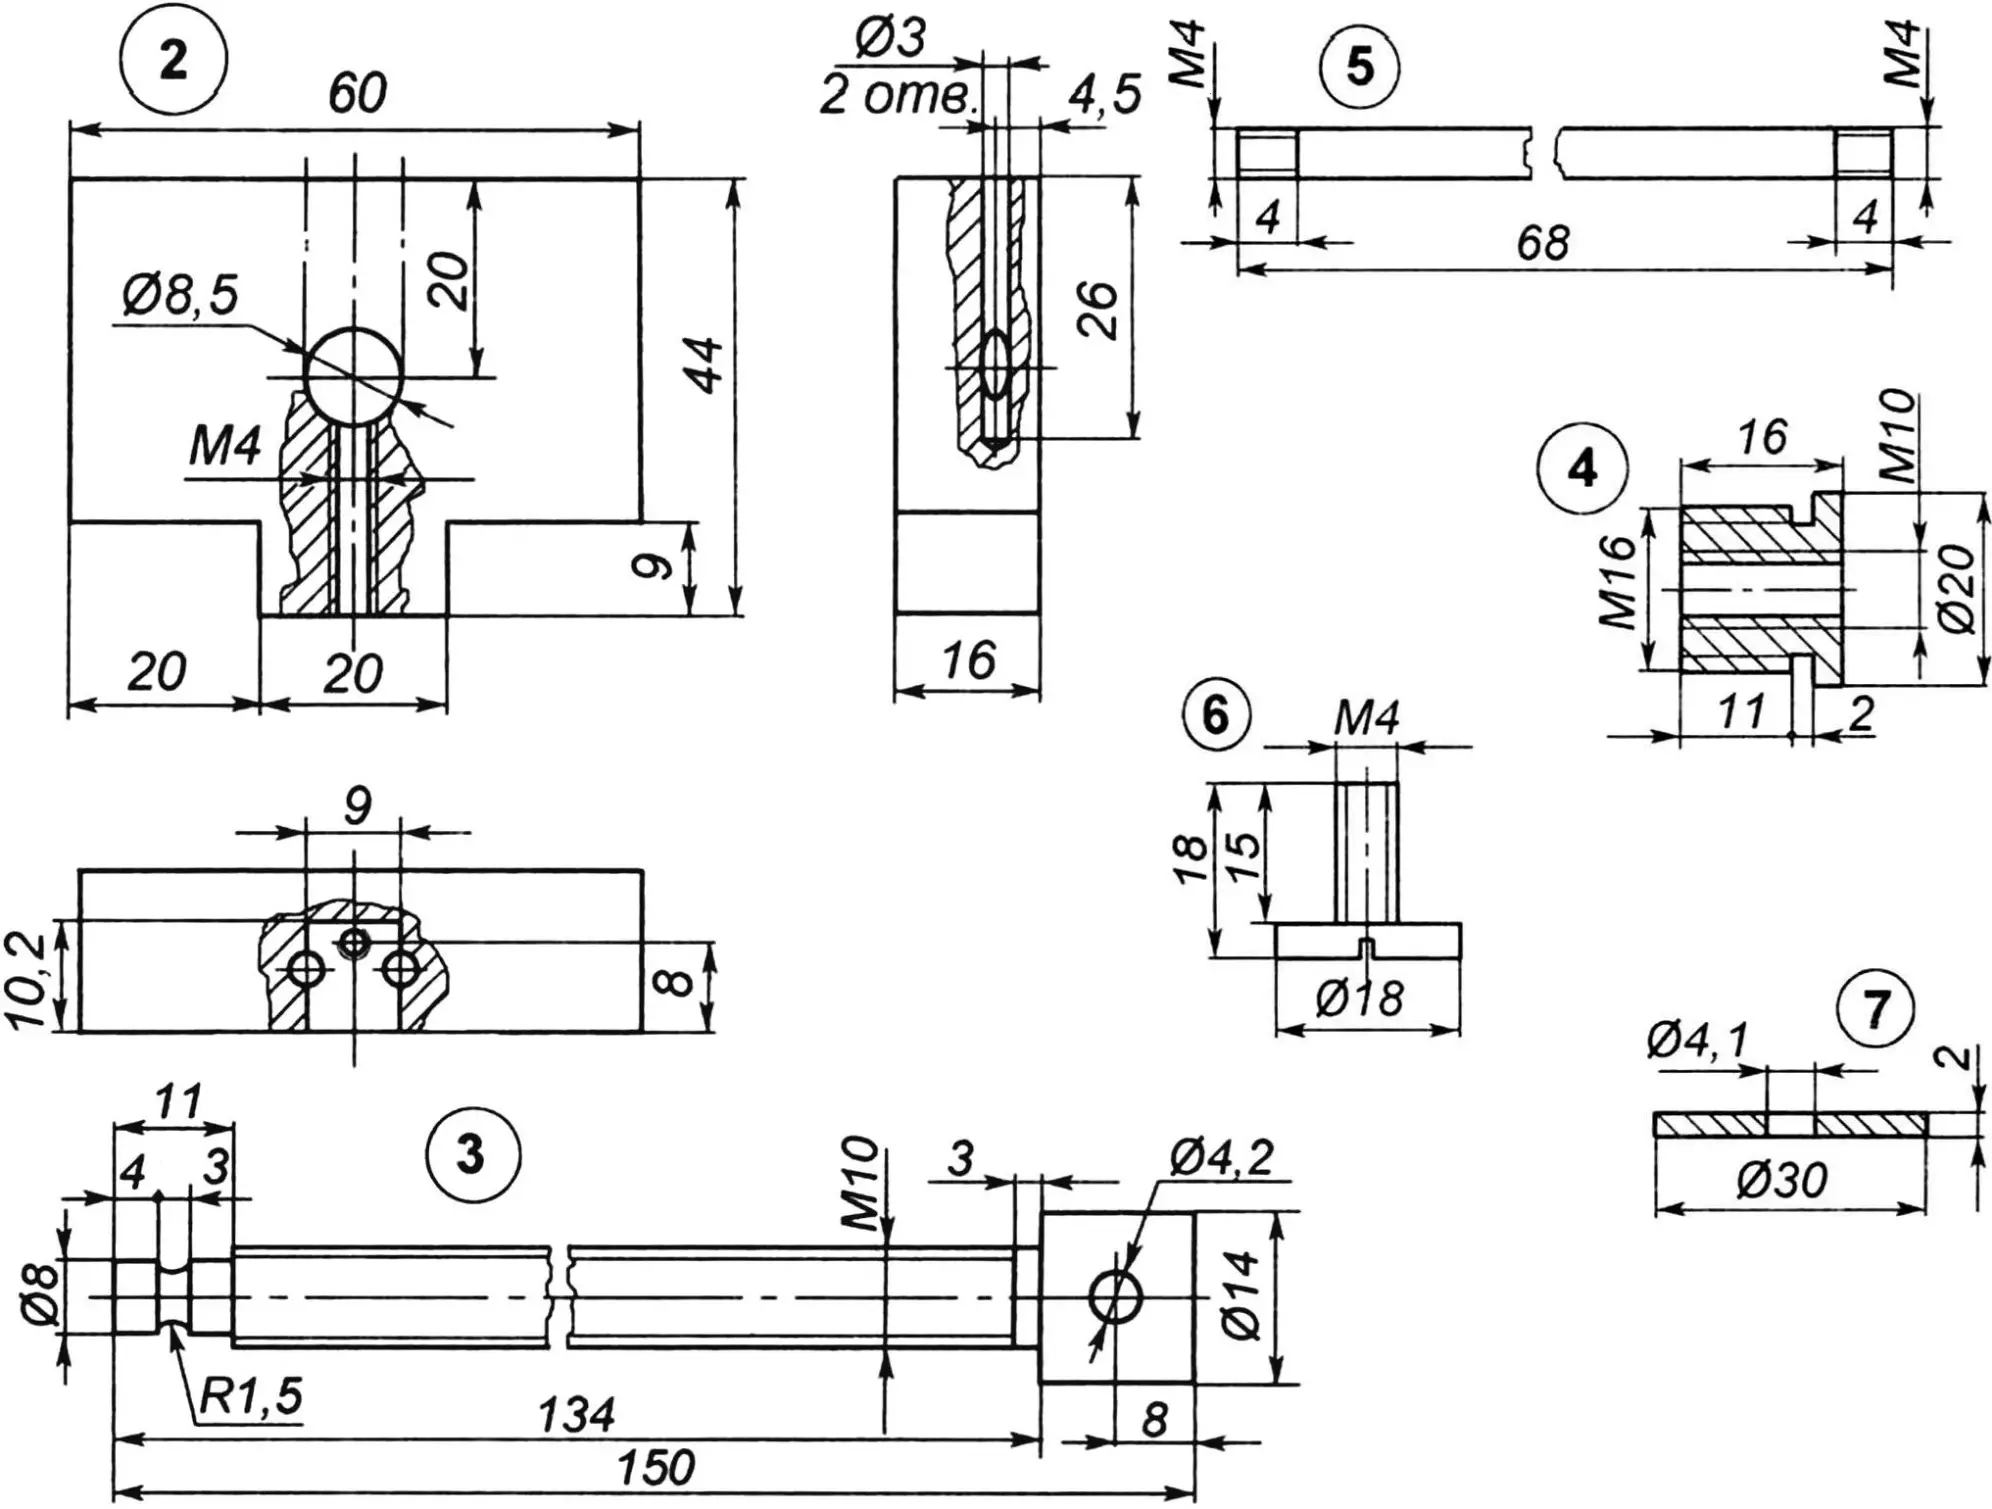
1 — base (St45); 2 — movable jaw (St45); 3 — lead screw M10 (St45, round 14); 4 — threaded bushing M16 and M10 (St45, round 20); 5 — handle (St45, M4 stud with two nuts); 6 — M4 screw for fixing movable jaw (St45); 7 — washer 30×4.5×2 (St10 round 30 or sheet s2); 8 — pin (steel wire Ø3, 2 pcs.)
The vise consists of the following main parts: base, movable jaw, and lead screw. The most complex part to make is the base. It is made in one piece with the fixed jaw and thrust post, and has a recess on the sole side and a longitudinal groove. Making the base requires a milling machine, as well as a lathe for the threaded bushing and lead screw. However, if the vise will not be used intensively, the threaded bushing can be omitted and M10 thread for the lead screw can be cut directly in the thrust post.
The movable jaw is a simple part, and the lead screw can be a standard one with minor modifications.
Auxiliary parts—the lead screw handle, movable jaw fixing screw, washer, and pins—are also easy to find among standard hardware, and even a beginner can make them without much trouble.
When building the vise, it makes sense to fit the movable jaw to the fixed one and grind them together on three sides: top and both sides. The tenon of the movable jaw should also run in the base groove easily but without play.
The hole for the lead screw (threaded bushing) in the base thrust post and the socket (blind hole) in the movable jaw should be drilled together. The end of the lead screw in the movable jaw socket should also run freely but without excessive play.
After making the parts, all sharp edges should be deburred, and the movable and fixed jaws, lead screw, and threaded bushing should be hardened to 30 HRC. On assembly, rubbing surfaces should be lubricated with a thin layer of grease.
«Modelist-Konstruktor» No. 2’2007, Yu. KURBAKOV
Recommend to read
 BREADBOX-SORCERESS
What place does the bread on our table, understandable and to the children no wonder the old Russian saying says: "Bread is a head". Frugal, rational use of it depends on how long he...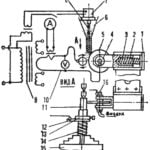 AS A NEWLY-MINTED
Just so you can say about worn parts restored by the method developed at the Chelyabinsk Institute of mechanization and electrification of agriculture. With the larger axles,...
