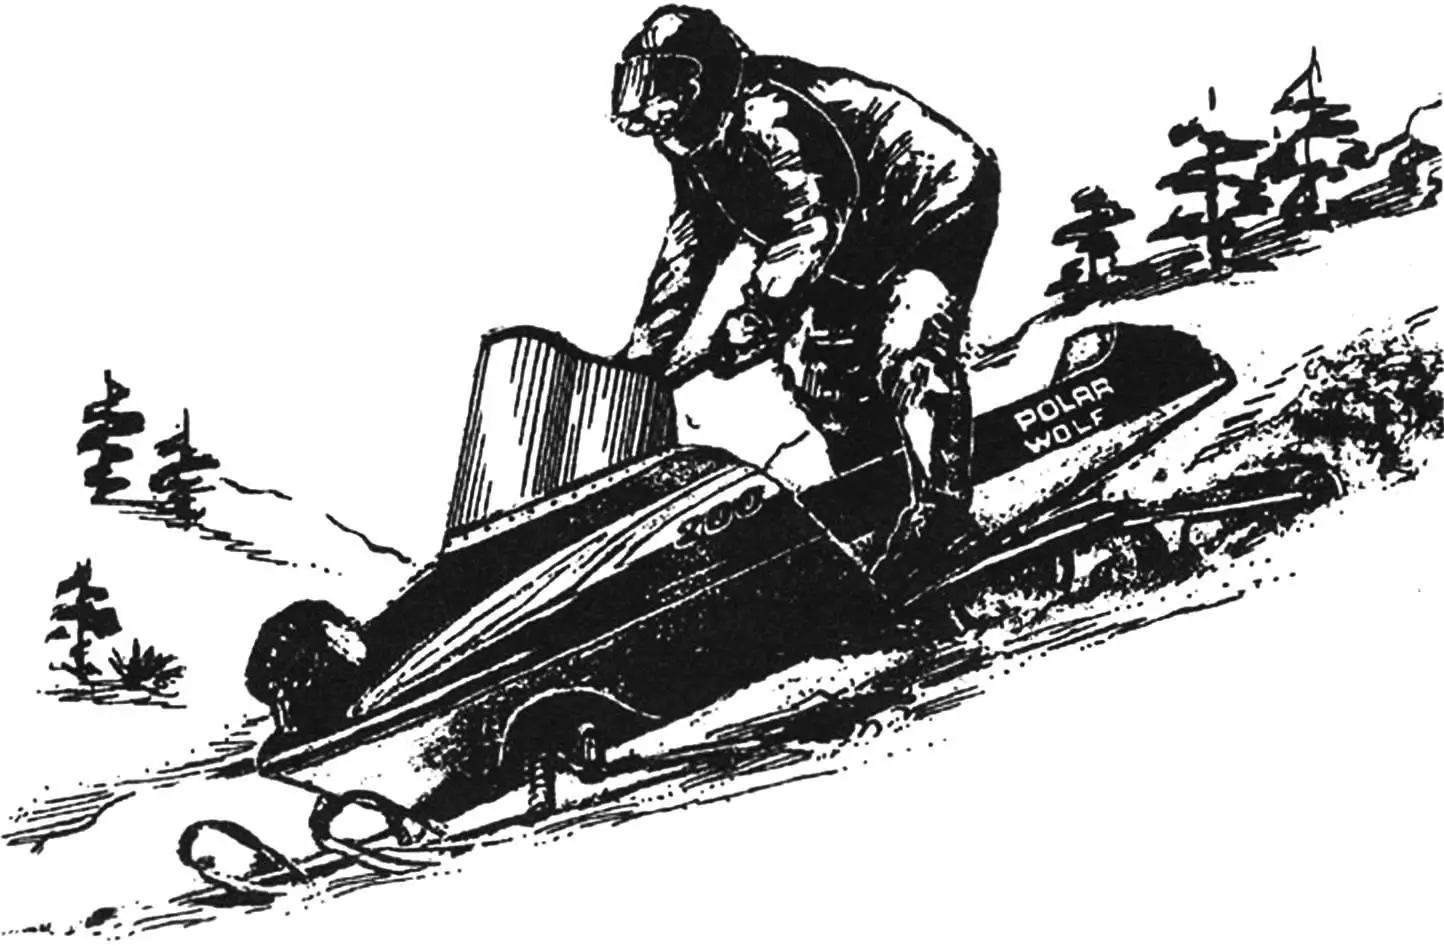
In recent years, DIY snowmobile designers have somehow forgotten about ski-and-track machines whose designs have been perfected by dozens of manufacturers across hundreds of models, and instead prefer simpler, more versatile all-terrain vehicles on low-pressure tires. Nevertheless, from time to time snowmobile enthusiasts design classic motor sleds as well, creating simple and functional machines. A characteristic example is the ski-and-track snowmobile “Polar Wolf,” engineered by Igor Galkin.
The “Polar Wolf” is a three-point vehicle (a pair of skis up front and a track in the rear) intended to travel over snow at speeds of up to 60 km/h.
The snowmobile is driven by a rubberized fabric track made from a 300‑mm-wide conveyor belt joined into a loop with a homemade articulating hinge. Duralumin channel cleats are mounted on the outer surface of the track, while special brackets on the inner surface let the drive sprocket set the track in motion.
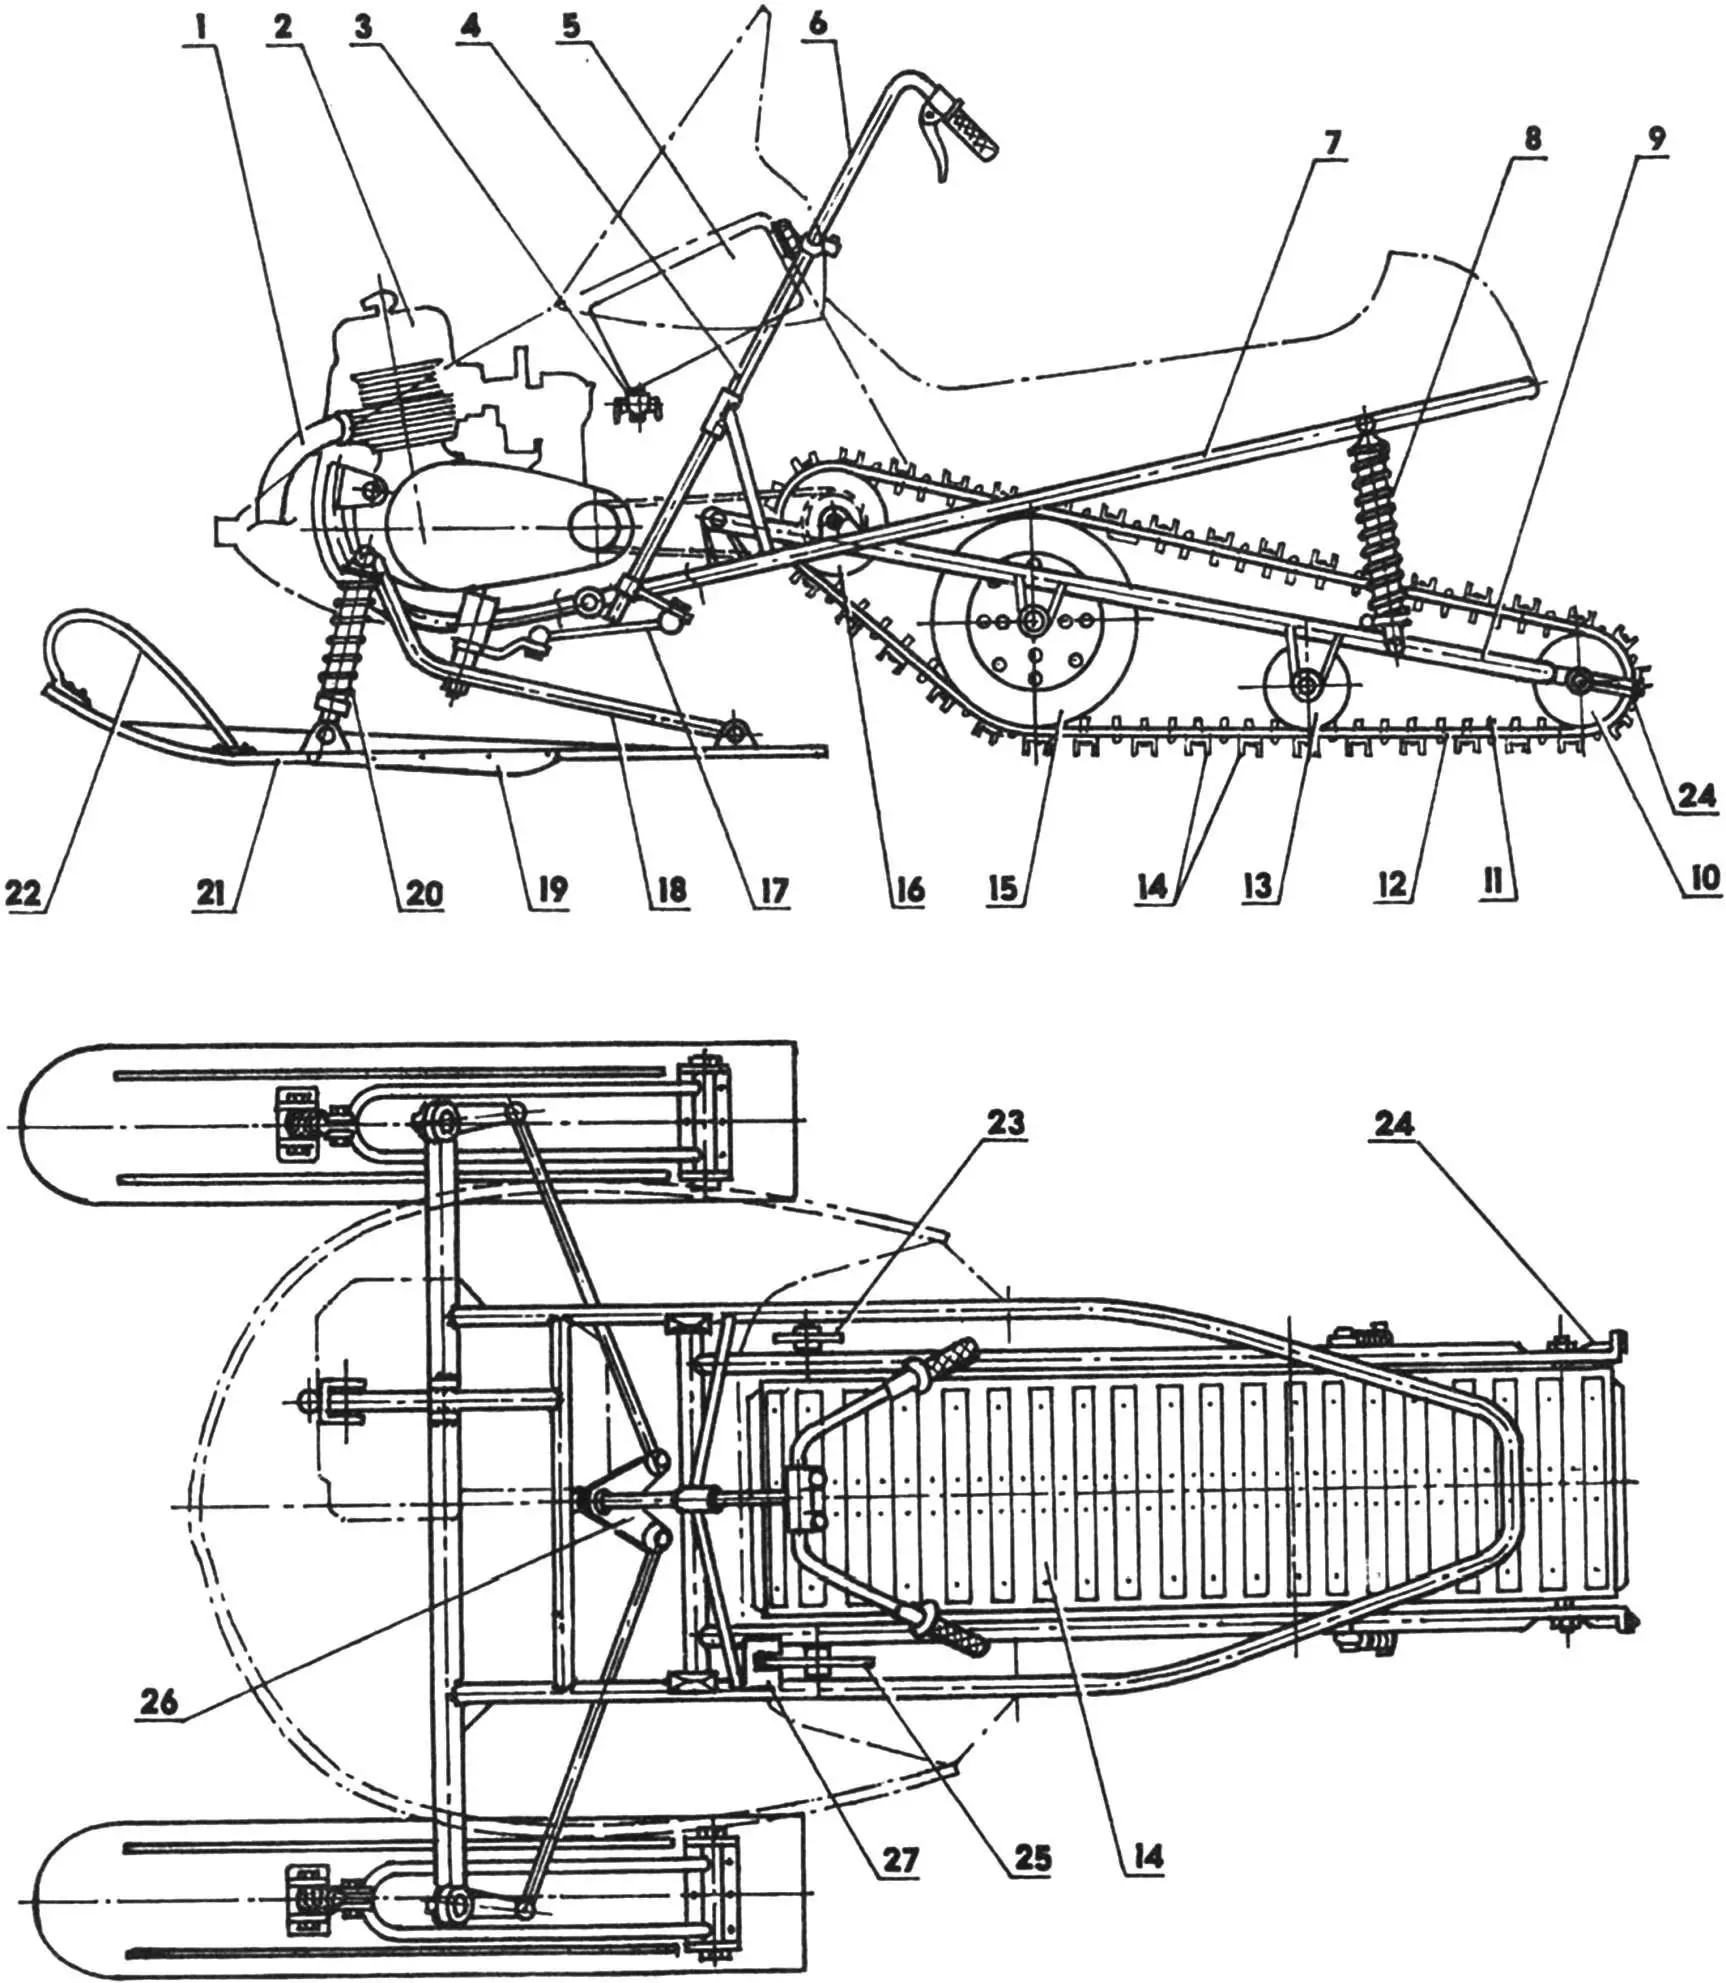
1 — engine exhaust pipe; 2 — TG-200M engine (displacement 199 cm3, output 14 hp); 3 — fuel shutoff/sediment cock; 4 — steering column; 5 — fuel tank (10‑L aluminum jerrycan); 6 — handlebar; 7 — frame (steel tubes 40×2 and 30×2.5); 8 — rear spring-hydraulic shock absorber (from an Izh motorcycle); 9 — track carriage (steel tubes 30×2.5 and 22×2); 10,13,15,16 — track bogie wheels; 11 — bracket; 12 — track (rubberized conveyor belt); 14 — cleats (duralumin channel 20x10x2); 17 — steering link; 18 — bellcrank bracket (steel tube 22×2); 19 — skid (steel sheet s3); 20 — front spring-hydraulic shock absorber (from a Voskhod motorcycle); 21 — ski (laminated from 5‑mm plywood and laminate); 22 — safety hoop; 23 — drive sprocket of the track unit; 24 — tensioner (from an Izh motorcycle); 25 — brake disc; 26 — double-arm steering rocker; 27 — brake caliper
U-shaped brackets with threaded legs are bent from 6‑mm steel rod. To fabricate them quickly and, more importantly, identically, you need a simple forming jig. Hole layout in the track is done with a template: a duralumin plate drilled with pairs of 6.1‑mm holes—at least twenty pairs are required. Place the jig on the rubberized belt, weight it down, and punch the holes with a sharpened, hardened steel tube. Then shift the jig, align the last pair of holes in the belt and jig, bolt it in place, and repeat the punching cycle. The brackets are secured with bolts, nuts, and washers; after tightening, stake the protruding thread lightly to lock the nuts.
The track is installed on a pivoting carriage: its front end is hinge-mounted to the snowmobile frame, while the rear is linked via a pair of spring-hydraulic shock absorbers borrowed from an Izh Jupiter motorcycle. The carriage also carries the drive sprocket plus large and small bogie wheels. Small wheels can be built from moped hubs fitted with improvised tires (rubber rings cut from a motorcycle tube), and big wheels reuse the same hubs with duralumin discs and children’s bicycle tires. The drive sprocket is cut from thick (20‑mm) textolite, though any strong, wear-resistant plastic—vinyl plastic, nylon, polyethylene—will work.
The track is driven by the TG-200M engine via a roller chain; the drive sprocket sits on the outer (right) side of the drive-shaft stub. A brake disc is mounted symmetrically on the opposite side of the shaft, allowing the snowmobile to use a standard Lada brake assembly.
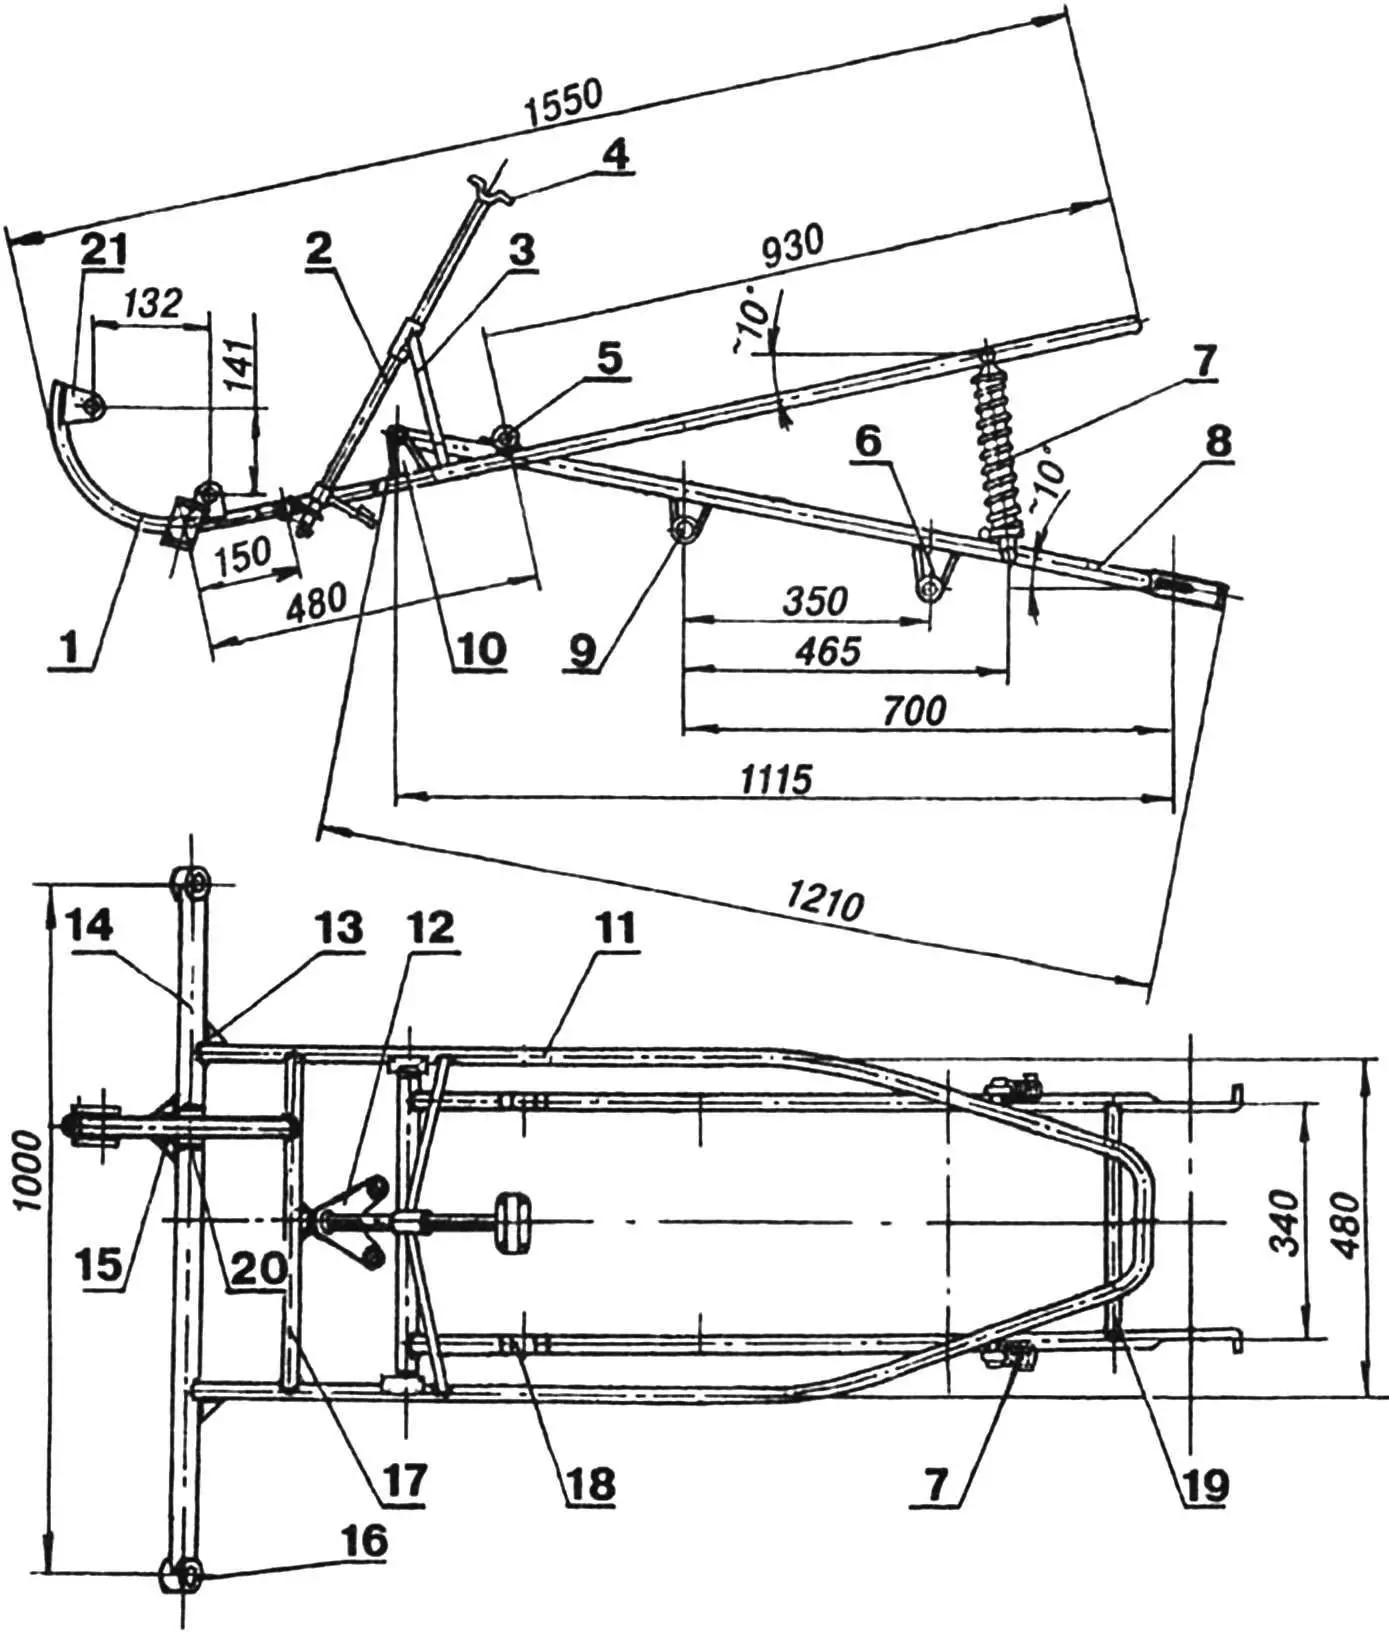
1 — engine cradle (steel tube 30×2.5); 2 — steering column (steel tube 25×2.5); 3 — strut (steel tube 18×2); 4 — half clamp (steel sheet s3); 5 — bearing-housing bracket; 6,9 — support-wheel axle brackets (steel s3); 7 — spring-hydraulic shock absorber (from an Izh motorcycle); 8 — swinging-carriage longeron (steel tube 30×2.5); 10 — carriage-axle bracket (steel sheet s3); 11 — frame base (steel tube 30×2.5); 12 — steering arm (steel sheet s6); 13,15 — reinforcement gussets (steel sheet s3); 14 — front frame cross tube (steel tube 40×2); 16 — steering column; 17,19 — crossmember (steel tube 30×2.5); 18 — bearing-housing bracket (steel sheet s3); 20,21 — engine-mounting nodes
The frame is welded from thin-wall steel tubes 40 mm in diameter for the front cross tube and 30 mm for the rest. A simple jig—say, a large particleboard platform—simplifies assembly: clamp the parts with C-clamps or steel straps and tie them together with soft wire. Weld in stages: tack, verify and true the geometry, then complete the seams. Finish welding in short, alternating beads on the right and left sides to minimize heat warping.
An engine cradle—a hoop bent from 30‑mm tubing—secures the engine to the frame. A front mounting lug, a U-shaped bracket with a bolt hole, is welded to the hoop; a similar bracket is welded to the front tube of the frame to form the rear mount.
The pivoting carriage is likewise tubular and welded. The front wheels, drive and idler sprockets, plus the brake disc, sit on the front shaft of the carriage, which turns on two 203 bearings. The idler sprocket is bolted to its hub with four bolts and nuts; the hub is locked to the shaft with a pair of “electro-rivets” formed by welding shut drilled holes. The rear-wheel axle resembles a motorcycle swing-arm axle and can slide within elongated slots at the carriage ends to adjust track tension.
The skis are laminated from plywood blanks—each needs three 5‑mm sheets. A laminate (furniture-grade) sole provides low friction and wear resistance. Lamination is done on a simple jig: a thick board with blocks nailed up front that match the curvature of the ski tips. Each ski receives two skegs made from 3‑mm steel plates fastened to the side faces.
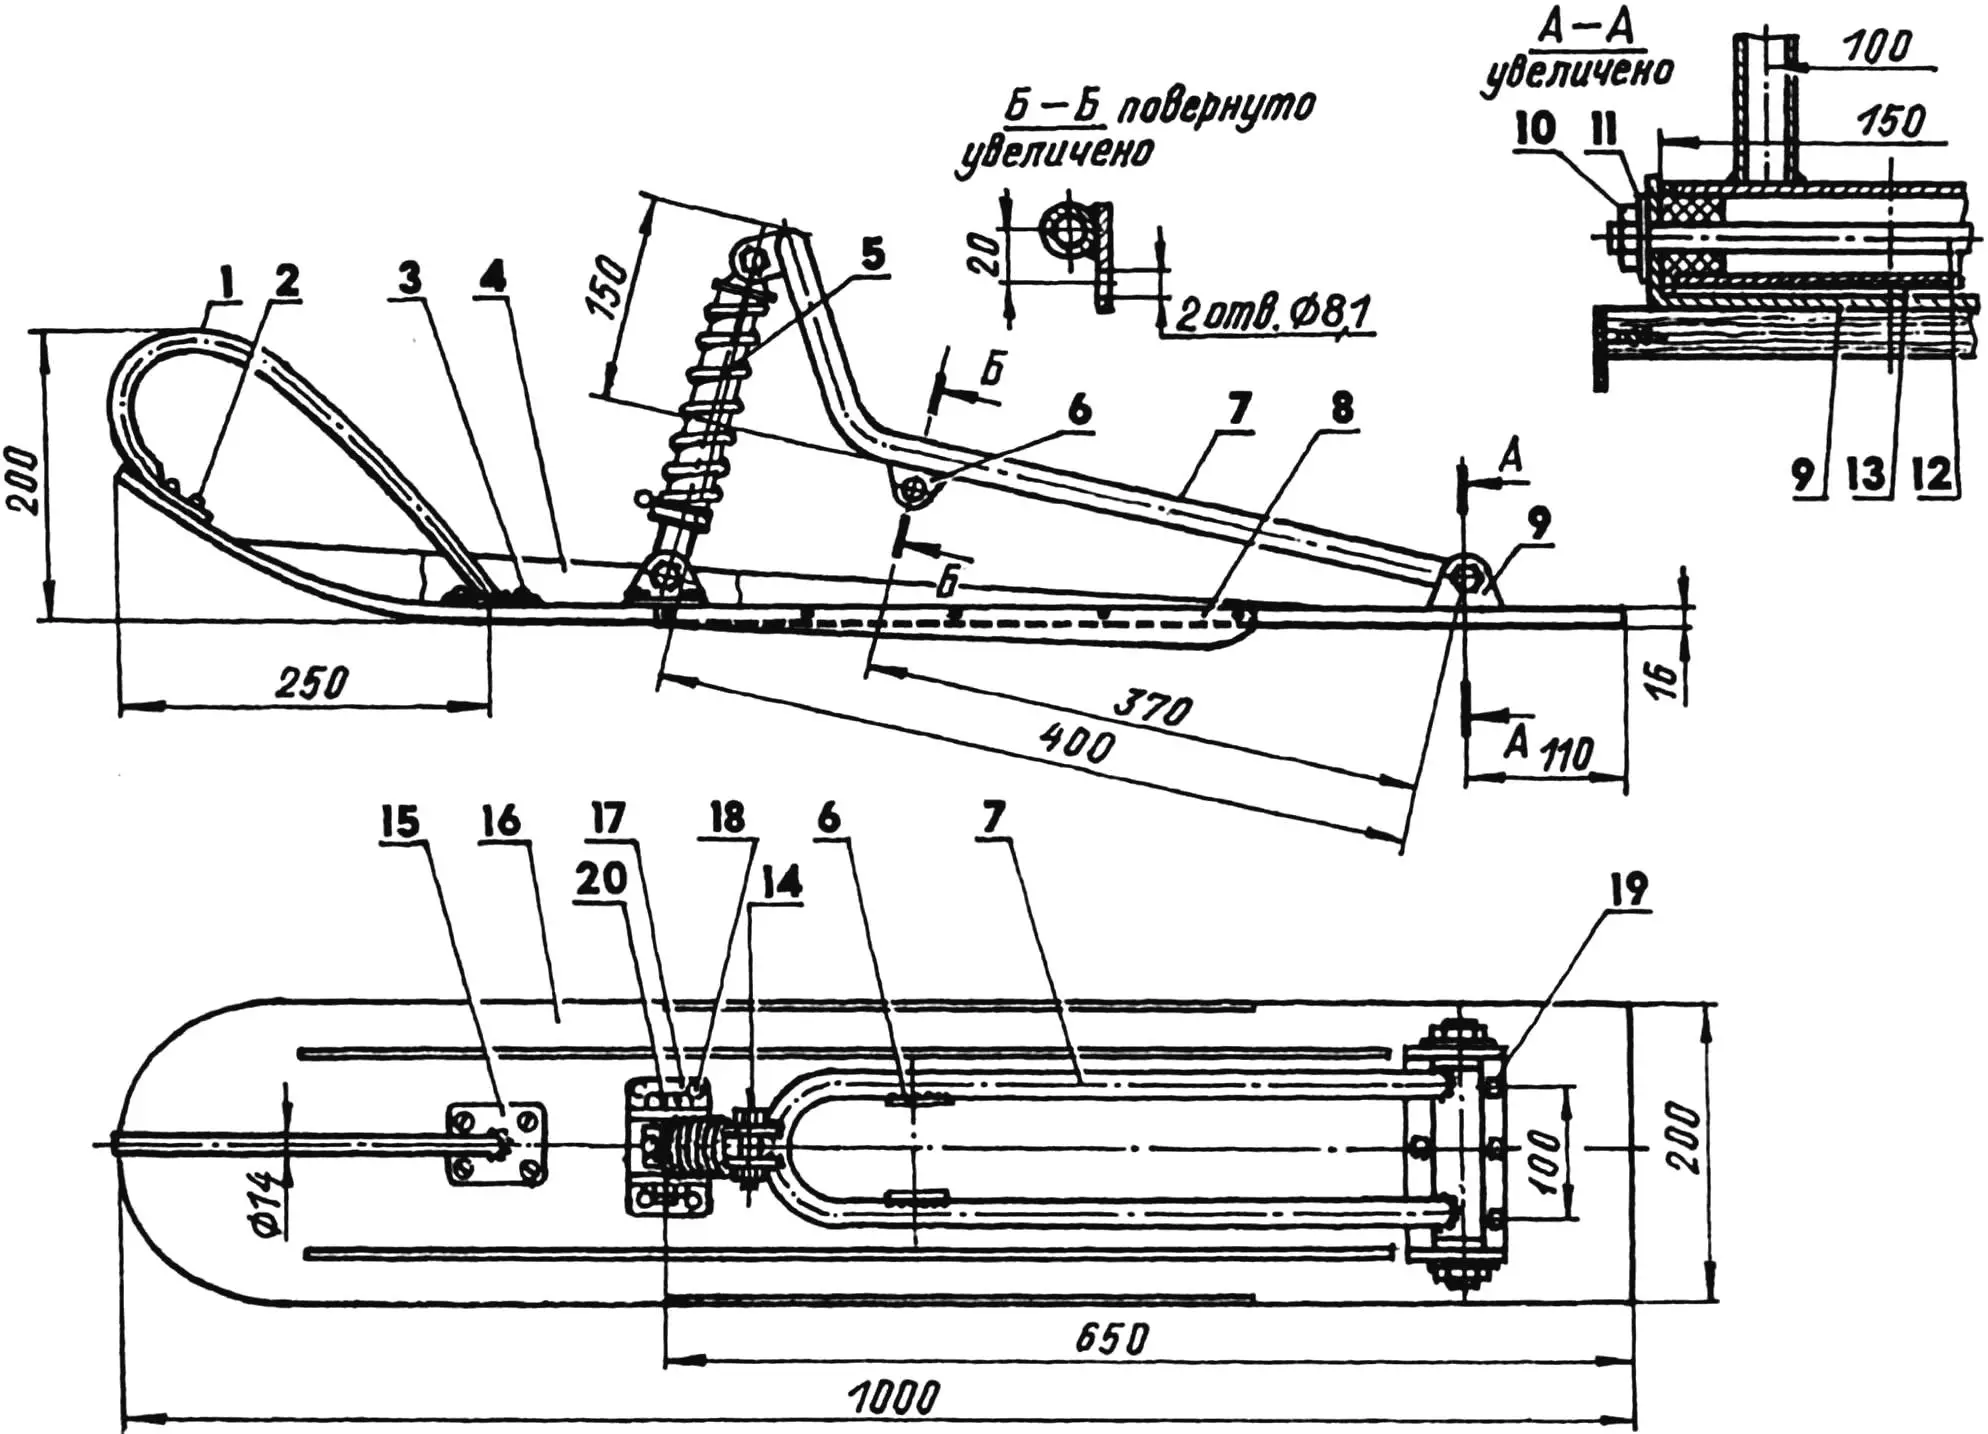
1 — safety hoop (steel tube 14×1.5); 2,3 — hoop mounts (Ø5 self-tapping screws); 4 — stiffening rib (birch strip s10); 5 — spring-hydraulic shock absorber (from a Voskhod motorcycle); 6 — steering-shaft bracket (steel sheet s4); 7 — bellcrank bracket (steel tube 22×2); 8 — skeg (steel sheet s3); 9 — bellcrank-base channel (steel channel 150x50x4); 10 — M10 nut; 11 — washer; 12 — axle (M10 stud); 13 — joint body (steel tube 30×2.5); 14,20 — shock mounts (M8 bolts with nuts and spring washers); 15 — safety-hoop flange (steel sheet s2); 16 — ski (laminate of three 5‑mm plywood blanks plus a 1‑mm laminate sole); 17 — lower shock seat; 18 — seat fastener (M6 bolt with nuts); 19 — bellcrank-base fastener (M6 bolt with nuts)
Each ski carries a suspension unit consisting of a bellcrank bracket and a motorcycle shock absorber (a Voskhod spring-hydraulic shock works well). A tubular safety hoop is mounted at the front of every ski.
The steering system comprises motorcycle-style handlebars, a steering column with a double-arm bellcrank, and two tie-rods with Lada-style ball joints linking the bellcrank to the right and left steering knuckles. When laying out the steering geometry, it helps to build simple plywood or heavy-cardboard mockups at a convenient scale—they make it easier to fine-tune rod lengths and lever arms to the snowmobile’s actual dimensions.
The fuel tank is a 10‑liter aluminum jerrycan fitted with a standard motorcycle fuel shutoff/sediment cock. Installing it requires TIG-welding a threaded bung into the can.
The body, consisting of a base and hood, is laid up from fiberglass cloth and epoxy using a simple plug of plywood, lumber, and plaster. A wax-based parquet polish applied and buffed on the plug serves as the release layer. First lay up the base: use plywood strips and modeling clay to form a flange along the future seam, which will later serve as the lip. After curing, remove the plywood and clay, trim the flange to 30 mm, tape it off, and only then laminate the hood.
Once the resin cures, lift the parts off the plug and reinforce them from inside with batten stringers glued on with epoxy filler and small screws. Cut openings in the hood and base for the cylinder barrel and the front cross tube.
Finish the body with automotive filler and air-dry enamel. Join the body sections with bolts and nuts, and cover the flanges with decorative duralumin channel trim.
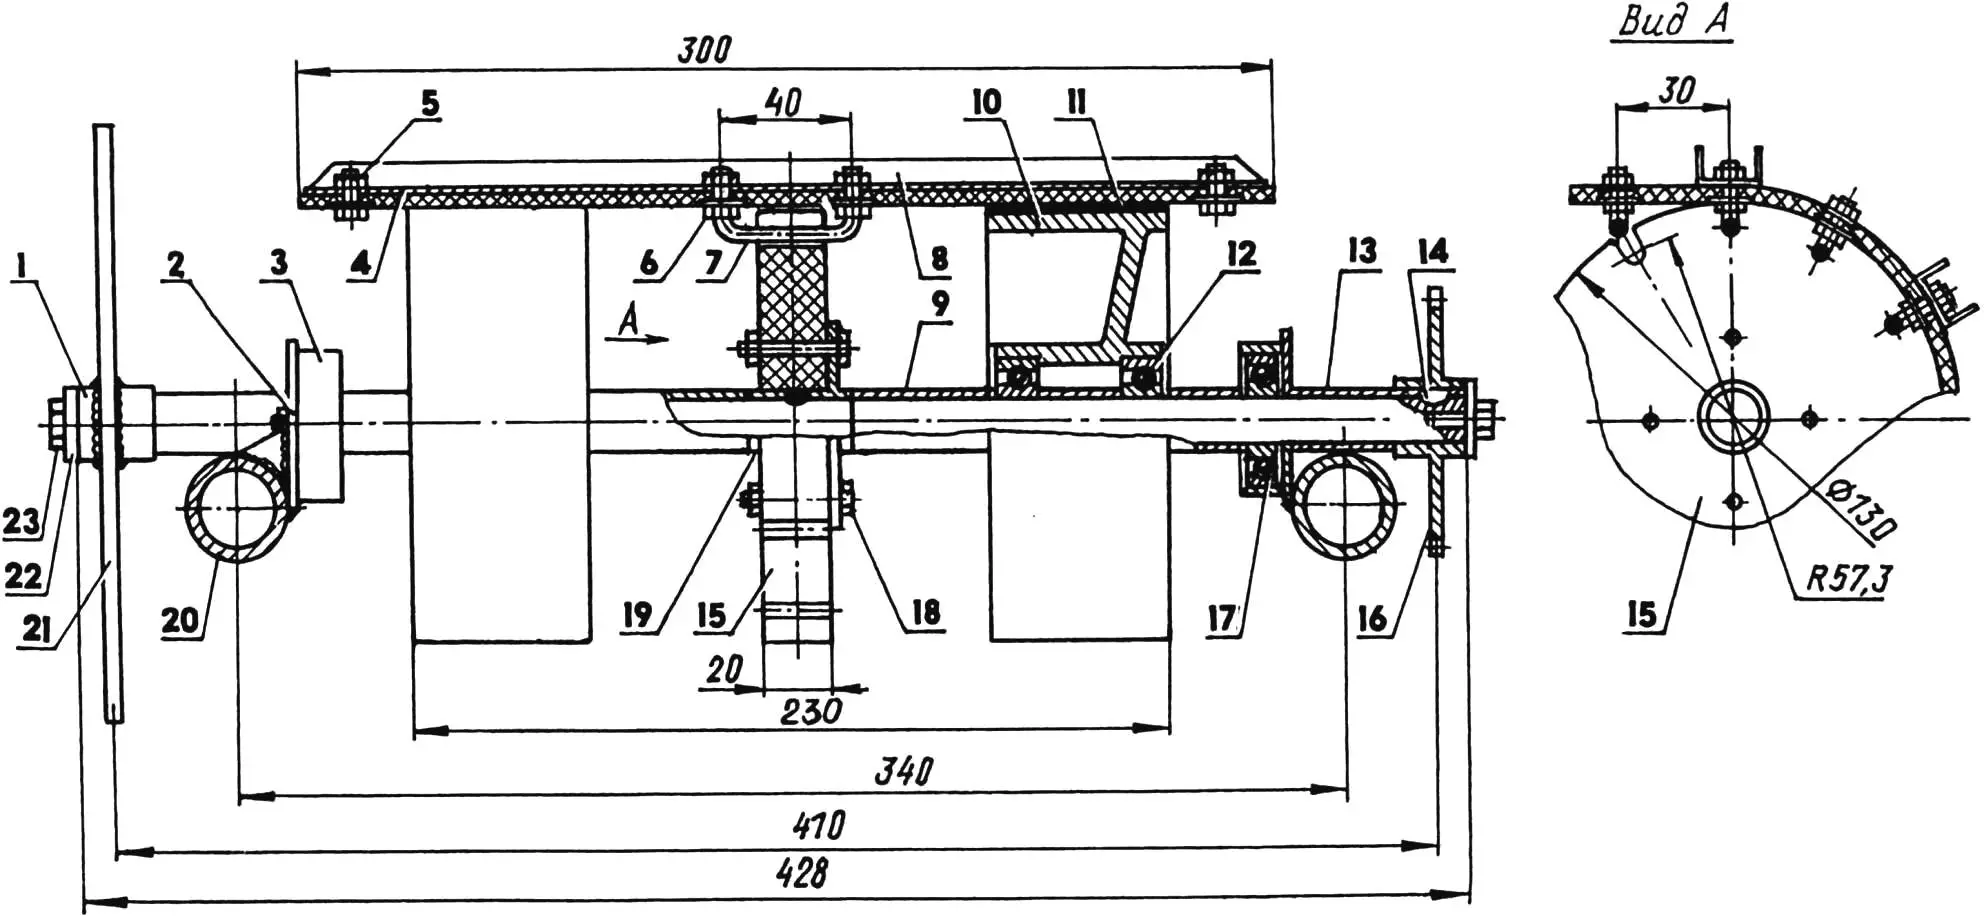
1 — brake-disc hub; 2 — bearing-housing bracket; 3 — bearing housing; 4 — track band (conveyor belt); 5 — cleat fastener (M6 bolt with nut and washer); 6 — bracket fastener (M6 nuts and washers); 7 — bracket (steel rod Ø6); 8 — cleat (duralumin channel 20x10x2); 9,13 — spacer sleeves (steel tube 22×2); 10 — wheel (moped-hub center); 11 — wheel tire (rubber ring); 12,17 — 203 bearings; 14 — Woodruff key; 15 — idler sprocket (textolite sheet s20); 16 — drive sprocket of the track unit; 18 — idler-sprocket-to-hub fastener (M6 bolt with nut); 19 — idler-sprocket hub; 20 — track-carriage longeron (steel tube 30×2.5); 21 — brake disc (steel sheet s8); 22 — washer; 23 — brake-disc fastener (M6 screw)
The frame carries a 10‑mm plywood floorboard impregnated twice with hot linseed oil. Corrugated rubber strips are glued where the driver’s and passenger’s feet rest.
Controls are motorcycle-style: a twist throttle and clutch lever on the handlebar, plus brake and gearshift pedals. The electrical system includes a motorcycle headlamp and tail lamp.
The seat is a plywood box assembled on duralumin angles with bolts and nuts, then fastened to the floorboard. A high-density foam cushion is glued on top and the entire unit is upholstered with faux leather.
The windshield is made from Plexiglas. A duralumin angle bent to match the hood secures it to the body. A cardboard template helps trace the correct contour onto the plastic before cutting.
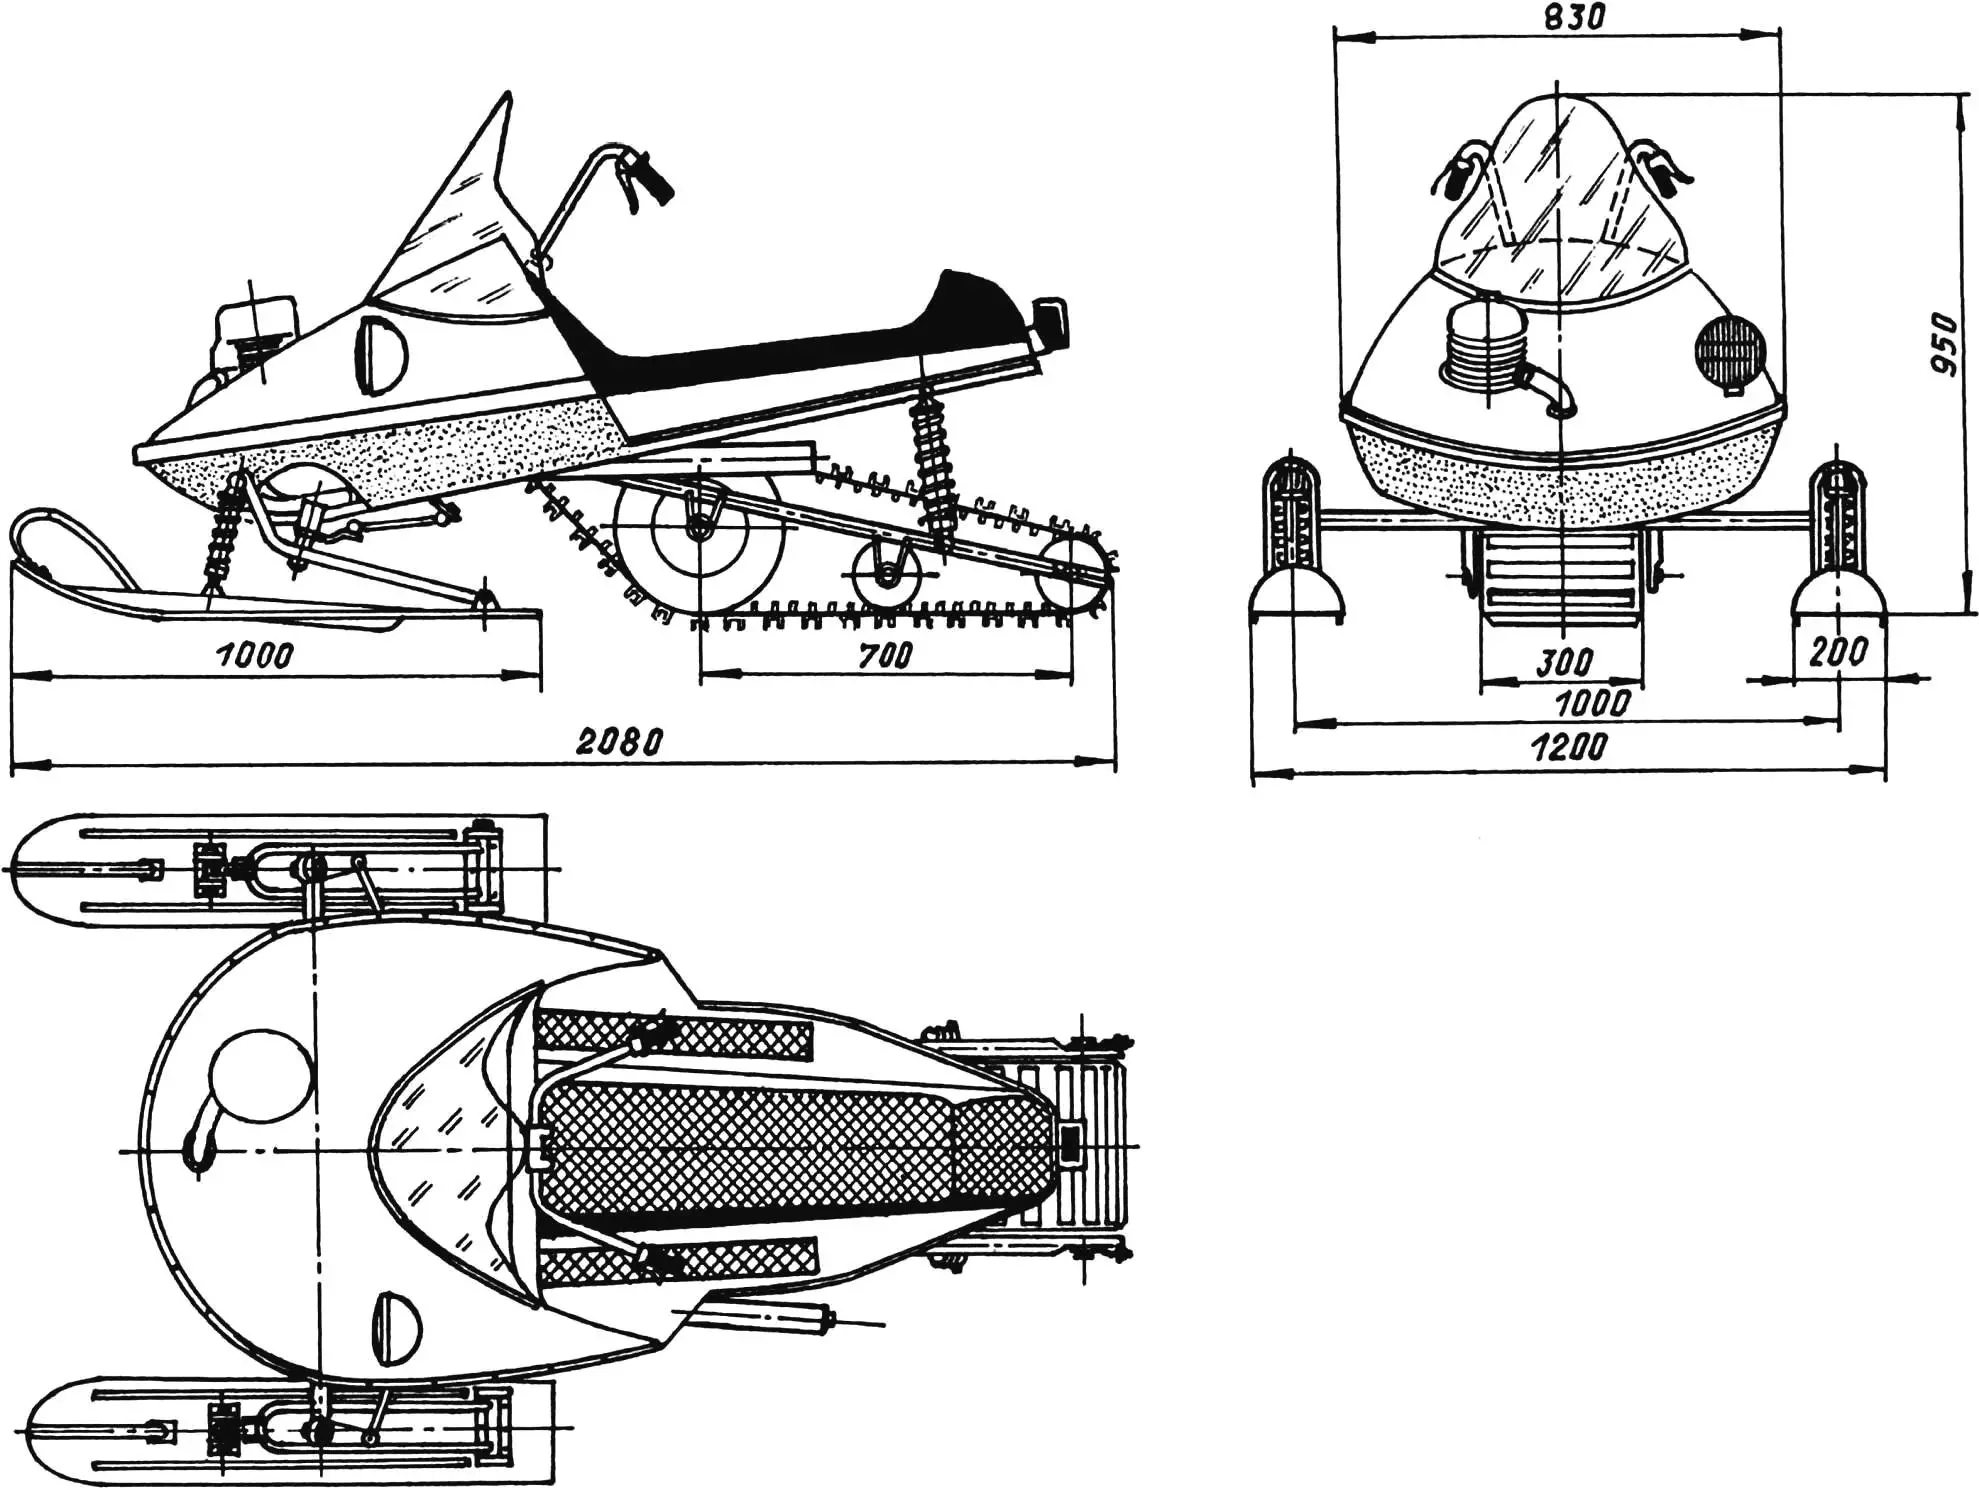
Ski-and-track snowmobile “Polar Wolf”
Length, mm … 2080
Width, mm … 1200
Track width, mm … 1000
Height, mm … 950
Engine, type … TG-200M
Displacement, cm3 … 199
Power, hp … 14
Top speed, km/h … 60
I. Galkin, engineer
Recommend to read
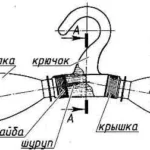 “BOTTLE” HANGER
The journal "modelist-Konstruktor", according to my calculations, for a long time can already be entered in the "Guinness Book of world records" for number of published articles on...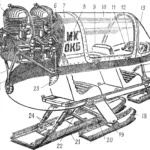 “Cocoon” on the snow
At the end of winter in 1974, on snow-covered fields near the airport “Domodedovo”, an unusual machine appeared—something like the egg of a fairy bird Rukh, or like a gigantic cocoon....
