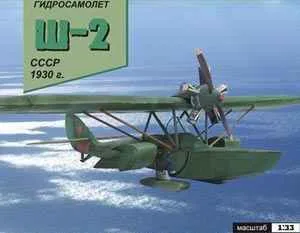
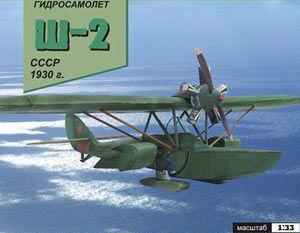
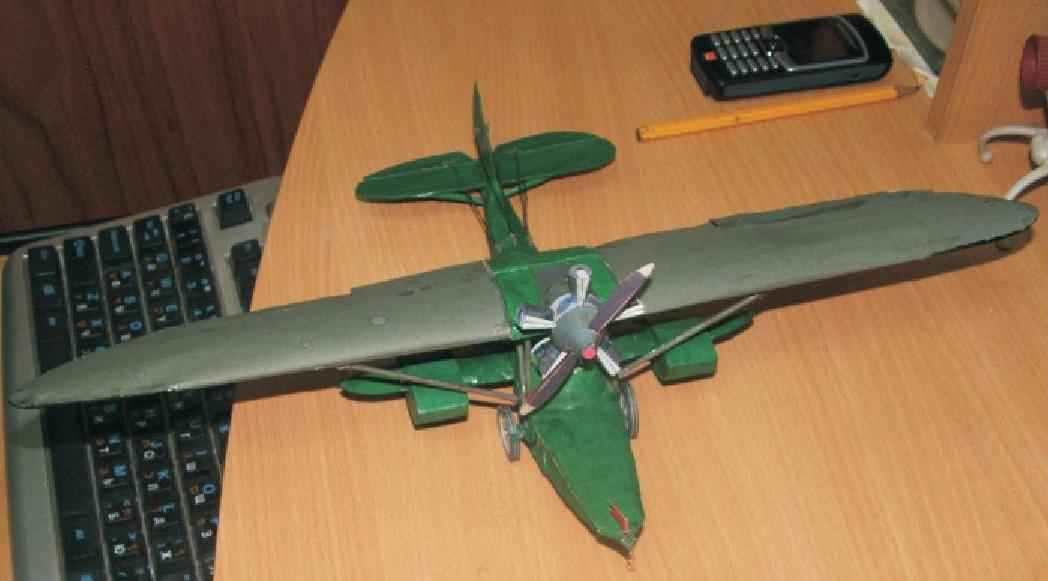
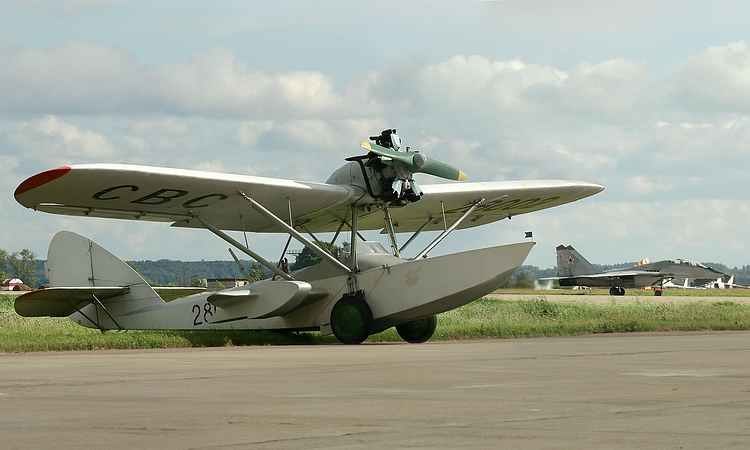
 SEAPLANE W-2. Scale model 1:33.
In Russia in the late 20-ies of the last century there was an urgent need in small aircraft for communication with remote facilities. Especially this problem existed in the Northern regions, Siberia and the far East, where there was no other means of communication.
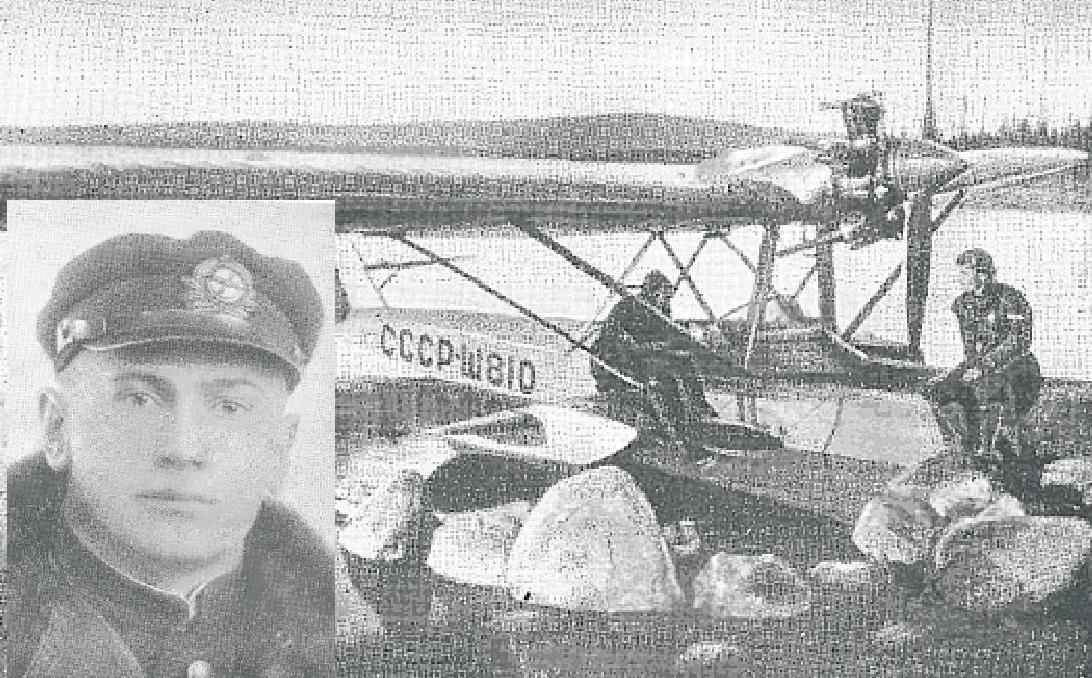
In 1928 the Leningrad young designer Vadim Shavrov together with Victor Korovin and Nikolai Puntikov decided to collect amphibian. The development and Assembly of the aircraft took place on pure enthusiasm at the apartment of Victor Korovin. After 13 months ready of the aircraft, the boat, the fuselage ,wings and tail made through the balcony of the apartment Korovin on the street and finished the Assembly in rowing port. W-1,such designation received small plane rose into the air 21 Jun 1929.
In 1930, V. Shavrov creates your second plane-amphibian sh-2 ,which differed from
Sh-1 domestic engine M-11 and up to 150 kg flight weight. Boat W-2 was longer than W-1 at 0.5 m, and increased the size of the top of the wing. Now in the boat besides the pilot could fit 2 more passengers. The first flight of the sh-2 was held in November 1930 and six months later, the aircraft successfully passed state tests and in 1932 became mass-produced. The last flight W-2 was held in 1964. There is evidence that in some parts of Russia it is used and now, restored or rebuilt by the hands of craftsmen and enthusiasts.
W-2 had a heroic biography. The plane was used during the development of the far North, on the Kola Peninsula, in the rescue “Chelyuskin” in the far East, Siberia and Central Asia. It was used to communicate with remote areas for ice and fishing exploration, aerial photography, air ambulance and on the fronts of the Finnish and the Second World War, where it was used for reconnaissance and evacuation of the wounded.
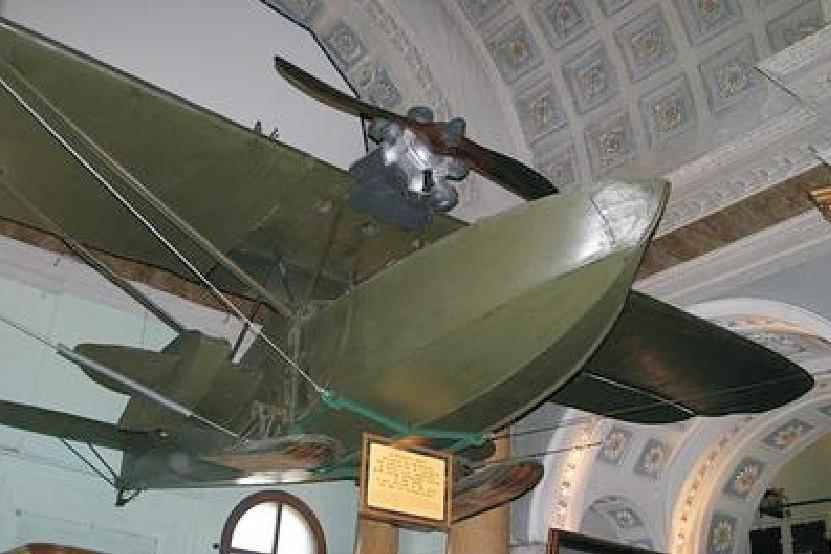
Aircraft sh-2, where the pilot grandmother took out two “Chelyuskinites” on the mainland is on display at St. Petersburg Museum of Arctic and Antarctic.
When creating this model, sh-2 were used materials of the amphibious aircraft of the air-link trust “Apatite” in Khibiny tundra, which was operated by the pilot P. Ovchinnikov.
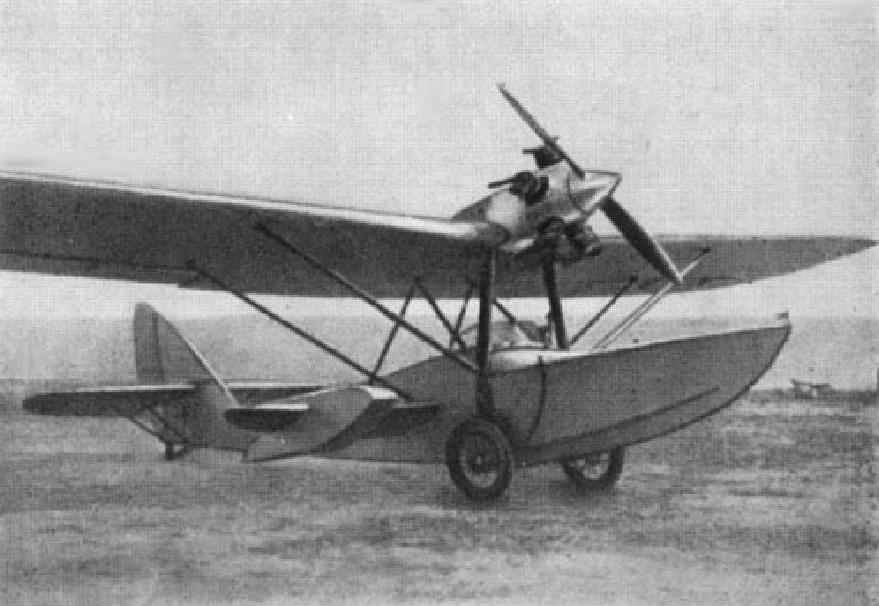
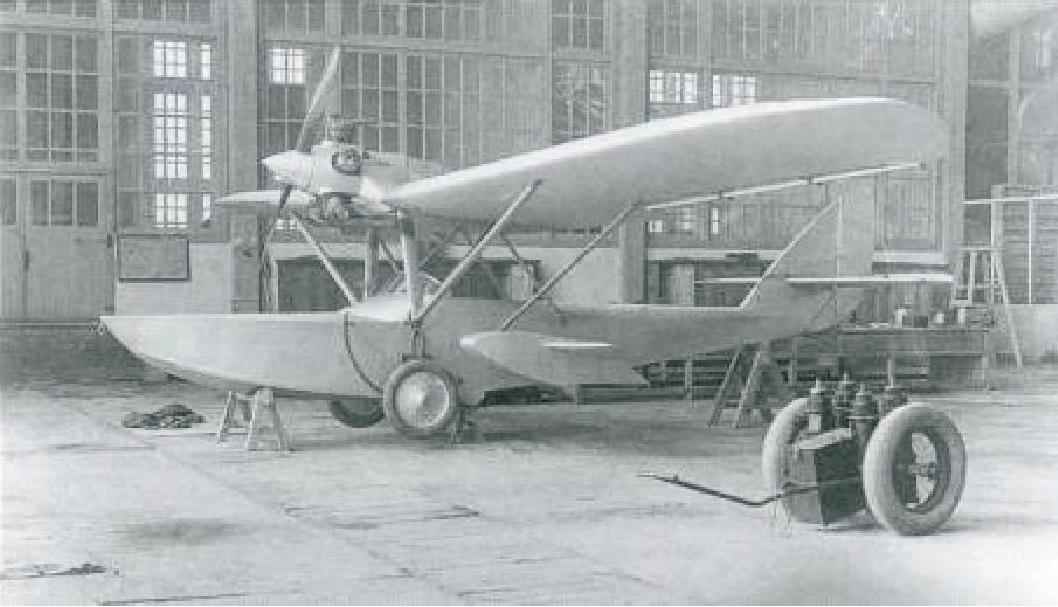 DESCRIPTION OF THE AIRCRAFT. The fuselage-one-piece construction assembled from wood and plywood, covered with fabric, is a boat. Aircraft – polytropes with pulling sintomatico band on the upper wing, with a triple cabin, with the rising of the chassis, the axis of which can dress up the wheels or skis. The lower wings of free-carriers located close to the waterline, carrying the floats lateral stability. The upper wings backed, can be folded back for easy storage. Lifting and lowering the chassis are made from the cockpit. The plane is amphibious ie can produce takeoff and landing on water and on land, and with the skis on the snow and ice.
It is a light plane of mass use/
Boat plane has a large open cabin, in which there are two seats for pilot and passenger, the third seat is behind the seat backs, where you placed a spare gas tank, this space can be used for the transportation of small goods. Second spare tank placed in the seventh frame. The radio is in a special crate in an alcove between 14 and 15 frames. For fire extinguishing carbon dioxide fire extinguisher is suitable, type “Typhoon”, the hose from which you type under the hood the engine compartment.
THE ASSEMBLY MANUAL.
Model of amphibious aircraft made in the scale 1:33, and has a number of small parts, so before you begin to assemble the model, You should carefully study this manual to choose the complexity of the Assembly model.
You can assemble the model with the folding or not folding wings, with movable or stationary elevators, turn and sharename, with the chassis on wheels or on skis, in the retracted or released condition. You will need:
1. Smooth surface (Board, plastic or plywood)
2. Cutting tool – scissors straight and curved-nail cutter for cardboard and paper, sawing-a jigsaw tsyrkul with cutter.
3. Awl or drill with a diameter of from 1 to 3 mm.
4. PVA glue and glue on a polymeric basis.
5. Copper wire of thickness 0.5-1 mm, toothpicks, staples for stapler, thick thread or fishing line 0.3 mm.
6. A sheet of fine sand paper.
7. Markers.
8. Colorless Matt varnish the furniture. PARTS LIST.
 1-the basis of the bow; 2-the basis of the tail; 3-frames 1 -: 23, And (sternpost); 4-section of the forward fuselage; 5-section of the frames 7-8; 6 – section of ribs 8-12; 7 – section frames 12-14; 8 – section frames 14-21; 9-section frames 21-22; 10-section frames 22-23; 11 – section of the frames 23-A; 12-Caudal trim of the fuselage; 13 – steering lever turns; 14 manholes; 15 – fastening plate vane; 16 – a cap; 17 – a lining under the eyebolt; 18 – glands control cables; 19 – the roof of the tail; 20 – floor cabin; a 21 – pedal foot control; 22 – the back seat the pilot and passenger; a 23 – seat chairs; 24 – headrests; 25 – basis sideney; 26 – the main petrol tank; 27 – replacement fuel tank; 28 – beam of fastening of a seat; 29 – leg mounting seats; 30, cross pipe mounting dashboard; 31 – longitudinal pipe mounting dashboard; 32-fairing (cockpit rim); 33 – the covering of a cab on 7th frame; 34 – air keel; 35 – the wheel turns; 36 – the contours of the keel of the boat and sides; 37-wing-nose portion; 38-the center-folding portion; 39-the hinge of the folding part of the wing; 40-:-42-rib of the center section; 43 – landing gear wheel; 44-tire wheel; 45-tread tires of the wheels; 46 – axis wheel; 47-foot chassis; 48-feet rails of the chassis; 49-pattern of the windshield; 50-redan; 51-frame of the windscreen; 52L – rib upper right wing; 52L – rib of the upper left wing; 53 – rib of the ailerons; 54 – rear spar of the upper wing; 55-front spar of the upper wing; 56-instrument panel with flight map; 56 – Aileron spars of the upper wings; 57R – right lower rib of the wing; 57L – rib lower left wing; 58 – rib floats; 59 – rib stabilizer; 60 – pads extreme ribs of the wing and the upper wings; 61 – lining of the ribs of the floats; 62-pads 6-th ribs of the upper wings; 63 section floats; 64 – the right lower part of the upper wing; 65 – the upper right part of the upper wing; 66 – the lower left part of the upper wing; 67-the upper portion of the upper wing; 68 – the right Aileron of the upper wing; 69 – Aileron left top wing; 70-the right lower wing; 71, the left lower wing; 72 – insert the rudder turns; 73-insert air keel; 74 – front of center front; 75-front of center average; 76-stands center rear; 77 – brace upper front wings; 78-brace, upper rear wings; 79 radio station; the 80 – side of the left ski; 81 – sidewall skis right; 82: upper part of the ski; 83 – lower part of the ski; 84 – ski bindings to the axis of the chassis; 85 – control knob; 86-the hinges of the folding part of the lower wings; 87 – joints of the upper wings; 88 – the contours of the upper wings; 89 – struts of the crutch; 90-spoon crutches; 91 buffer of the crutch; 92-stabilizer and Elevator, left, 93 – stabilizer and Elevator, right, 94-struts stabilizer; 95 – fairing screw; 96f – frame motor front; 96b-frame motor rear; 97-housing of the motor; 98 – cylinder engine; 99-the hood motor; 100-frame of the hood; 101 – insert into zeroplane;
102 – screw; 103 – blades propeller; 104 – pattern of the mounting ribs of the lower wings; 105Ь-based stabilizer left; 105R – based stabilizer right; 106Ьшаблон elevators left; 106R – template elevators right; 107 – extinguisher; 108 – the pattern of the spars of the upper wings; 109 – pattern of ribs of the upper wing; 110 – hinges elevators; 111-fairings stabilizer; 112 electrodes; 113-candle box.
The following items must be pasted on thick cardboard with a minimum thickness of 0.8 mm: 1,2,3,25,28,29,40,41,42,43,44,47,48,50,52,53,54,55,56,57,58,59,80,81,84,96,102,104,105,106.
 ASSEMBLY of the forward FUSELAGE of the BOAT (Fig.1) Carefully cut out with scissors and cutter based bow, do it cuts the thickness in your chosen cardboard, cut out the frames no 1-:-7,making them the cuts and insert the basis of the nose, pre-lubricated with a polymer adhesive joints. Frames you need to insert so that their edges exactly match the edges of the bases, so before installing them you need to try and fit with the help of sandpaper, you Need to make sure that the frames and basis are perpendicular to each other. Frame No. 7 paste with the back side sticker green outline cut from sheet No. 6. After drying, Assembly, start a label of her section of the forward fuselage. To start the sticker better with the deck pieces, then glued Board, the bottom and the second Board, and then glued the nose.
ASSEMBLY of the COCKPIT (Fig.2) Cut the frame No. 8 and section 7-8, pasted section of the frame, after drying bonding adhesive section 7-8 to the frame 7 Assembly of the bow, thus it is necessary to monitor the coincidence of the edges of the banknotes and the line of the keel of the boat. Likewise, the bonding sections 8-12. Before you install section 12-14 glue to the bulkhead No. 12 redan (50),section 12-14 glue on the level of bonding on the redan. After gluing all the sections of the cab with the nose of the boat take the equipment of the cab. Cut out the cockpit floor and foot controls, glue assembled pedal to the floor and insert the floor into the cab so that its front edge with the control pedals coincided with the frame No. 8, and back to bulkhead No. 14. Collect and insert fuel tank, seat, pipe installation, instrument panel, cylinder of fire extinguisher, instrument panel, control stick and radio.
 ASSEMBLY of the rear FUSELAGE (Fig.3) Assembly of the tail section similar to the Assembly of the bow is used the base (2), the frames No. 15:-And and the appropriate section. Before assembling the sections 23 And install the air keel (34).Before gluing of the rudder on the middle line of the pattern (35) put a wire in diameter 0.5-0.8 mm, but not attach it .The end of the wire bend a loop at an angle of 90 degrees and secure the lever steering turns (13) and together with the tail plate (12) install on the fuselage.
After the installation of the roof rear part (19) is a fairing (32) and installed the windshield (Fig.9), which is cut from a transparent film with a thickness of 0.2-:-0.3 mm. the pattern (49) and paste the frame (51).
ASSEMBLING the LOWER wing AND the FLOATS (Fig.4) Assemble the lower wings, children 57,70,71,104., if the ends of the wings do not flap folding section glue with a basic rib No. 4. Assemble the floats and put them on the lower wings, glue the lower wings to the fuselage (the place of gluing the marked sections of the fuselage 8-12 and 12-14). To the ends of the lower wings were folding in them is fixed the hinge from the tube dressed on a bracket for the stapler and clip a piece of floss with a length of 3 mm., which on the one hand glued to the main part of the lower wings , and the other enters the hole in the rib of the folding part.
Mounting the TOP of the WINGS (Fig.5)
 First collect the ailerons, and then the upper wings, though the upper wing is going in the collapsible embodiment, the rib No. 1 is necessary to pierce or drill a hole of 2 mm diameter in her bow. The spars have to install all the ribs for the whole wing, and for moving the ailerons instead of the ribs 8 to 13 can be set equivalent patterns 108 and 109, the ribs of the ailerons are cut from the ribs of the wing -they are shown in dark color. In order for the ailerons to turn,
they inserted a wire with a diameter of 0.5 mm, which is adjustably secured on the ribs 6 and 15. Details of 37-:-42 going to the center, for not folding wings, the center section, make whole, and for the variant with folding wings – made of two parts connected by a hinge. The hinge is made from three tubes mounted on a wire, the middle tube is fixed on the fixed part of the wing , and two outer tubes on the movable part. With a hinge, similar to which were fastened the ends of the lower wings and the same retainer, the upper wings are attached to the center section.
The struts of the upper wings also run folding, so the folding wings need to unhook from the wing, from 77-78 parts to make a tube and insert inside wire diameter of 1 mm., the end of the wire going to the wing to bend at an angle of 120 degrees and insert into the hole on the bottom of the wing, and the other end of the strut attached to the fuselage with a hinge, the design of which is described above.
ASSEMBLY CHASSIS (Fig.6) From parts 43-:-48 collect guides and combine them with the legs of the chassis, glue them to the axle. To the tube axis , for strength , insert a piece of toothpick. Want to pin to the axes of the wheels or skis. Wheel assembled from the rim 43 of the tire 44 and 45 of the protector; ski – parts of an 80:-84.
ASSEMBLY of the TAIL (Fig.7) assembled from parts: 59, 92, 93, 105, 106, 110, 111. Elevators after Assembly to connect so that they turn synchronously, it will approach a thin wire or strip of paper folded into a thin tube. The elevators are attached to the stabilizer by a hinge similar to that applied for the connection of the movable and fixed parts of the wing.
 The Assembly of the MOTOR (Fig.8) the Motor is assembled from parts of 95:103,110-:-113. First going motor housing parts 96 and 97, are then assembled cylinders from parts 98,111-:-113 and fixed to the housing of the motor in the form of a regular five-pointed star. From parts 99,100 going to the hood and connects to the housing of the motor. Going screw, is inserted into the hole in the cowl and glued the motor body . The collected design is mounted on the center section.
For ease of Assembly of the motor with the cowl and screw in the frames of the motor (96) to insert the axis of the toothpick.
The plane will be ready after the installation of the crutch under the sternpost and the cables of the Elevator control and rotation, as in Fig.9. On the bow of the boat to install the cap (16) and the anchor, which is made from a piece of wire bent into a ring with a diameter of 3 mm. To make a model beautiful appearance and durability it can be covered with colorless Matt varnish.
The Council for bonding cylindrical parts: to the cylindrical part had a smooth seam bonding in the joint under glue ends should from the inner side to enclose podleski of paper. Poklejki this leaves the Assembly in the form of strips of green.
 FLIGHT-TECHNICAL CHARACTERISTICS
Full length of the plane -8200 mm.
The scope of the upper wing —13000мм.
The scope of the lower wing —5415мм.
The maximum height to the end of the blades when
the Parking lot on wheels — 3600мм.
Full length of the boat — 7850мм.
The greatest width of the boat — 1160мм.
Gauge wheels — 1470mm.
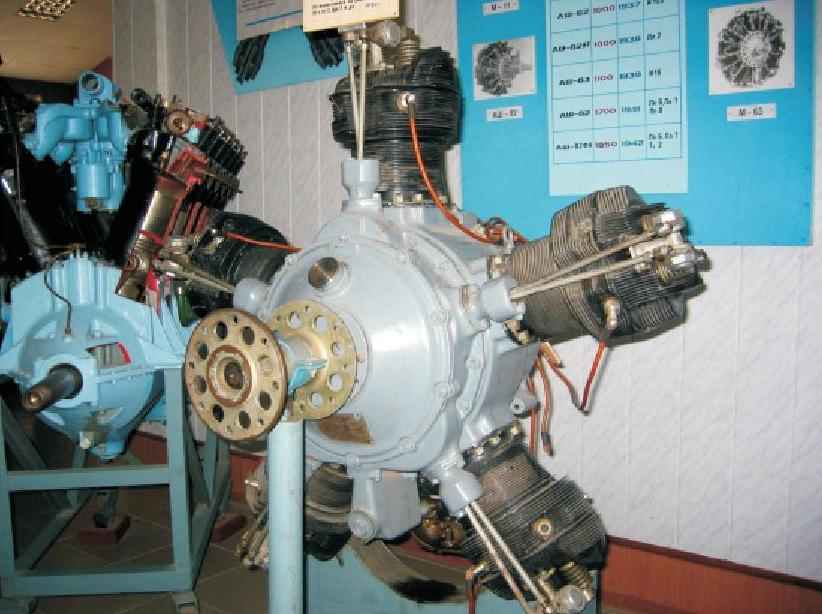
Motor M-11 of series “M”
Number of cylinders — 5
Power — 100 HP
Empty aircraft weight — 660 kg.
Flying weight — 937 kg.
Maximum speed — 139км/h.
Ceiling -3850 m.
The materials to build a model HYDROPLANE sh-2 (download)
Recommend to read
 JIGSAW
The proposed design of the jigsaws are manufactured in workshops Menzelin-sky teacher's College in Tatarstan Republic. To ensure the reciprocating motion of the saw in that jigsaw... COMFORT THREE PART
This comfortable chair can make even a novice handyman. Tools required hand saw, hacksaw, planer, chisel hammer, Yes; materials — the cross-bar 65X35 mm and 35X35 mm, round rods (e.g.,...
