
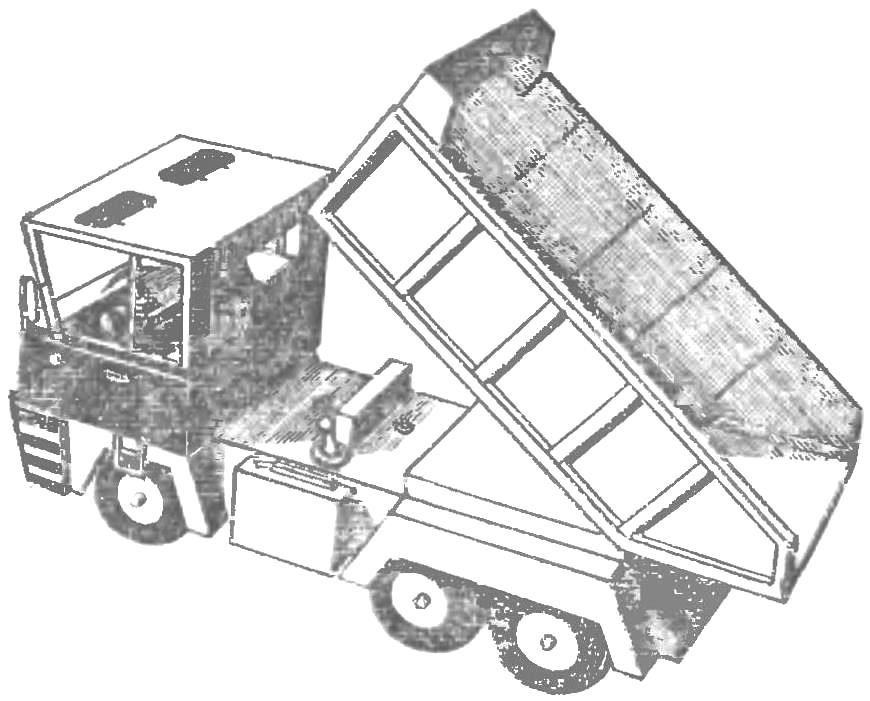
 The entire model except for the axles and the engine is made of paper and cardboard. It can make students 3rd-5th grade. The model is like a real machine of the separately mounted parts, so building it is best to deal with just a few people. Before proceeding to the construction of the model, it is necessary to review the plans, collect all materials and tools. It is necessary to increase the drawings in the correct scale and make sure they are correct.
The pattern is dominated by rectangular shapes, it facilitates the work on the production of individual parts. In the drawing there are solid and dotted lines. On the dotted, it is necessary to bend the workpiece, and in solid — cut. To the bend line form a solid and tidy, it is necessary to clearly identify: using a ruler to hold the thorn, so on paper there were deepening. This deepening and folded paper or cardboard.
For bonding model is better to use a PVA glue-e (polyvinyl acetate emulsion), but you can use another. The advantage of PVA-e is that it dries quickly and leaves no residue. To work you need the following tools and materials: ruler, pencil, compass,
scissors, awl, thick drawing paper, cardboard, velvet paper, gummed paper (paper with sticky sing), organic glass or celluloid.
The construction of the model should begin with the manufacture of the load frame out of cardboard, since it will later be attached to other parts and it bears most of the load. Then proceed to manufacture the main frame. It needs to be done exactly the pattern. Special attention needs to fit a cardboard frame (power) to the base, made of heavy paper. After careful adjustment of the frame are glued together. The next step will be fabrication
bumper. It is also made from paper. The finished bumper is glued to the front of the frame, and to it in the left corner and attach the license plate. Note manufacturer
cab. Correctly and neatly done cabin lends a beautiful and finished look, so it is especially necessary carefully and accurately drawn on thick paper its pattern. Line vivarte all sizes. Window cut with a sharp knife or scalpel. After this, you need to carefully mark all the fold lines. Again check everything. Glue should be very carefully and
clean. If you look closely at the pattern of the cabin shows that the front neverthemore the cockpit window is simultaneously and the instrument panel, so to make it separately is not necessary.
A gradual transition to the manufacture of cabin equipment. First of all it is necessary to issue the instrument panel of the driver. Devices cut out of colored paper n stick on the shield. The wheel made of cardboard and paste over it with velvet paper, glue to the flap on the left side of the cab. Seat fabricated of heavy paper, and the upholstery in velvet, better light. To the front of the cab, glue a pre-cut radiator grille and headlights. Lights of colored paper, better than yellow on a black background. The cabin also need to glue the rear mirror, and vents. To give the cabin a finished elegant look, you have front and side window glass insert. For this suitable thin organic glass or transparent celluloid. To glue the windshield wipers, the cab to the frame. The next step is to manufacture the body. Exactly the pattern cut out. Pay attention to making ribs, they add strength to the entire body. Make a paper fence of the cockpit, glue it to the body. Then take the reference platform and glue it over the rear axles of the frame. Glue the platform to the movable connection of cardboard, in which the body is mounted to the frame, and start fabrication of fenders — fenders. They are made of thick paper and bonded to the sidewalls of the frame. Then glue them dark gummed paper. Left wheels. Since they are also paper, you should do them carefully.

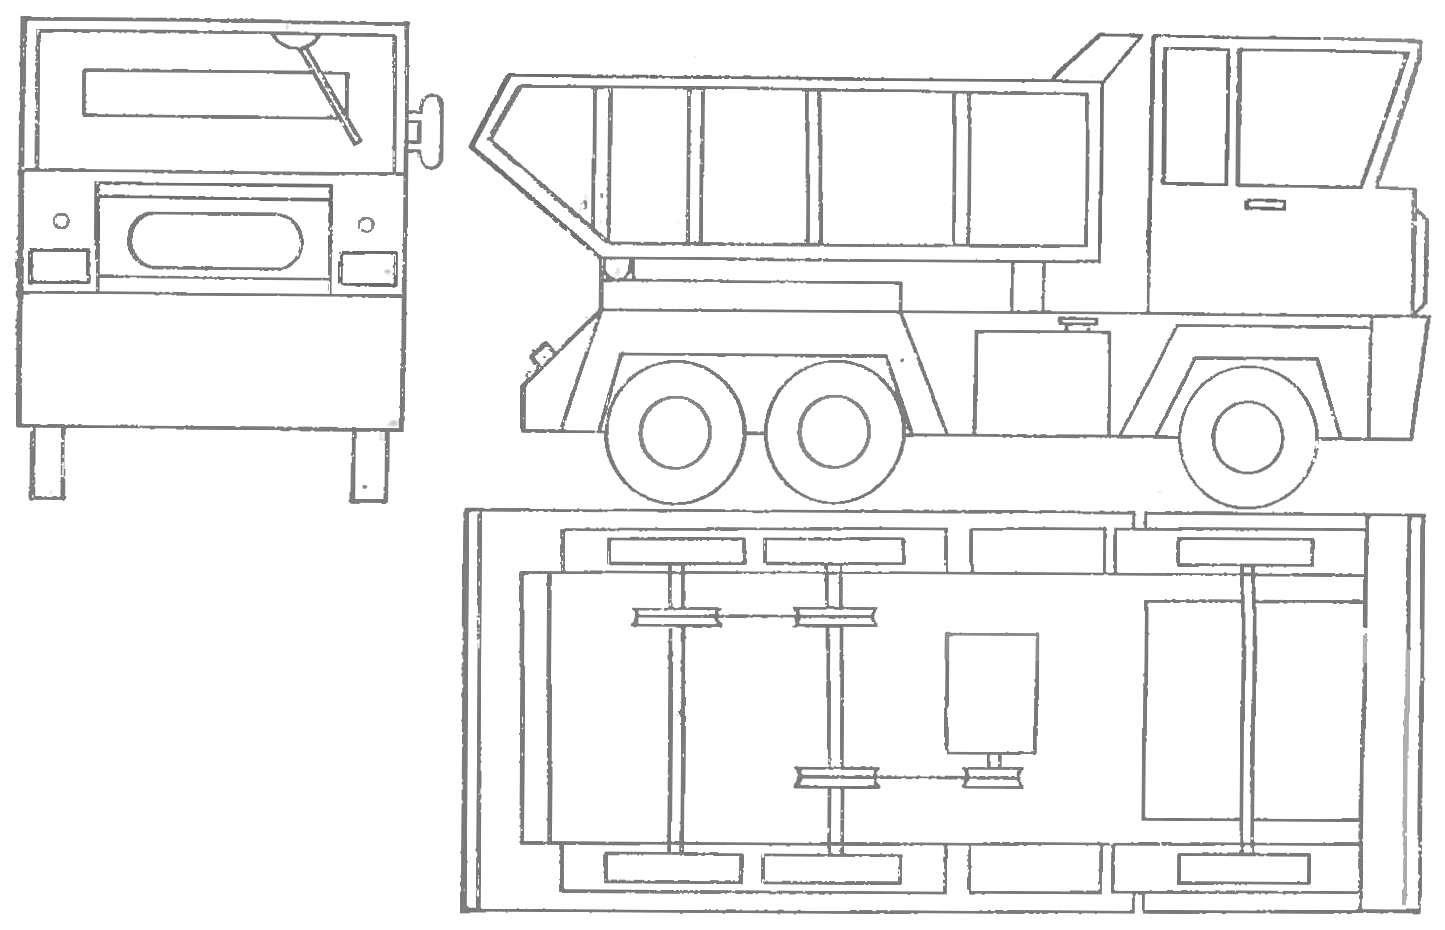
A PATTERN MODEL OF THE TRUCK:
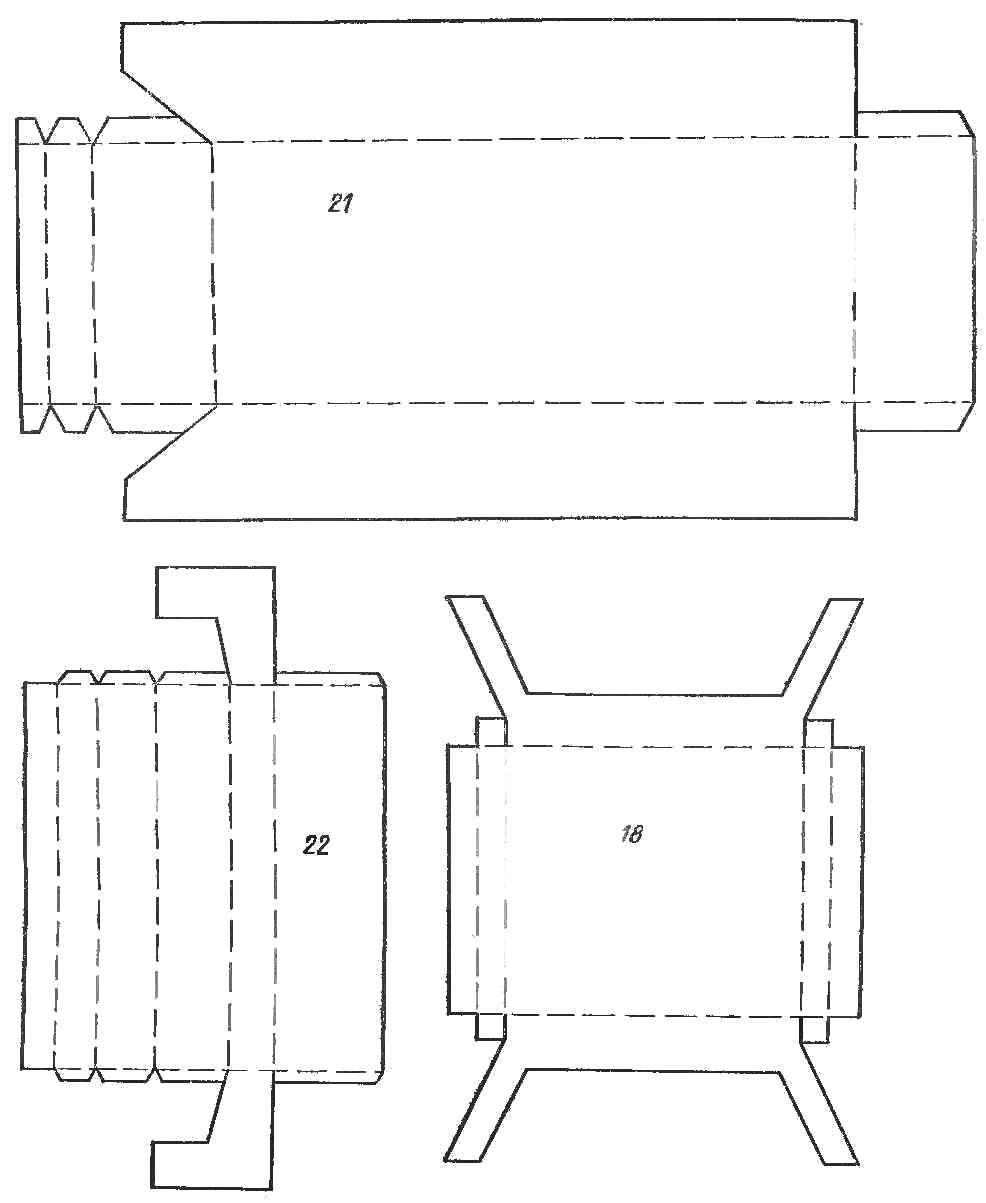
1 — power frame, 2 — sadn wing, 3 — body, 4 — levers hinges, 5 — rear wing, 6 — fencing of the cab, 7 — drive wheel n protector, 8 — wheel, 9 — stall, 10 — bracket for the battery, 11 — instrument panel, 12 hatch, 13 — mirror, 14 — ladder, 15 — wiper, 16 spotlight, 17 — a support body 18 — fuel tank, 19 — a stiffening rib 20 to the bumper 21 — main frame, 22 — seat 23 — a platform body.
First, cut out three discs on each wheel: two discs of drawing paper and one of velvet. Velvet paper, which is pasted on the circumference of the wheel, the model replaces the protector. With awl make a hole in the center of the wheels, the diameter of the holes should be slightly smaller than the diameter of the axis on which they will be pasted with glue BF-2. For axles you can use a rod, wire, long nails, electrodes or ready axis metal “Designer”. The axle should rotate freely, and the wheels never hurt. In motion our model will allow the electric motor.
It is best to use a motor with a reducer RDP-1. You can buy in the store. Leading will be the last four wheel. It will provide models of good permeability and smoothness. Motor attach with screws to the frame between the front and rear axles. For pulleys and axles, you can use the finished part of the “Designer” or manufactured wood. Pulleys saw out of plywood. The role of the timing belt may carry the model aircraft rubber, or rubber rings cut from an old Bicycle inner tube. The battery of the motor position over the front axle. For this we need to provide for attachment of the battery, it is possible to use rubber rings. Switch — better small — hook up over the body between the cab and the supporting platform Lights can be glowing. This is at your discretion. Assembled model should be finished with colored paper. Bumper stick of the longitudinal strips of black paper. This will give the car elegant look. The cockpit paste over with paper of one color, body another. The ribs attach the strips of paper the same color as the cabin. Now we have to be driven and the car is ready.
The city of UKRAINETS, head. initial laboratory simulation, Moscow
Recommend to read
 Broom on wheels
In “M-K” No. 4 for 1982, an article was published about the young technicians club at housing management office No. 8 in the city of Vitebsk, and about the amusing and useful machines... BIOGAS ON THE FARM
«Dear editorial board! While reviewing back issues of 'Modelist-Konstruktor' from previous years, I became interested in materials about biogas published in issues No. 1'87, 5'88, 4'96 of...
