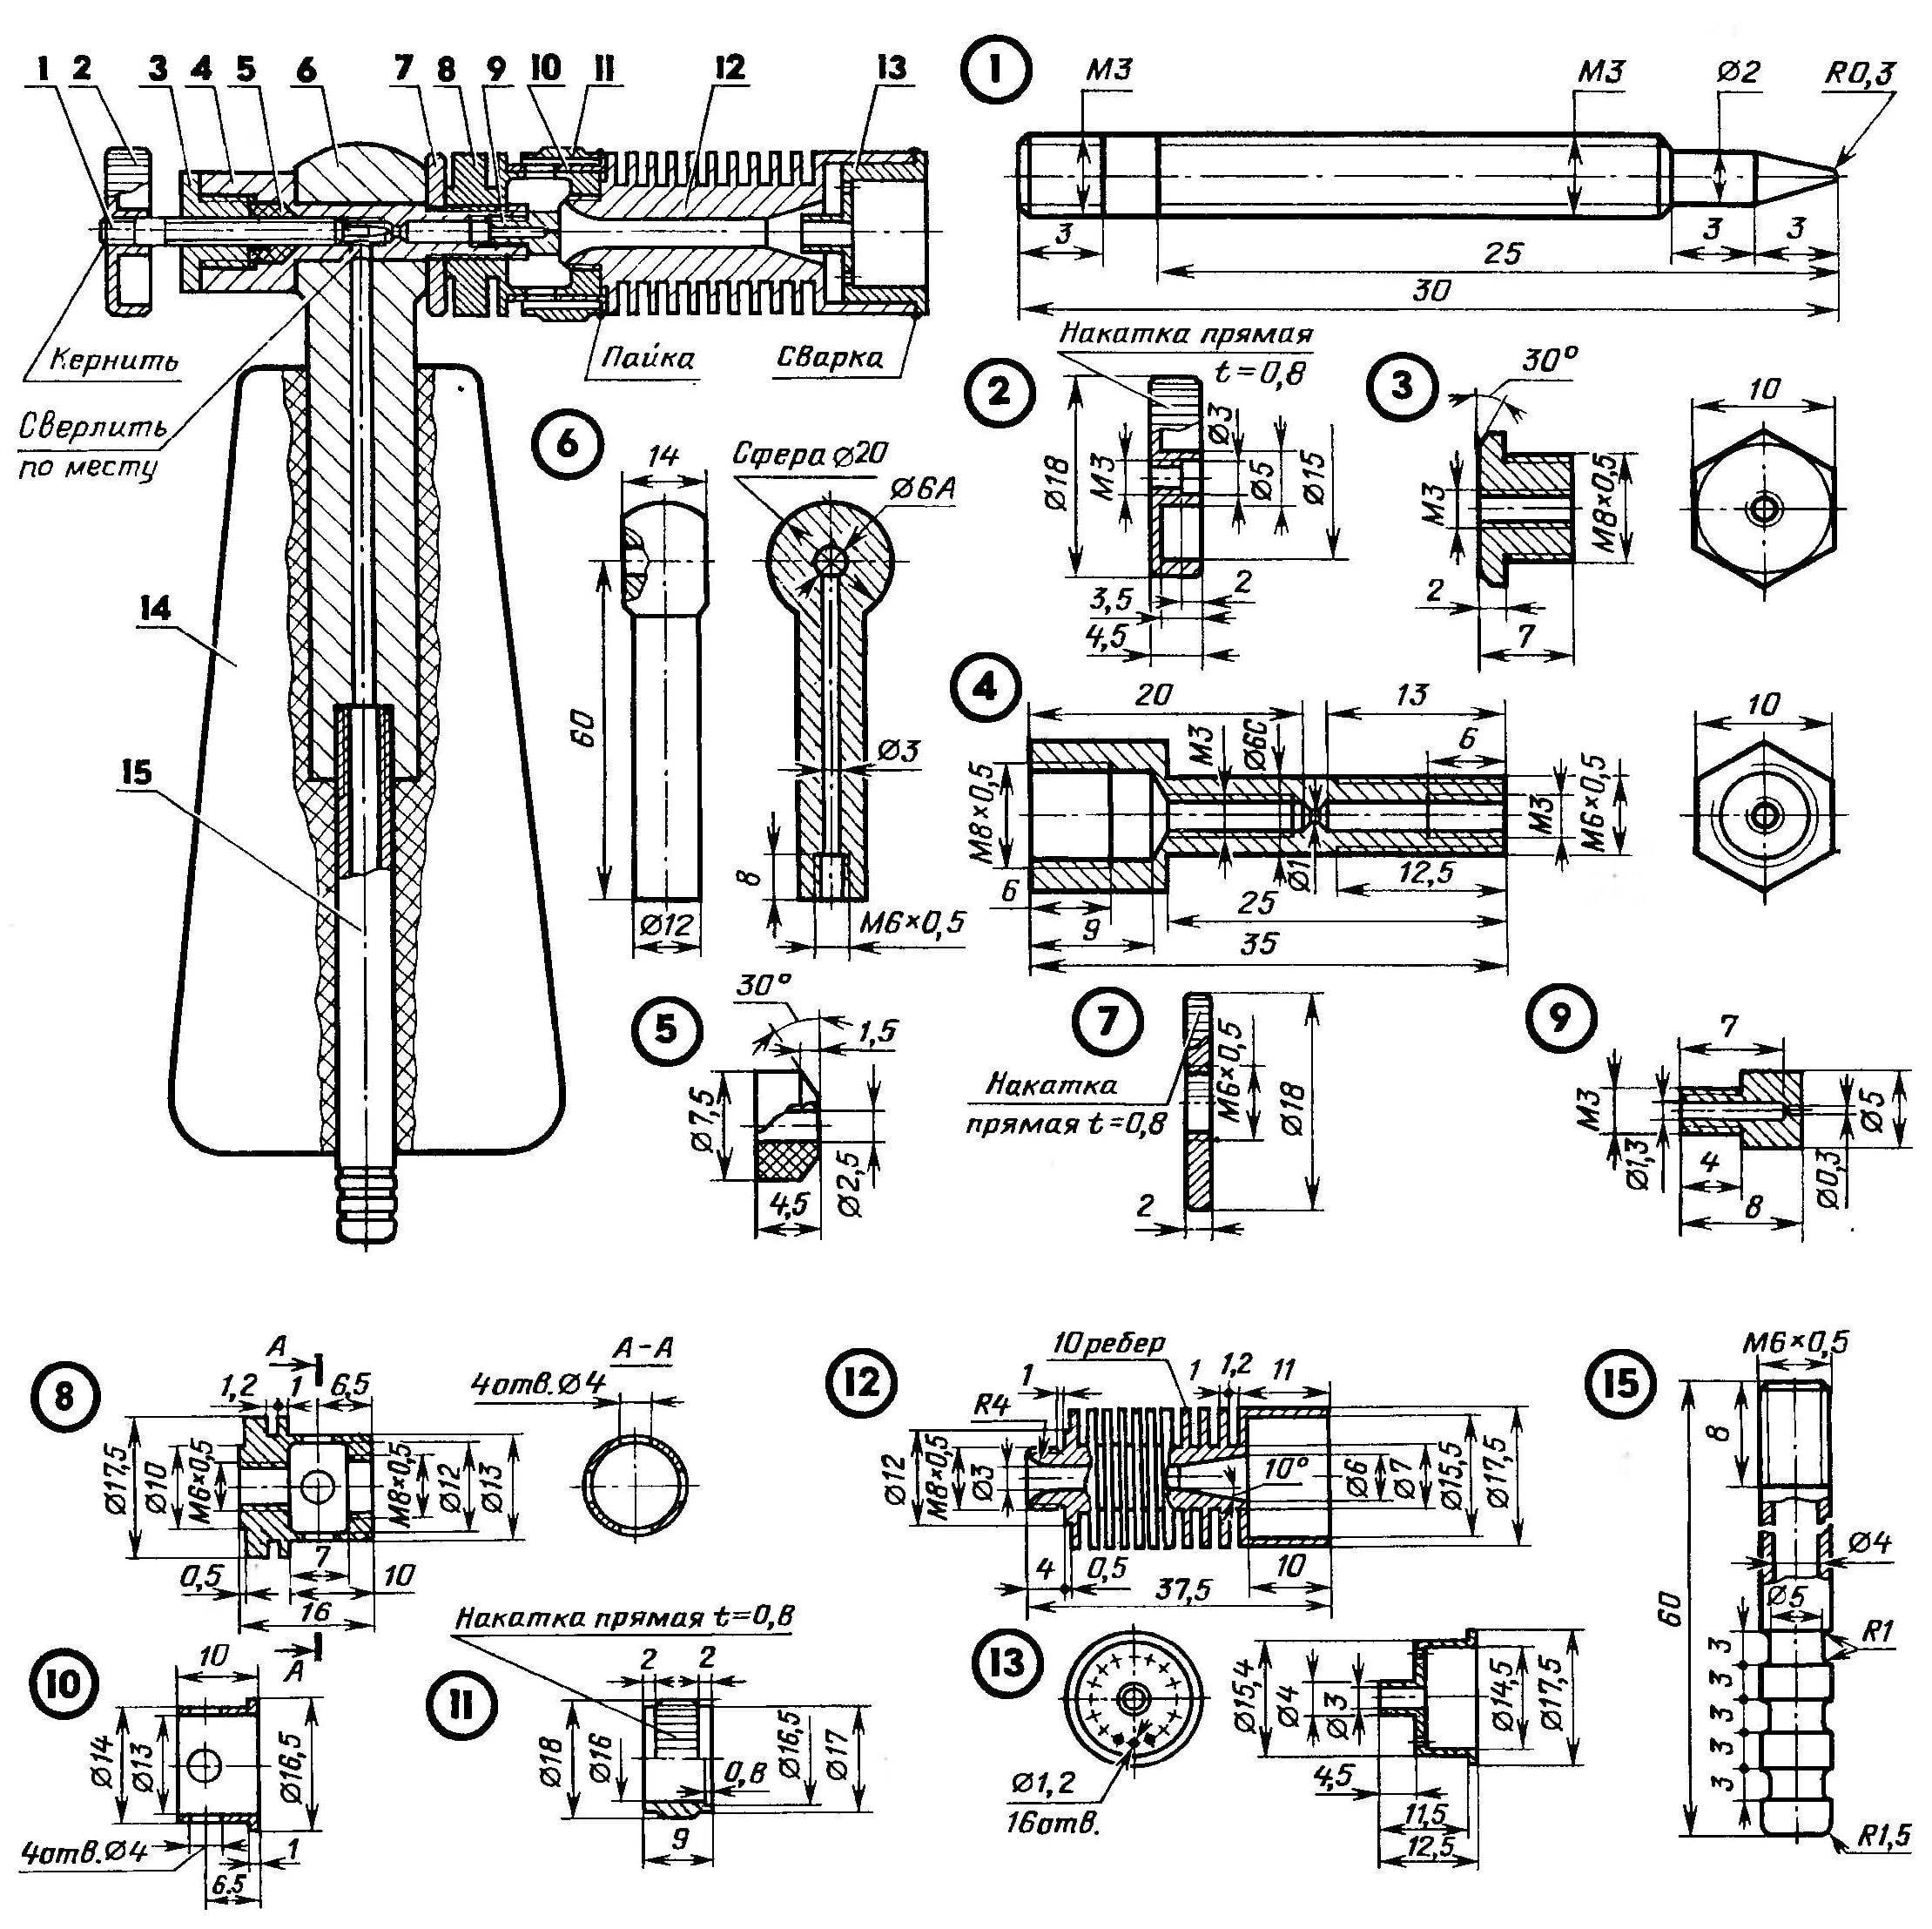
My burner — ejector for high temperature soldering. Running from the LPG cylinder. It is economical: the number supplied to the gas ejector can be adjusted. The burner is arranged in the following way. From the gearbox or gate valve on the cylinder gas is fed through the hose to the inlet tube built into the base of the burner. From there it flows through the vertical channel of the rack in the Central bore of the body of the jet, where the amount dosed adjusting needle mounted on the threads of the housing cover. Further, the gas supplied to the nozzle and ejected through the hole.
Podsushivaya from the cavity of the air valve required for combustion air, the gas is fed through the axial channel of the radiator to the divider where it is divided into a main Central stream and an auxiliary feeding hole peripheral divider necessary to maintain the flame. With the help of worn on the ejector sleeve of the rotary valve with radial holes you can dose the amount of incoming air, and by adjusting the needle — the amount of gas. This allows you to shape the burner flame as in size and quality.
 My burner — ejector for high temperature soldering. Running from the LPG cylinder. It is economical: the number supplied to the gas ejector can be adjusted. The burner is arranged in the following way. From the gearbox or gate valve on the cylinder gas is fed through the hose to the inlet tube built into the base of the burner. From there it flows through the vertical channel of the rack in the Central bore of the body of the jet, where the amount dosed adjusting needle mounted on the threads of the housing cover. Further, the gas supplied to the nozzle and ejected through the hole.