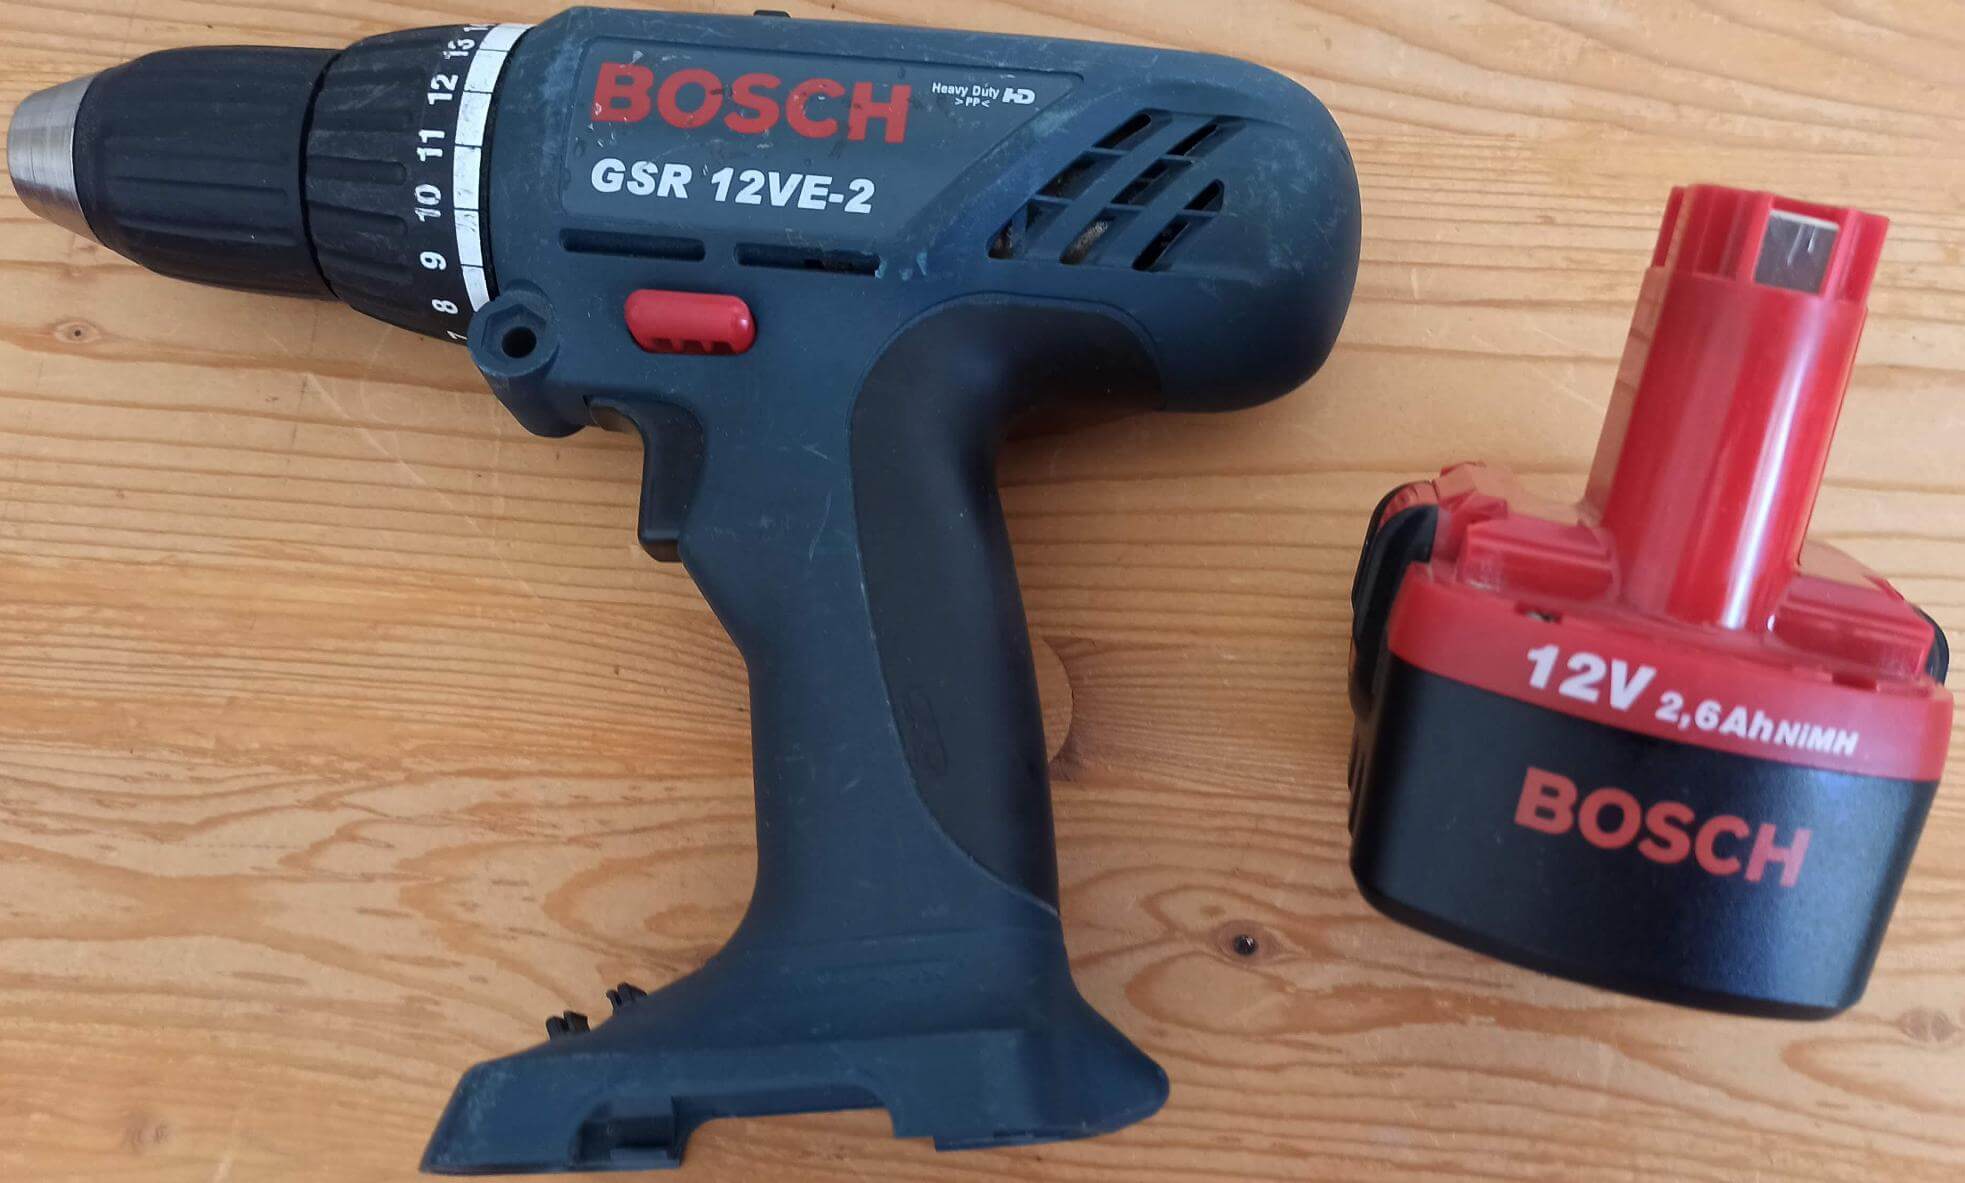
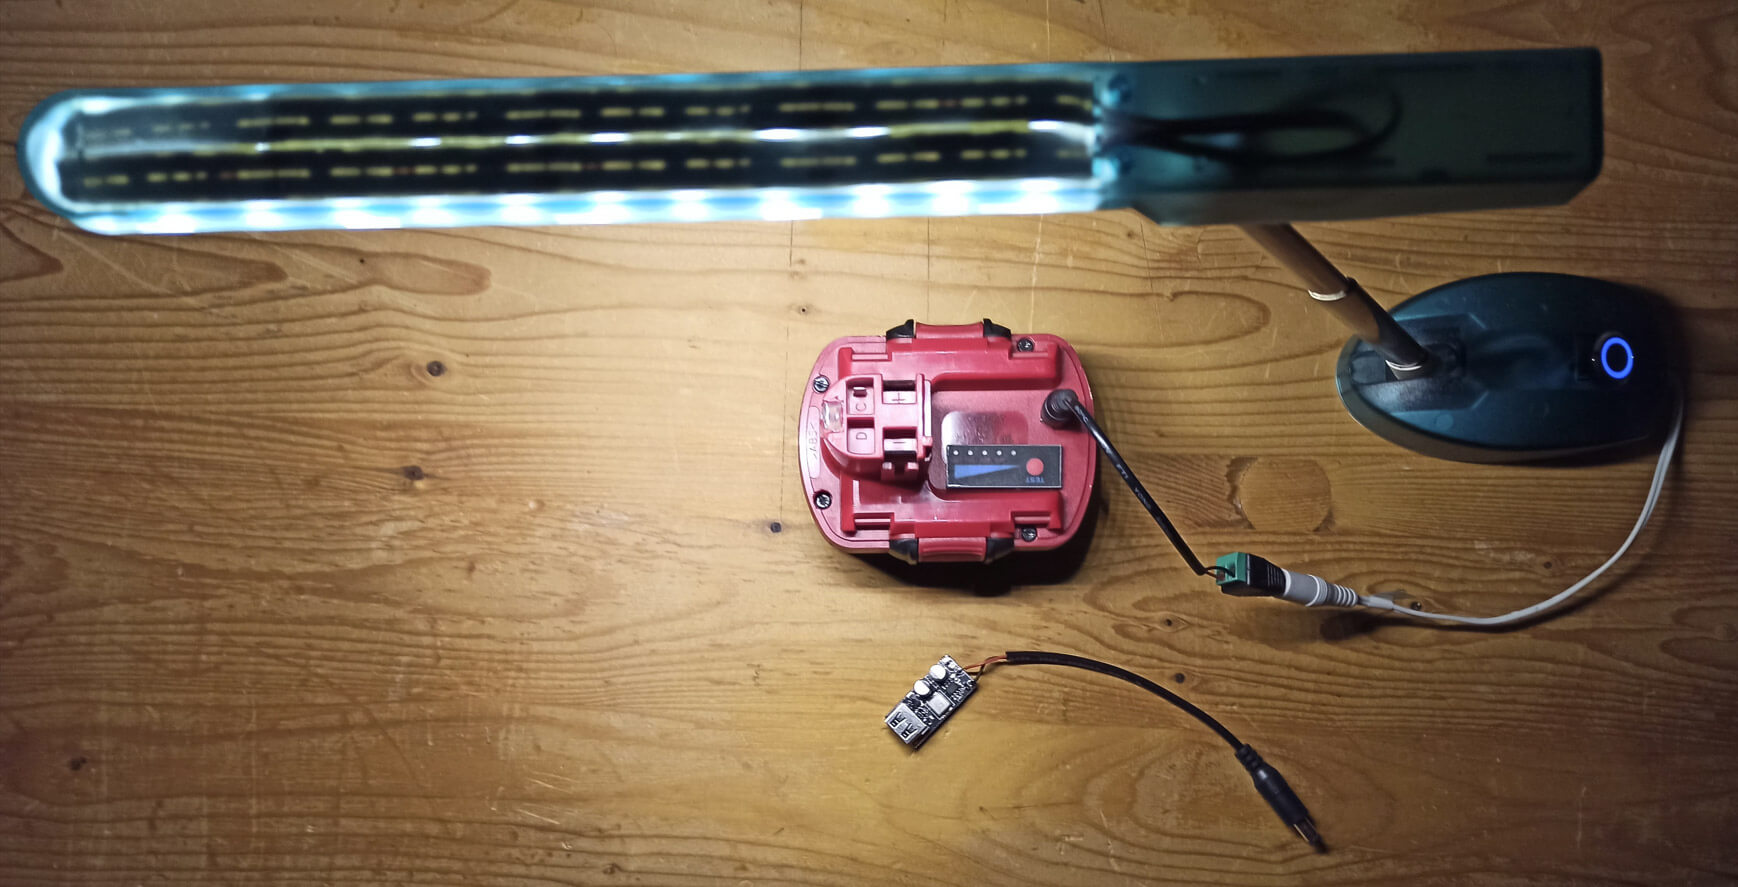
Have you ever wondered what to do with an old screwdriver that is lying around idle because of a dead battery? I had a similar situation – a friend gave me his old Bosch with the comment: “The batteries don’t hold at all, it’s just torture.” So what do you think? I decided to breathe new life into it by replacing the outdated Ni-Cd cells with modern lithium-ion ones. And, I’ll tell you honestly, the result exceeded expectations – the charge lasts three times longer, and the battery is now suitable not only for a screwdriver, but also for other gadgets.
What will you need?
Before we roll up our sleeves, let’s gather everything we need. Here is the list:
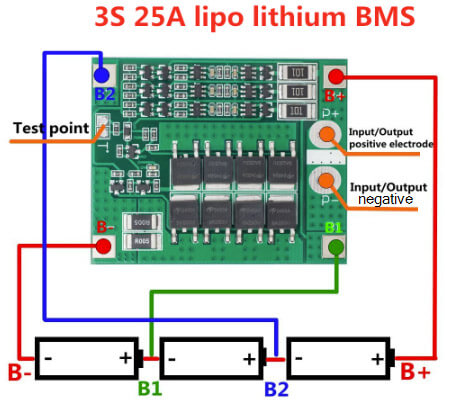
- BMS module – This small scarf protects lithium-ion cells from overdischarge and overcharge. There’s no way without her.
- 6 lithium-ion cells – it is better to take them individually, rather than in a plastic case. They simply won’t fit inside the original battery.
- Nickel tapes for connecting elements.
- Charger for Li-Ion.
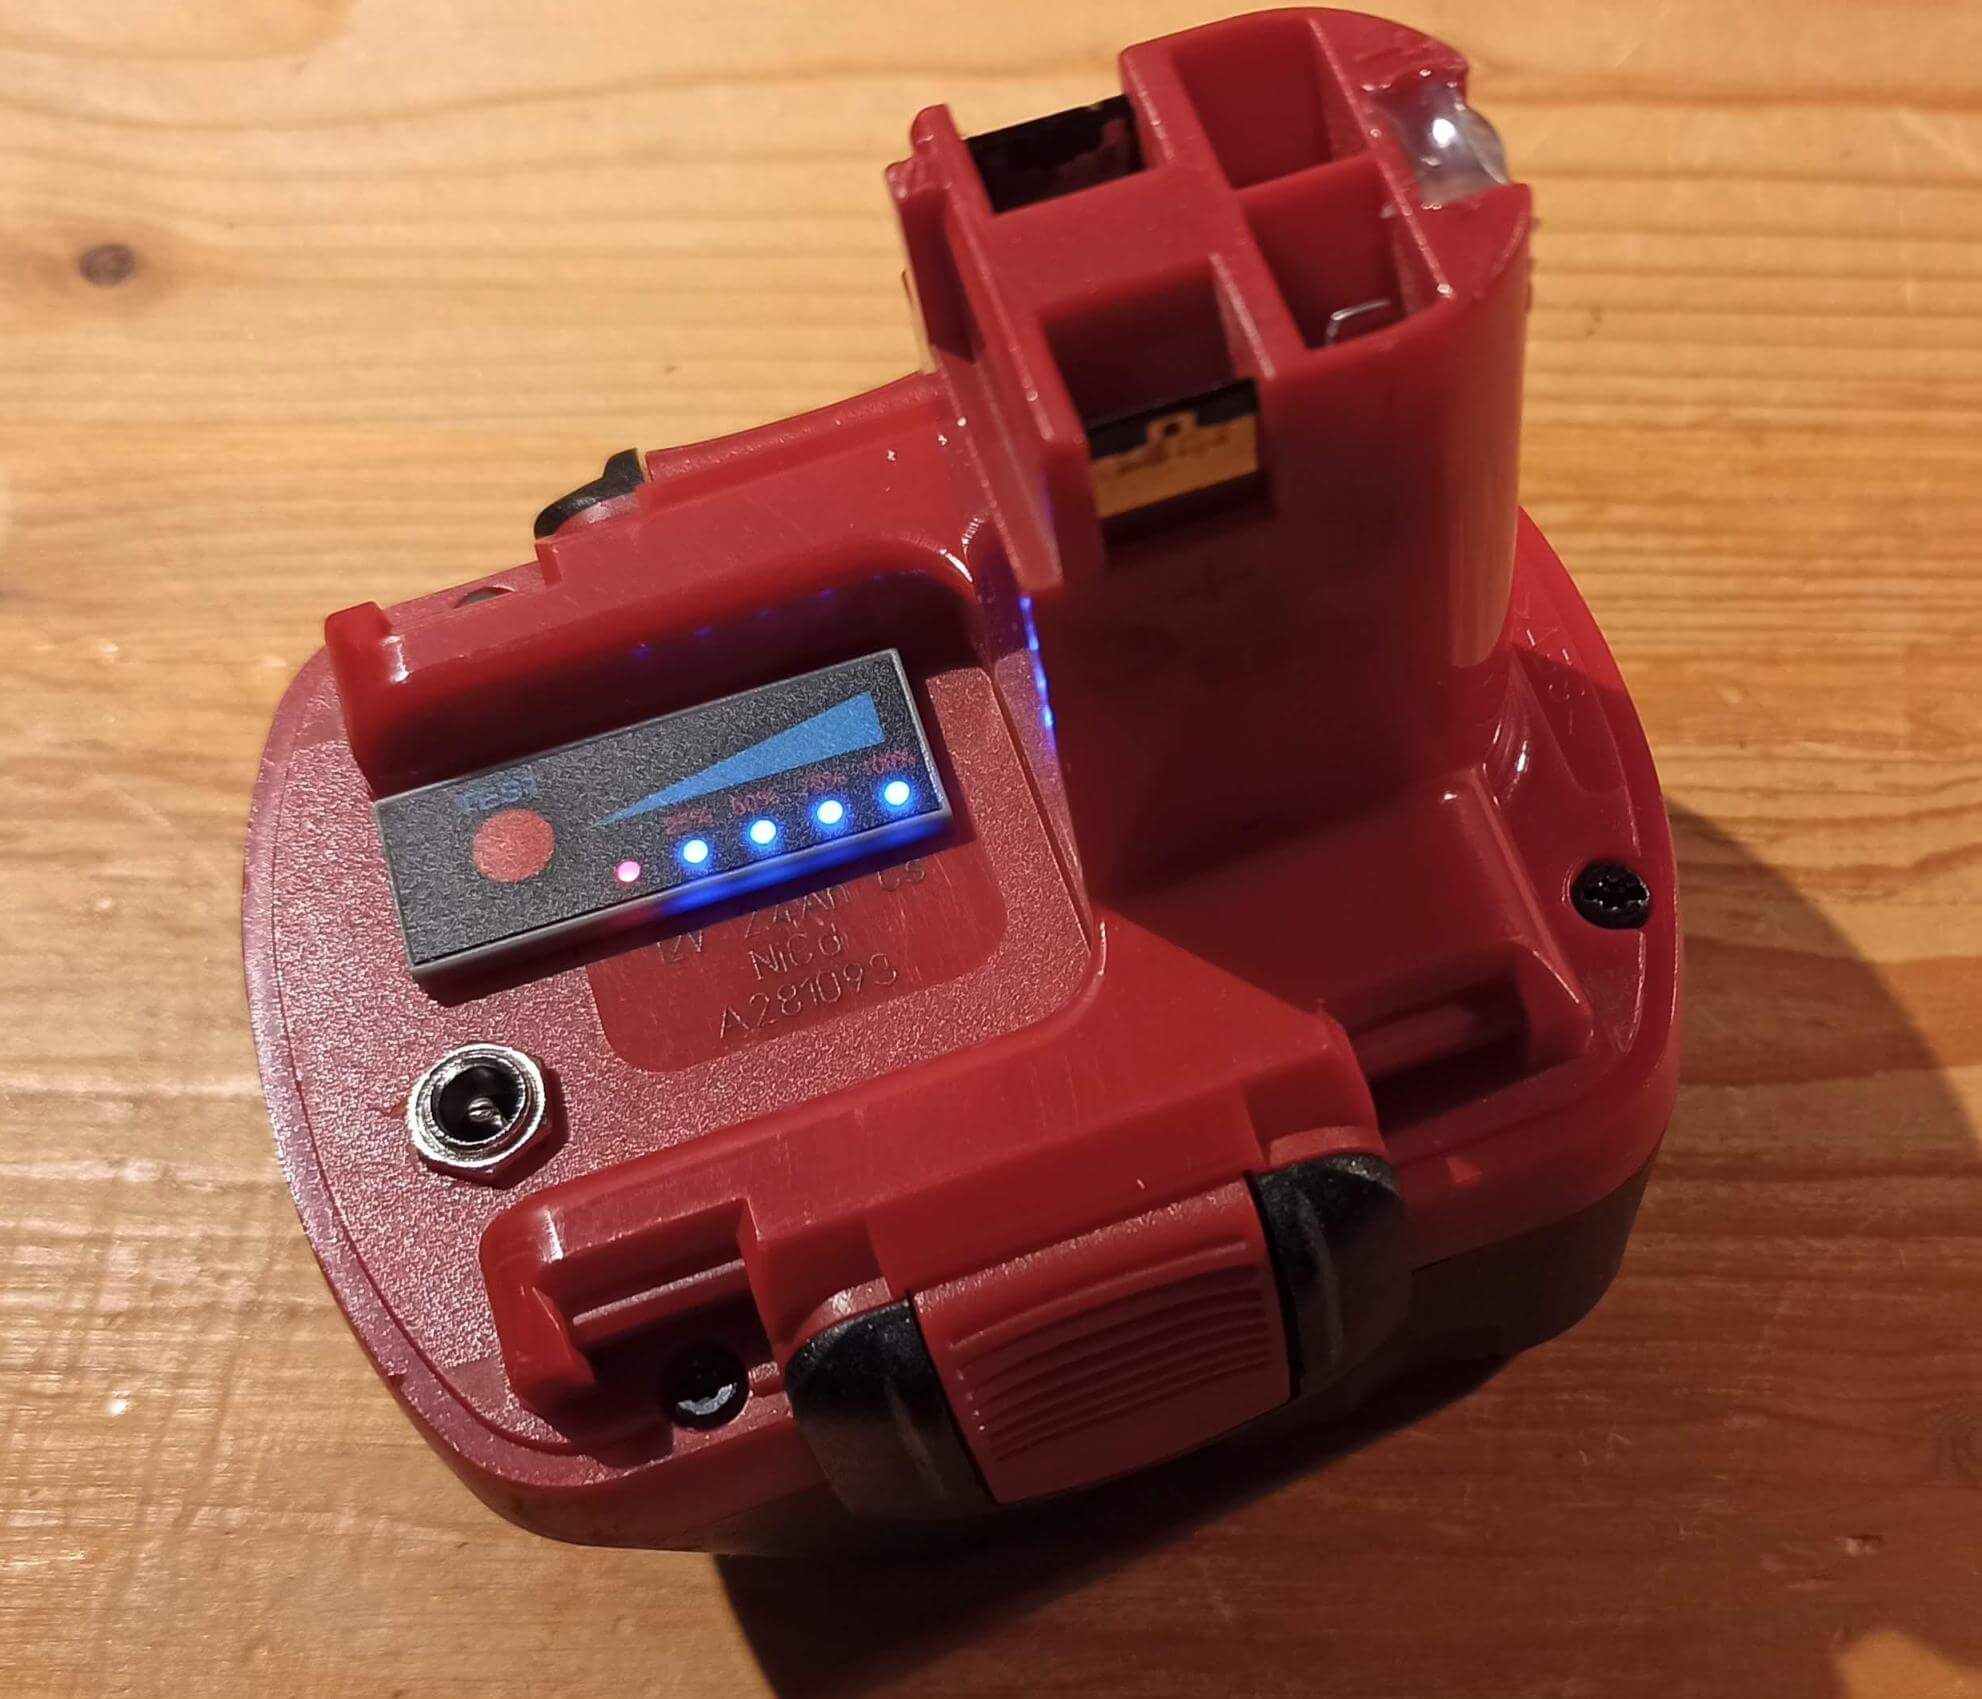
- Charge level indicator – it’s convenient to track how much “life” is left in the battery.
- Charging connector , wires, some cardboard and glue sticks.
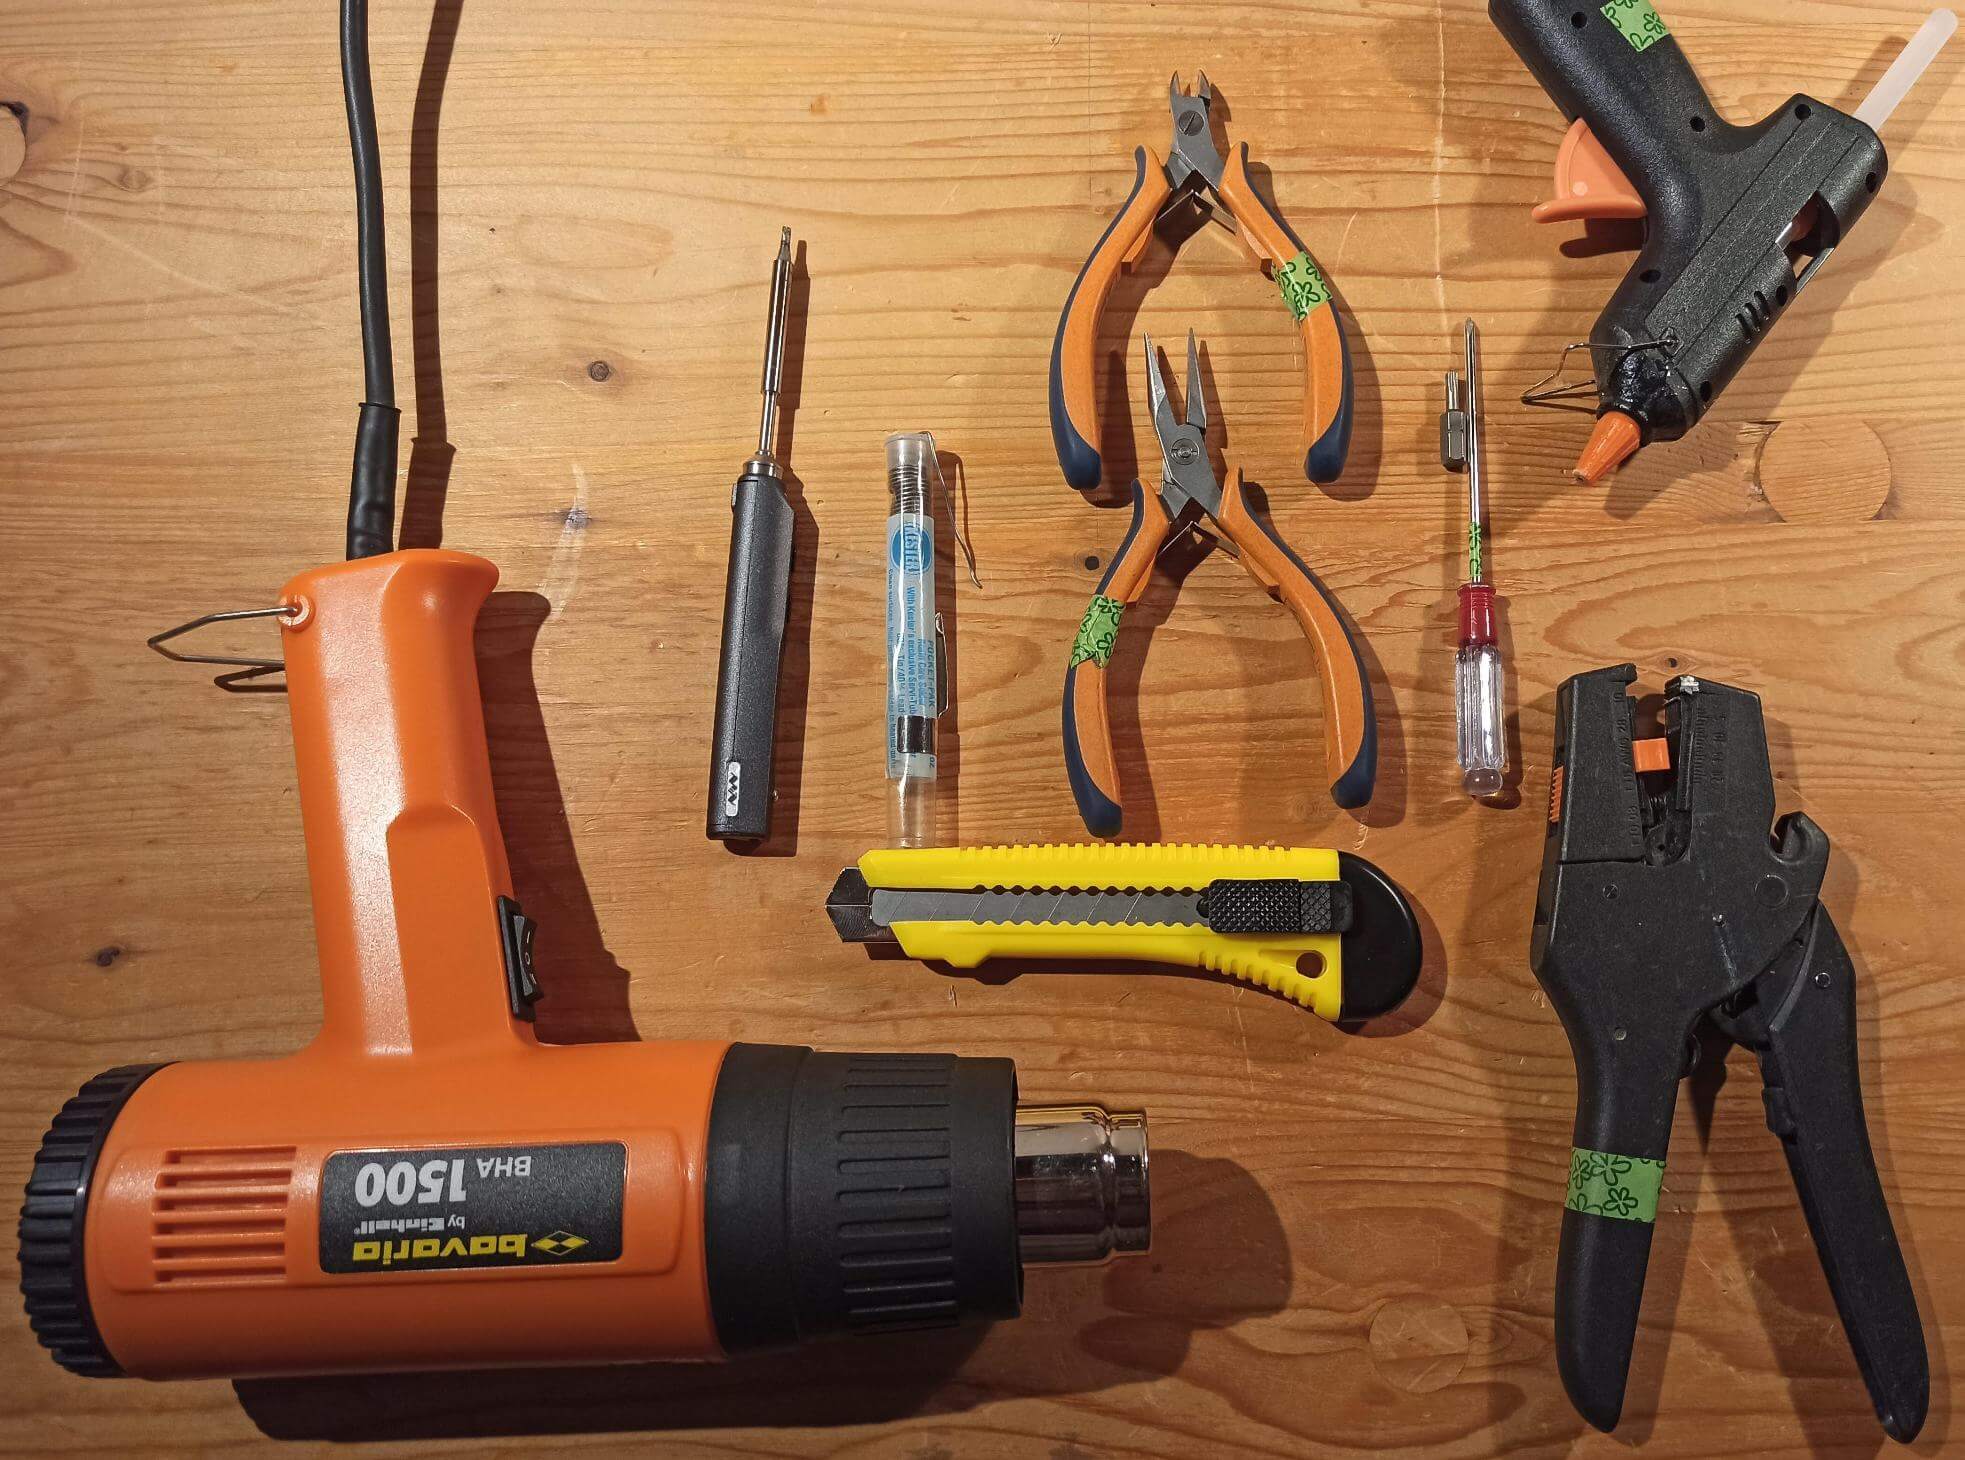
Which of the tools?
You can’t do it without the right tool. Here’s what will definitely come in handy:
- Spot welder (preferably Arduino version or something similar). It’s expensive to buy, but you can borrow it.
- Soldering iron and solder , hot glue , Torx screwdriver , drill , multimeter and eye protection .
Are you ready? Let’s go step by step!
Disassembling the old battery
First, carefully unscrew 4 screws (one is hidden under a plastic plug) and disassemble the case. Carefully remove the batteries, plastic clips and springs. Next, cut off the temperature sensor (two thin wires) and disconnect the connector. The old battery pack is sent for recycling, and we move on.
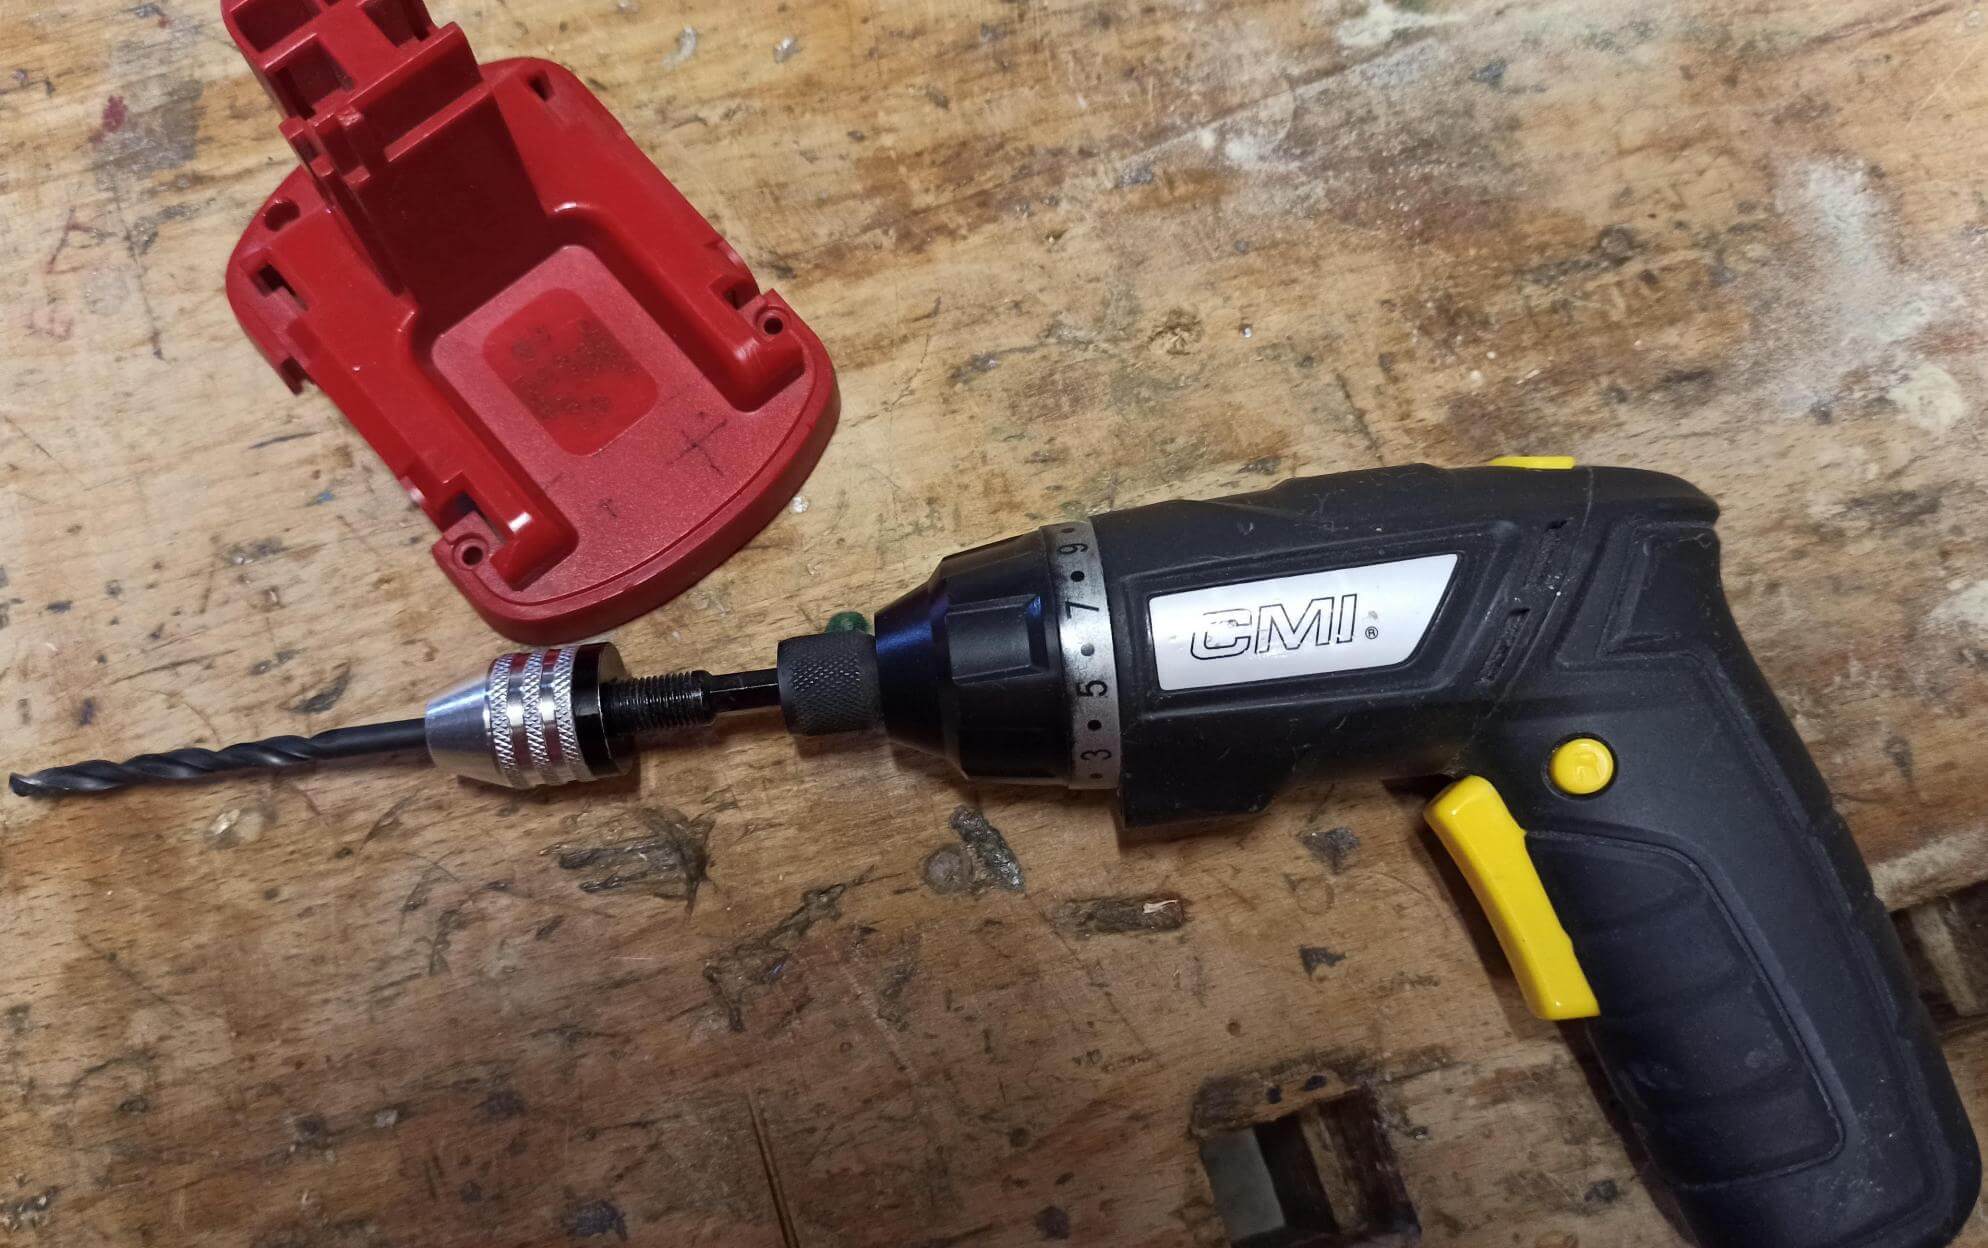
Preparing the body
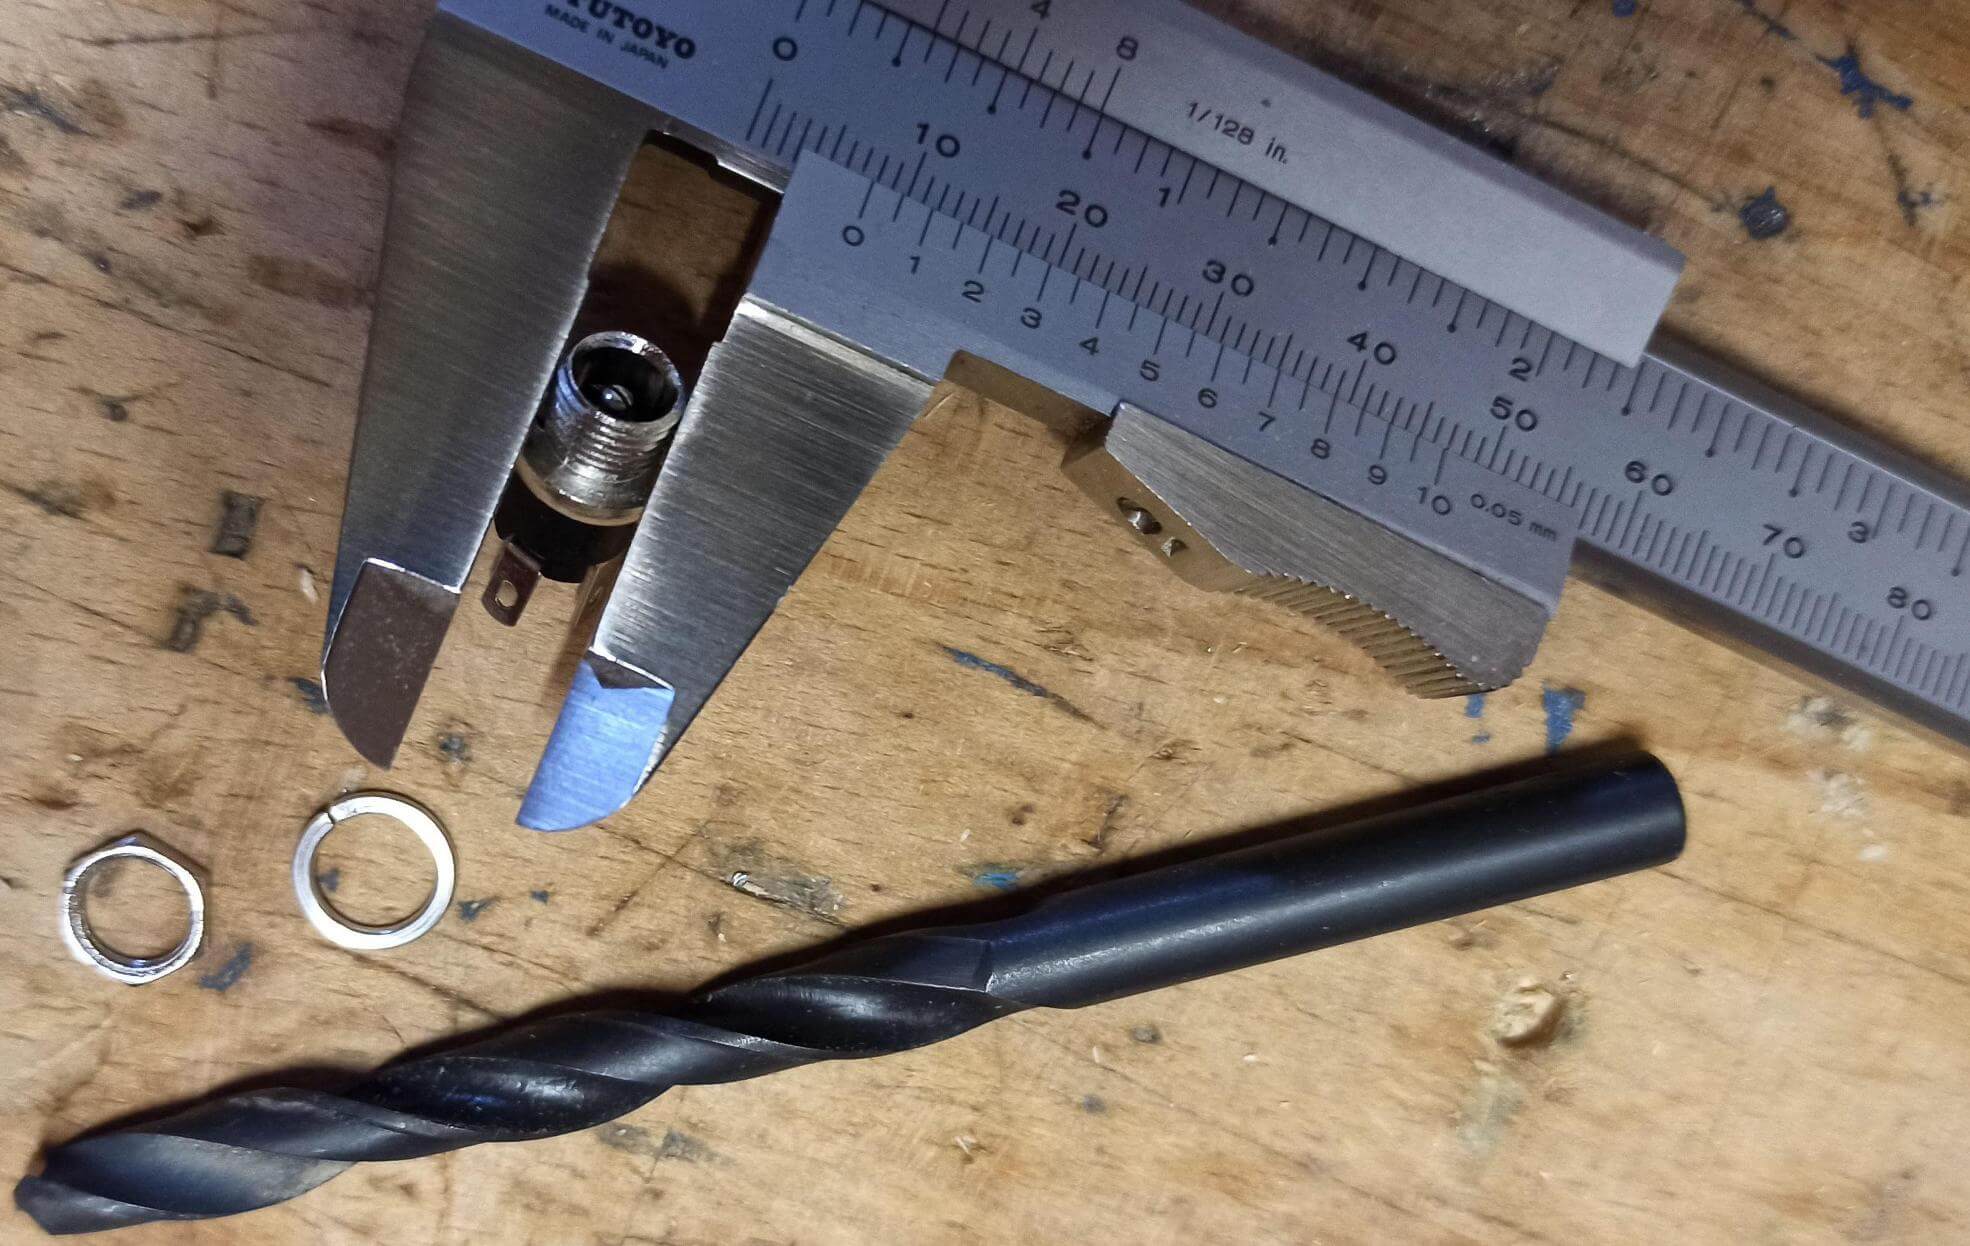
Drill a hole for the charging connector and indicator. The main thing is to make sure there is enough space inside so that nothing gets in the way.
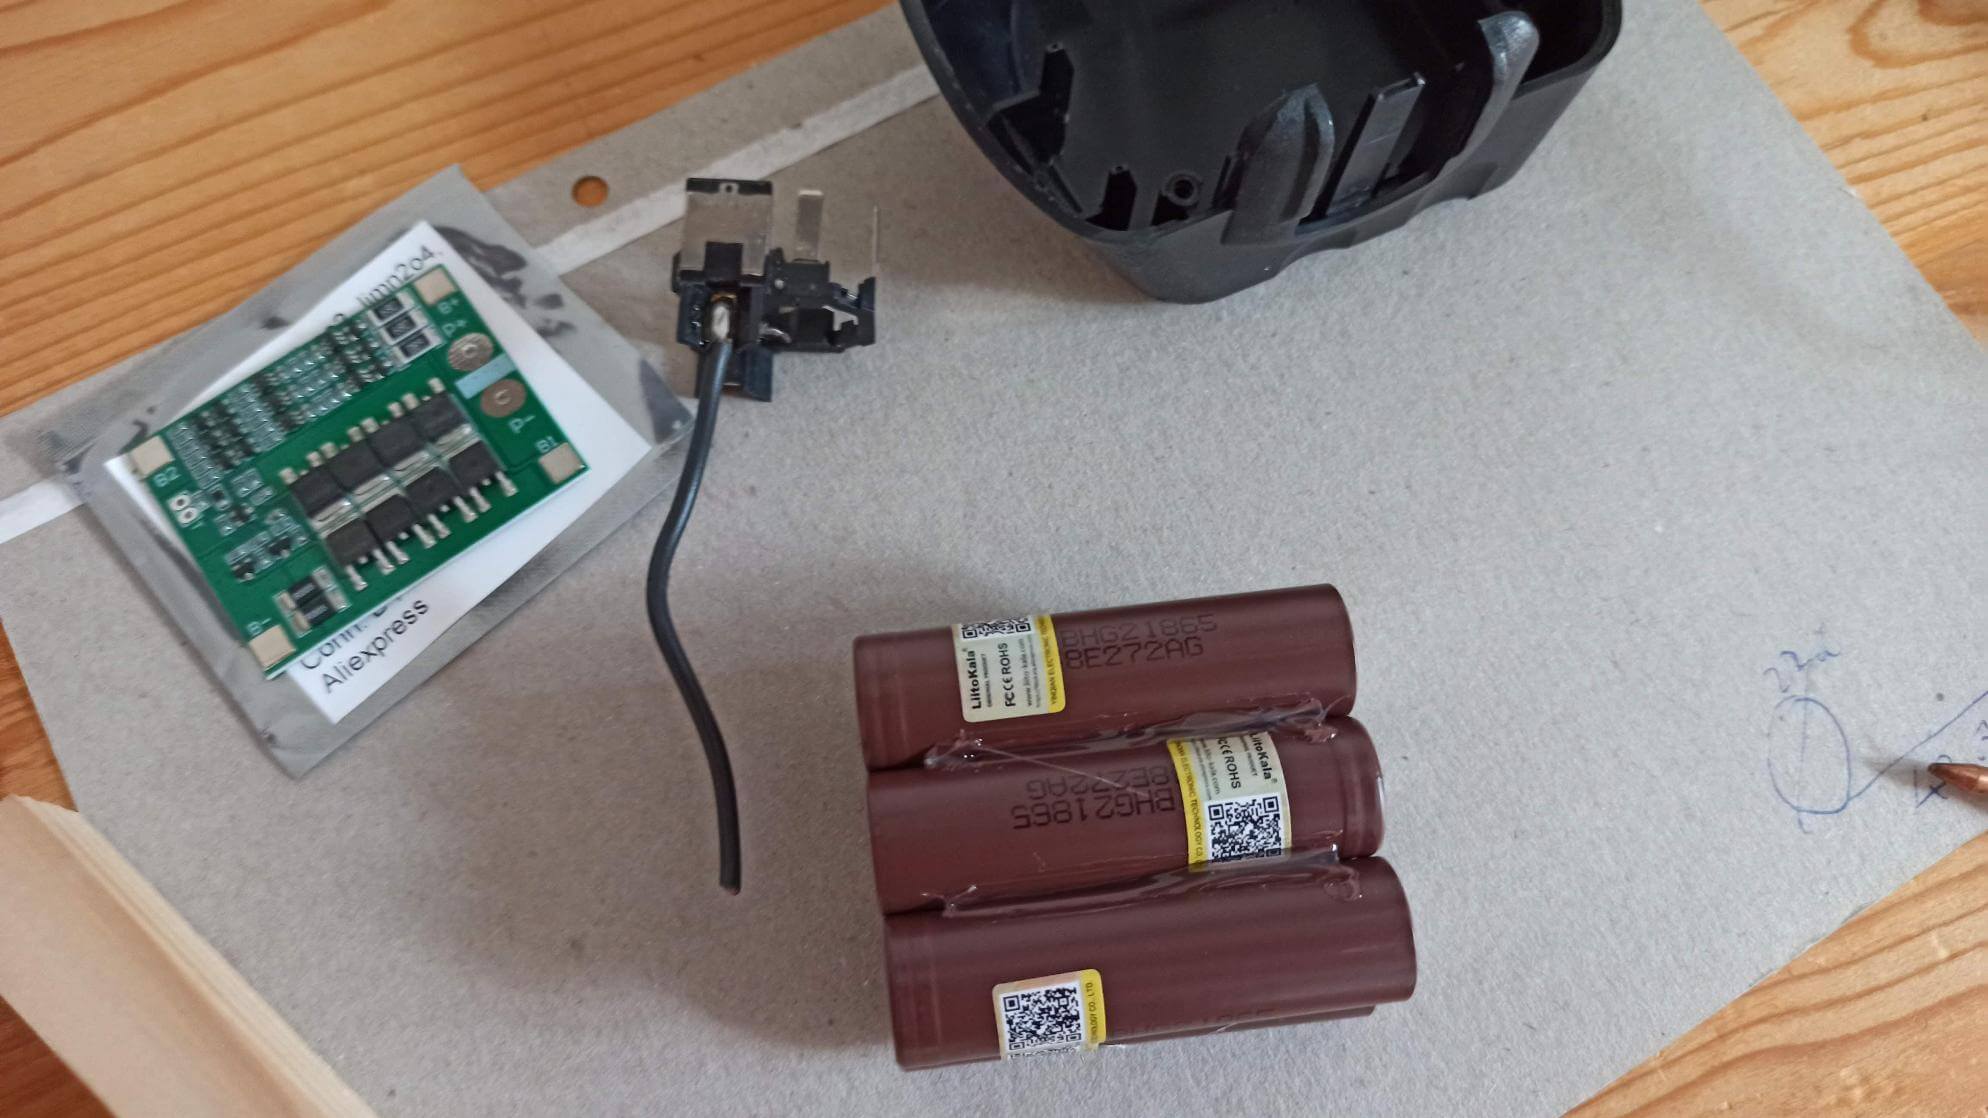
Assembling a new battery from Li-Ion
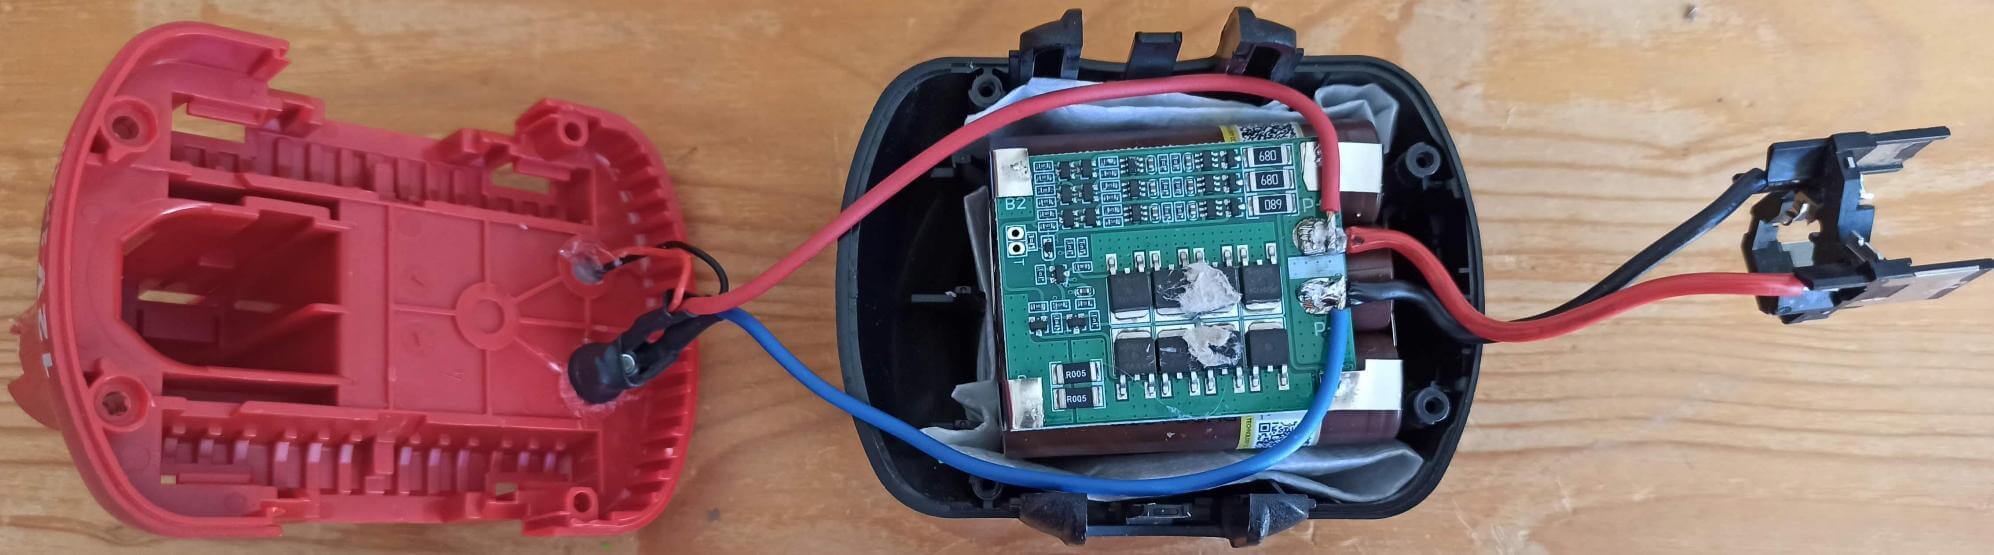
We arrange the elements in a checkerboard pattern: 2 rows of 3 pieces each (2×3 pattern). We glue them together with hot glue – this is not only reliable, but is also practiced even in the automotive industry. Do not use plastic holders – they will not close the case later.
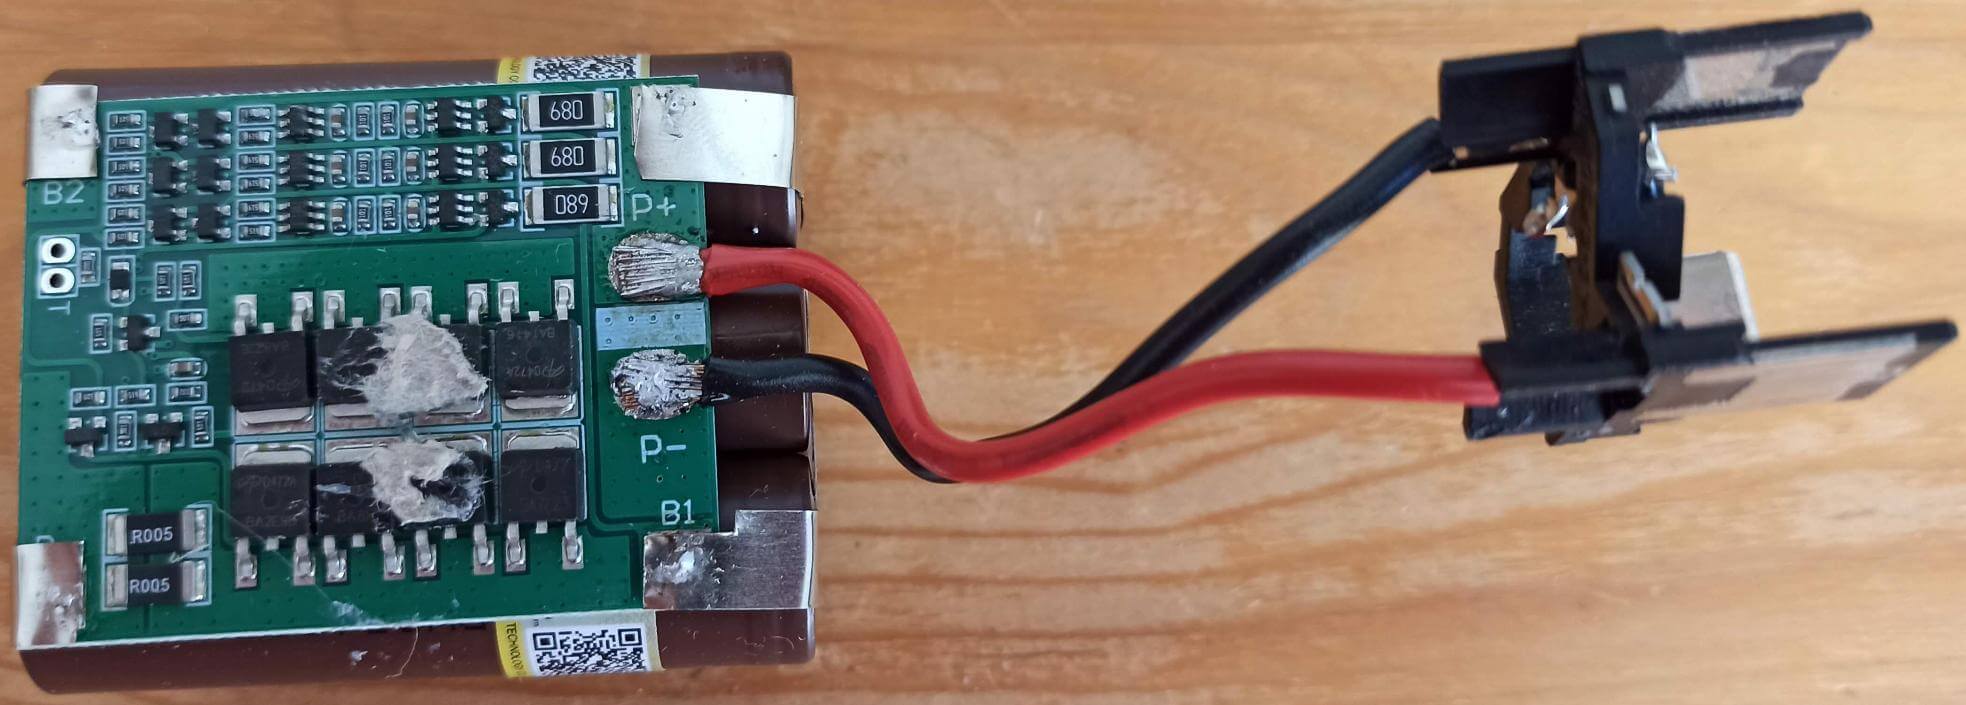
We glue the BMS to the elements with double-sided tape – this makes it easier to place nickel tapes. We wipe the contacts with alcohol – soldering will be better. We cut the tapes to the required length, some are made longer – they will be used to connect the BMS.
Spot welding is the key to reliability
Now we weld nickel strips to the elements, assembling a 2P3S circuit: two elements in parallel, then three such pairs in series. This will give the required voltage and capacity.
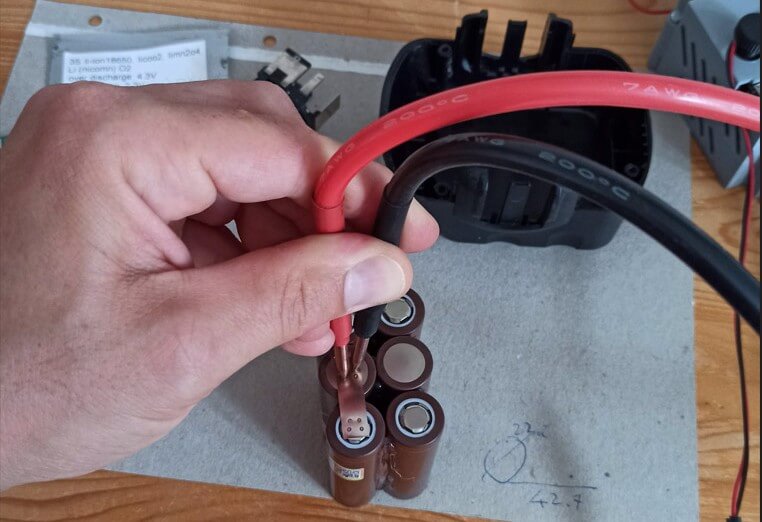
All electrical – we connect everything
We pass the wires from the indicator through the hole and connect them to the charging connector. To it we add two wires going to the battery. Then carefully solder the wires from the charging and the screwdriver itself to the BMS.
Final assembly
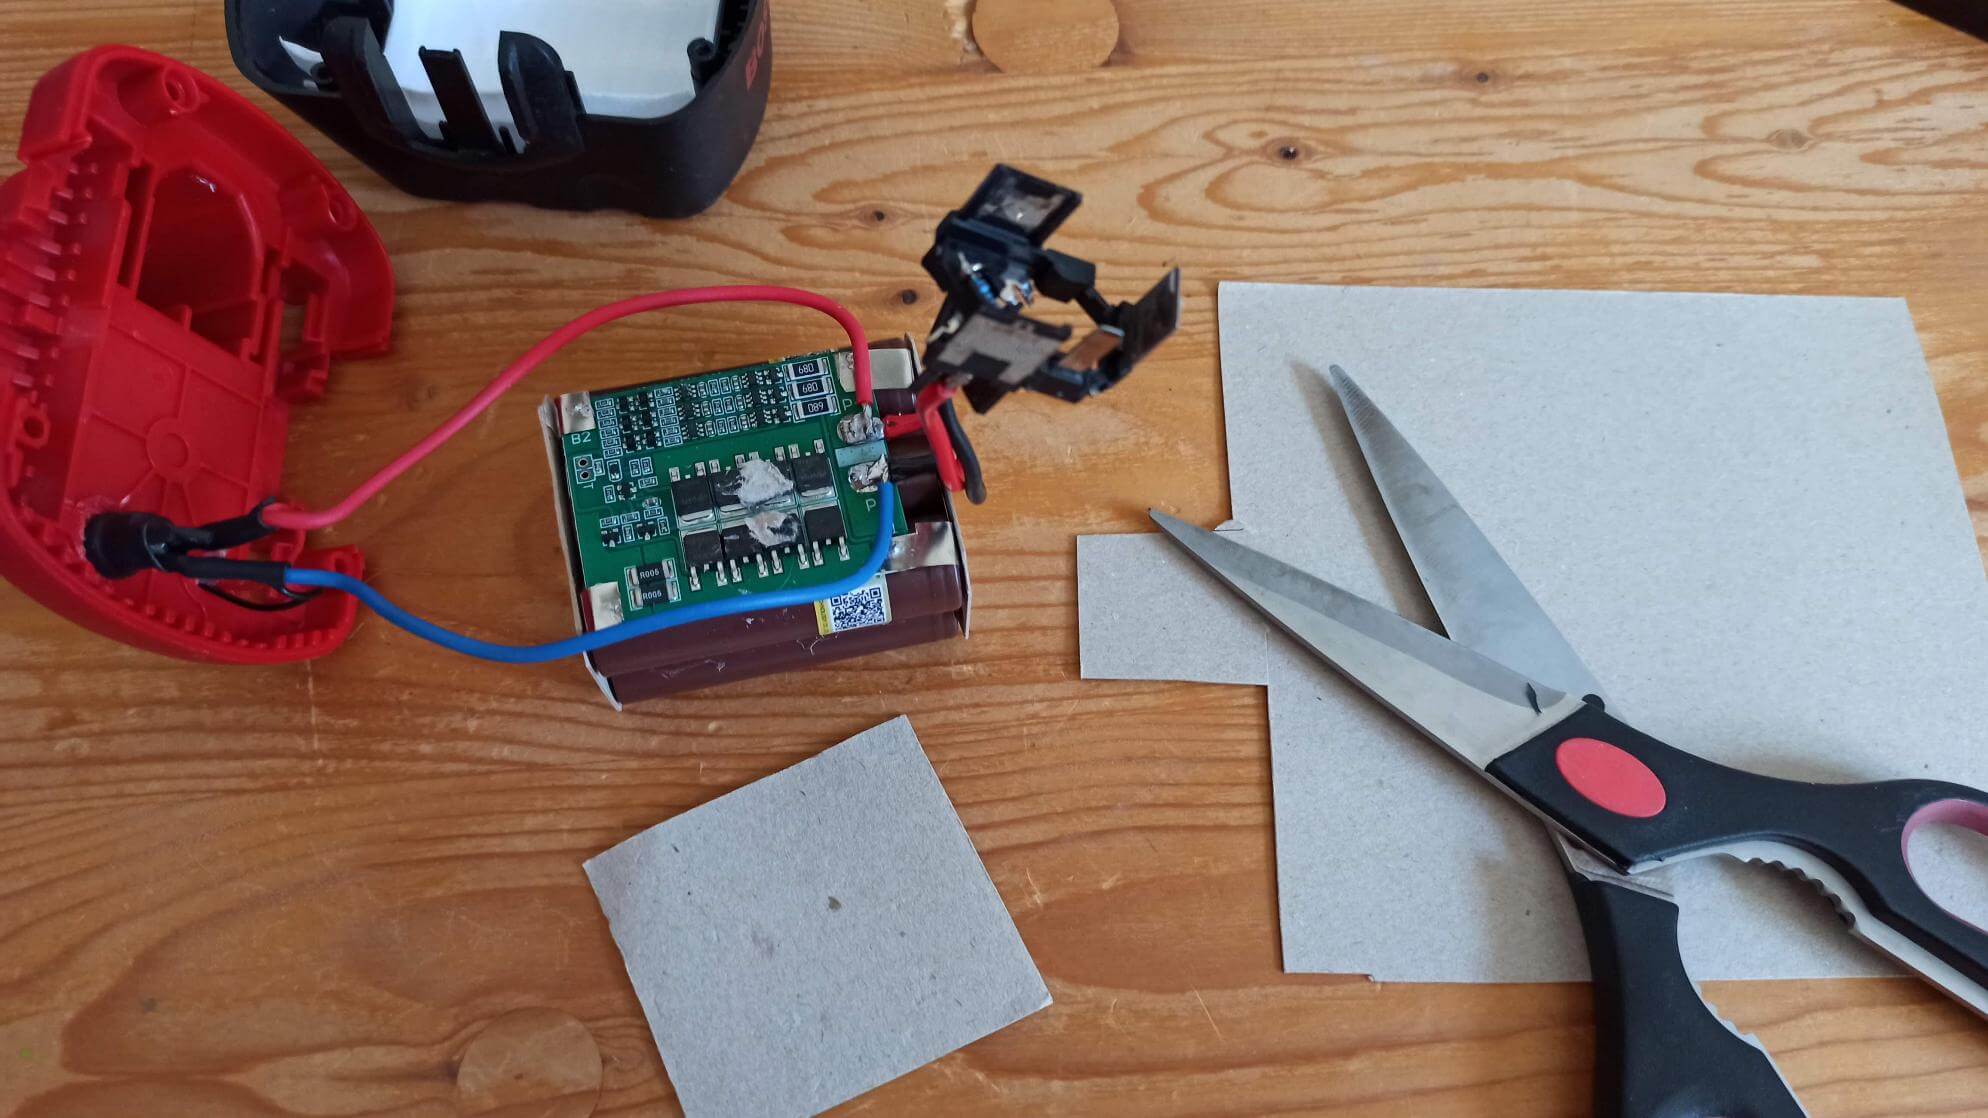
We glue a piece of cardboard onto the metal parts (for insulation) and put thin foam underneath. Putting everything back together: body, springs, latches. We tighten the screws and – hurray! You can test it in a screwdriver. But before serious work, be sure to charge the battery.
Charging in a new way
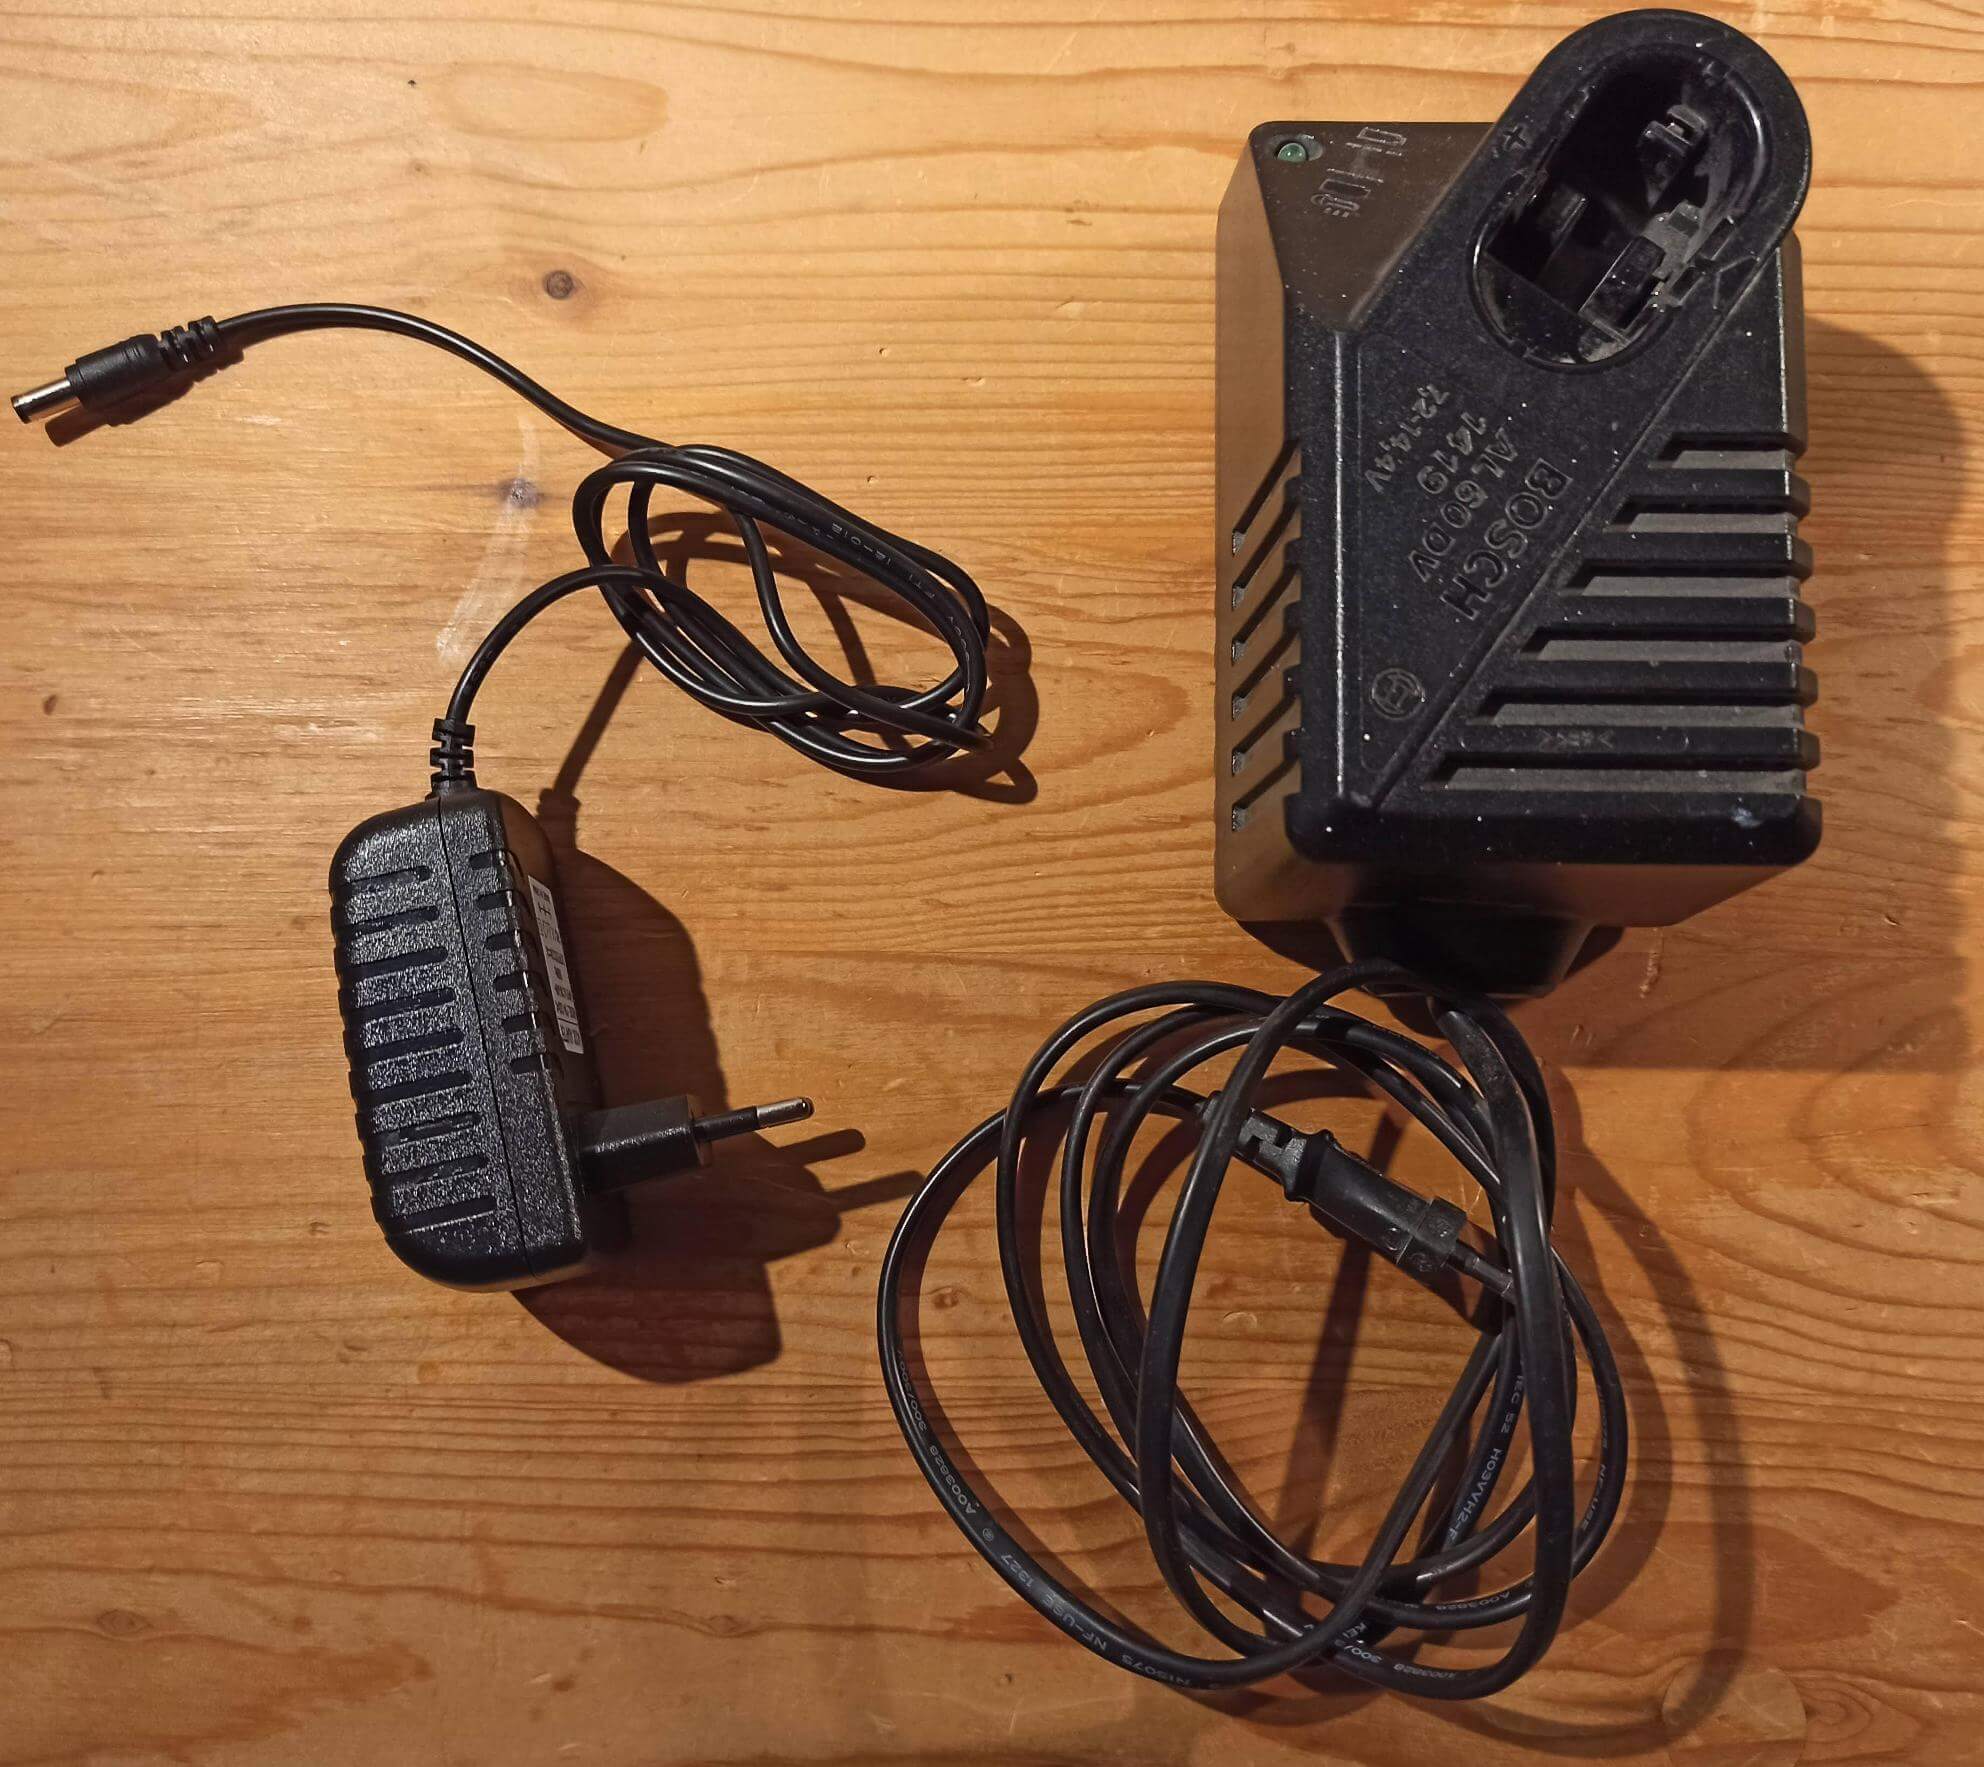
Important: old Ni-Cd or Ni-Mh charger goes in the trash (or better yet, recycled). It is not suitable for lithium and may damage the battery.
Now we will charge directly through the new cylindrical connector. With a capacity of 6Ah and a current of 2A, charging will take a little more than 3 hours. The main thing is not to confuse chargers. The connector may fit a bunch of power supplies with different voltages, and if you make a mistake, you can ruin the battery.
What next? Superbattery for all occasions!
Cool feature – the charging connector is double-sided. This means you can connect not only a charger, but also power other 12-volt devices from it: a lamp, a car charger, or even a mini-compressor. Savings and versatility in one bottle!
By the way, using the same scheme you can bleed batteries from other tools. Just make sure this is possible before you start – Google the specific model.
Conclusion
This is how, friends, an ordinary, almost discarded battery turns into a real workshop superstar! Yes, you will have to tinker a little, but the result is worth it – you save money, do not pollute the environment and get cool functionality. And if you get involved, you will be able to pump other batteries – not only for yourself, but also for friends or clients. Why not?
Recommend to read
 MATCHBOX “ELEVATOR”
Matches... How many times we use them for the day! To do this, constantly having to open and close the drawer or get them off the shelf — they are thrown on the table — the baby was right... WITH STROLLER UP THE STAIRS
For families where a young child, is not without interest, perhaps, will be the proposed revision of the pram. Quite a simple upgrade allows one person to easily raise or lower at an...
