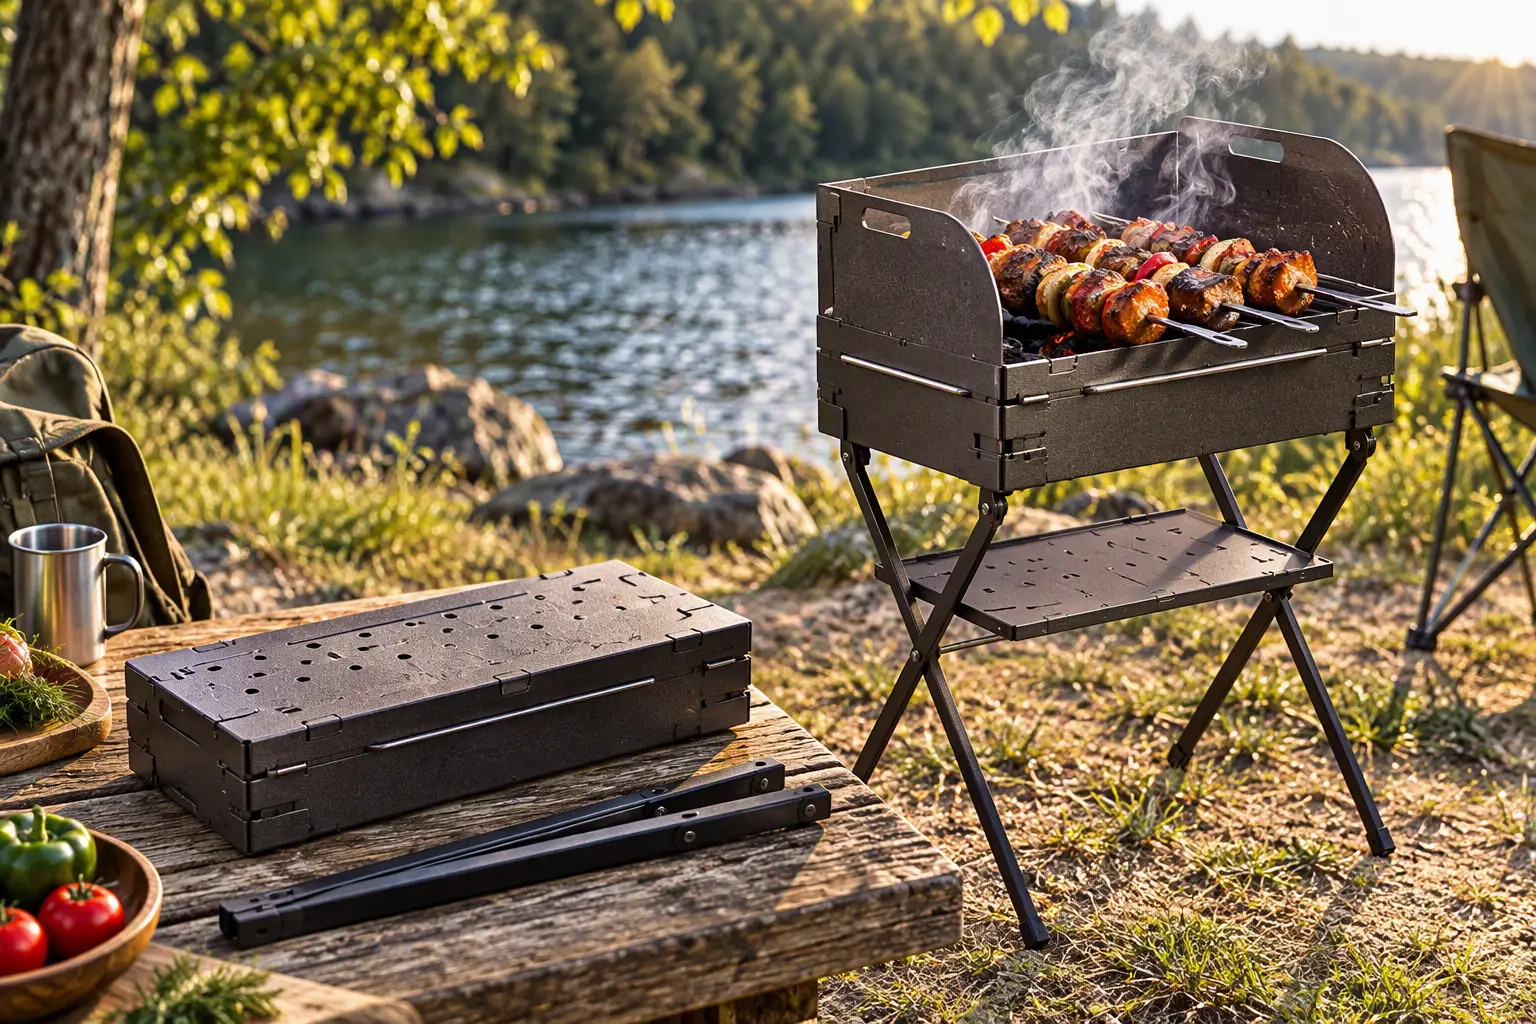
The design of this portable barbecue is convenient both for camping conditions (for example, for tourists, hunters, or anglers) and for a garden plot or a country house for quickly cooking shashlik or roasting vegetables, frying sausages, frankfurters, or fish.
Its advantage is that this kind of barbecue can be taken apart and folded instantly, turning into a small suitcase with a “staff” made of the support tubular legs folded together.
The availability of the materials used and the simplicity of the design make it possible for anyone who wants to build the barbecue themselves.
Body
As with any suitcase, the barbecue body consists of two parts: an upper and a lower “trough,” which form the base of the design. To make them, you will need a sheet of iron — for example, roofing iron — from which two patterns are cut with metal shears according to the enclosed drawings. Bend lines are marked on them, and ventilation holes are drilled or punched with any punch.
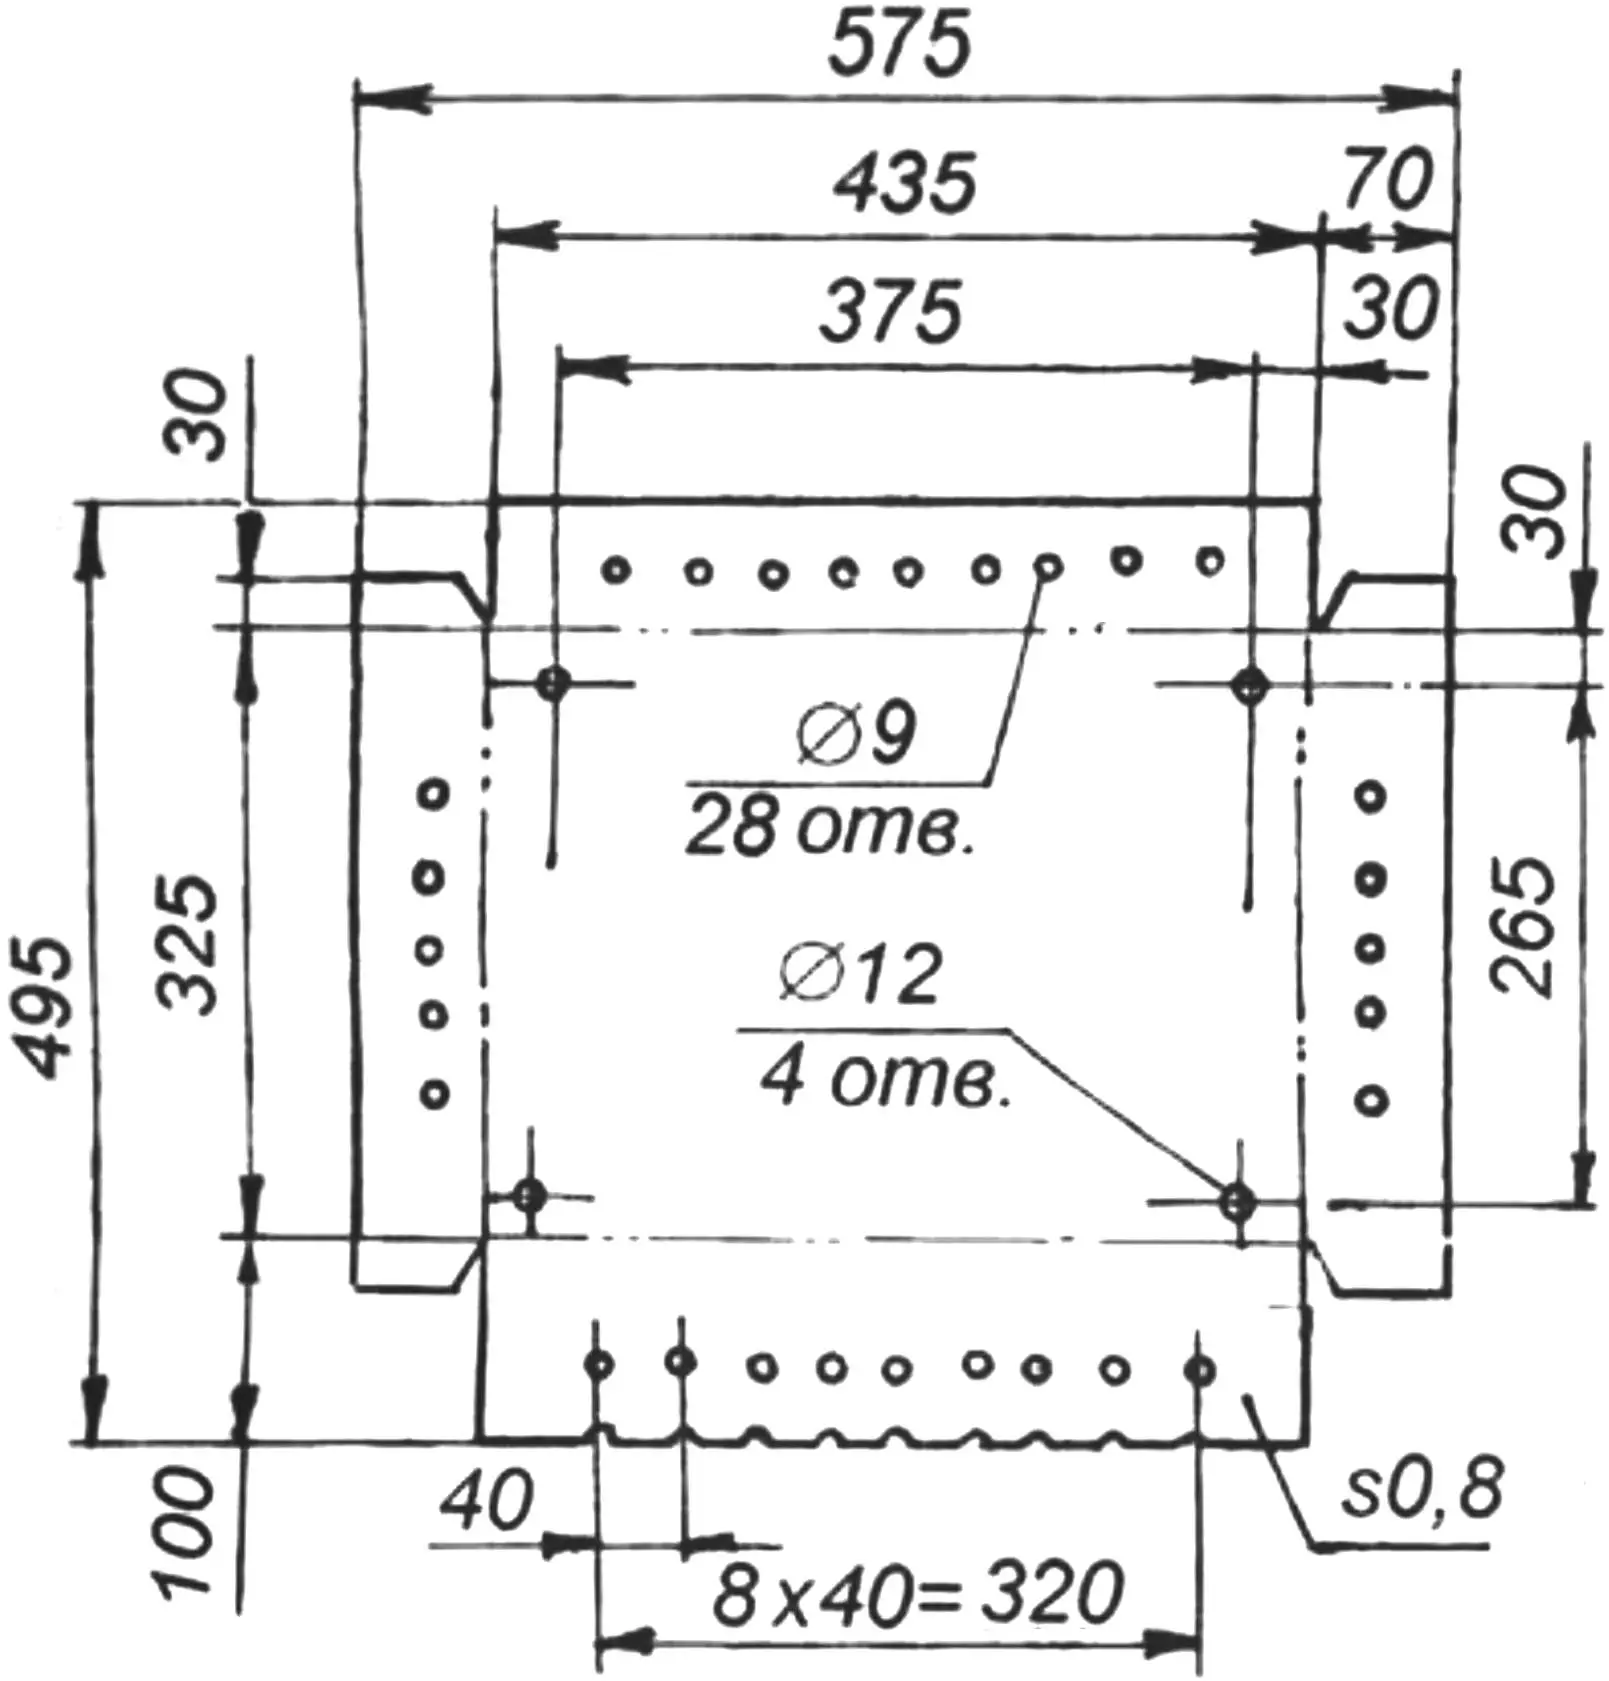
Then both blanks are placed in turn, as appropriate, on the edge of a workbench or table reinforced with a metal angle, and are bent with a hammer along the marked lines so that troughs are formed. The one that has perforation only along the side walls will become the lower part of the barbecue, or the tray. On the upper edge of its front wall, tooth-like notches for skewers are formed with a triangular file (or again with shears).
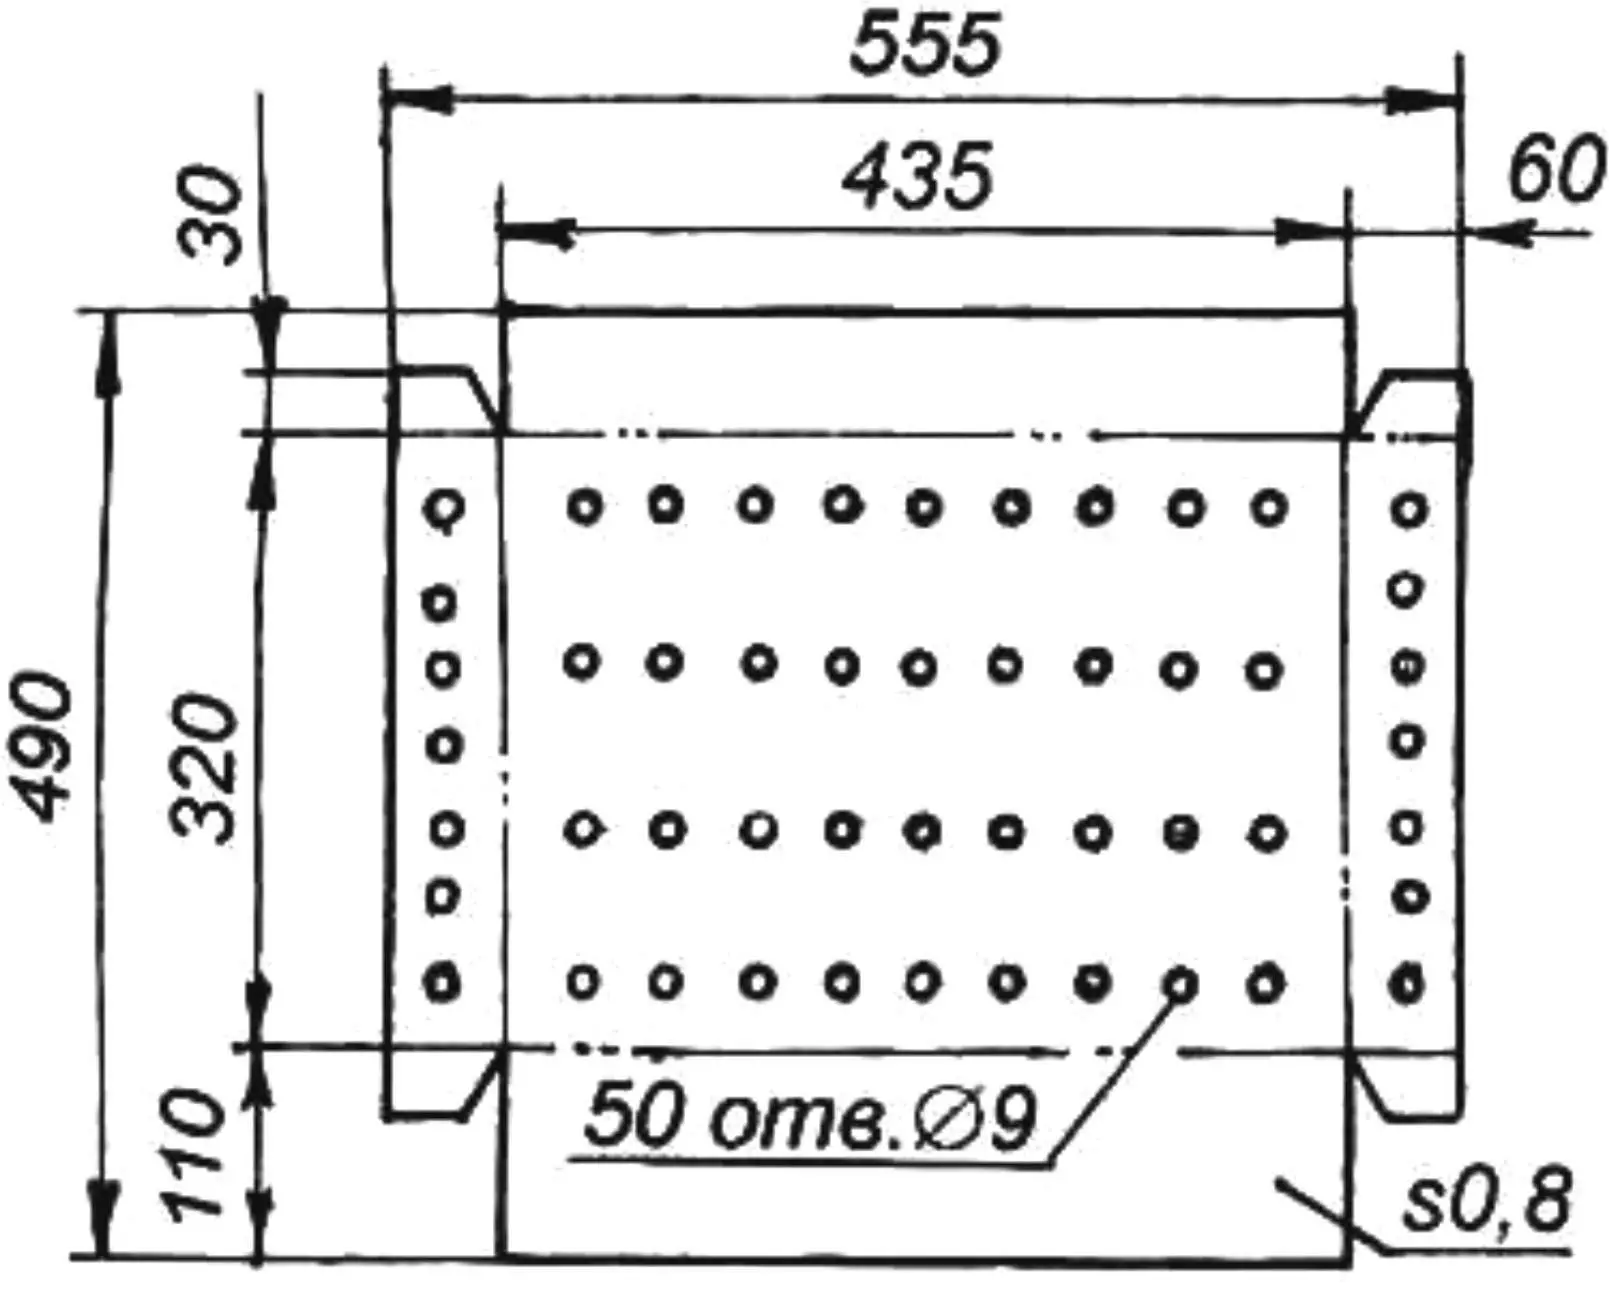
And the fully perforated trough will serve as a vertical wind-shield “rear” wall. Its lower edge is bent so as to serve as a support for the ends of the skewers.
Side flaps
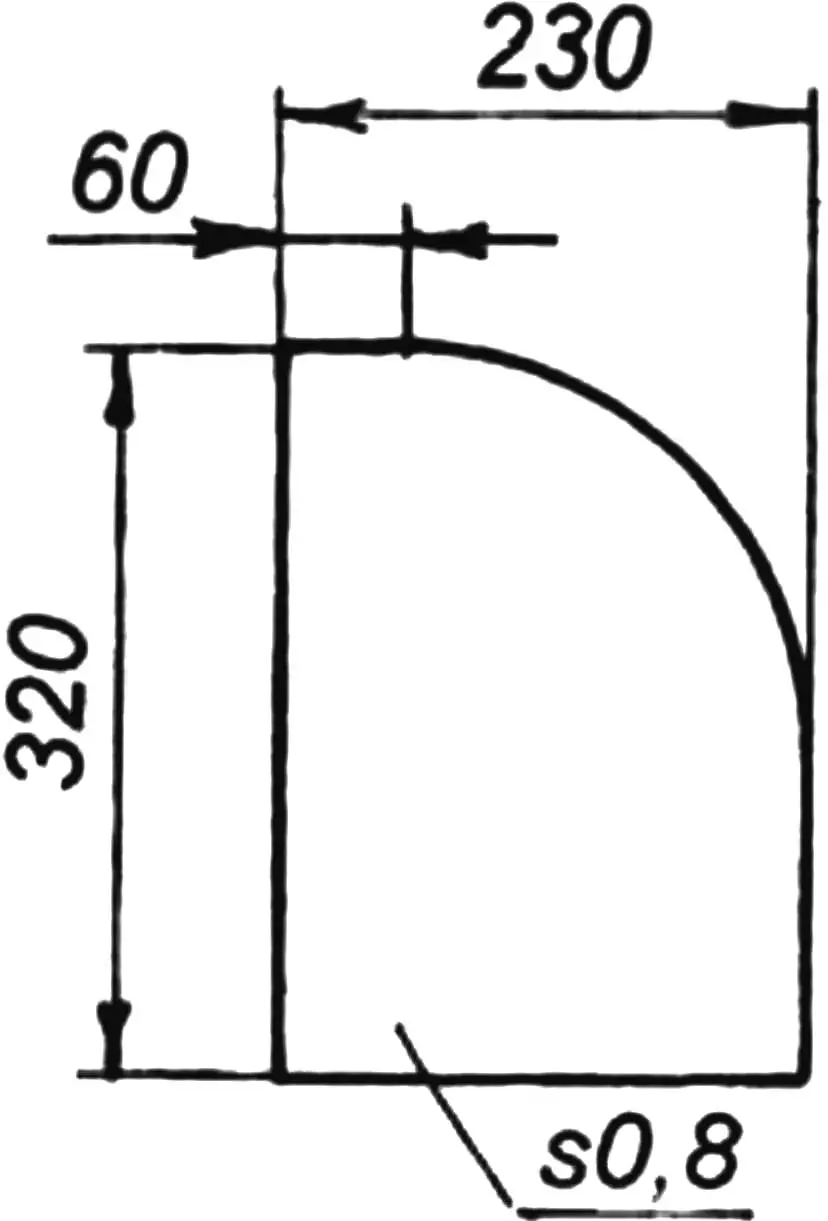
To assist the wind-shield wall, two side flaps are laid out and cut from the same sheet. They are rectangular plates with one of the corners (the upper one) rounded. The flaps are installed tightly, without additional fastening: their lower part rests against the tray, and the upper part is pressed by the canopy of the wind-shield wall.
All of the blanks mentioned may, if desired, be fitted with additional hinged joints (for example, hinges) at assembly, or in a simplified version simply be inserted into one another in the appropriate way.
Supports
Metal tubes 10 mm in diameter are used as the barbecue supports; they are joined in pairs roughly at mid-length so that they form hinged X-shaped legs. It is more convenient to use M6 bolts with wing nuts as the hinges: the latter provide rigid clamping of the tubular pairs and, when needed, easy separation for transport or storage.
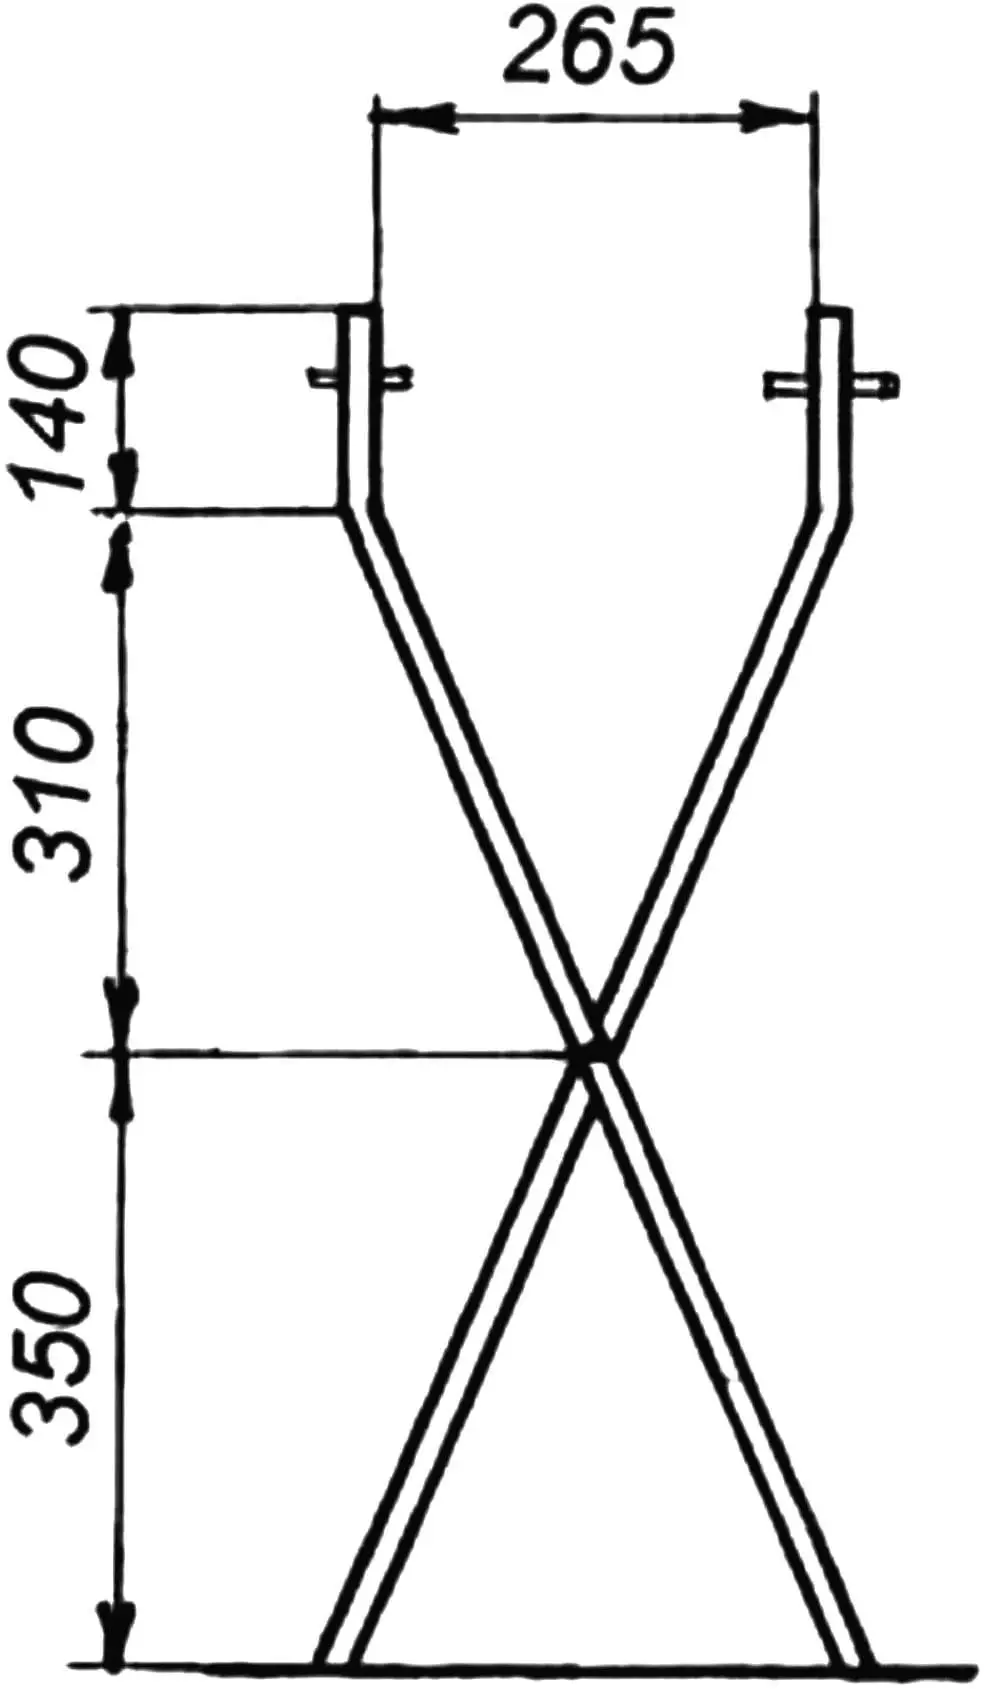
Connecting the legs to the barbecue does not require special fastening: the tray is simply placed onto the upper ends of the spread tubes. For this, matching holes are drilled at the corners of the tray, and there are stop pins on the ends of the tubes that keep the tray from sliding down.
However, this method alone would not provide the necessary rigidity of the structure in the working position. Nevertheless, the barbecue, despite the apparent fragility of the “structure,” stands quite steadily. This is achieved by one more design detail — an auxiliary shelf.
Shelf-table
This part is a rectangle cut from the same metal sheet. At its corners, as on the barbecue tray, holes are drilled by which the shelf is placed onto the upper ends of the legs before the barbecue stop pins are installed. The shelf then drops to the required height, limited by the corresponding bends of the leg ends. And after the tray is placed onto the legs after the shelf, the structure gains the desired rigidity and stability.
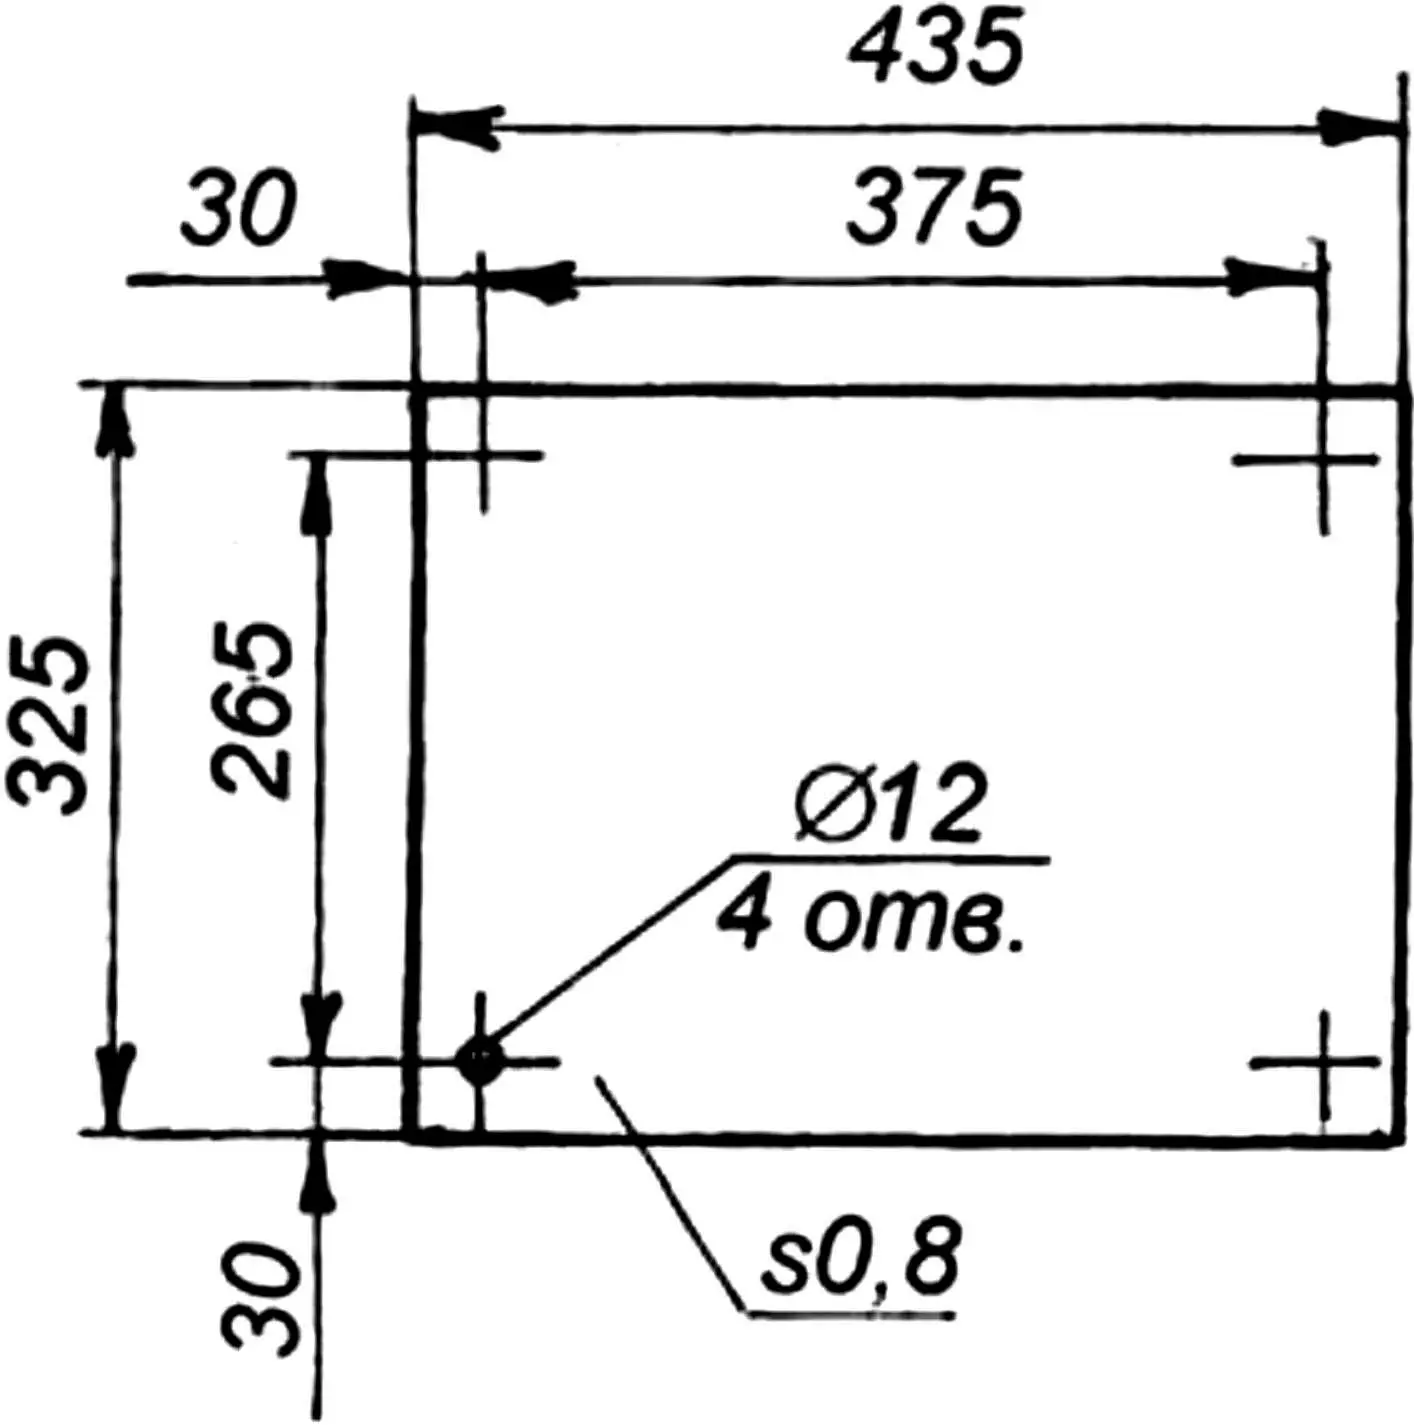
However, the function of the shelf is not limited to this: at the same time it also serves as a kind of table on which everything needed for grilling can conveniently be arranged.
“Modelist-Konstruktor” No. 7’2005
Recommend to read
 “TRIPOD” FOR THE ROD
Sometimes in fishing there is a need to put the bait, take the bait, Sneath from the fire pot with the finished soup, and the hand is not even an ordinary slingshot. To get rid of this... LET THE WIND
The wind has always been a symbol of impermanence, and attempts to transform its energy into electrical energy has led often to results that are not very encouraging. Indeed, everything...
