CHILDREN’S BUNK

CHILDREN's BUNK
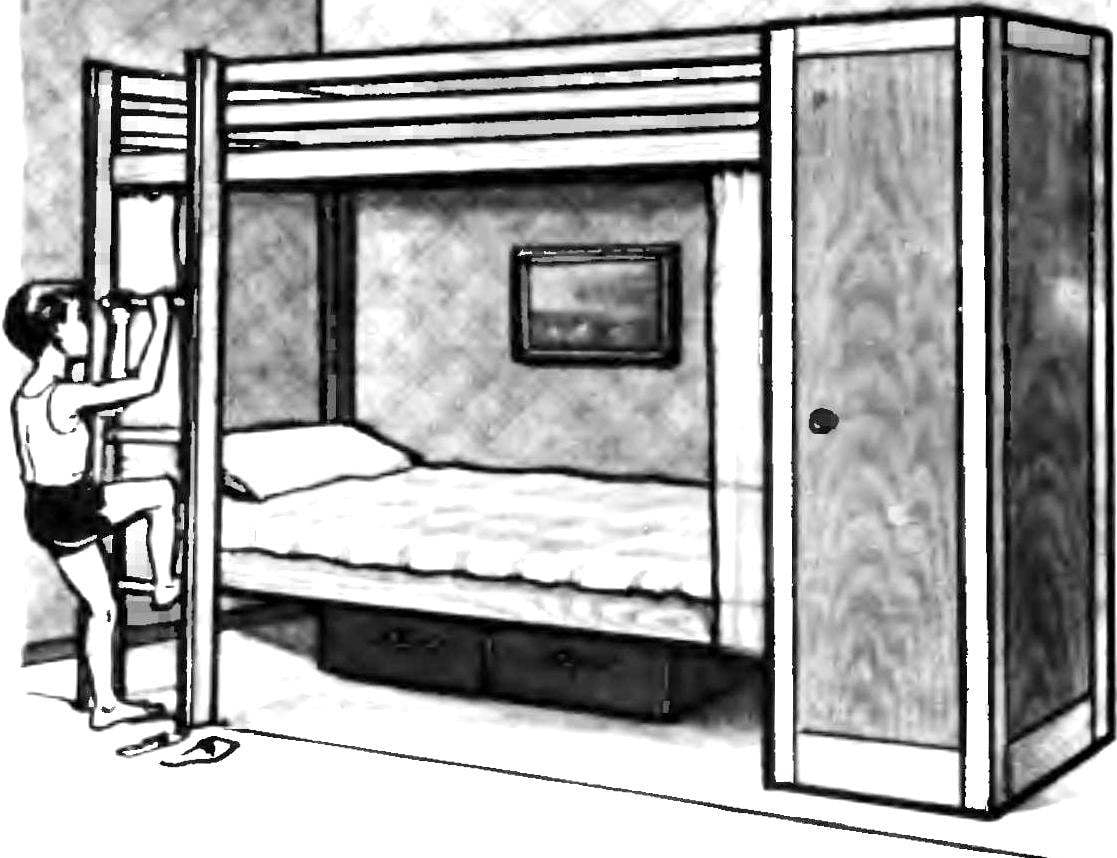
to Make a bunk bed I was forced circumstances. A small area of the apartment is not allowed to make beds for the children, so I decided to make a double-Decker. I worked on the ships of the merchant Navy and for the sample decided to take the ship’s bed, but with the ability to manufacture at home from available materials. Sizes are determined taking into account the fact that children grow quickly and the time will come when the bed will be small. Therefore, the calculation was done for an adult of average height.
I want to say that the room with the appearance of bunk beds just somehow changed, became truly child. For the right to sleep on the second floor in children inflamed “struggle”. But the first floor has its advantages — blinds allow you to relax during the day retreating from the bright light.
 
Material for making the bed, I chose ash, a tree with beautiful texture, which there is no need to paint, just cover with hot linseed oil. You can open the texture to furniture with lacquer, but I do not, because under the varnish it has a more natural matte color. For facing of the Cabinet side panels, doors of Cabinet and front panels of the drawers used plastic mounted on plywood with casein glue. If it is not possible to buy plastic, you can glue the plywood with fabric.
Fig. 1. Bunk bed.
Fig. 1. Bunk bed:
1 — stand (timber 50X50 mm), 2 — sleepers (timber 30X70 mm), 3, 6 — podmerzaniya panel (plywood 10 mm thick), 4, 9 — slat fencing (22Х50 mm), 5 — drawer sides (timber 30X70 mm), 7 — ribs, 8 — side panel of the Cabinet, 10 — cover of the Cabinet (plywood 10 mm thick), 11 — front Cabinet, 12 is a rod for hangers, 13 — ribs for the side panels of the Cabinet, 14 — door 15 — bottom rail, 16 — drawers, 17 — area 18 — drawer slides, 19 — ladder, 20 — area 40Х40Х4 mm, 21 — Poloz curtains, 22 — curtains holder, 23 — bolt M8, 24 — timber drawer runners.
 
All joints of the bed frame and wardrobe is assembled on a casein glue in the spike. Rack and rail rack have longitudinal grooves in them during Assembly are inserted into the side and rear panels. The grooves are selected on a homemade machine type “Skilled hands” circular saw in two passes. To longitudinal beams of the power frame by means of screws attached to the steel angle brackets with shelves width 40 mm, which are based on the upper and lower podmerzaniya panels made of plywood thickness of 10 mm. The top panel to SAG under the weight of a person, has ribs from strips, glued on the bottom side of the plane the reliability of the bolted screws. Lower — relies on the boards of the drawers, so additional ribs it has. Mattresses purchased, the standard, they can put a layer of sheet foam rubber — this bed will be softer.
 
Fig. 2. Drawer.
Fig. 2. Drawer:
1 — side, 2 — area, 3 — stop, 4 — bottom, 5 — facade panel.
 
Fig. 3. Stairs.
Fig. 3. Stairs:
1, 2 — stand ladder, 3 — step, 4 — mounting area.
 
Fig. 4. Homemade door canopy.
Fig. 4. Homemade door canopy:
1 — door Cabinet, 2, 3 — parts of the canopy.
 
Fig. 5. Scheme of the Assembly of the Cabinet doors.
Fig. 5. Assembly diagram Cabinet doors:
1 — decorative plastic sheet, 2, 4 — sheet plywood, 3 — frame.
 
Fig. 6. Technological operation to grooving using a circular saw.
Because the bed is placed close to the wall, on the one hand it has no fence, but outside the upper tier of plank fencing required. They are fastened at one end to the racks of wardrobe at spike, the other end to the ladder with screws. The ladder is made of two racks section 70X30 mm and three steps O 30 mm, made on a lathe. To the bed ladder is attached at a slight angle. In the lower part of it with steel angles fixed to the floor.
 
The closet has shelves for linen and a brass pipe to hang the “hanger” for clothing. On the back of the wardrobe, on one of the stiffeners are furniture hooks. The Cabinet door with the front side covered with plastic and fastened to the Cabinet in two makeshift shelters made of sheet steel 3 mm thick, painted black nitroenamel. The door includes a doorway frame of the Cabinet flush. Going she. Made of thin strips made the frame size of 1-2 mm larger than the opening under the door. A sheet of plywood for the inner side it is advisable to take a fine, smooth and beautiful surface. Substrate under plastic (a sheet of plywood) better to use thicker and harvesting of plastic to cut out several large sizes. Everything is greased with casein glue and is going in the package. Below the design is not broken up during the build, you can grab the wooden parts with small nails. Plastic is laid over paper in layers, then Reiki the whole package is clamped by the clamps and held under pressure during the day. After gluing the edges of the door are treated planed to the required sizes.
 
To the steel “corner” of the external longitudinal beam at the bottom of the top layer screwed the ledge with hooks for curtains. And the outside of the side panel (at the head) is mounted a small electric canopy. The wiring from it appears in the wardrobe and from him to the wall and then to the nearest outlet.
 
Pull-out linen drawers assembled from four boards, each connected to a spike of type “dovetail”. The bottom of The plywood of 3 mm thickness when the Assembly is inserted into the grooves of the walls of the boxes. The front panel is made from 10mm plywood with glued to it with plastic and attached to the drawers with screws, screwed from the inside of the box. Thus it is necessary to choose the length of the screw so that it is well kept bar, but did not go through and did not hurt the fascia panel. On the sides of the drawers install steel skids — “angles” bent from a steel strip of 1 mm thickness with which the boxes fall on the metal plate. Below the drawer did not warp down the front part, at the ends of the runners are restrictive cheeks against such possibilities. To bend the rails with a length of 600 mm is difficult, therefore, you can use ready-made parts.
 
V. VESELOV

Recommend to read

  • RECTANGULAR ASTERISKRECTANGULAR ASTERISK
    Not so long ago was invented the elliptical leading Cycling asterisk, allowing to increase the efficiency of holotransmit, faster to scroll through "dead spots". One time they even went...
  • AND DRILL AND COUNTERSINK BITAND DRILL AND COUNTERSINK BIT
    Holes in wood, plastic or duralumin parts are usually done in two steps: first, through drilling, and then chamfering with the core drill or drill bits of large diameter. I suggest a...