 Periodically to the owner of the house or apartment, the question arises about “cosmetic” repair their homes. Many are sent to the shops for Wallpaper, paints, various finishing materials, since they are now such a huge number and variety that they can satisfy the most discriminating tastes.
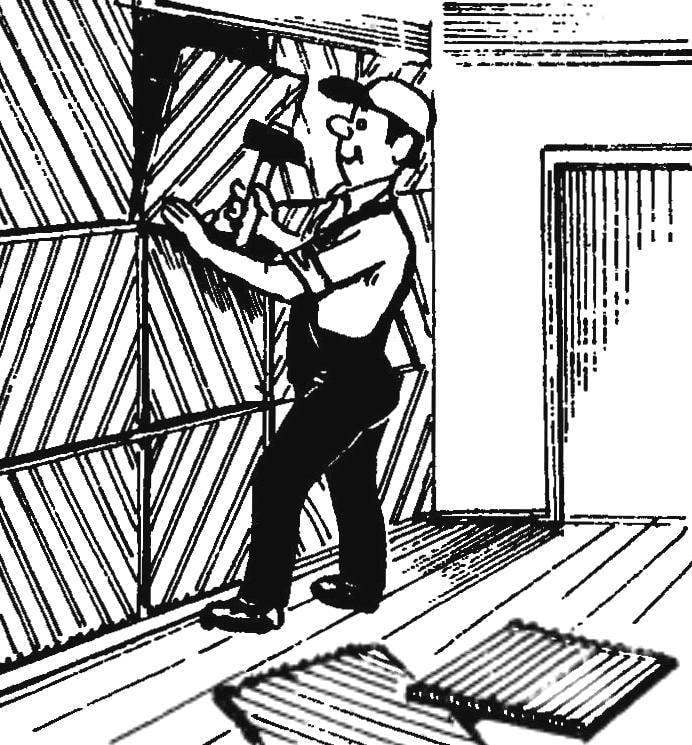
But, in my opinion, any “painted” Wallpaper can not replace the natural beauty of the material. And if oblitsevat wall panels, hand made using even a waste of natural wood, such finish is not only quite modern look, but also gives the house a special touch and comfort, and most importantly helps create a favorable microclimate.
I live in the village and with the processing of wood has known since childhood — and had floors laid, ceilings and sheathing; could, if necessary, and a stool to do, and the kitchen table, the frame of the window to link. But putting a brick wall in a tree was not possible. So first I picked up and looked at the literature on the subject. Mostly it was proposed to prepare a wall: attach the frame to it — based, and it—facing components. Such design and technology does not suit me. So I had to come up with their own veneer, in my opinion, more simple and technologically advanced.
Raw material (blanks for parts of the veneer) were mainly plank wooden packing crates. Missing pieces sawed on a circular saw from scraps of boards. Blanks were from various breeds of wood: softwood and hardwood, hard and soft, and there are even valuable (beech, oak), which gave a variety of shades and textures throughout the composition, but in separate panels. It went even straps with wood defects: socastee, gnarled, coasline and other after the finish of the machine, these defects not only spoil the look of the veneer, but rather to add variety in texture.
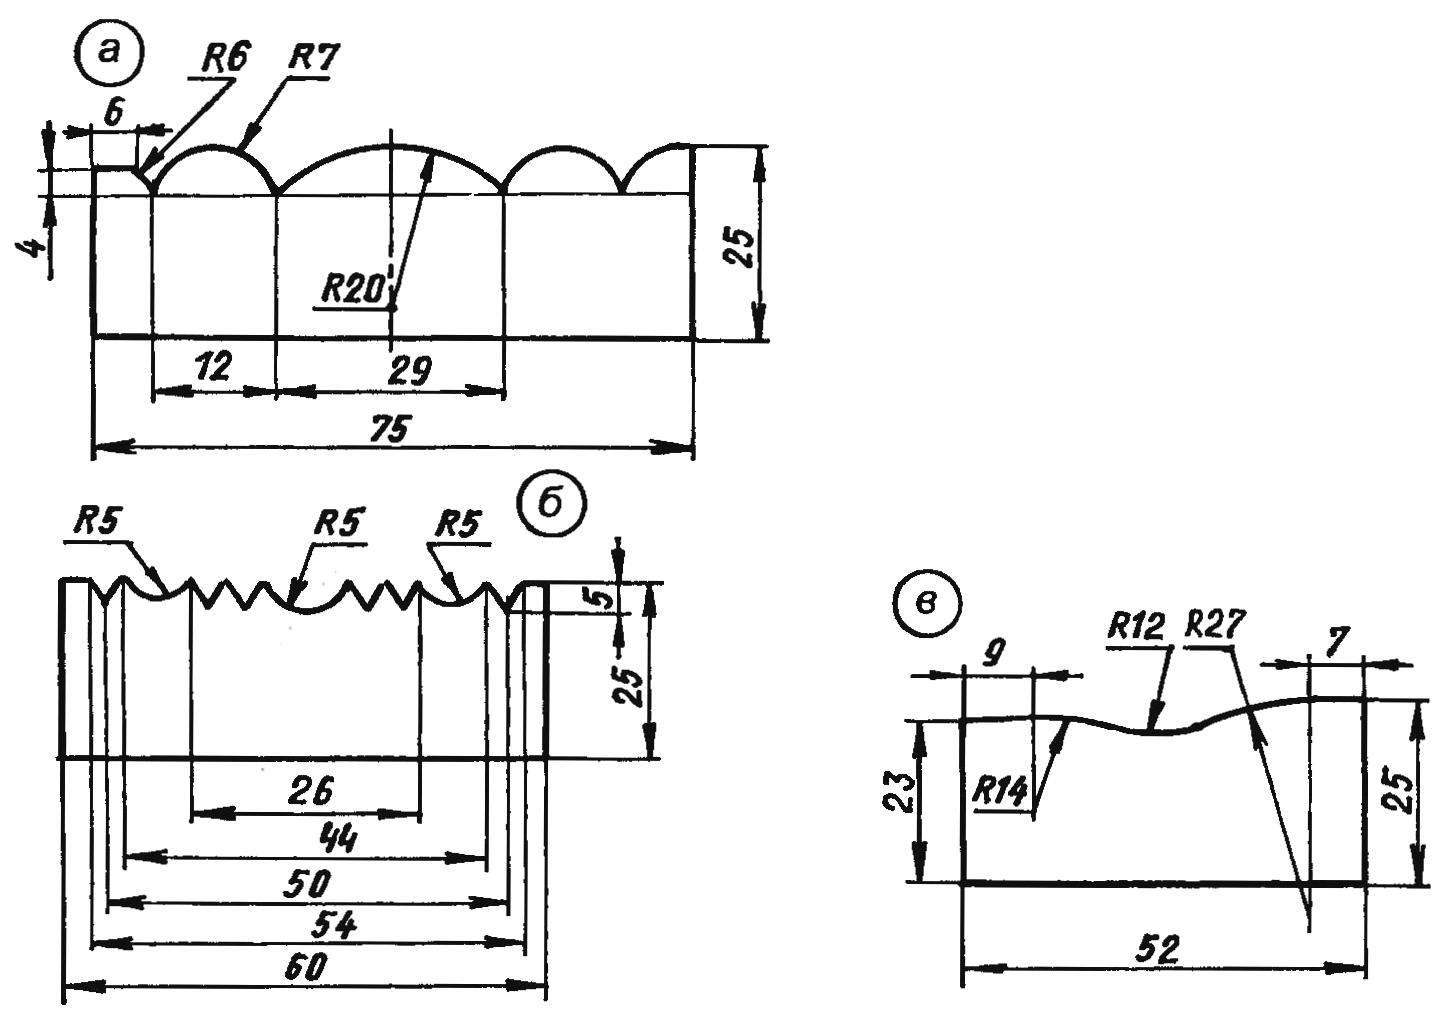
The approximate form of shaped knives for items:
a — diagonal; b — the main “background”; in — corners “female”
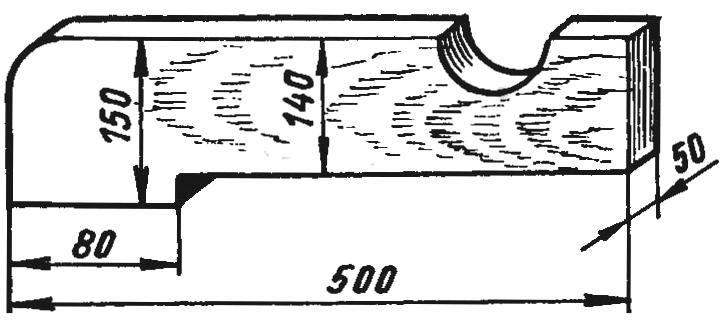
Fixture for clamping the workpiece during planing
Importantly, the billet was dry. Strap after appropriate profiling was fixed on square panels made of three-millimeter plywood; they sheathed directly exposed brick walls.
The dimensions of the panels 380×380 mm were selected on the basis of the length of the blanks, but so that the number of panels in the “front” (the most visible areas of the walls) fit an integer number of times. In walls with Windows, doors, inevitably the use of the panel, and “bypass” openings, too, need to observe a certain symmetry on opposite sides of the openings must be installed equal parts. These calculations are, perhaps, the most difficult. However, the most interesting in the design of the panel is the creation of her figure and choice of terrain the outward surface of the bars that define the pattern.
The experiments found that we should not strive for excessive variety and complexity of the profile of the bars (except for additional costs of time and effort during processing it gives little), and stayed for three. The basic motive of the ornament steel strap with a large terrain, and smaller — it background. The third profile makes future wall composition for more variety, forming a small rosette.
Profile on the workpiece received in the processing of her on a planer with a curved knife. Usually, to obtain a flat surface Board put the rotors with two (and even three) knives with smooth blades. I only used one knife for each profile, so as to make two identical shaped tool and install them without the slightest displacement in the grooves of the rotor in conditions of a home workshop is extremely difficult.
To achieve high purity treatment of relief surfaces, reduce the feed rate of the blanks and the strips oriented so that the cutting has been carried out “in the wrong”.
My planer has no special clamping device, so when you work on it I use a simple jig from a Board fifties length 500 and a width of 150 mm. On the bottom edge of the boards at the rear part thereof is made small ledge with a height slightly more than half of the workpiece. The upper edge is processed so that it can conveniently be taken by hand and press it like a normal plane.
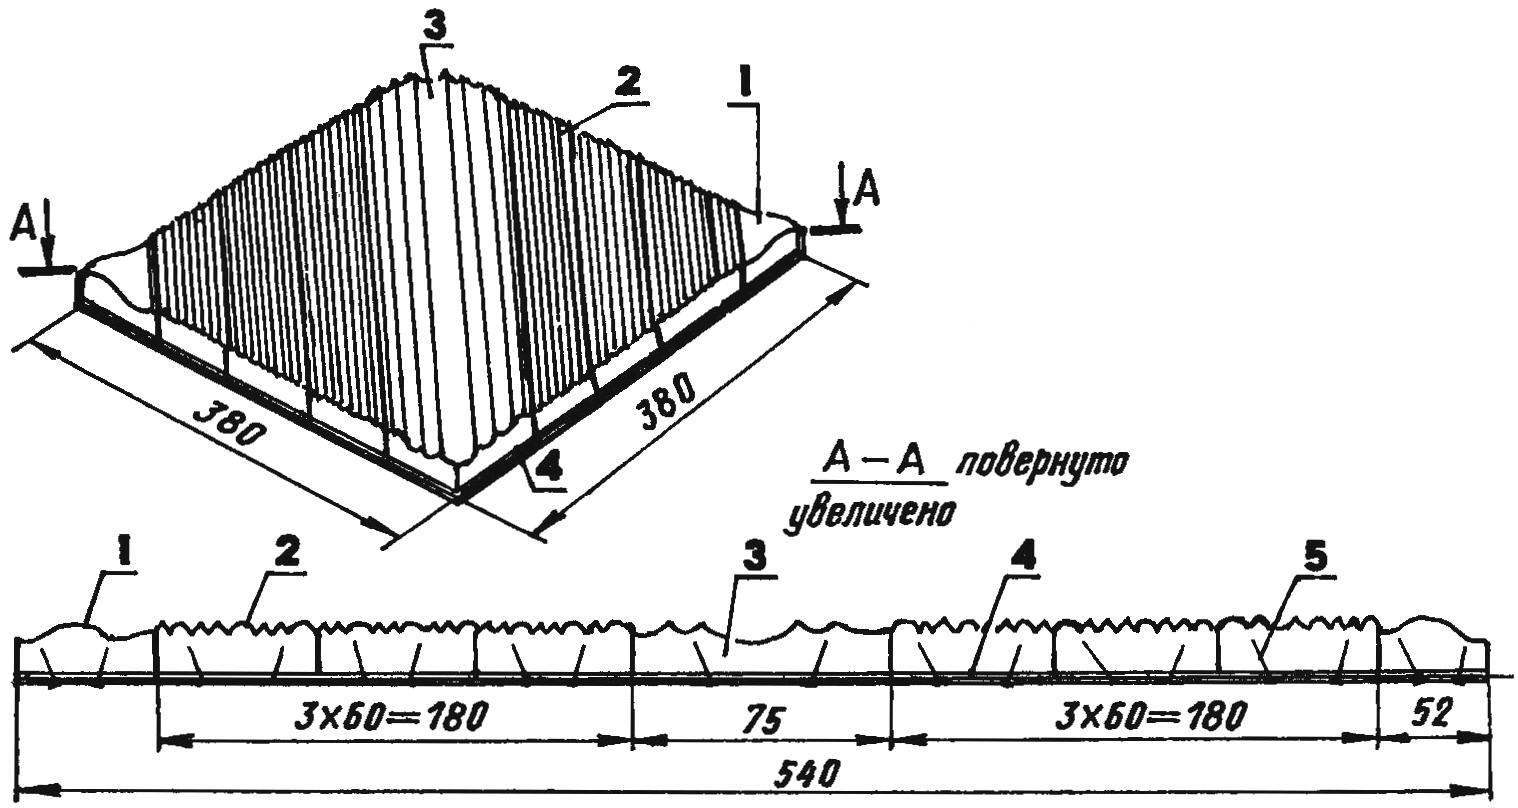
The mounting elements outlet on plywood base:
1 — angular “female” (2 PCs); 2 — “background” (6 PCs); 3 — shoulder; 4 — plywood base; 5 — nail
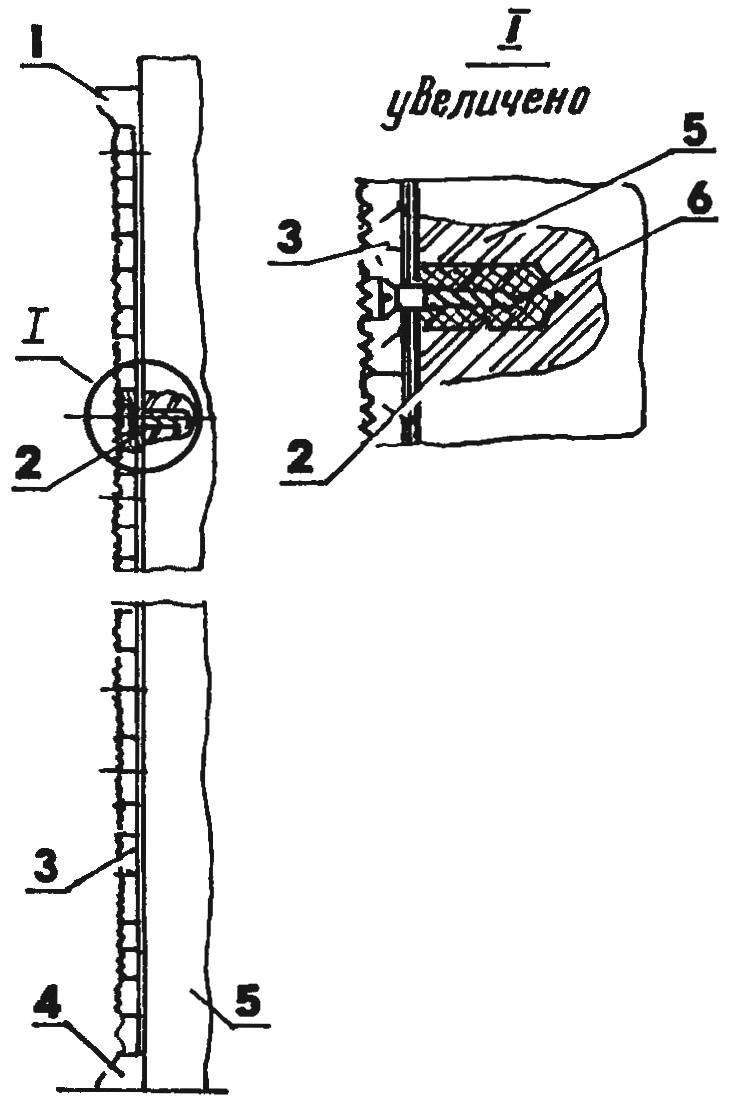
The panels on the brick wall:
1 — edging; 2 — dowel (plug); 3 — panel; 4 — plinth; 5 brick wall; 6 — a screw (a nail)
After processing all of the workpieces in a planer their figured surfaces must be treated with sandpaper so they were smooth, without a “NAP”. This operation is perhaps the most time-consuming, but how well it is made, depends on the result of the whole work. But “visceral” blanks I once fixed it on a plywood base with a thin 15-mm nails hammered from the interior side with a tilt in different directions for better fixation. Before posting drew the basis for a more precise location on the container. The first fastened element with a large pattern on the diagonal, and on either side of him, three blanks with a small profile, and finally in opposite corners — on the “female” element. As the workpieces do without the docking units (quarters, grooves-tenons), then the installation had to fit them more tightly to one another After the plywood base is secured on their seats all the elements and their protruding parts carefully, avoiding chips, cut fine teeth saw along the contour of the panel. It is easier to do from the basics: in this case the edges will serve as limiters. If necessary, the edges of the panels completely customized in size, podstrelivat a plane and the rubbing cloth to the outside edges.
Trim the notched outer surfaces of the cladding depends on the artistic taste of the masters and the overall interior space. But in any case the coating should be transparent (lacquer or varnish), otherwise largely lost the beauty (and meaning) of such decoration. But toned wood stained with different concentrations or lightly burn it with a blowtorch to highlight the texture, even desirable, a preliminary experiment on the waste odnorodnoi wood. May not toning the entire surface of the veneer, but only parts of it. I did it with a wide diagonal element of the panels and “sockets”.
For mounting panels on the wall made the template size with holes near the corners. This fixture spaced attachment locations on the panels and the centers of the holes under the tube on the wall. Level checked otvesnost corners and jambs of door and window openings. With regard to their deviation from the vertical under the same template made the markings on the walls to fit adjoining edges of panels closest number to ensure strict verticality of the rest. The levelness of the bottom row controlled by the level of the plinth. In the corners of the room abutting edges of the panels trimmed mustache (45° angle). At the completion of the top row missed the rail with a thickness of about 20 mm width as the plinth with a shaped outer surface that serves as a border.
P. BELOUSOV, village Alekseevskaya, Volgograd region
Recommend to read
 PEUGEOT 307 CAR 2002
In November 2001, the authoritative international jury of fifty-five journalists from leading European automobile magazines named the PEUGEOT 307, the contestant from France, "European... Il-76TD-90VD
Despite the high performance, engines and avionics of the Il-76 aircraft leave much to be desired. Excessive noise and emission of pollutants to the environment, made it impossible for...
