Like most moms fed their baby? Usually sitting at the table and placing the baby on his knee. But mother cannot see the baby’s face, and he can’t see mom: he involuntarily looks around, and turns out — turns. Meanwhile, his place at the table, he may have already since I began to confidently sit. But for this the child needs a combined chair having seat and table top. For example, as proposed by the Hungarian magazine “Earmaster”.
Besides being very comfortable, it has another advantage: its easy to make dad, not even with skills in the manufacture of furniture. Besides, you will not need any special tools or materials. A fairly simple hand saws, screwdrivers, wrenches, several wooden rods (like the cuttings for shovels), a small sheet of plywood. As a fastener suitable screws. It will take another two pieces upholstery or drape fabric on the backrest and seat (though they can make out of plywood).
First collected from all parts of the chair. Intended for furniture sheet of plywood with a hacksaw is a cutout for the child, which forms both a kind of armrests on the sides.
Two cuttings can be used entirely on the rear rack; two front — shorter. Of the remaining cuttings are cut at the frontal crossmember.
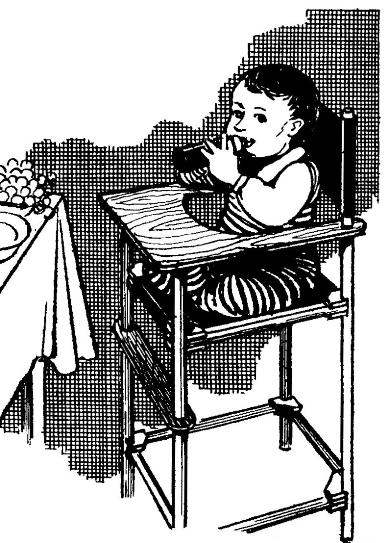
High chairs baby:
1 — rear rack; 2 — stand front; 3 — cross front; 4 — cross-member side; 5 – countertop; 6 step; 7 lining.
Table of dimensions of parts
Remain to procure plywood footboard and pads for connecting the cross members to the uprights. The footrest it is necessary to drill two holes (bringing them up to the desired diameter of the round hole with a file or chisel nasverlennye around the circumference of the chain holes). Holes should be in the arms of the table.
To change the step height on the growth of a child, at the front there are several adjustment holes for fixing it with pins (of wood or metal, for example, thick nails with no sharp ends).
Lining attached to the corresponding form that allows them to dock with racks. With these connections and begins assembling a high chair. It is laid at a right angle to the cross members sequentially attached with screws lining first one side, then the other. Have a pretty durable frame. The top frame then stretched the fabric seat or is the seat tube from a sheet of plywood.
You can now proceed to final Assembly of the chair. It is better to start with the lower part of the connecting screws of all four racks with plates of the lower frame. Then put back on the bandwagon and above it also screws attached to the frame of the seat. The table in turn, “put” holes on the rear rack and fastened with screws to the ends of the front struts. Completing the assembling of the fabric backrest of the chair, which you can flash at the edges and pre-formed kulisami to put on the rear rack.
Finishing of wooden elements depends on the capabilities and desires of the master. If the material used is high quality — it can be done after assembling the chair: for example, paint enamel paint in white, brown, green or red colors or their combinations on different parts. However, the finish is better to do immediately after harvesting elements of the chair, to Assembly: carefully sanded the parts with sandpaper and cover furniture varnish in several layers, with intermediate drying and sanding of the coating.
Recommend to read ALL FOR THE CAR Every year our industry produces more and more cars. Today while driving to meet a man of almost any profession — the engineer, doctor, architect and worker, farmer and teacher. On how... WITH A COMPASS THROUGH THE WALL If the wall must be drilled through hole, and the length of the drill is not enough, then this operation can be performed in two stages: the one on the other side of the wall. Drill to...