To work on the production of the isolated tires were disputes, the original bundle of wires tie in several places with twine and roll into the Bay with a diameter of 600-800 mm. the tape overlap at an angle to the harness to each subsequent coil overlaps half of the previous, and the insulation was a double layer. Using cloth or paper, do not forget that these materials require subsequent impregnation with bakelite varnish or any (excluding latex) paint.
Similarly fabricate and bus to the secondary winding of the welding transformer. Here only wires in its composition must be so that the total section of copper wires was equal to 30-35 mm^2.
Now on the completion of the magnetic circuit. Its essence boils down to the base of the stator with a hammer and chisel to remove the jumpers between sections. And formed with sharp edges smooth with a file. The finished magnetic core is covered with several layers of insulation for the above technology.
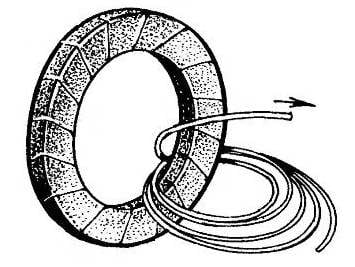
To facilitate the winding insert the cable into the core and rotate the ring until, until the last round will not be worn freely on tor-core “svarochnik”. Get as to two related heterogeneous link (steel yoke and copper coil) circuit.
The tire winding of the transformer to perform better together. First, clamp the vise to the edge of the yoke, then insert through the center of the torus the end of the bus, collapsed into the Bay, and, gently turning the last make got like two connected chain link. Securing the beginning of the primary winding on the surface of the torus with string, continue to rotate the tire, tightly stacking the coils on insulated magnetic core.
For the first layer of turns should be laying light weight insulation, impregnation the resulting “sandwich” liquefied bakelite varnish or diluted paint. Then a new layer of winding, distributed evenly across the surface of a torus with subsequent isolation. The coils are laid down strictly radially.
Completing primary (network) winding of the 220-th round. Next is the secondary (welding). Put it, after making a reinforced multilayer insulation. Just this winding, as already noted, 60 (with loop taps from 40 th and 50-th) of the coils.
General rule: if you suddenly found out that the wire (bus) is shorter than required, the increase should be performed outside of the winding, and properly filling out the appropriate conclusions.
Design improvised welding transformer depends on the capabilities of the author-artist. One of the most simple and acceptable variants— “side” consolidation “svarochnik” on an insulated base a simple clamp with a carrying handle.
P. BELOUSOV, Volgograd region
Recommend to read
 COUNTRY ASSISTANT
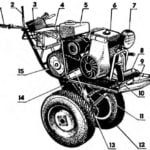
For cultivating soil in garden plots most appropriate mechanism to consider a walk-behind tractor. It has a small footprint and consumes few fuel, has the necessary agility and...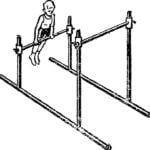 THE HORIZONTAL BAR FROM UNDER THE BED
I offer a sketch of the room sports equipment for children 5-8 years: "double" the horizontal bar or uneven parallel bars. The main advantage of the simulator is that it can be...