GCR — THE MATERIAL IS COMFORTABLE

GYPSUM BOARD — MATERIAL IS COMFORTABLE“I was interested in publication in the journal for drywall (“Favorite finishes”, MK-10’09) Think that they are very useful for those who builds or repairs of the premises on their own, be it a house or an apartment. Because the material valuable for homebrew properties — ranging from a large flat surface, convenient for finishing, and finishing flame retardant. I wish the team continued the theme and described specific techniques for working with this material.”
 
A. CHERNOV, Novosibirsk, Russia

Magic leaf
 
Gipsokartonnye sheets (GKL) — amazing construction and finishing material primarily because of its wide versatility: used for walls, devices, interior partitions, suspended ceilings, fire retardant designs, and also for the manufacture of decorative and sound-absorbing constructions. If you use GCR in the process of finishing works are excluded inconvenient “wet” processes, significantly increasing productivity, the opportunity to implement an unlimited plan, multiple architectural solutions, including the device of curved and arched surfaces. When using sheets of gypsum Board achieved overall savings in construction costs by facilitating the design of the building, provided by environmental friendliness, human-friendly microclimate in the room.
 
Manufacturing process of gypsum Board includes forming on a conveyor a continuous flat strip with a cross section of a predetermined shape (the desired thickness and type of the side edges) width 1200 mm. the Resulting sheet consists of two layers of special cardboard with a layer of gypsum dough with reinforcing additives, while the side edge strip cavalcavia edges of the cardboard (front layer). Then, after “setting” of plaster is done cutting the strip into separate sheets and is dried.
 
For the formation of the gypsum core is applied, which as the material has superior physical and mechanical properties. Materials based on gypsum are characterized by their ability to “breathe”, i.e. absorb excess moisture and to allocate it to the environment with a lack. Gypsum is non-combustible, fire-proof material, it does not contain toxic components and has an acidity similar to the acidity of human skin. Its use has no adverse effect on the environment. To achieve the required performance gypsum core, characterizing its strength, density, etc., it adds a special ingredients that improve its performance properties.
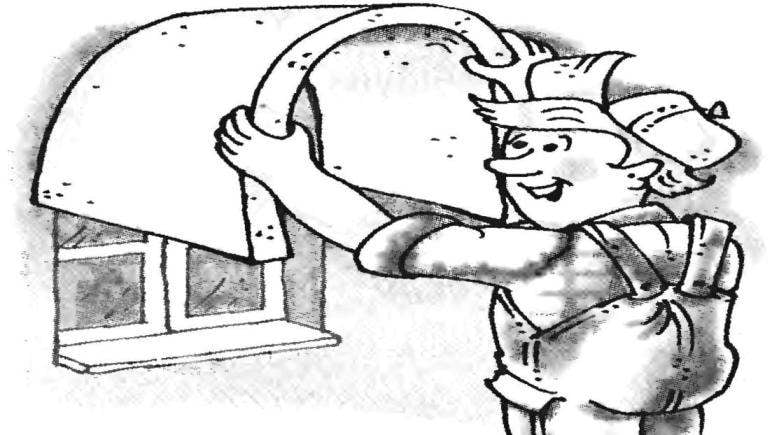
Another essential component of GCR is the linerboard, adhesion with the core is ensured by the use of adhesive additives. Cardboard plays the role of reinforcing sheath and along with this is an excellent basis for the application of any finishing material (plaster, Wallpaper, paint, ceramic tile, etc.). Due to its physical and hygienic properties gypsum Board is ideal for use in the living room. It is not complicated, making it accessible for Amateurs. Operation of the FCL is quite simple, though require a specific sequence
 
Cut sheet of gypsum Board
 
Cutting drywall sheets (GCR) shall be made on a flat surface. When this work is performed in the following order.
 
First you need to make an incision on one side of the cardboard and part of the gypsum core (Fig. 1).
 
Fig. 1
 
Fig. 2
 
Fig. 3
 
Fig. 4
 
Fig. 5
 
Builders do this a knife to cut the gypsum Board or with the help of special tools: cutter small for bands width up to 120 mm, cutter large — for bands width up to 630 mm. you Then move the sheet on the edge of the table (Fig. 2) and slightly fracture the gypsum core along the line cut Then flip the GCR and cut the cardboard on the back of the sheet (Fig. 3).
 
Educated edge to treat rough planed (Fig. 4). The edge should be smooth, without kinks. If the cut edges will form a seam, you should first prepare them for the filling, for which edge to remove a plane from the front facet at an angle of approximately 45° to half of the thickness of the sheet (Fig. 5).
 
The joints at the joints of leaves
 
At the junction formed by the prepared edges lined with cardboard, putty knife (or screwdriver) you should apply a layer of putty (Fig. 6) pre-podrachivaya protruding screws Vertical movement to align the stacked mass while removing the excess. Lay the reinforcing strip, pressing firmly with a spatula in a layer of putty (Fig. 7).
Operation to perform immediately after applying the mass, prior to drying (solidification). Give the putty to dry, this process takes 12 — 24 hours.
 
Fig. 6
 
Fig. 7
 
Fig. 8
 
Fig. 9
 
 
A wide spatula (200 — 300 mm), apply a skim, leveling layer of putty (Fig. 8). When applying the first and second layer of putty mass must not settle, protruding from the seam. After the seam dries, treat it with grout (Fig. 9) without damaging linerboard.
 
End joints
 
The joints formed by the cut edges that are processed by the plane, are as above, but with the imposition of a broader leveling layer of putty (Fig. 10), as in the place of laying reinforcing ribbons may be a slight thickening.
 
Fig. 10
 
Protection angles
 
External corners should be strengthened with perforated metal area. It needs to be pressed into pre-applied putty, then cover the leveling layer of putty (Fig. 11). Internal corners should be filled by applying the reinforcing tape along the bent corner.
 
Basic operations for the installation of partitions
 
First, you need to mark the position of the partitions on the floor with norootlogin fixture (Fig. 12), then to produce the response markup on the ceiling using a plumb-line.
 
Fig. 11
 
Fig. 12
 
Fig. 13
 
Stick to the guide profiles for fixing to the floor and ceiling, and rack profiles, attached to the walls, a sealing strip (Fig. 13). In accordance with the markup to fix the guide profiles on the floor (Fig. 14) and the ceiling with expansion anchors with spacing of 1 m. Also dowels to pin the extreme, adjacent to the wall rack profiles. The rack cut on the actual distance between the bottom and top rail, with the length of the column must be less than the height of the room approximately 1 cm to Install mullion profiles into the rails on the floor and the ceiling with a pitch of 60 cm (Fig. 15), and put them vertically plumb. Consolidate profiles in the guide by using metal stud crimping tool or screws. In case you need to take out rack profiles, connect them with screws with an overlap of one profile to the other not less than 0.5 m (Fig. 16). The magnitude of overlap depends on the room upright profile: 50 PS at 0.5 m; PS 75 — 0.75 m; PS 100 — 1 m.
On the door frame to mount the support rack profiles and horizontal jumper from the profile (Fig. 17). To install an intermediate rack from the profile on the door frame. It should be located adjacent the junction of the plasterboard sheets. In the case of a double layer of sheathing to install two racks to ensure overlap of the first layer above the door.
 
Fig. 14
 
Fig. 15
 
Fig. 16
 
Fig. 17
 
Fig. 18
 
Fig. 19
 
 
To strengthen the lateral support struts under the door weighing up to 30 kg insert and secure them to wood or mount to optional stand, cementing them with the basic through the ear from the same profile (Fig. 18).
 
Sheathing frame plasterboard to be installed vertically and mounted on sheets GKP self-tapping screws with step of 250 mm (Fig. 19).
 
The upper edge of the sheet when mounted to press flush to the ceiling. The attachment of the sheet should be from the corner.
 
The screws must be screwed, retreating from the edges lined with cardboard edges is not less than 10 mm, and the edge is not lined edges not less than 15 mm (Fig. 20). When installing the screws using a power screwdriver or electric drill with a special nozzle pre-drilling holes is not required. The screws should log-in drywall at a right angle and penetrate in the shelf profile to a depth of about 10 mm. Heads of screws need to be drowned in the sheet surface to a depth of about 1 mm and putty. Deformed or incorrectly placed screws to remove and replace with new, setting distance 50 mm from the previous one.
 
If necessary, can be placed between the uprights heat and sound insulation material (mineral wool), but subject to its fixing, for example by using ear profile (Fig. 21).
 
Fig. 20
 
Fig. 21
 
Fig. 22
 
During the formation of the horizontal joints of the plasterboard must be fixed vrazbezhku. Under the joints to set up jumpers from the profile (Fig. 22).
 
When a two-layer covering the seams of the 1st and 2nd layer should not coincide. The joints of the 1st layer are in this case (the reinforcing tape is not necessary). The distance between screws when mounting 1-th layer can be increased to 75 cm, if the 2nd layer is installed on the same day.
 
In high humidity areas it is recommended to use moisture-resistant drywall. In places of contact with water (e.g. in the bathroom) before tiling the surface of the gypsum Board is better to cover the waterproofing. If the casing of the GCR is performed in a single layer, the rack should be fixed via 400 mm.
 
The wiring in the frame set so that when fastening the sheet not to damage its insulation from the sharp edges of the profile and screws.
 
If it is assumed decorative coating gypsum Board, gypsum plasterboard should be treated with a suitable primer which will provide the desired quality of finish.

Recommend to read

  • WILL NOT SLIP OFFWILL NOT SLIP OFF
    On the door of the wardrobe is usually a wire bracket-hanger for small things: scarves, ties, belts, trying to slip off, fall off when opened. This will not happen if they were to...
  • “EAGLE” THE FIRST-BORN RUSSIAN FLEET“EAGLE” THE FIRST-BORN RUSSIAN FLEET
    Will have to make a reservation at once — reliable information, which is not causing doubts and questions about the shape and design of the firstborn of the Russian Navy, very little....