
For a fan of going to a bathhouse to steam means not only (or rather, not so much) performing a routine procedure of cleansing the body, but a ritual process of “cleansing the soul”. And often the steam room replaces many medical procedures and promotes health and even rejuvenation. So a home bath can in no way compete with a Russian bath or a Finnish sauna, although… Why not arrange a steam room right at home, in the bathroom?!
I first implemented this idea ten years ago (a description of the structure of that home bathhouse was given in the article “Steam room in the bathroom” in issue No. 10 of “Modeler-Constructor” for 1997).
For many years, I could regularly indulge in this healing procedure without leaving home. The accumulated experience confirmed the correctness of the basic idea. But at the same time, some shortcomings emerged that should be eliminated.
In this material I would like to share with those readers of the magazine who followed my example, the experience of improving the previously proposed design of a home bathhouse.
The main change affected the “heart” of the steam room – the electric fireplace. Unfortunately, the heating elements (TEH) from the burners of kitchen electric stoves or portable electric stoves turned out to be insufficiently durable, and after 5-6 sessions they needed to be replaced. This required a lot of time and money. Therefore, after a little experimentation, I finally settled on a spiral of 1.5 mm nichrome wire 6-6.5 m long. It is not difficult to make such a spiral: it is wound using a simple homemade device based on a hand drill. The mandrel is a steel rod with a diameter of 8 mm, 400 mm long. At 5-6 mm from the end, perpendicular to the axis of the rod, a hole with a diameter of 2 mm is drilled. Next, two guide pads are made from a 20 mm board, the wide sides are clamped in a vice, and a hole with a diameter of 9 mm is drilled along the joint. That’s the whole device.
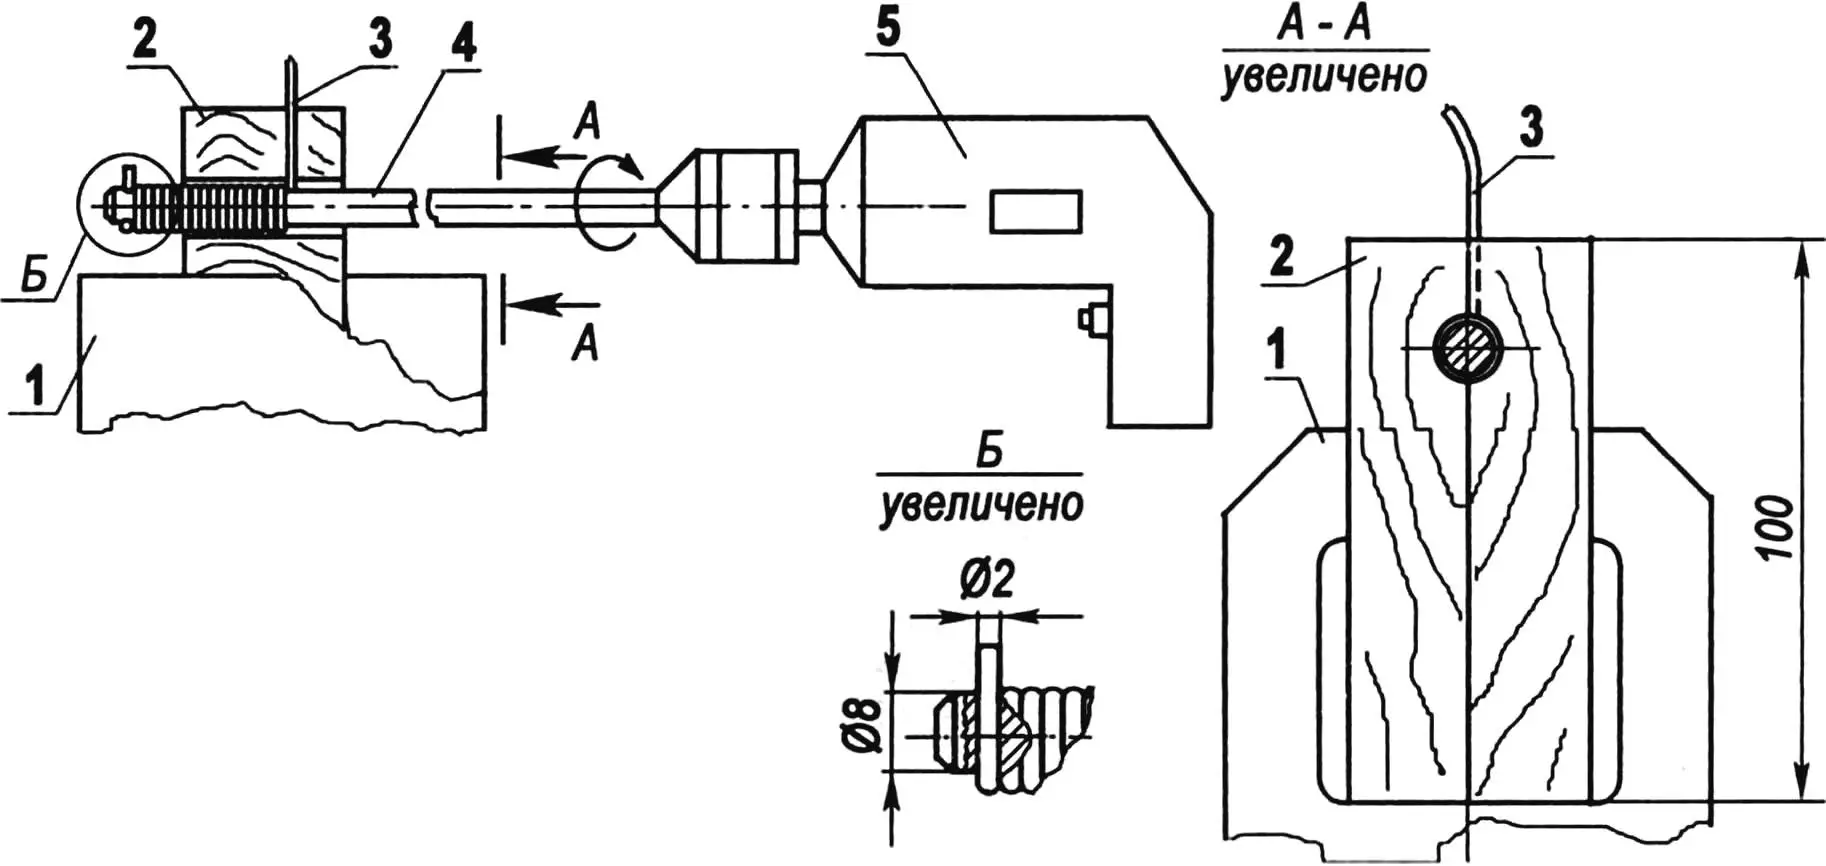
1 — vice jaws; 2 — guide gasket (pine, 20×50 bar, L100, 2 pcs.); 3 — heater (nichrome, wire Ø1.5); 4 — mandrel (steel rod Ø8, L450 — 500); 5 — electric drill with speed controller
Let’s start winding the spiral. Insert the nichrome wire into the hole at the end of the mandrel and tightly, turn by turn, make 5-8 turns by hand. The wound part is installed in the hole between two guide pads, and the free end of the mandrel is clamped in the chuck of the electric drill. Having tightly pressed the nichrome on the wound part with a vice, turn on the electric drill and wind the spiral at low speeds. The whole process takes a little time: after all, it is necessary to make only about 300 revolutions. After finishing winding, remove the mandrel from the drill chuck and very carefully move apart the jaws of the vice: it should be borne in mind that the spiral has turned into an extension spring and, having been released from the vice, its end can “play” and cause injury.
Having bitten off the end of the wire inserted into the rod, we remove the spiral from the mandrel. Then we clamp one end in a vice, and stretch the other with pliers to a length of 3 – 3.5 m. This operation, as well as winding, should be carried out in gloves and glasses to avoid injury.
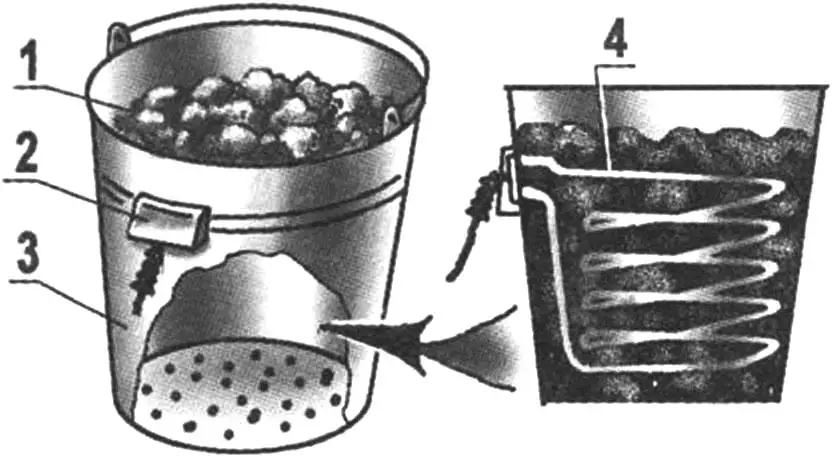
1 — filler (stones or ceramic fragments); 2 — power block; 3 — body (bucket or laundry bin); 4 — spiral
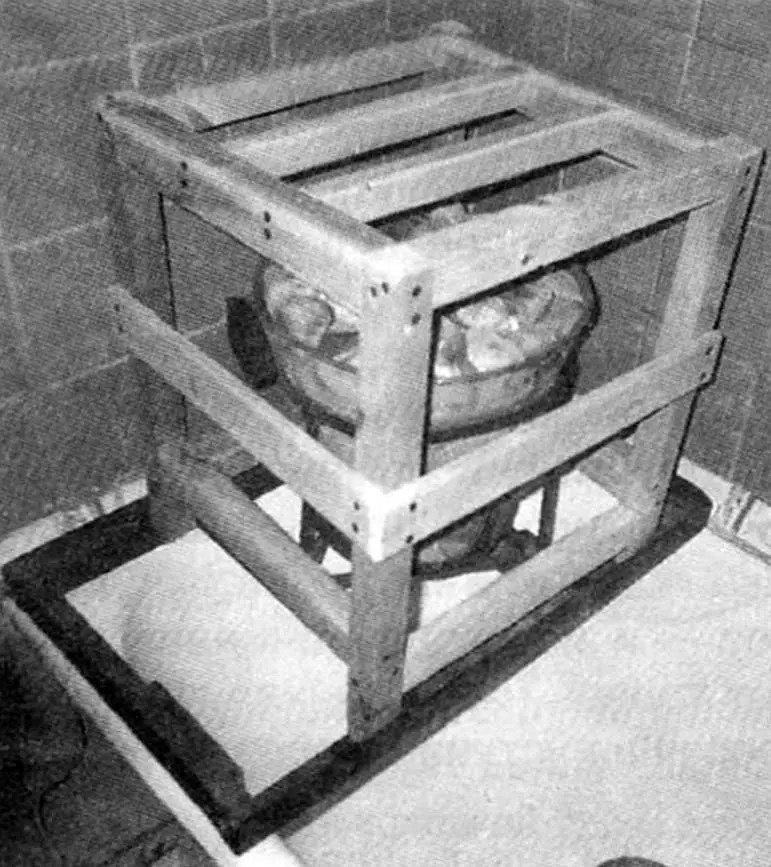
The “heater stove” itself has remained virtually unchanged – it is a 10-liter tin bucket (or laundry bin) filled with heat-accumulating material. As experience has shown, it is better to use ceramics from high-voltage insulators or porcelain sanitary ware instead of stones. When using ceramics, the “heater” operates more stably, while stones crack over time and require replacement.
Pieces of ceramics, such as fragments of a broken sink or toilet, should be processed on an emery wheel, filing down sharp edges. The size of the ceramics (or stones) is at least 5 cm, but smaller pieces will also be needed to completely fill the bucket. For aesthetics, it is better to lay out the top of the “stove” with small stones. In the base of the bucket, 15-20 holes with a diameter of 3-4 mm should be drilled to drain water that has not had time to evaporate. Drill from the inside of the bucket so that the burrs come out and do not interfere with the flow of water.
1 — housing; 2 — washers (steel s2, 4 pcs.); 3 — bolt M6x30 (2 pcs.); 4 — heater (nichrome, wire Ø1.5); 5 — board (acetyl s10); 6 — insulator (ceramic beads); 7 — casing (galvanized sheet s0.8); 8 — terminal (copper, brass s0.8, 2 pcs.); 9 — terminal mount (nut M6, 4 pcs.); 10 — washer (copper s1.5 — 2, 6 pcs.)
The heating coil in the “stove” is located between the filler along a helical line with a uniform indent of 2-3 cm both from adjacent turns and from the walls of the bucket. Power is supplied to the coil through a power block fixed on the outside on the top of the bucket. The wires are attached to the block using M6 bolts with nuts and washers. The washers inside the bucket must be at least 2 mm thick to avoid their deformation at high temperatures. Thinner washers can be installed on the outside.
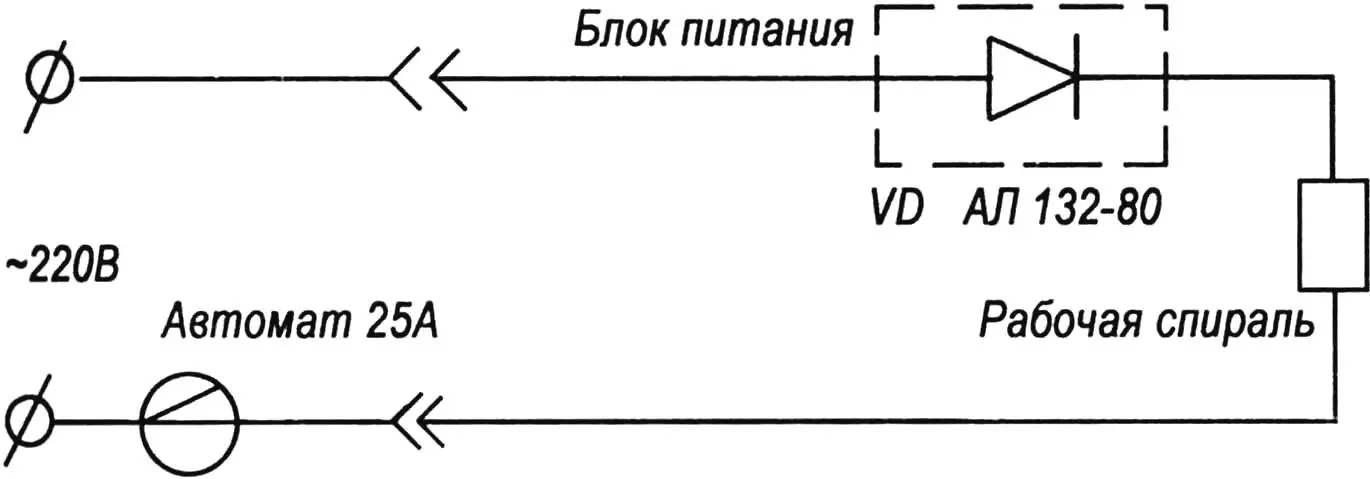
The wiring diagram for the “bath” is quite simple. The “bath” consumes 22-25 A, so all wiring is done with a separate wire: copper heat-resistant flexible cross-section 4 mm2 in organosilicon insulation. Ceramic beads are strung on the wire at a length of 100 mm near the terminals. A separate 25 A circuit breaker must be installed in the electrical panel. The use of the AL132-80 diode (80 A) on a powerful radiator in the electrical circuit allows you to reduce the length of the spiral by 2 times and, accordingly, increase the durability of the electric heater by 5-7 times.
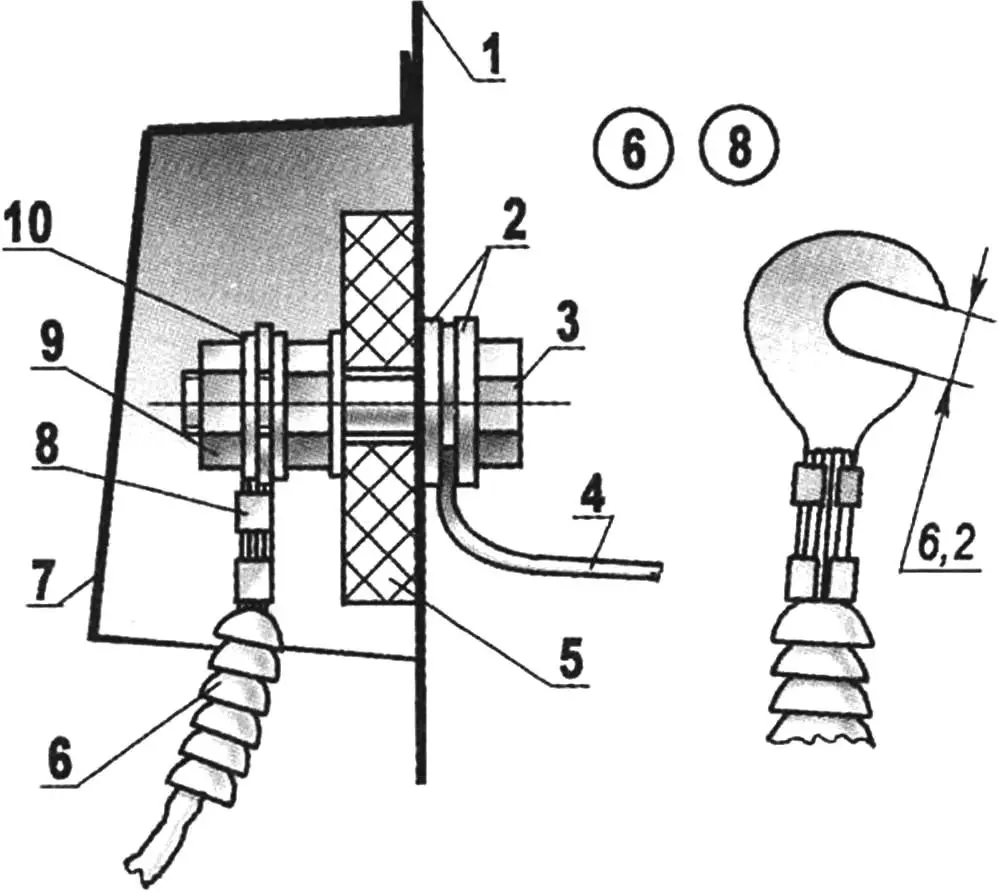
Since the power consumption of the “bath” is 5-6 kW, and the current is 25 A, an electrical outlet with increased reliability is required (for a regular outlet, the maximum current is 16 A). I solved this problem by leaving but upgrading the old ceramic socket with hidden wiring. Firstly, ceramics ensure the strength of the case when overheated. Secondly, the socket for the plug pin consists of two contacts: fixed and movable, spring-loaded. This ensures a reliable connection and the ability to use both regular and “Euro plugs” (in this case, the hole in the socket cover must be drilled to 5 mm).
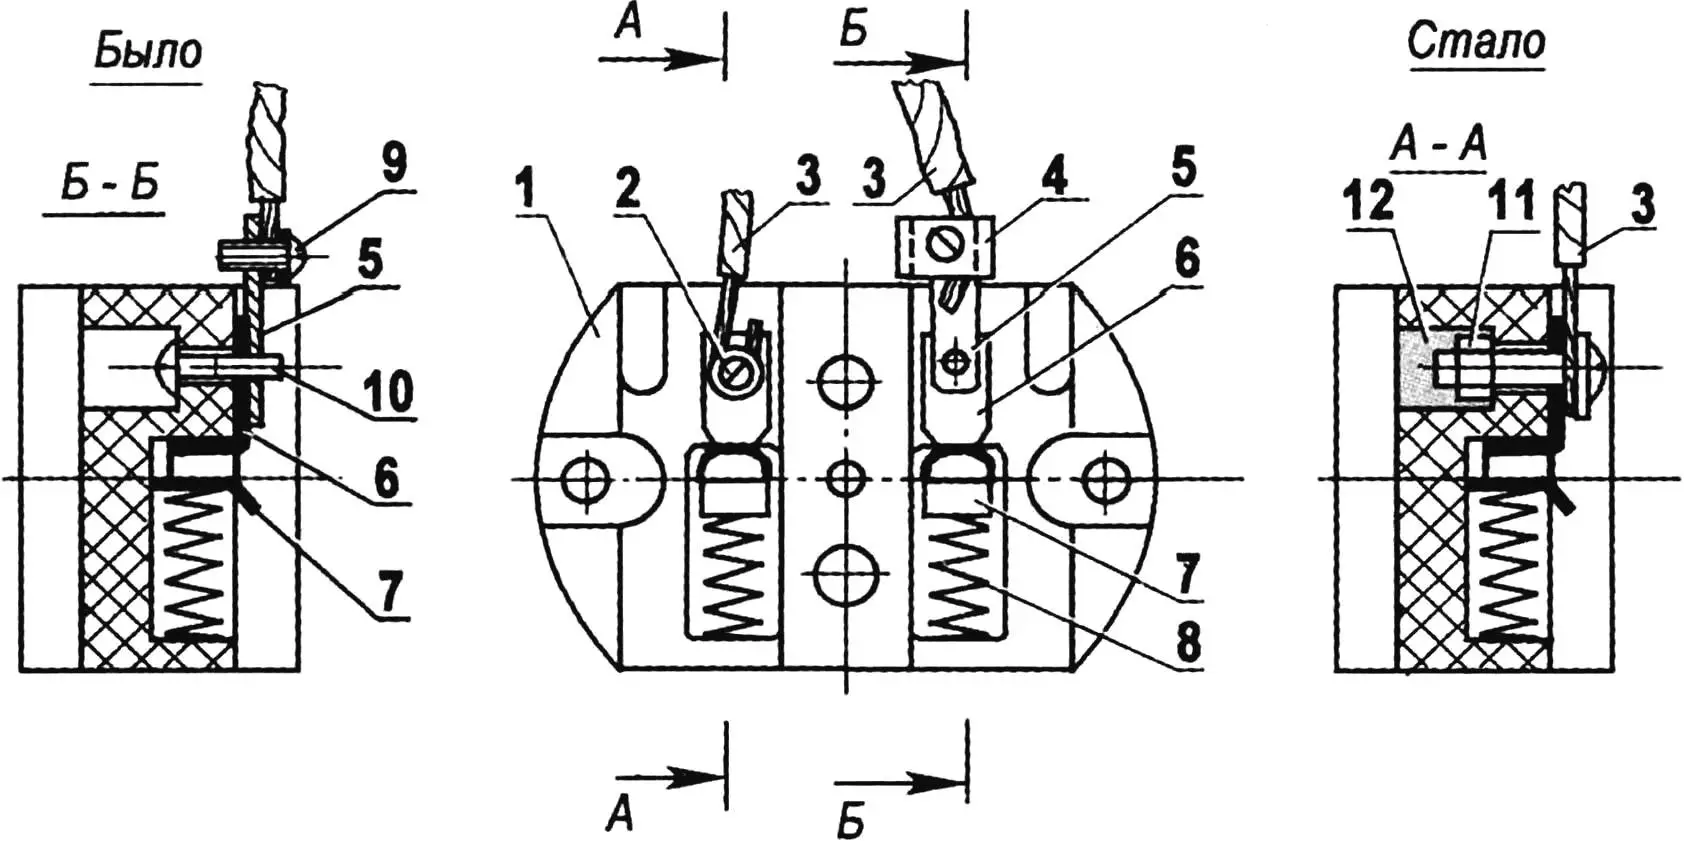
1 — socket body (ceramics); 2,11 — fastening of power cable after modernization (screw, washer, nut M3); 3 — power cable; 4,9 — fastening of power cable in standard socket (curly washer-clamp, screw M3); 5 — intermediate plate of standard socket; 6 — fixed contact; 7 — movable contact; 8 — spring before compression; 10 — fastening of intermediate plate (screw M3); 12 — putty-fixer (alabaster, gypsum)
The socket modification is very simple. First, I removed the intermediate element — an intermediate bar with two threaded holes. I attached the wire directly to the fixed contact with a screw and an M3 nut, installing it in the hole in the base of the case and fixing it with alabaster (or plaster).
The proposed design easily holds 25 A, since it has nothing superfluous, the body is ceramic, and the reliability of the contact between the socket and the plug pin is ensured by a spring.
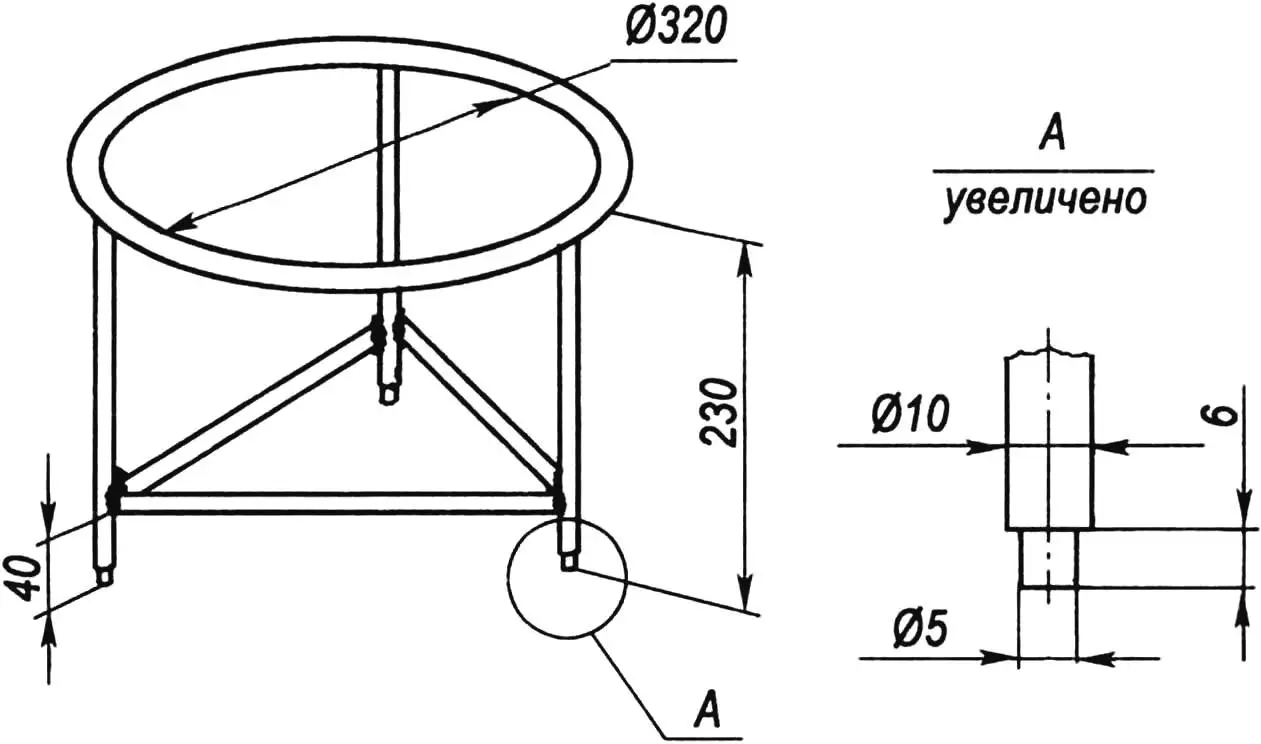
The holder made of 10 mm steel rod and the stand with a stop made of 25×25 mm angle are practically no different from the original version. The fence and seat have changed their “image”, have become more convenient and easier to manufacture.
The unit can be used in two modes: as in a Russian bath or as in a Finnish sauna. In the first case, 1.5 – 2 hours of heating to a temperature of 50 – 60 ° C is sufficient. In sauna mode, the room must have 70 – 80 ° C, which will take 3 – 4 hours.
When the room is warm, you must first turn off the power supply (see below) and then cover the heater with a wooden fence (made of 30×30 mm bars). Only then can you begin the “sacred” procedure.
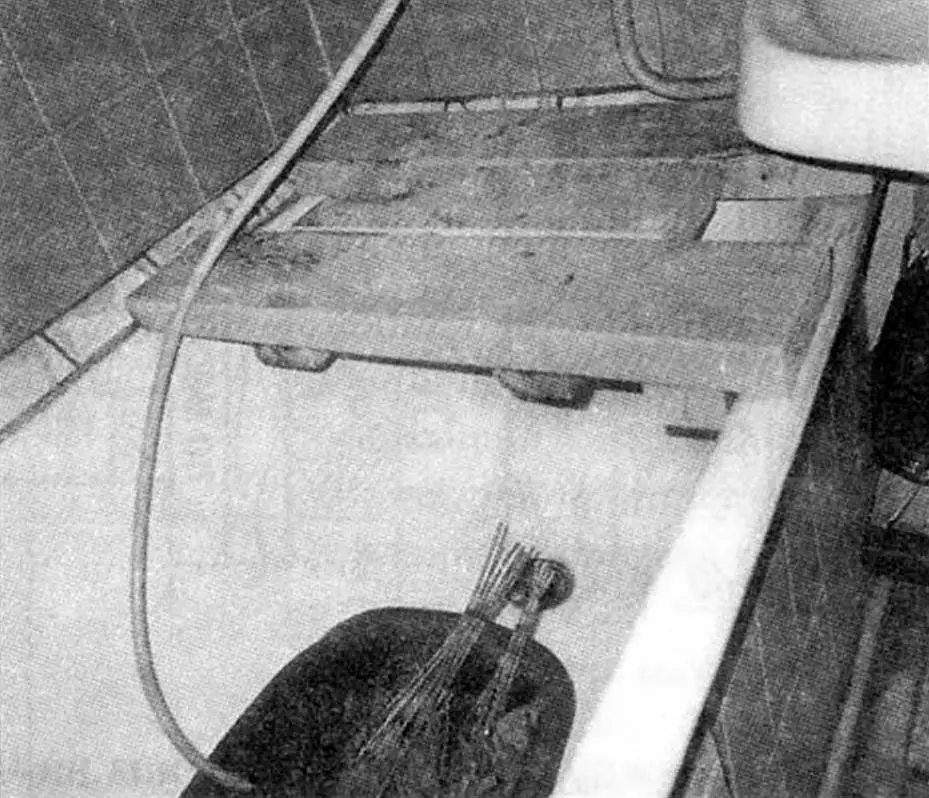
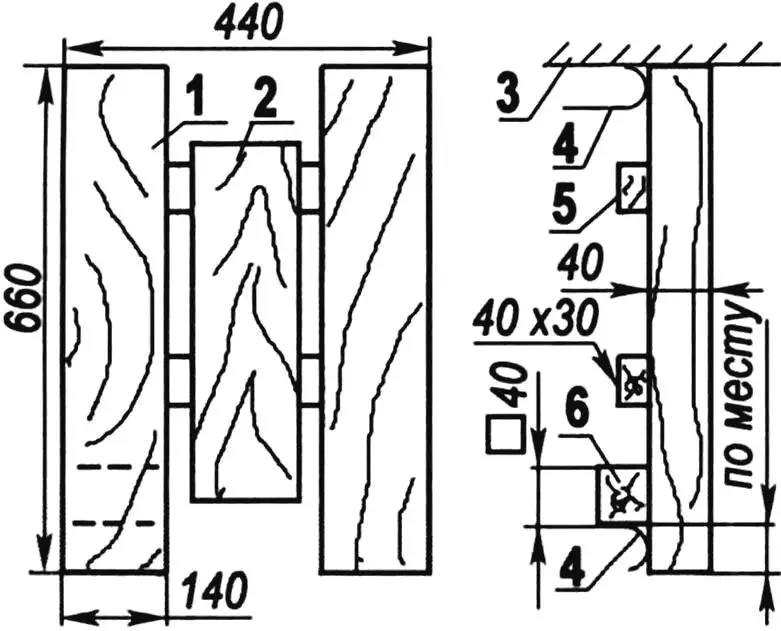
1 — side shelf (board 40×140, L660, 2 pcs.); 2 — middle shelf (board 40×140, L450); 3 — wall; 4 — bath; 5 — lintel (beam 30×40, L440, 2 pcs.); 6 — side stop (beam 40×40, L140)
It is better to pour hot water from the shower, pouring it on the stones from above. The water that has not had time to evaporate flows out of the bucket, so in order not to burn your feet, you need to keep them in a basin of water.
Maintenance of the sauna “stove” consists of periodically tightening the threaded contacts on the bolts of the power block, replacing cracked upper stones. If the spiral burns out at a distance of up to 100 mm from the terminal, it can be shortened and used further. If closer to the middle, it needs to be replaced. My spiral lasted for a year of work (approximately 60 sessions). It is convenient to use current measuring clamps to control the spiral.
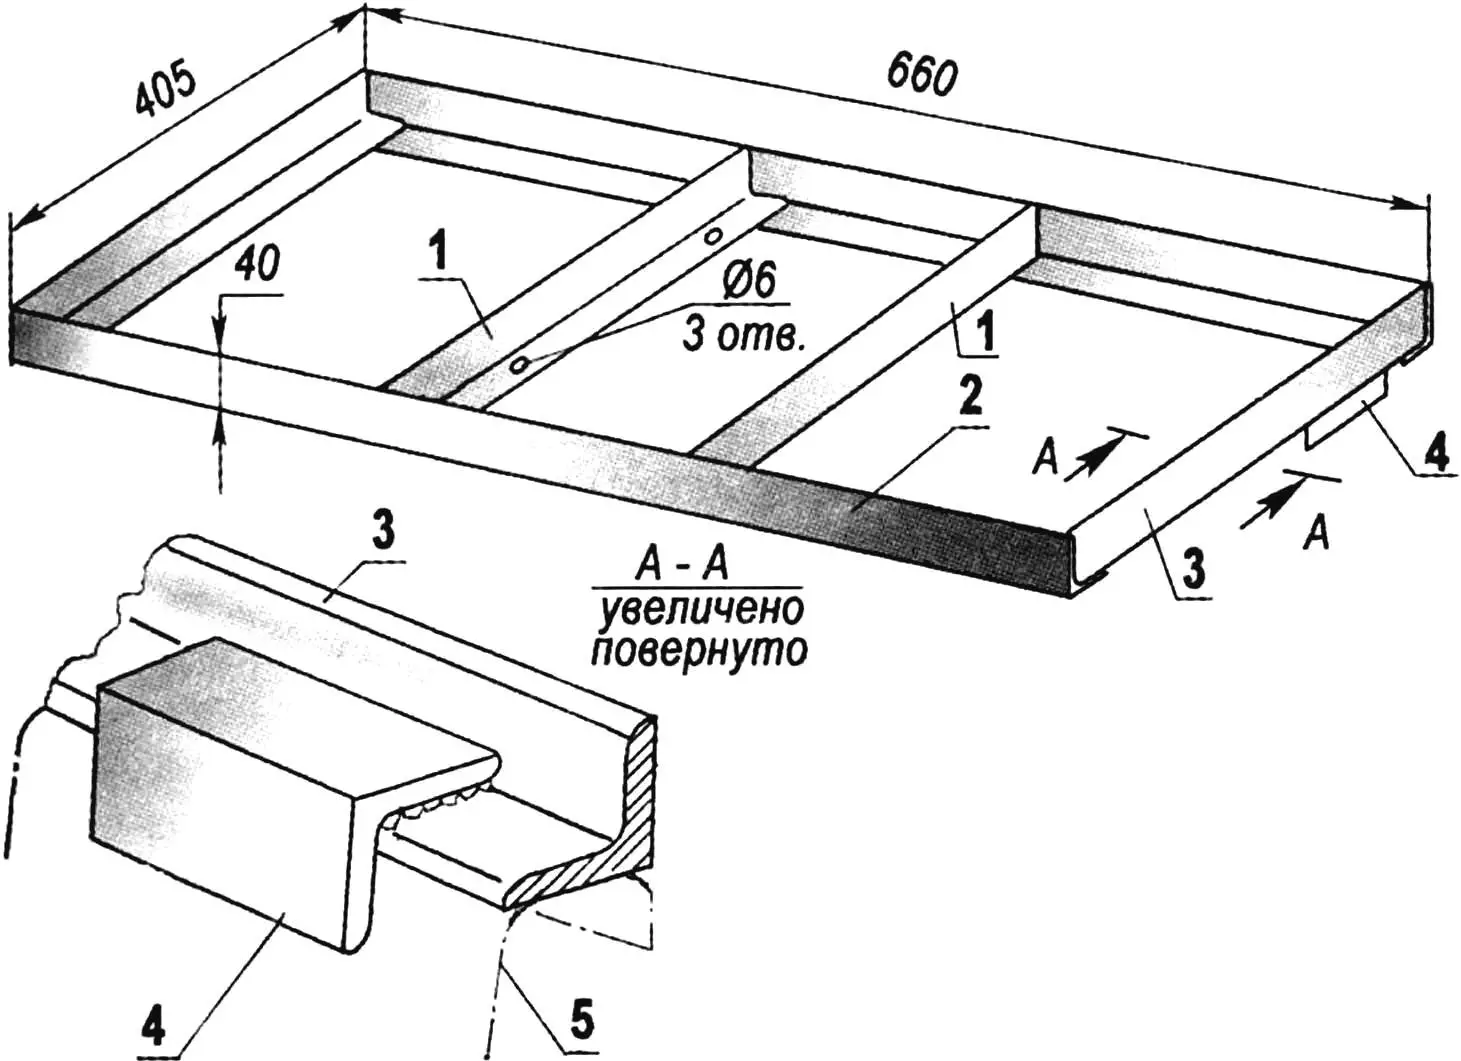
1 — holder supports; 2 — longitudinal connection (2 pcs.); 3 — crossbar (2 pcs.); 4 — stop; 5 — bath; material of parts 1-4 — steel, angle 25×25
In conclusion, I would like to draw more serious attention to compliance with safety regulations when using the “bathhouse”.
Any electrical installations powered by a 220 V network in damp and wet rooms create a serious risk of electric shock. Moreover, electric shock can be caused not only by contact with metal parts, but also by touching any objects in the room, since wet surfaces are excellent conductors of electric current. Therefore, you can use the bathroom and even enter it only when the electric heater is completely disconnected – the machine must be outside the bathroom and must be turned off. This is the main rule.
For greater safety, the stand under the electric heater can be grounded by connecting it to a cold water pipe. Additionally, the stand should be insulated from the bath by gluing pieces of rubber from a bicycle tube.
The sequence of switching on the “bath”:
- Make sure that the 25 A circuit breaker in the electrical panel is turned off.
- Connect the power supply to the power block on the body of the electric heater.
- Plug the power supply into the socket.
- Turn on the circuit breaker in the electrical panel.
After the bathroom has been heated to the desired temperature, turn it off in the reverse order, starting with the machine.
O. LAVROV
Recommend to read
 NOT TO THE SIDE AND UP
We are accustomed to the fact that the curtains should be spread out. For this there are special rods or strings, fastened above the window. Some of them are mechanized: it is necessary...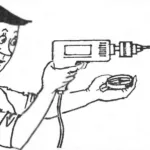 COMPASS — DRILL ASSISTANT
If you need to drill through wall, out the other side exactly in the right place — use...a compass. Of course, in collaboration with the magnet, which should be put behind the wall...
