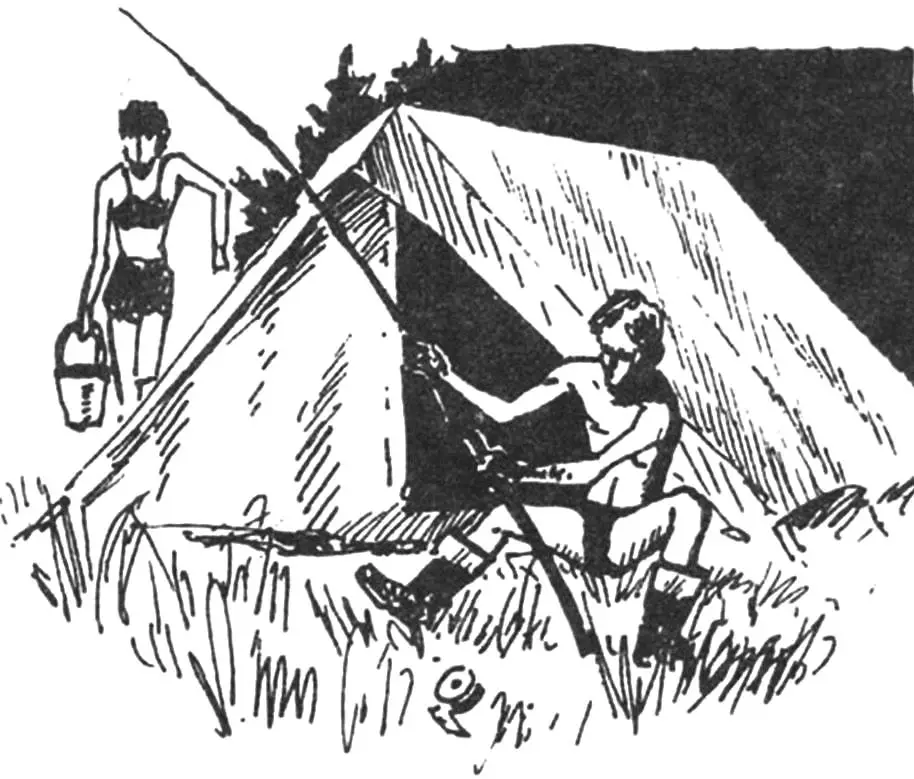
Domestic tents with awnings sold in stores are heavy (usually about 3 kg), and without an awning, they do not protect well from rain. Imported ones are lighter and better, but expensive. Therefore, some tourists make tents themselves from thin nylon combined with an awning made of waterproof material. However, the awning complicates the design of the tent, makes it heavier and increases the time it takes to “set it up”, and the total cost remains high.
I am a seasoned tourist and have used various industrial tents for hikes of varying difficulty. This experience allowed me to design and make a lightweight, rain-proof and quickly set up two-person tent from regular polyethylene film. It is quite convenient, cheap and quite suitable for weekend hikes. Its simple design and uncomplicated manufacturing technology allow even a person with only basic tailoring skills to sew this “bivouac shelter” on their own.
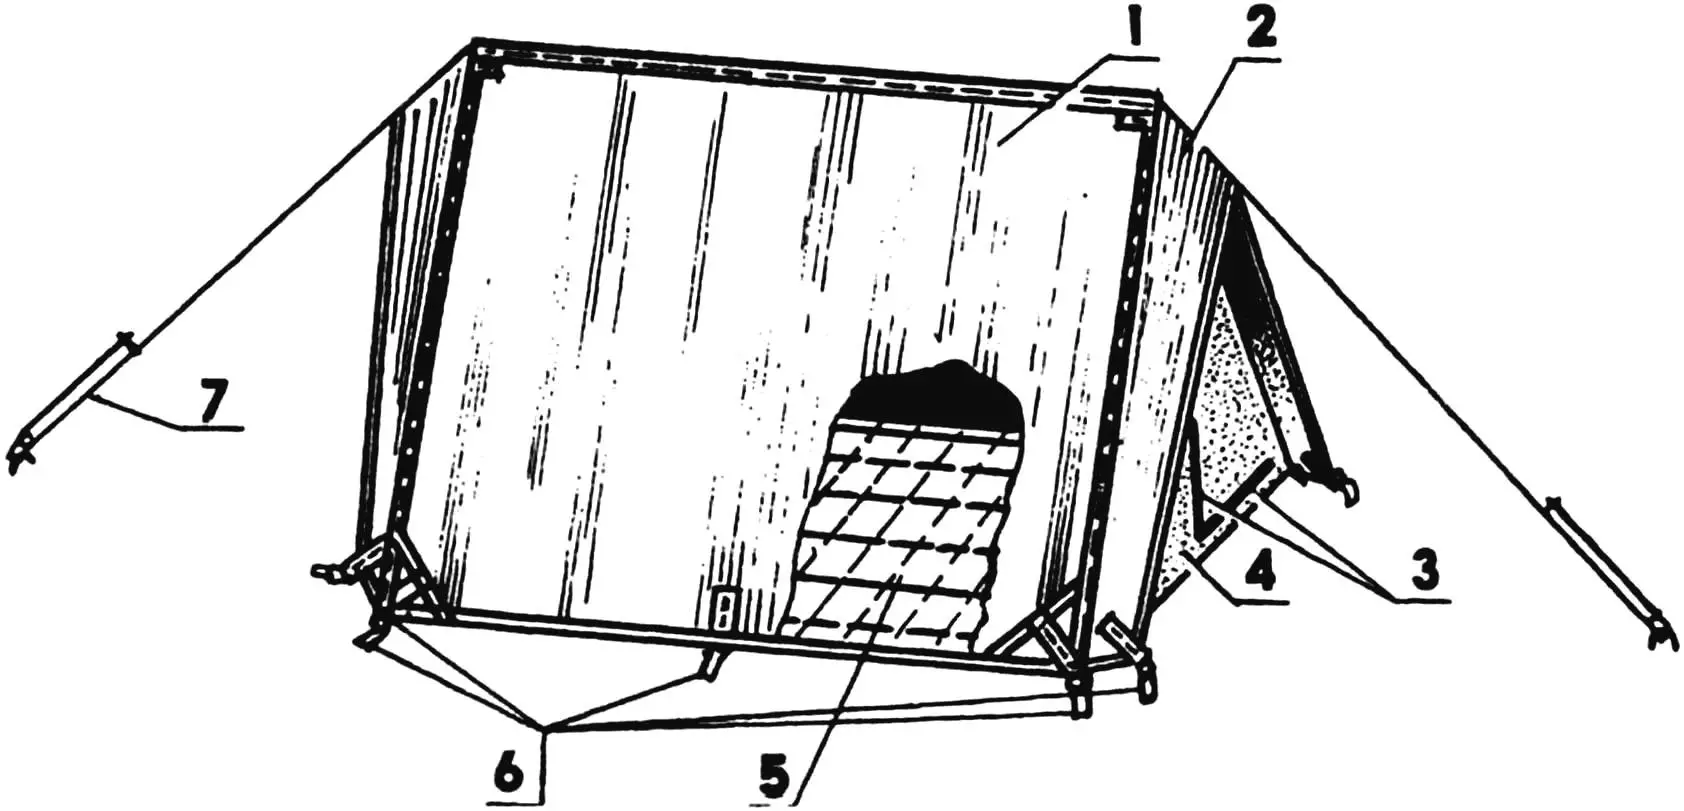
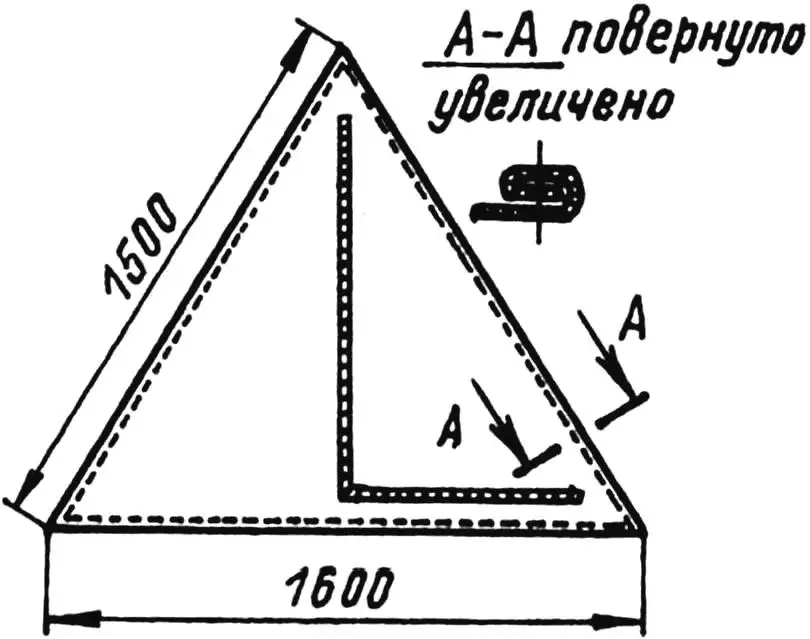
1 — roof; 2 — canopy (2 pcs.); 3 — entrance zippers; 4 — end panel (2 pcs.); 5 — floor; 6 — lower stretchers with pins (10 pcs.); 7 — ridge (end) stretcher with peg (2 pcs.)
In addition to the film, you will also need light cotton fabric for the ends of the tent and the polyethylene floor covering, and adhesive tape such as “Scotch tape” to seal the seams. It is better to make the roof of the tent from opaque milky-white or colored film. If ordinary transparent film is used, it should be “duplicated” from the inside with gauze, which will make the tent opaque, prevent the “greenhouse effect” on a hot sunny day and reduce the condensation of vapors in cold weather.
To simplify cutting and sewing, the tent is designed in the form of a hut (without vertical side walls). This design is more resistant to wind and reduces the number of “air” guy lines with pegs from the usual eight to two end ones, which speeds up its installation and removal. The height of the ridge is the same as that of most two-person tents. The floor is made somewhat wider to compensate for the decrease in volume due to the lack of vertical side walls.
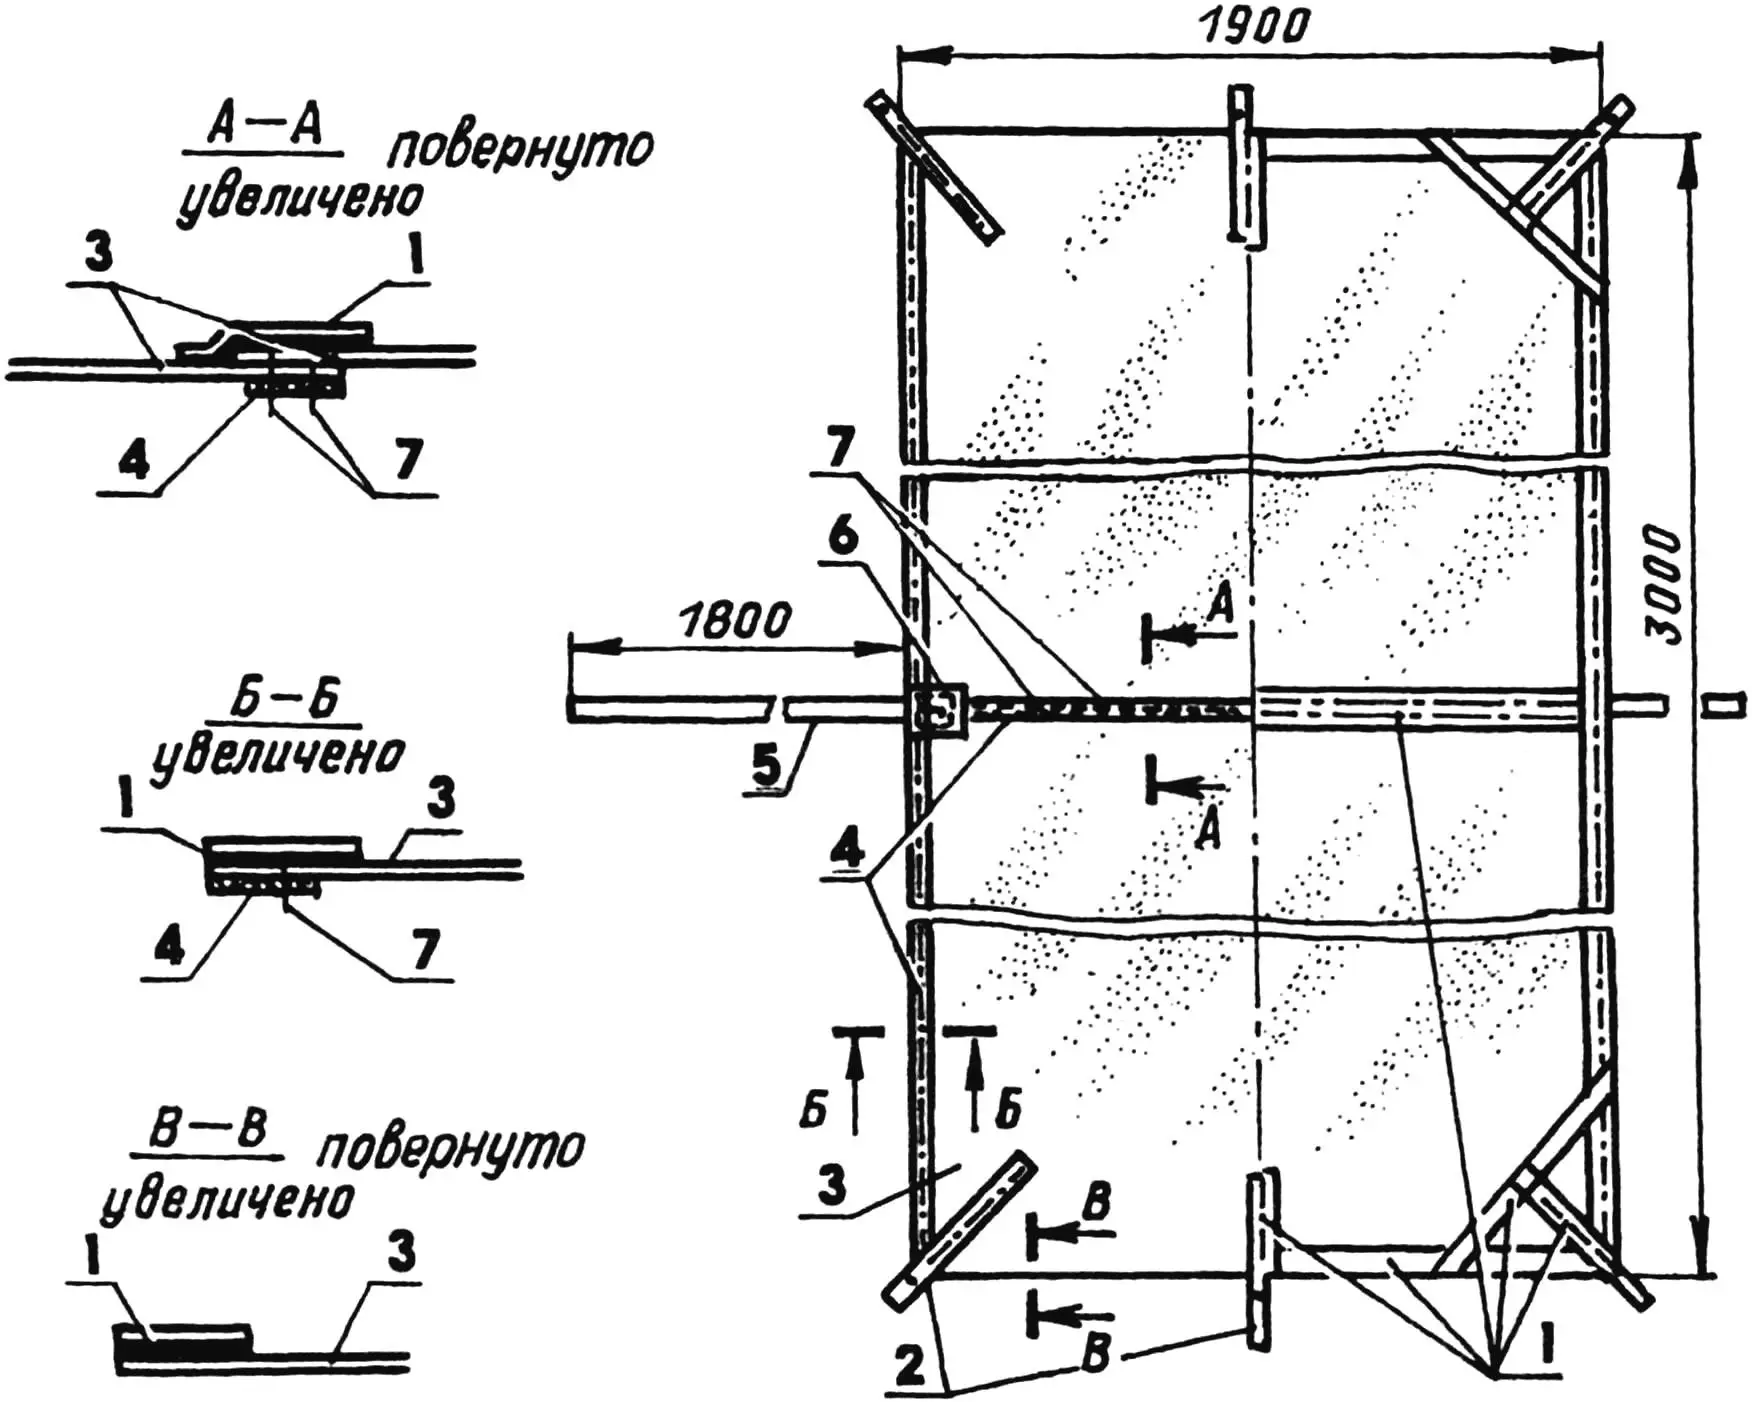
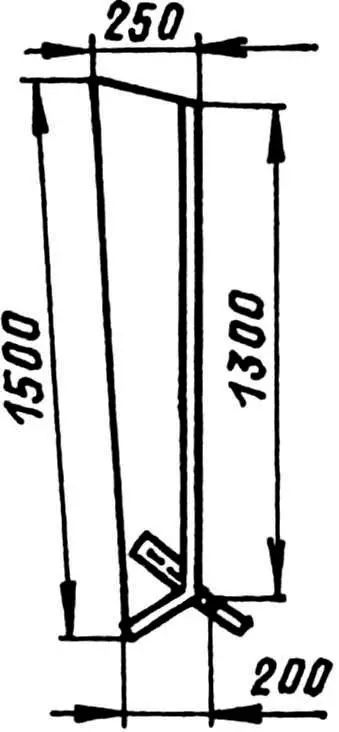
1 — adhesive tape; 2 — lower stretchers; 3 — roof (polyethylene film s0.06…0.08); 4 — “power frame” — ridge and end edges; 5 — ridge stretcher (2 pcs.); 6 — lining under the post (polyethylene s2…3); 7 — seams;
elements 2,4,5 are made of nylon (“trouser”) tape
The figures show the dimensions and stitching lines of all the main parts of the tent – the floor, roof, ends and canopies. The polyethylene film of the floor is covered from the inside with fabric, which is stitched to it on a machine every 300-350 mm in two mutually perpendicular directions. Then a strip of adhesive tape about 30 mm wide is glued to each seam on the film side. Strengthening the seams and protecting them from water, the tape also increases the overall strength of the floor and other elements of the product.
Before sealing the tent seams with tape, the surface of the film to which the tape is glued must be cleaned with acetone or gasoline. It should be borne in mind that the tape is unwound from the reel with some effort and stretches. If it is glued to the seam immediately, then after some time folds will appear, which can only be eliminated by cutting the tape and gluing additional pieces. Therefore, after unwinding a piece of tape from the reel, it is necessary to wait 1-2 minutes for its length to stabilize.
In the corners of the floor (on the extension of the diagonals) and in the middle of its side edges (outside, perpendicular to them) six stretchers are sewn from pieces of nylon trouser tape. Holes are subsequently made in them for stretching and fastening the floor to the ground with pins. The same pieces of tape are sewn in the appropriate places on the roof. In addition, long strips of tape are sewn to the roof: in the middle – a ridge strip, turning into longitudinal stretchers, and along the end edges, to which the end panels (gables) are then sewn. The lower corner parts of the roof are “reinforced” with strips of “scotch tape”, which are glued perpendicular to the diagonal stretchers, passing through their beginning.
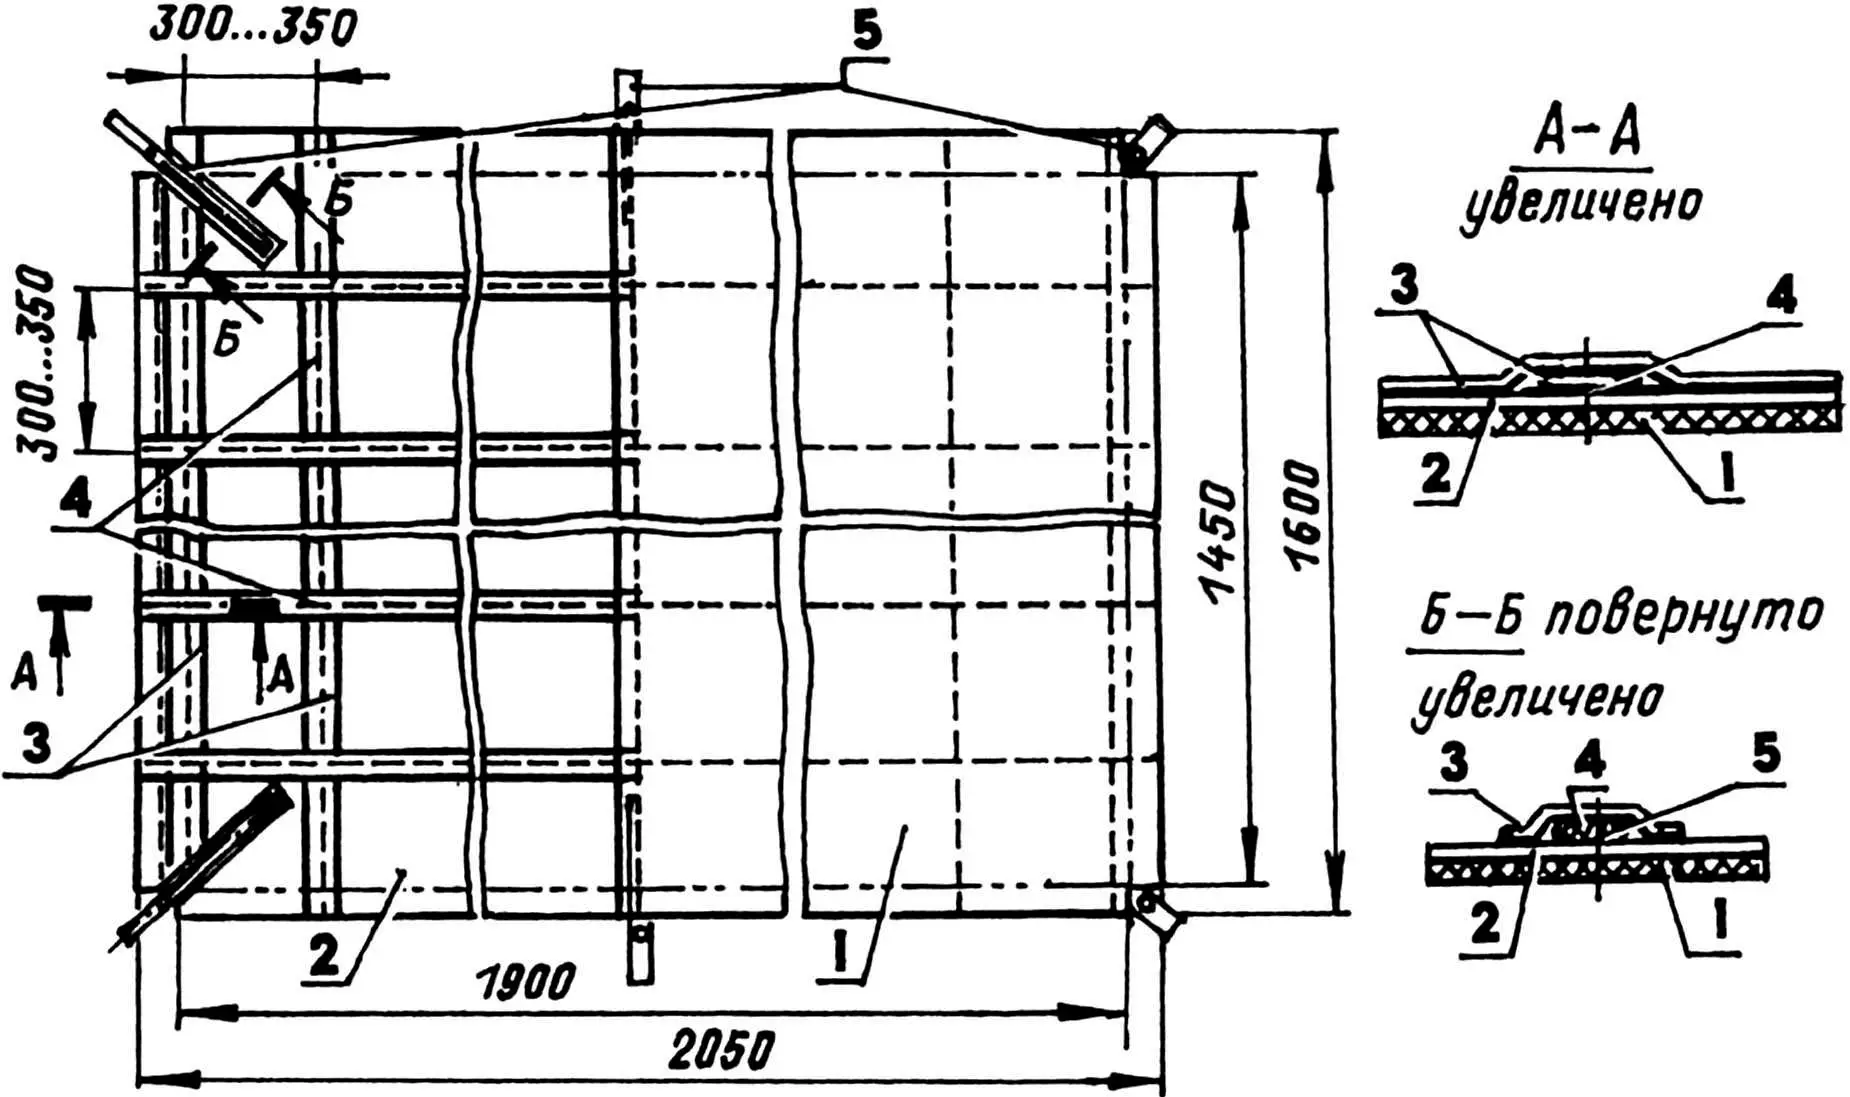
1 — fabric base; 2 — film (s0.06…0.08); 3 — adhesive tape; 4 — seams; 5 — lower stretchers (nylon “trouser” tape, 6 pcs.)
To strengthen the upper corners of the roof in the places where the posts are installed, polyethylene pads 2-3 mm thick are used. If the roof is made of transparent polyethylene, which is “shaded” with gauze, then the film in this case is sewn to the gauze, and the seams are sealed with adhesive tape in the same way as is done when making the floor. In this case, the “scotch tape” that strengthens the lower corners can be omitted.
When preparing the fabric ends of the tent, you should hem their edges on a machine and sew two plastic zippers with locks in different directions into the entrance end. If desired, nylon mesh windows with flaps to close them and pockets for small items can be sewn into the ends.
The blanks of the canopies are cut from the same polyethylene film as the floor and roof. Pieces of nylon tape (stretchers) are sewn onto their lower outer corners to secure the canopies to the ground with pins, and the outer edges are reinforced with adhesive tape.
The prepared parts and components of the tent are connected in the following sequence. First, the floor is sewn to the bottom of the roof and to the nylon tape previously sewn onto the edges of the roof with overhead seams, then the ends are sewn. The latter are also stitched to the floor overlaps. The places where the ends are joined to the floor and roof in the corners of the tent are sewn up manually during the trial pitching of the tent.
The canopies are sewn onto the end edges of the roof, and the seams are pasted on the outside with adhesive tape. Before joining the parts of the canopies, it is advisable to place the extensions of the ridge tape (stretchers) so that they are then attached to the ground at an angle of approximately 45°, and baste the line of joining the canopy parts. After sewing the parts, the seams and “free” edges of the canopies are pasted with “scotch tape”.
When test-setting the tent, you need to specify the locations of the holes for the pins on the floor guy ropes. They should match the holes on the roof guy ropes so that each pin pulls and holds both the floor and the roof well. Later, after a good fit, for ease of setting up the tent, the floor and roof guy ropes should be sewn in pairs.
The weight of the tent in the given version does not exceed 1.5 kg. Of this, slightly more than 700 g is “pulled” by polyethylene film (10.5 m2 with a weight of 70 g/ m2 ). Cotton ends with an area of 5.5 m2 made of the same fabric weigh 300-500 g depending on the thickness of the material. The remaining weight is made up of adhesive tape, nylon tape and “zippers”.
If the transparent film of the tent roof is duplicated with gauze (40 g/ m2 ), then the tent is weighed down by another 250 grams. It is best to make 150 mm long pins from steel wire with a diameter of 3 mm. Together with two duralumin pegs, they will “pull” about as much as the gauze.
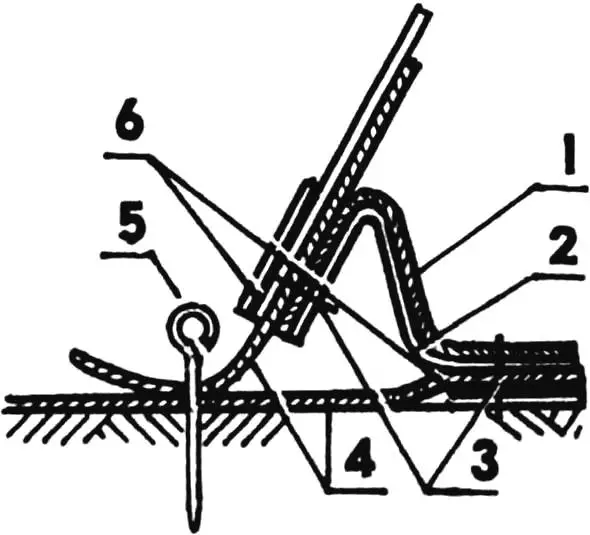
1 — fabric base of the floor; 2 — floor film; 3 — seams; 4 — stretchers; 5 — pin (wire Ø3, L150); 6 — adhesive tape
The tent is pitched in the following order. First, the floor is straightened and secured with six pins (in pairs on each side). Then the roof is raised on the racks and the ridge guy ropes are pulled tight with two pegs at opposite ends. Lastly, the canopies are pinned to the ground in a taut position.
The design of the tent allows you to easily change its dimensions if necessary. To do this, you only need to increase or slightly decrease the length of the floor and roof shown in the figures (1900 mm) to the desired length. For better protection of the ends of the tent from “slanting” rain with wind, you can also increase the canopies, taking into account the convenience of entry and exit.
Using the tent in various hikes, we were convinced of its sufficient reliability. It should be noted that the strength of this polyethylene film is not as small as it seems at first glance. For clarity, you can remember how young fishermen carry fish in a bag filled with several liters of water: after all, the strength of polyethylene is 150 kg / cm 2 . This means that a 10 mm wide film strip can withstand a load of up to 1 kg (the thickness of a regular film is 0.06-0.08 mm). At the same time, it should be remembered that the film is easily punctured and cut by sharp objects. In this case, you should always have a roll of adhesive tape with you for urgent repairs.
N. IVANOV, St. Petersburg
Recommend to read
 Cargo mini moped
I have been a long-time reader of the magazine “Modelist-Konstruktor” and subscribed to it for many years in a row. Then, due to financial difficulties, I had to give it up. But since last... GLIDER-GYROPLANE “BUMBLEBEE”
The design and construction of the "Bumblebee" creative team "Rise" was based on microalloy design V. Barkovsky, V. Vinitsky and Y. Rysuke described in "MK" (see: 1969, № 6, 1970, № 3,...
