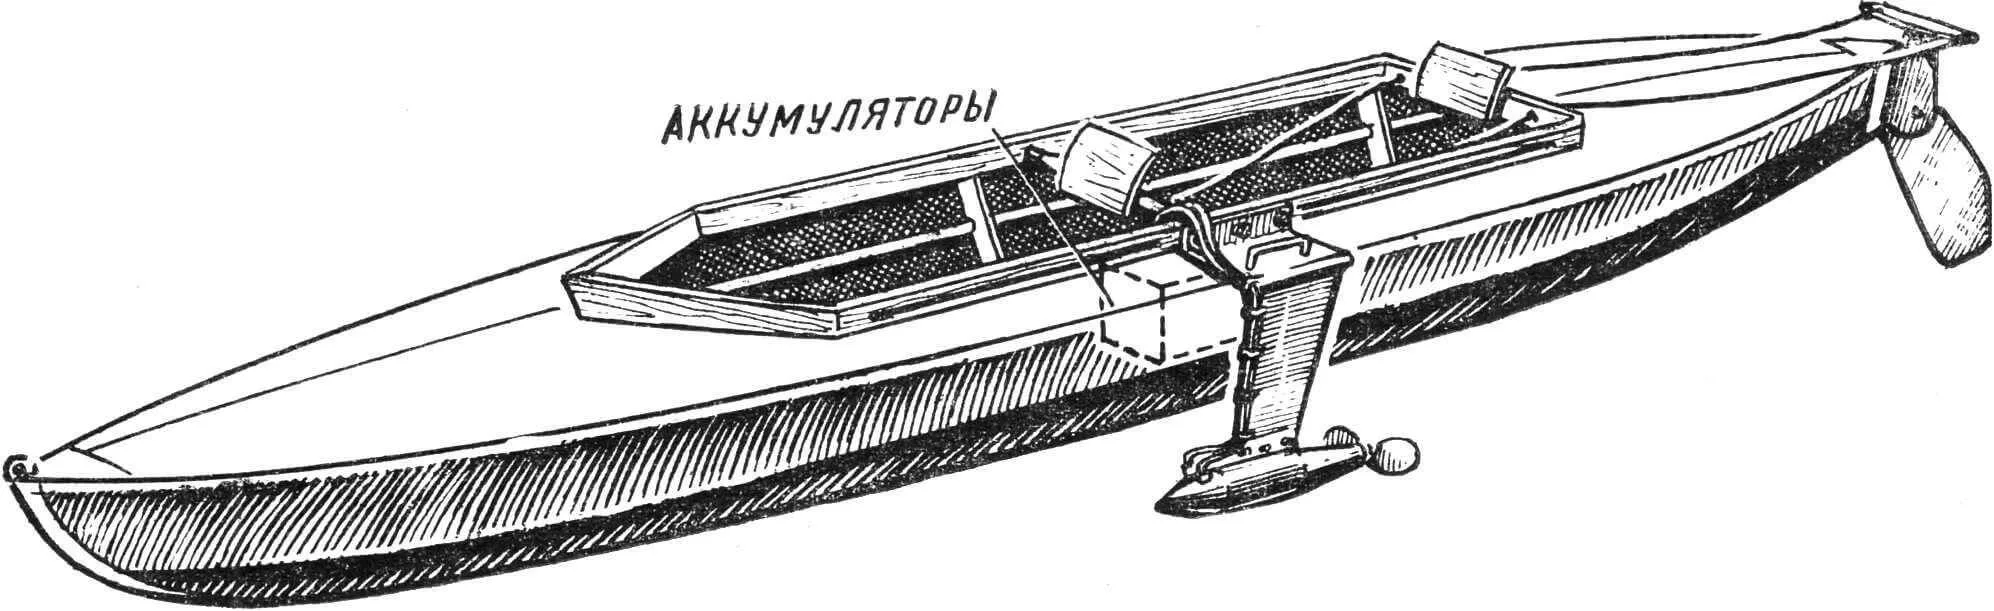
I once had at my disposal a DC generator from a Wartburg-311 car (6 V, 180 W), and I decided to adapt it as an outboard motor for a kayak. I built the “fuel tank” from two parallel-connected car batteries (6 V, 84 Ah).
From the very beginning, I decided to abandon the classic outboard motor scheme and positioned the motor below the waterline. I was prompted to do this by the following considerations: lower losses compared to classic scheme motors due to friction in the driveshaft and bevel gears; good motor performance in peak modes, since cooling of a motor located underwater is very intensive.
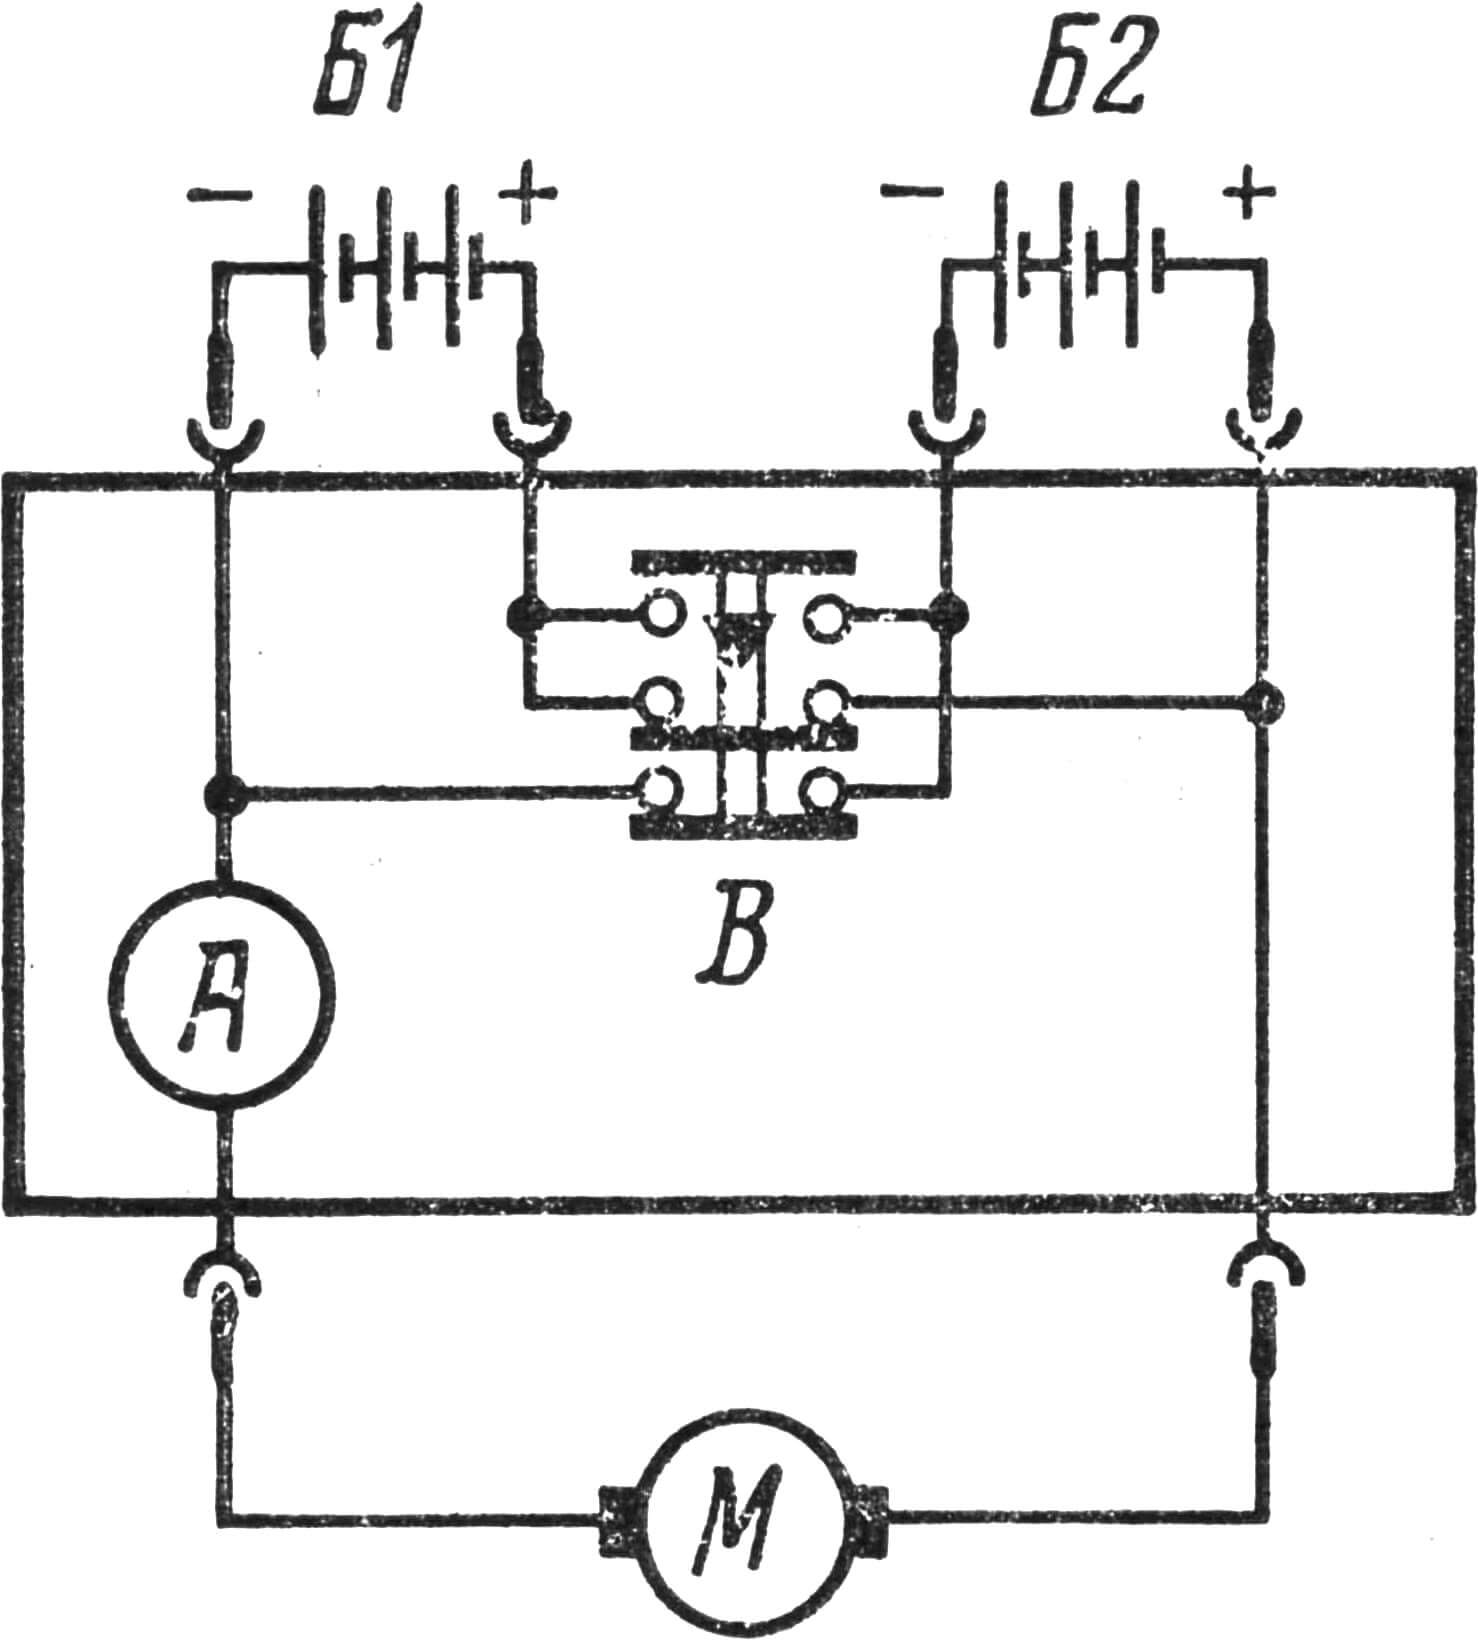
Sea trials conducted in the summer showed that the generator in motor mode consumes about 25 A at 6 V and about 50 A at 12 V.
With fully charged batteries, my motor ran for three hours straight, and when I managed to get a set of new ones, this period increased by another two hours and twenty minutes.
As a propeller, I used a large-pitch screw from a “Tümmler” outboard motor.
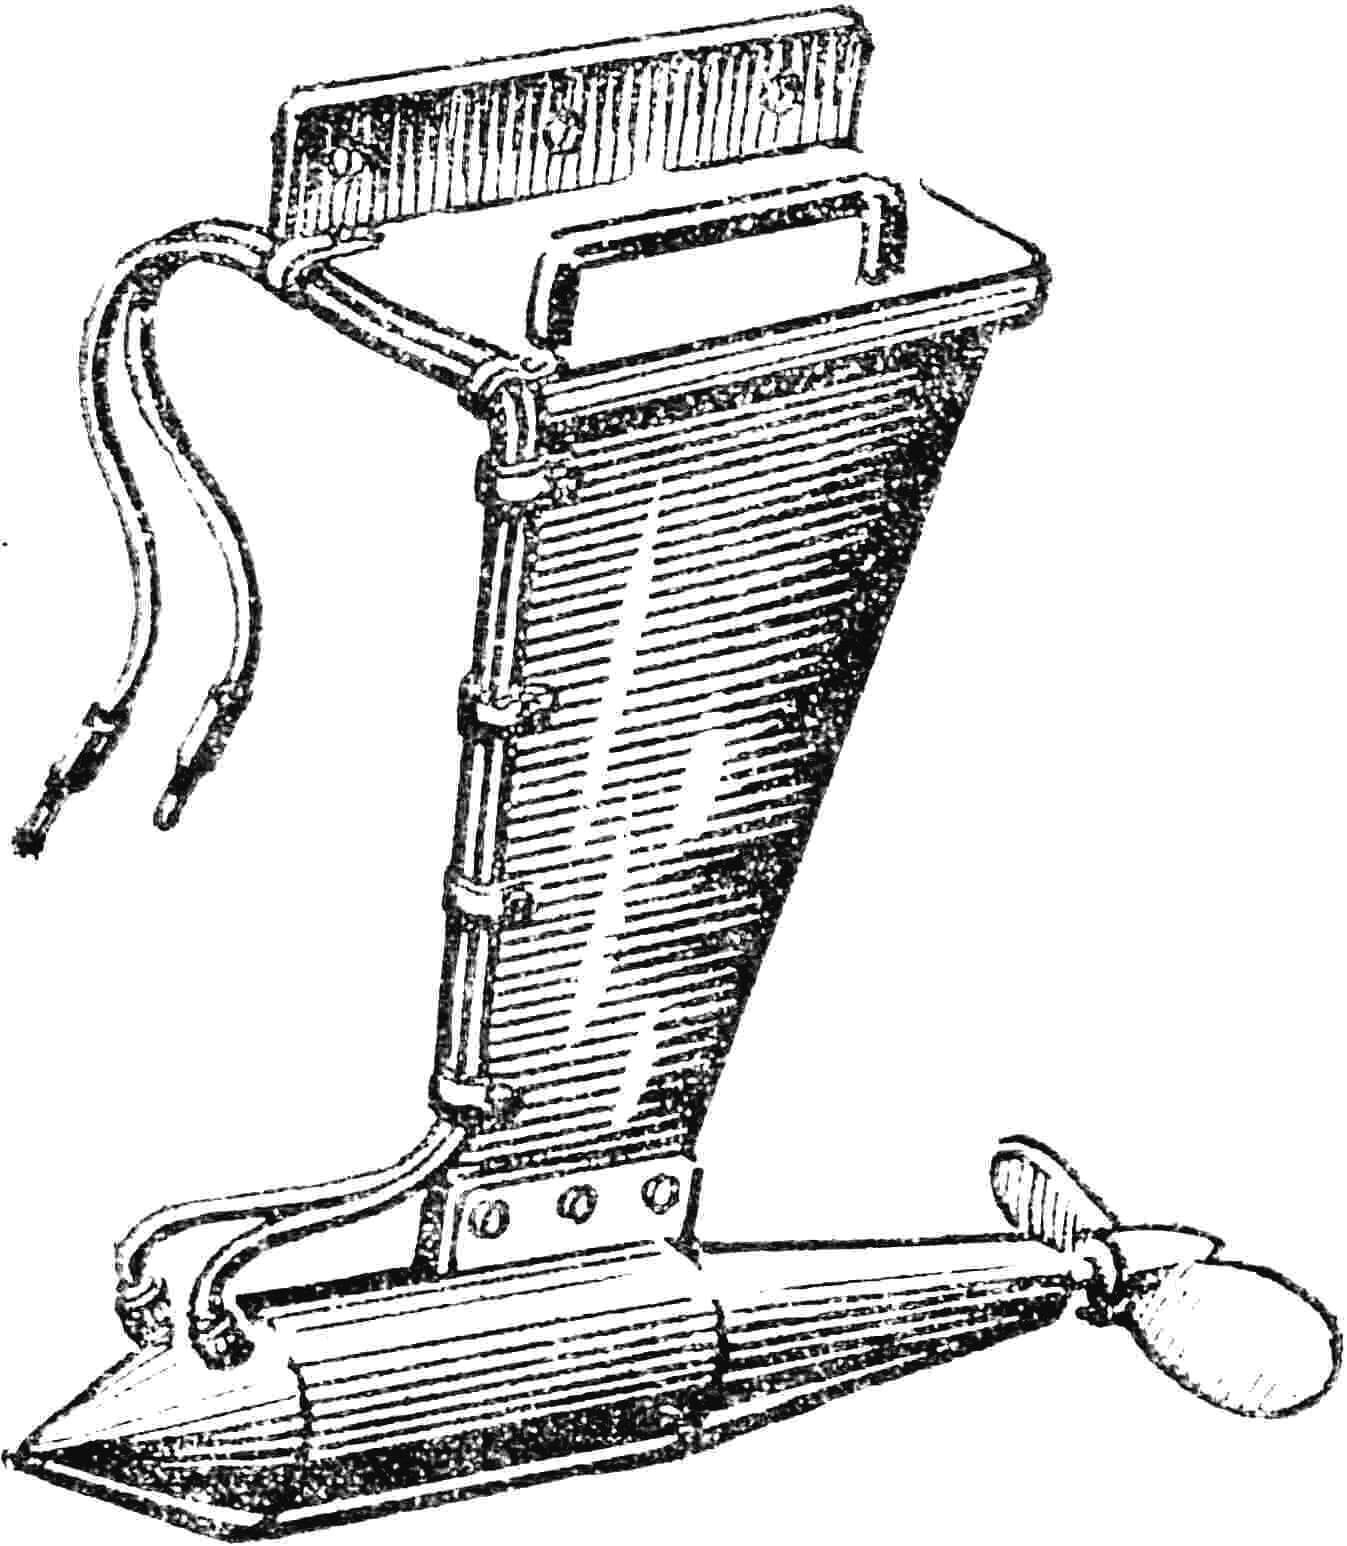
The generator is encased in a streamlined housing soldered from a 0.6 mm thick brass sheet. Power wires are passed through two brass bushings and sealed with epoxy resin. For power supply, I used a flexible insulated wire with a cross-section of about 10 mm2.
Reliability and trouble-free operation will increase significantly if terminal connections are abandoned and replaced with soldering.
Mechanical units must be made very carefully, as after assembly and soldering of the housing, any repairs inside it will be impossible.
For the propeller shaft, a 12 mm thick stainless steel rod was suitable. The screw was appropriately fitted to it. The main problem was ensuring absolutely reliable sealing of the propeller shaft exit.
I solved this as follows. In the brass bushing there is a bearing and two sealing rings, the space between which is filled with grease.
The propeller shaft is connected to the motor shaft using a bushing.
Before final assembly and sealing of the housings, it is necessary to lubricate all bearings and let the motor run at various modes.
Leak test: immerse the assembled outboard motor in hot water, and within a few minutes even the smallest cracks will show air bubbles.
All electrical connections must be made with wire of sufficient cross-section. The switch must have high load capacity. When using a 12 V power source, a powerful wafer switch should be used to switch voltage. The current is controlled by an ammeter connected in the motor circuit.
When moving, one must beware of all kinds of branches and snags, as the screw gets stuck and the running current increases several times.
GERD WEISIGK (“Praktik”, Germany)
Recommend to read
 VITA — SWALLOW VELOMOBILES
Oddly enough, recumbent... older bike. Its ancestor can be considered the original "self-moving carriage" proposed by the famous Russian inventor Kulibin in 1791. On her back, at the... SHOWER WITH SHADE
In the baths of the old sample, where the shower head is located high on a tubular rod, the water sprayed too wide, gets on the floor. "Curb" this water fan will help a kind of...
