
The bottom bracket of a road bicycle — and indeed of any other bicycle — is probably its most heavily loaded mechanism. Therefore, in bottom brackets with external tapered bearings, bearing cages often fail under heavy overloads, and the ball races on the cones of the bottom bracket spindle are frequently damaged as well. Intensive wear of the races also occurs when riding on unpaved roads because dust gets into the bottom bracket assembly.
The simplest way to restore the mechanism’s serviceability is to replace the damaged parts or the complete assembly. That is usually what repair shops do. But such a solution is hardly acceptable for a thrifty DIY builder who will try to bring the stock parts back to life.
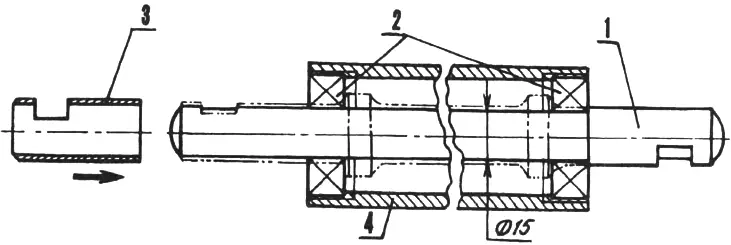
1 — spindle; 2 — bearings 60202 (80202); 3 — bushing; 4 — bottom bracket shell
He turns the bottom bracket spindle down to 15 mm in diameter along almost its entire length, leaving room at only one end to mount the crank arm with the chainring. This size matches the inner bore diameter of series 202 bearings. He presses a type 60202 bearing onto the spindle against the shoulder with the shield facing outward (type 80202 bearings with shields on both sides can also be used). He inserts the spindle into the bottom bracket shell and presses the bearing flush with the faces into the shell as well, if necessary slightly boring the threaded portion inside the shell tube to the outer diameter of the outer ring. Then, from the other side, he mounts the second bearing on the spindle and presses it into the shell with its shield facing outward. Next he turns a transition bushing for mounting the crank arm, cuts a keyway for the wedge fastener in it, and presses it onto the protruding end of the spindle.
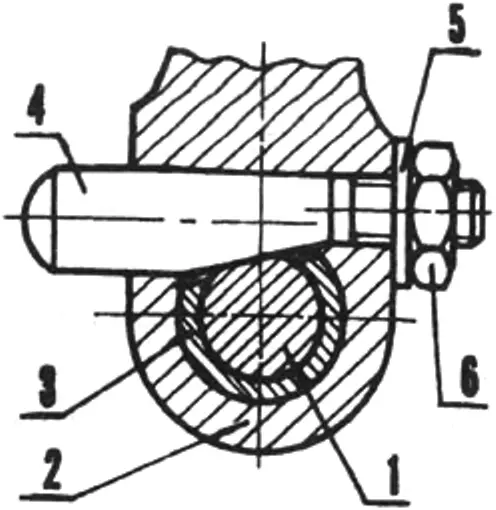
1 — spindle; 2 — crank arm; 3 — bushing; 4 — wedge; 5 — washer; 6 — nut
A bottom bracket repaired this way often lasts until the bicycle is “written off,” but too much material must be turned off, removing the entire hardened layer on the spindle, and the flat for the wedge key becomes very small. The crank arm on this side may loosen under heavy loads, and then one must think how to repair that area too. But the most undesirable aspect of this repair method is that the special SPM 35×1 thread (right-hand on one side and left-hand on the other) inside the bottom bracket shell will almost certainly be ruined, and the assembly becomes non-serviceable.
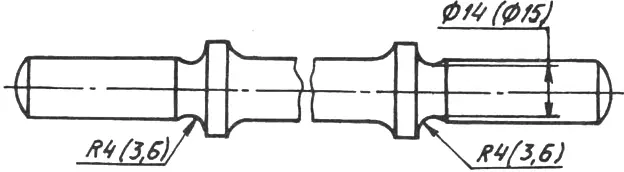
So I proceeded somewhat differently, although lathe work was still unavoidable. I turned shallow grooves with a 4 mm radius on the damaged races of the bottom bracket spindle cones for 8 mm balls (more precisely, 7.94 mm) so that the journal diameter under the grooves was 14 mm. I took the balls from two old 204 bearings. I ground the turned areas, although that could have been omitted — the balls can themselves true and even harden the races.
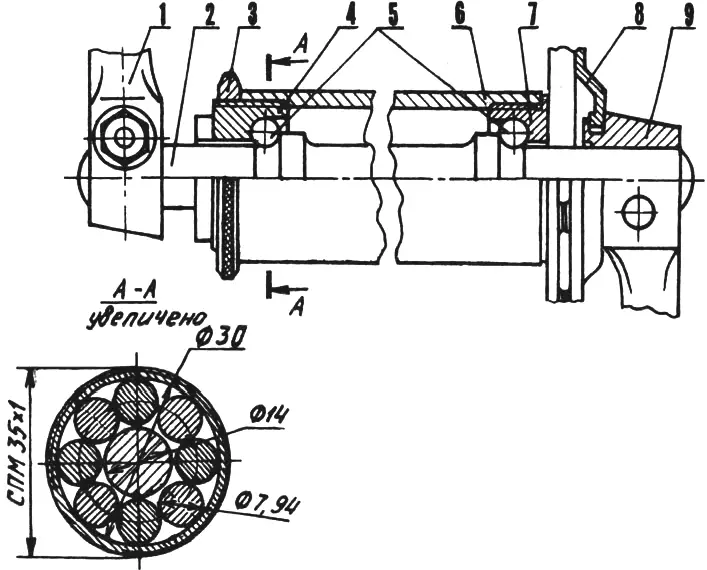
1 — left crank arm; 2 — spindle; 3 — locknut; 4 — left cup; 5 — balls from 204 bearings; 6 — bottom bracket shell; 7 — right cup; 8 — chainring; 9 — right crank arm
I assembled the unit in the following order. First, after packing the turned area on one side of the spindle thickly with grease, I seated the balls snugly one against another in the lubricant and slipped the cup over the spindle and balls. I inserted the spindle into the bottom bracket shell and screwed the cup in until it seated. I did the same at the other end of the spindle (on the opposite side of the shell), tightening the second cup until the spindle rotated in the shell without play but freely.
Instead of balls from 204 bearings, balls from 203 bearings can be used. Their 7.14 mm balls are installed nine on each side of the spindle. However, the grooves on the spindle must then be turned with a 3.6 mm radius, leaving the journal diameter at 15 mm.
Modelist-Konstruktor No. 2’2002, S. PALAGIN
Recommend to read
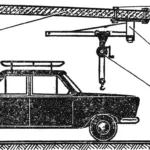 Car lift in the garage
When I bought a used passenger car and started repairing it, my first helper in the garage became... a hoist I built under the ceiling. Without it I would hardly have managed, for example,...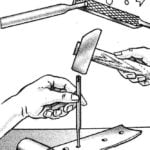 BALL PUNCH
When working with imitation leather or thin skin, which are often used for the models or devices, there is a need in the holes of small diameters. In these cases, rescue of a homemade...
