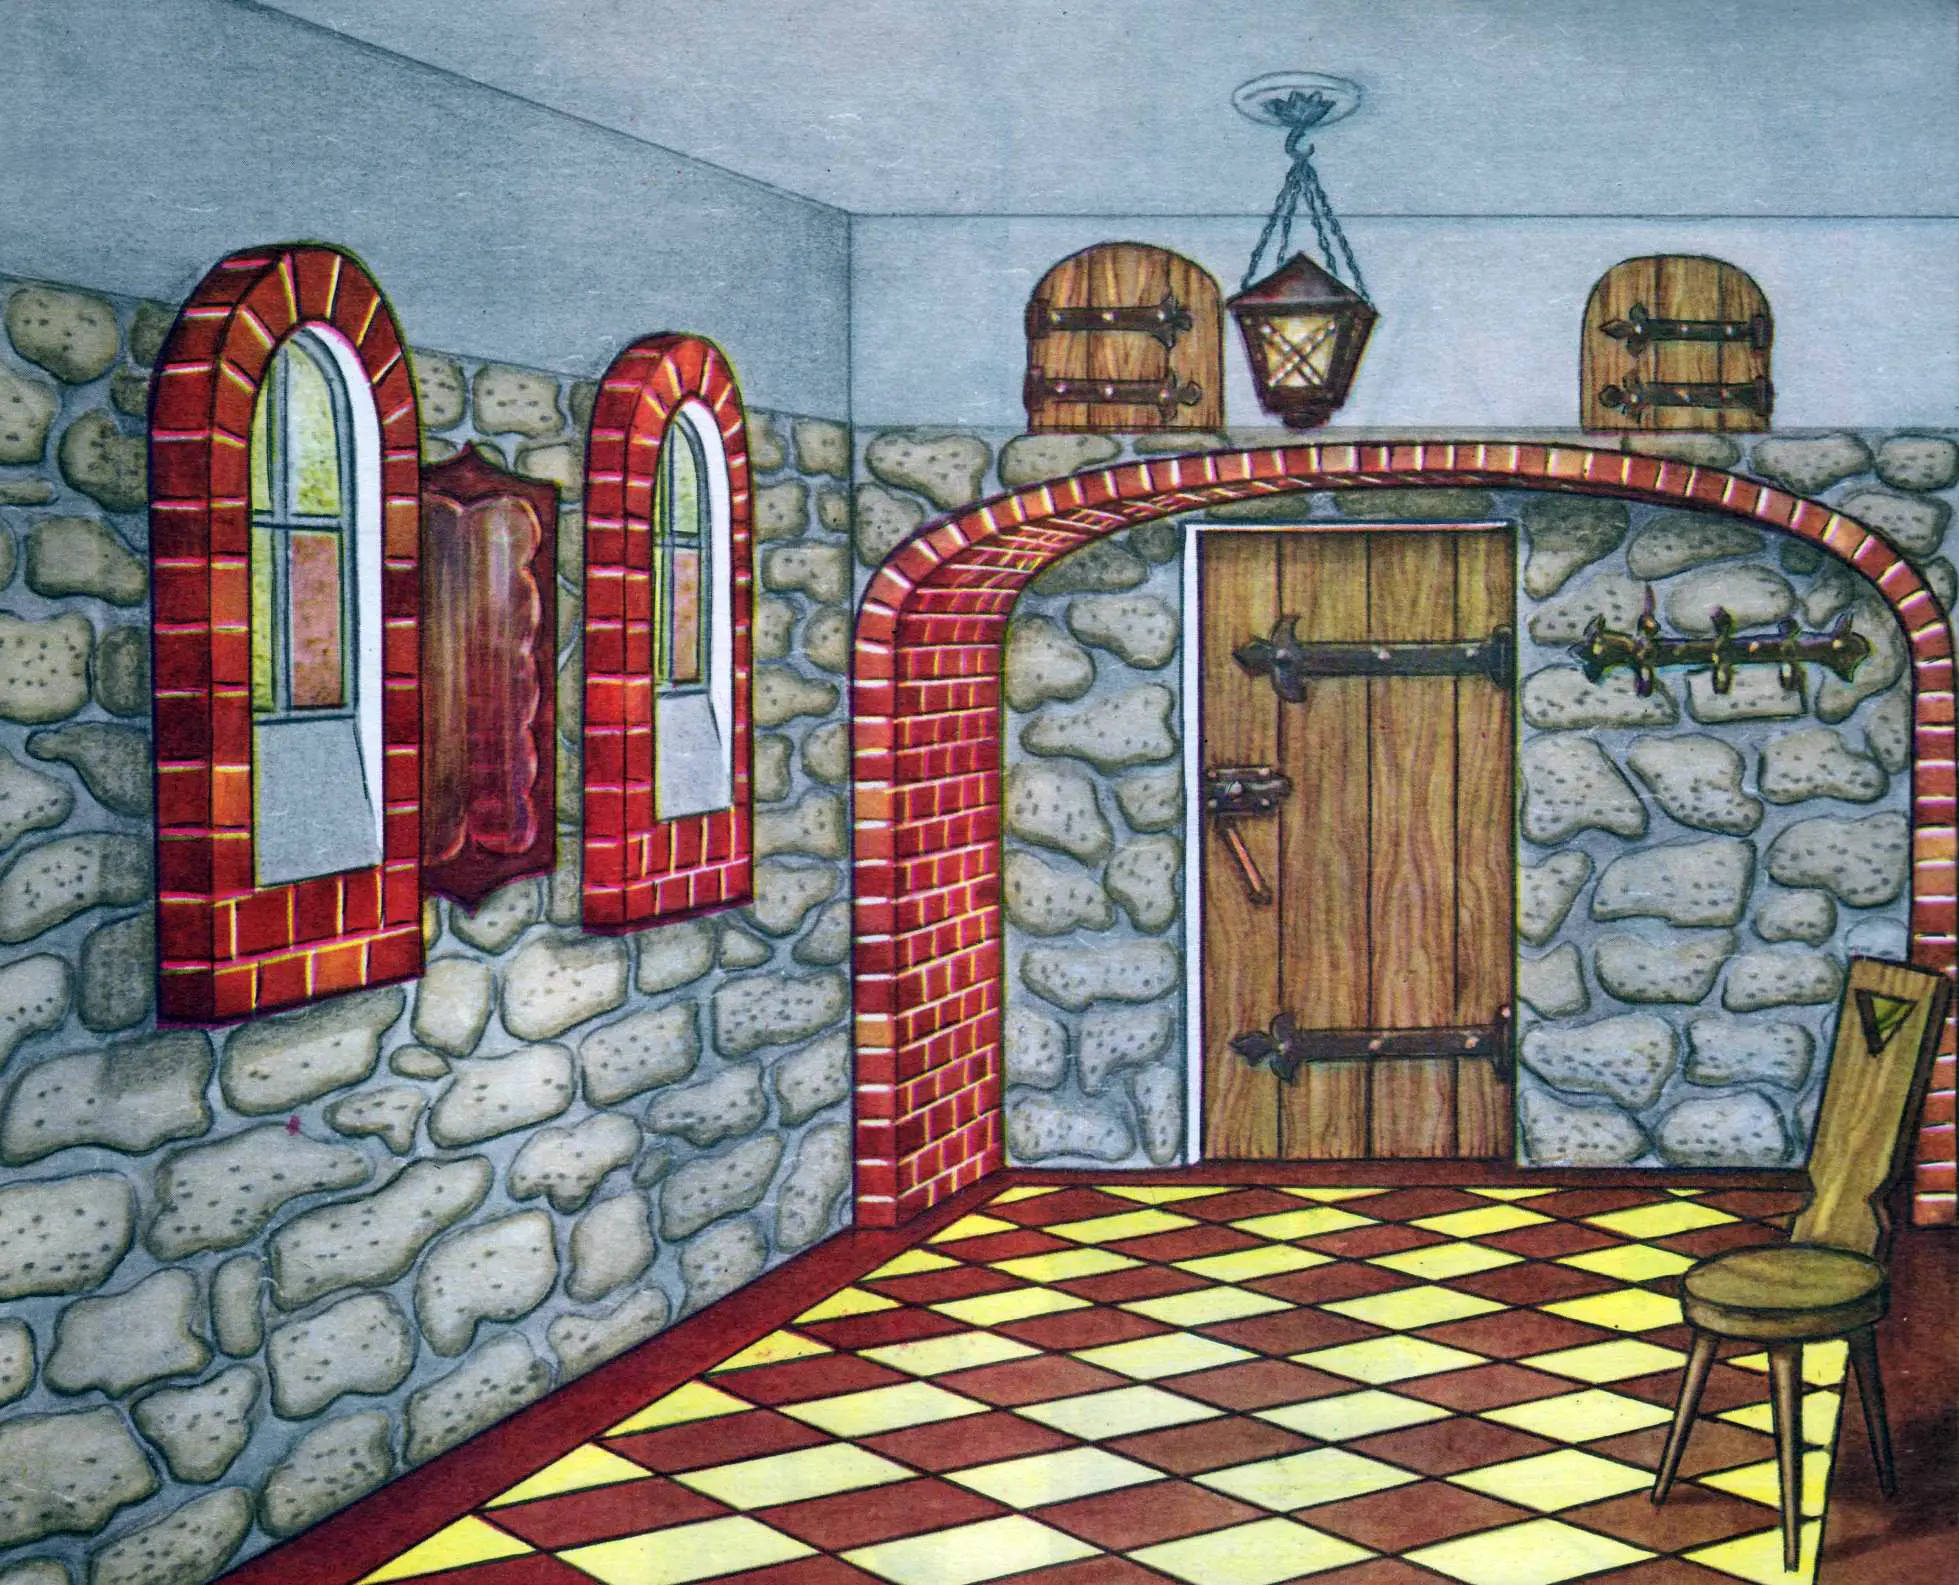
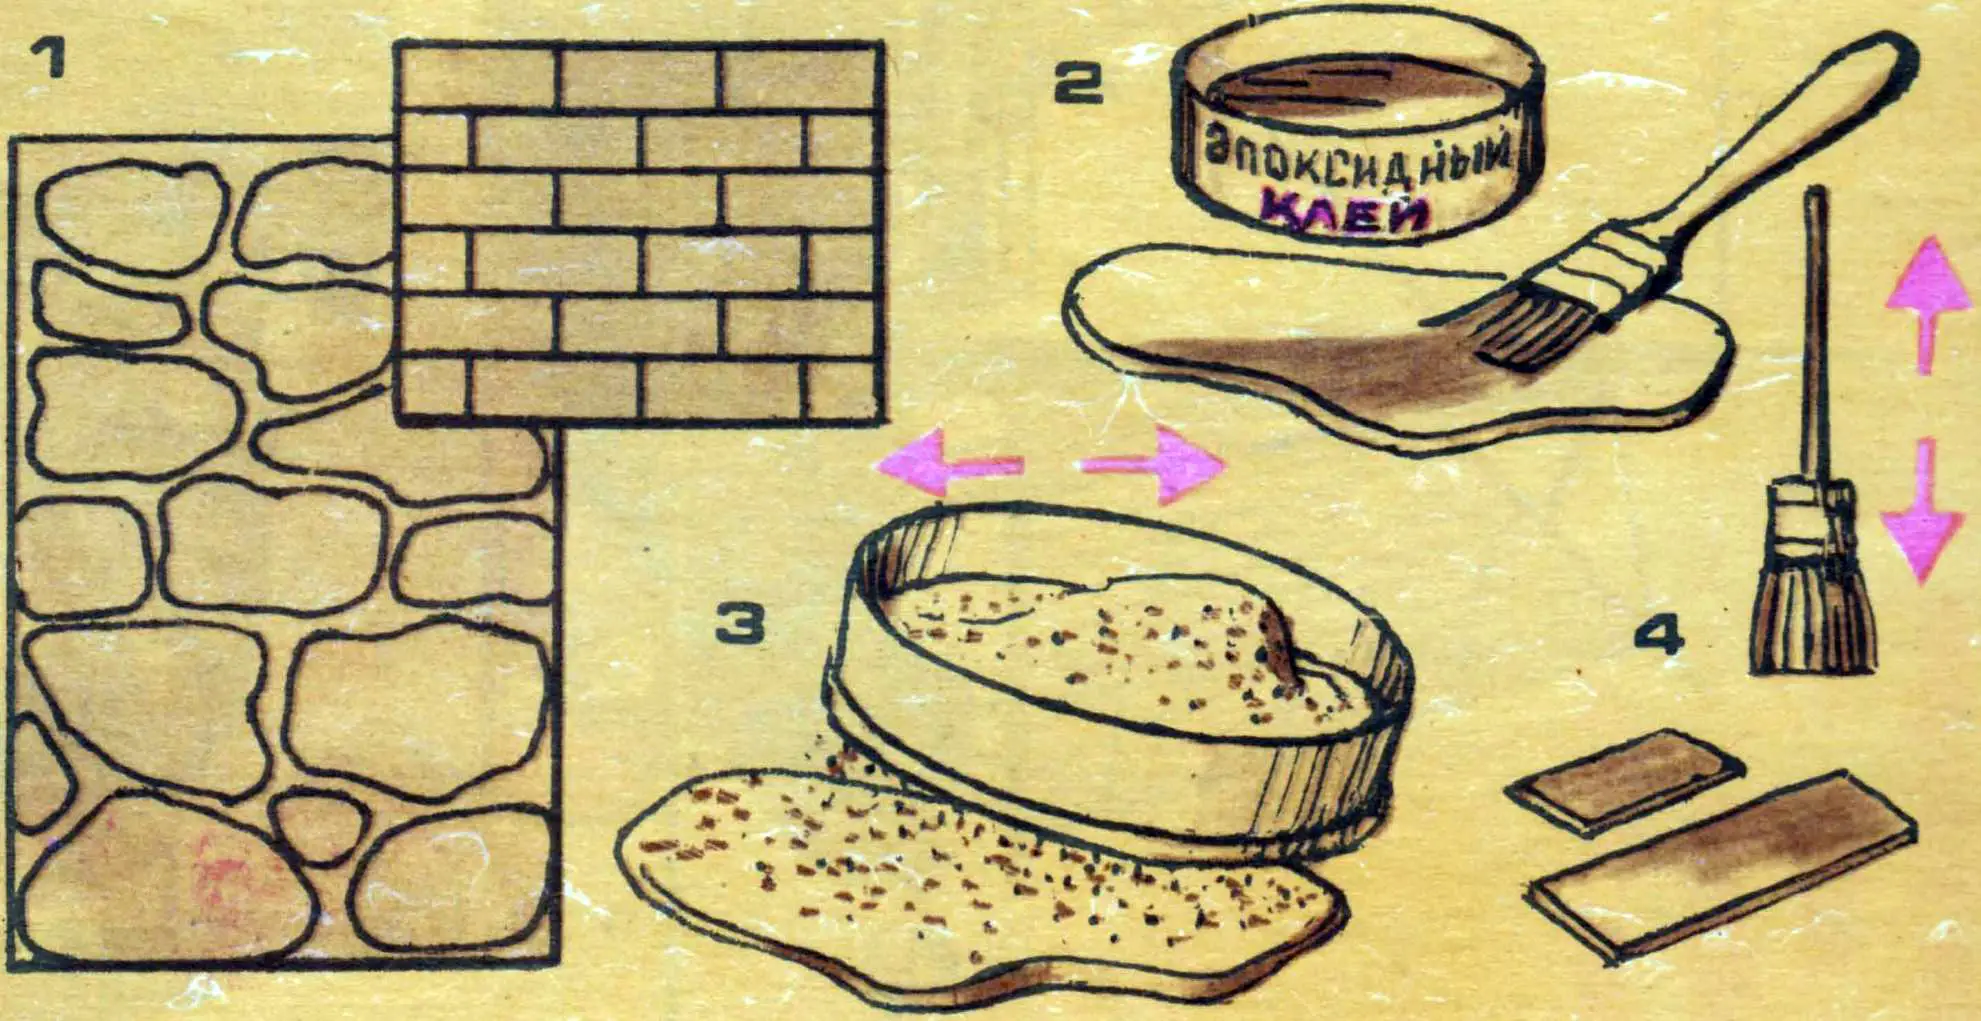
Before you is not a corner of an ancient castle, but a hallway in the most ordinary city apartment. And the “castle” interior is the work of skillful hands, invention, and the fantasy of its owner. At the same time, the home craftsman did not have to hew stones, mix cement mortar, or buy bricks. All of this is cut from thick cardboard, plywood, and hardboard (1); after that the “stones” are coated with glue (2) and seeded with dry sand (3), and the “bricks” are painted with polyvinyl acetate solutions (4).
When the most ordinary door of a typical city apartment opened before me, I found myself not in an ordinary hallway, but… Well, let’s take it in order.
From the inside, the door looked as if it had been put together from thick oak planks, darkened by time and held by blued hinge straps. Daylight streamed from two narrow windows to the right of the entrance, and behind the ribbed glass some kind of “medieval” landscape could be seen… In the pier between the windows was a mirror in a frame of chased copper.
Above the door — a brick arch supporting the ceiling; to the left — a door glazed with multicolored stained glass leading to the rooms; straight ahead — a very wide door assembled from oak planks, on the same kind of hinge straps as the entrance door, leading who knows where… And, of course, walls laid with rough stone blocks. The “castle” atmosphere was completed by lanterns with wrought frames, simple mats on the floor and here and there on the walls.
Such was the first impression of the unusual hallway of an ordinary city apartment. The hospitable host explained that the remodeling had not taken him all that much time — no more than two months, and even then the work was not done every evening. The costs required were minimal — everything was made from wood scraps, plywood offcuts, pieces of hardboard, and thick cardboard.
Well, first of all — the entrance door. The “thick oak planks” of which it consists are nothing other than plywood strips about 200 mm wide, glued to the door so that a gap of about 5 mm remains between them. After the simplest processing and light cleaning, the strips are stained (brown India ink will also do) and treated with the flame of a burner — the kind used to heat skis when applying resin, or a blowtorch. The “blued hinge straps” are also plywood. They are cut from a sheet with a fretsaw, carefully cleaned, sanded, and painted black. They are fastened to the door itself with small nails and polyvinyl acetate glue. Pick a dozen suitable plastic buttons with a convex surface — glued onto the hinges and painted black, they will create the impression of forged fastening bolts.
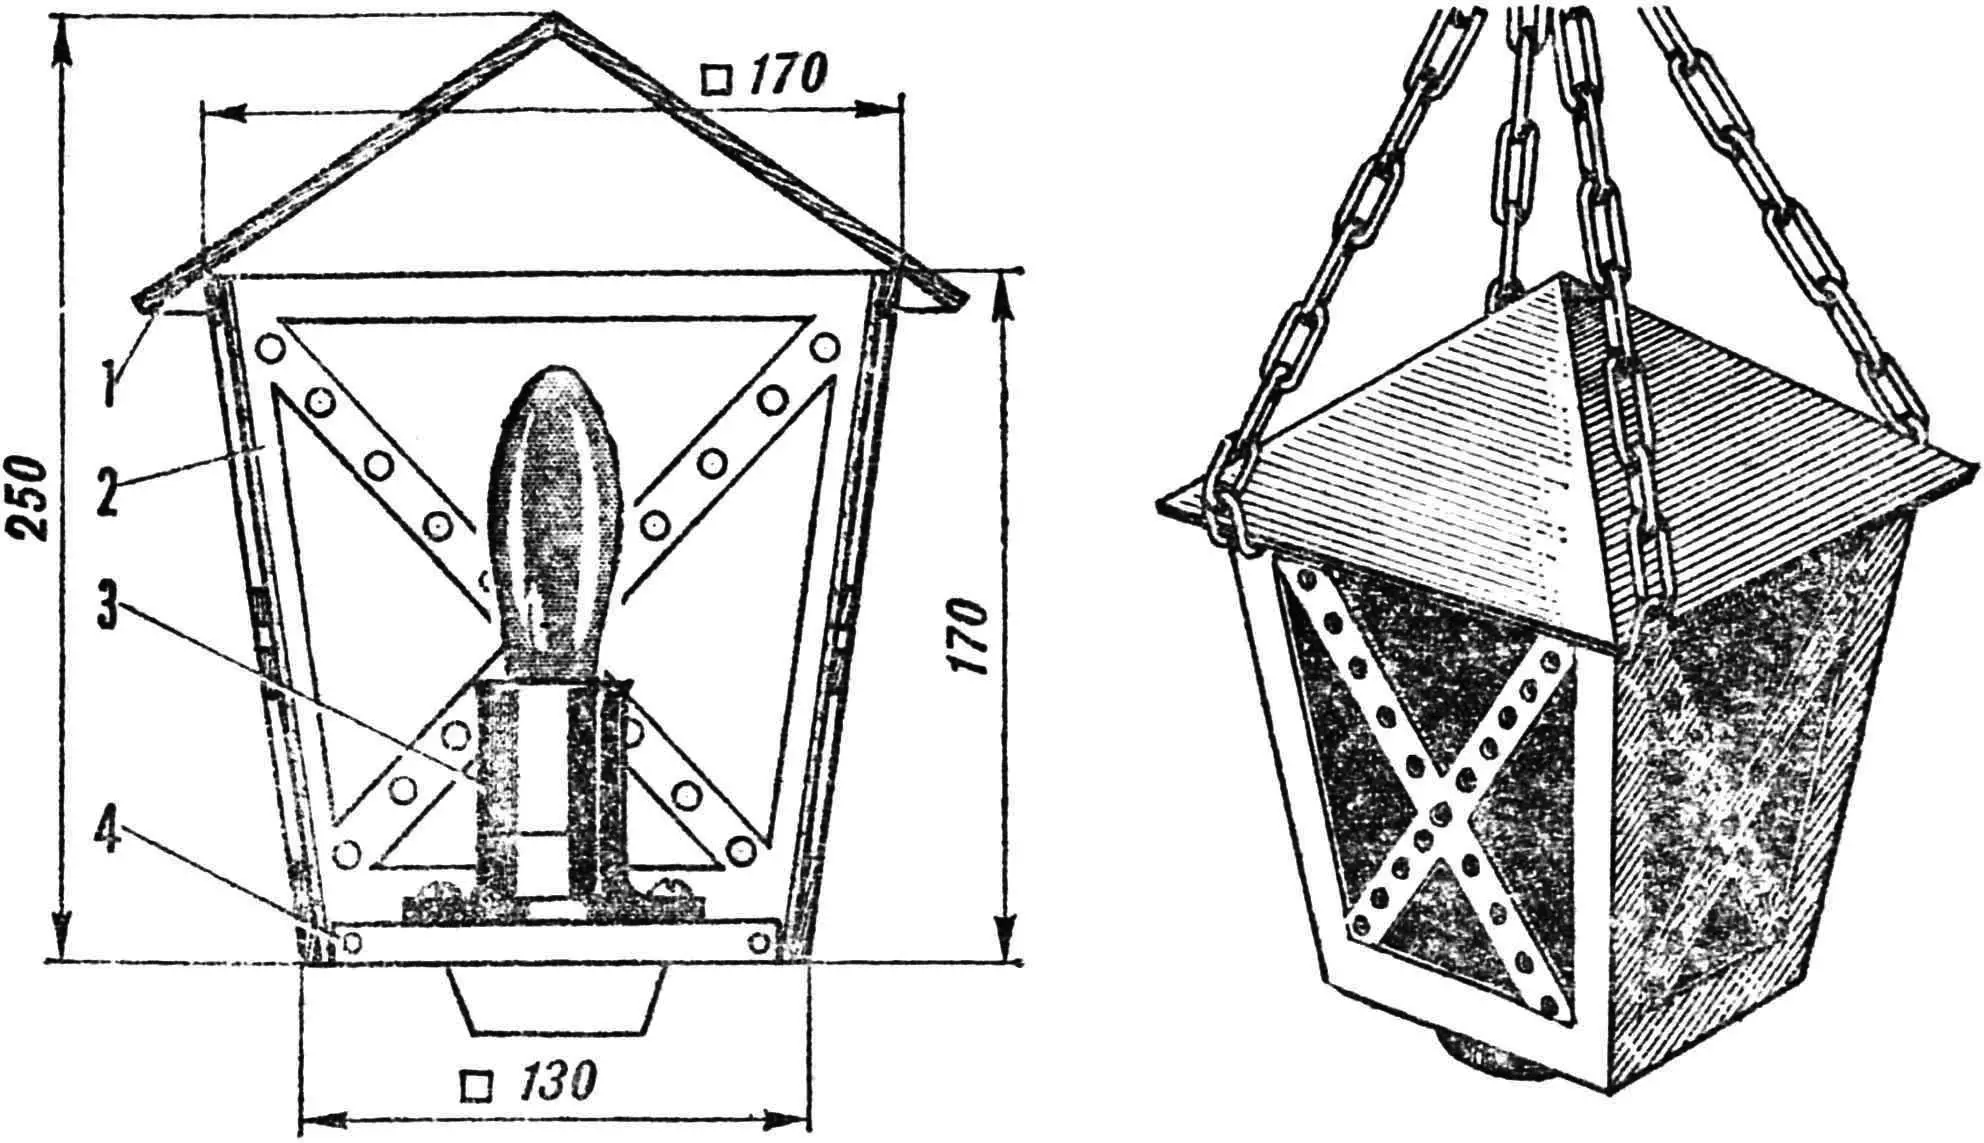
1 — cover, 2 — side panel, 3 — socket with candle-lamp, 4 — removable bottom.
The “two narrow windows on the right” turned out not to be windows at all — and would you find them in a modern hallway! They were luminaires decorated as windows, with fluorescent lamps. Making such ones is not difficult at all, and the effect is amazing. The hallway seems to expand; a sense of open space appears…
So, to work. First of all, boxes are assembled from hardboard or plywood — for assembly use wooden battens or corners and glue. The shape of the boxes can be most varied; it is only necessary that the style of the “window” match the future finish of the room. And, of course, that tubular fluorescent lamps with fittings fit freely inside each box. For the “window” it is preferable to use ribbed patterned glass. This provides better light diffusion. Besides, the landscape depicted on the luminaire’s backdrop then looks more convincing — the ribbing deceives us and creates an illusion of spatial depth. Finally the boxes are faced with “bricks” — plywood, hardboard, or even cardboard plates painted with water-based emulsion paint tinted with gouache. The joints between the “bricks” are filled and painted gray. The “window muntins” are simply varnished battens of suitable size glued directly to the glass. That, in fact, is the whole luminaire. Between two such “windows” you can place a mirror, and in the boxes of the “window” luminaires provide hidden cabinets or drawers for combs, brushes, and toiletries.
Now about the “brick arch”… This is simply a decoration of an intrusive mezzanine cupboard that catches the eye. Both the vault itself and the arch are made of battens and hardboard, filled, and painted with emulsion paint. The “brick” finish is exactly the same as on the “windows” — cardboard or plywood “bricks” glued to the corners of the wall and arch and painted in the same way.
A few words on how best to paint. A brush is not needed here. Take a newspaper, crumple it, and, using it as a pad, apply paint to the “bricks.” Keep in mind that you must not smear it — you may only “stamp” the newspaper onto the “bricks.” Mix paints of several harmonious shades — for example, orange-brown of different densities… After one shade dries, apply another, then a third… In the end the tone will turn out quite “bricklike.”
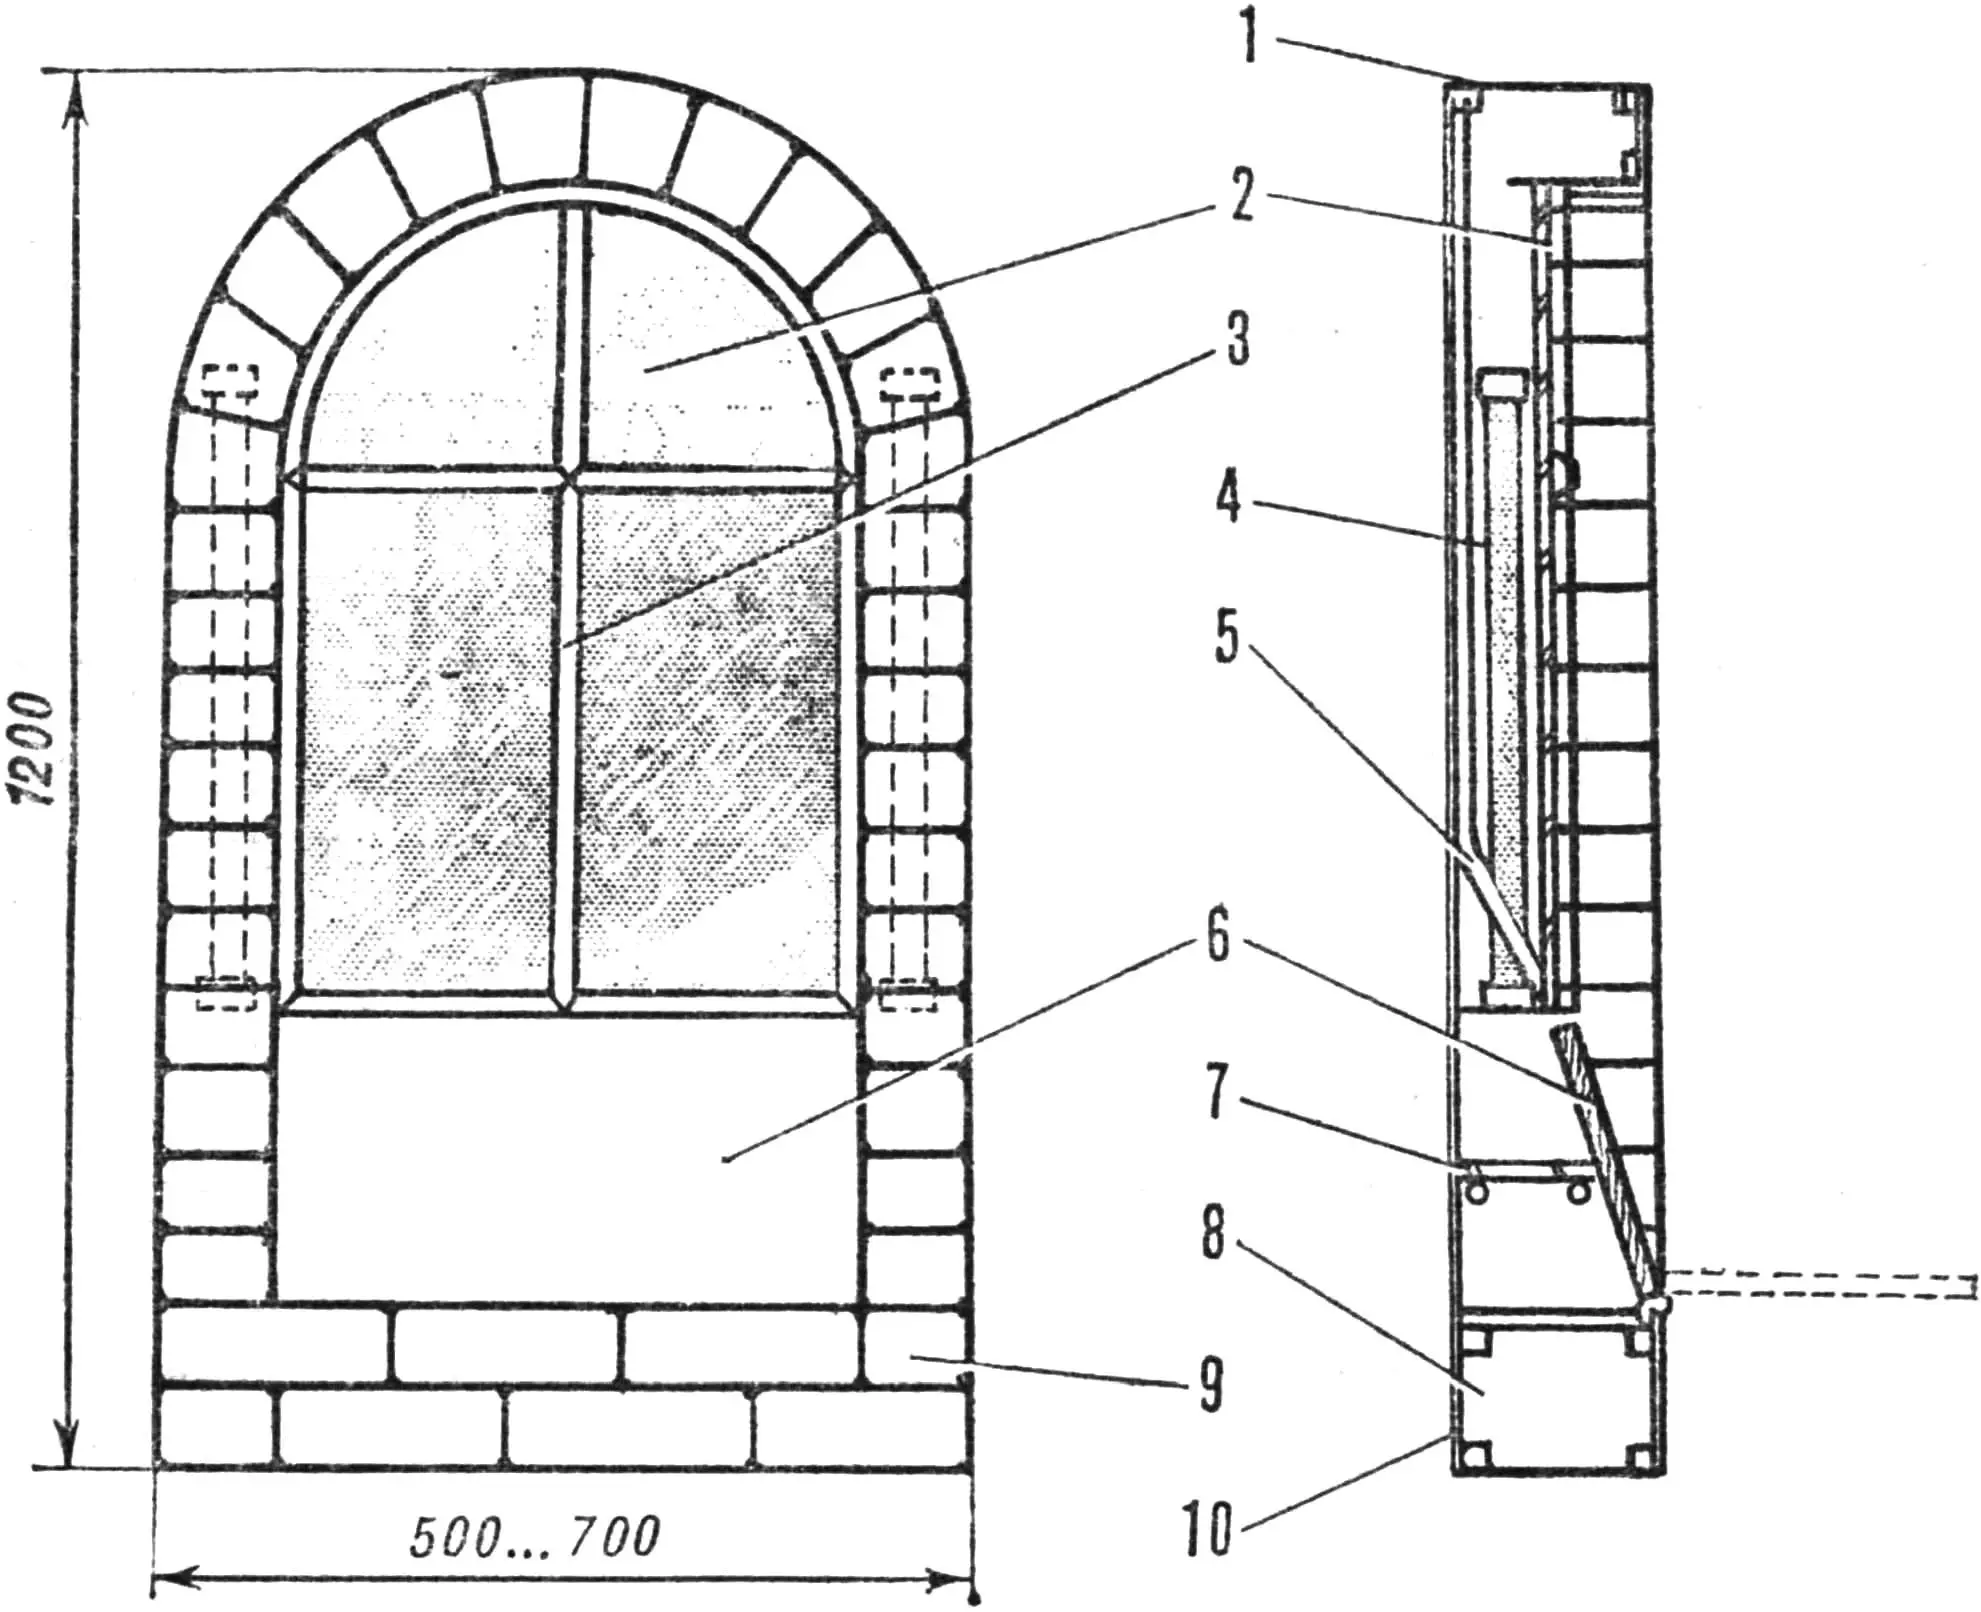
1 — box, 2 — ribbed glass, 3 — window muntin of wooden battens, 4 — fluorescent lamp, 5 — “window” backdrop with landscape, 6 — cabinet door, 7 — glass shelf, 8 — compartment for fluorescent lamp fittings, 9 — “brick” finish of the box, 10 — back wall.
A few words about the “stone walls.” You have probably guessed that the stones are the same hardboard or thick cardboard. Plywood offcuts will also do. You can turn them into stone as follows. After the plate is prepared, its surface is coated with glue (epoxy, polyvinyl acetate, or even simply silicate) and seeded with clean dry sand. It is desirable to select several grades of sand of different shade and grain size. It is best to glue the “stones” to the walls with Bustilat, then fill the joints and paint them gray in a “cement” color.
A few words about the “lanterns in wrought frames.” The simplest way is to make them from plywood 4—5 mm thick. Having sawn out four side panels, carefully sand them, glue them with a tongue joint, and close them on top with a cover assembled from four plywood triangles. The lower part of the lantern is a square cut from 10 mm plywood, on which the lamp socket is mounted. Keep in mind that the bottom must be removable; otherwise it will be impossible to replace burned-out lamps. The glass in such a lantern is best ribbed, camouflaging the bulb and improving light diffusion. It is desirable to hang the luminaire on chains. If you cannot find ready-made ones, the links can easily be bent from suitable (preferably aluminum — it deforms more easily!) wire Ø 3—4 mm. Finally both the lantern frame and the chain are painted dark brown or black.
Using our recommendations, you can fit out in “castle” retro style not only the hallway but also other rooms of the apartment — of course those in which this style is appropriate, for example a large kitchen-dining room. There you can lay a faux fireplace from similar “stones,” decorate, for example as a stove, an unsightly projection — a ventilation shaft found in some series of modern twelve-story buildings.
And what do you get, dear readers, when you finish one of the rooms of your apartment in a particular style?
If your searches and finds prove interesting, we will be glad to tell about them in the “Home Craftsmen’s Club” section.
“M-K” 7’84, I. SERGEYEV
Recommend to read
 AND THEY DON’T “DISASSEMBLE” THE CAR
Car enthusiasts and owners of agricultural machinery know first-hand how great the danger of suddenly ending up without wheels is. That is why they are ready to go to any lengths and spend... HANG FROM NAIL
Sometimes to connect two devices or articles required joint called a swivel. It provides independent rotations of one part relative to another. The swivel is often used in conjunction...
