Secondly, on the inner planes of the sidewalls of the support mounted metal corners: fit rack and pinion “shield” under the mattress.
In every corner moved the other end of which is pivotally mounted on a wooden usilitelei boss mounted on the inner side of the sidewall of the first half of the bed. At the time of sliding beds, this additional area takes on additional part podmatrasnye “shield”, secured the other end on the support pin on the side wall of the second half of the bed.
Podmatrasnye “shield”
It is made of wooden planks with gaps between them equal to the width of the straps. The “shield” it can be called because despite the apparent flexibility, it is, nevertheless, a single all-in-one design. This is achieved by the fact that all the bottom straps are connected by a rope (like clothesline), which is attached to each strap bracket with
construction spring-loaded stapler. These two enough rope they will tie the strap in a flexible but monolithic “shield”, which is not still in operation.
This design is needed instead of the shield it is because of the dividing of the bed: it is installed at a specific point in the length of fit is the number of slats you need, and the excess simply drops into the space near the backs and hang, waiting in the wings.
Finish
Since the bed is wood, all the parts can be processed like regular furniture. That is, first of all, before the Assembly they must all be thoroughly cleaned, and then polished with emery paper with gradual reduction of the grain size of the used sheets.
Further processing is carried out depending on the imagination, or simply the wishes of the contractor, and also features interior around made bed.
If it’s a children’s room with bright colored furniture and the bed can be decorated to match the already
existing objects painted with enamel or oil paint of the appropriate colors.
In the case when the bed is expected to be installed next to lacquered furniture in the interior, and its elements better lacquered. Here are possible options: whether to choose light (transparent) lacquer furniture, or dark, or to use the stain of appropriate shades.
Varnishing is performed in several layers to obtain a deep effective reflectivity of the surface. The first coat is best applied diluted varnish. This layer is applied by cloth pad, carefully rubbing them with lacquer so that it is well absorbed in the tree structure. After application of each subsequent layer can be applied with a soft brush, should be allowed to dry out well the painted surface.
After the Assembly there will be only correct a random error or if you wish to paint the product completely.
Assembly
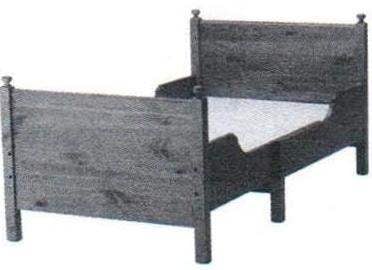
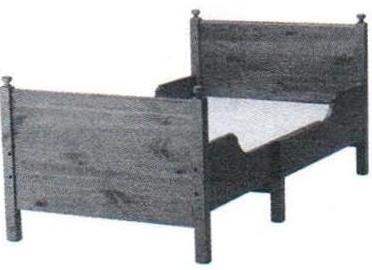
Thus prepared elements may be assembled in different sequences, since the two halves of the bed are practically independent, and their Assembly can be performed separately: first one half, then the other.
However, you can start with the connection of the backrest with studs – because the other elements will join them. This applies primarily to the first (reference) half of the bed. This sequence of action seems simple: first, assembled to the uprights of the backrest are attached to the sidewall, they in turn, legs, and the last (the final element) to the crossmember. The latter, as already mentioned, can be attached to the legs of two ways: either butt with plug-in thorns, or the pad on the back side of the legs – just screws. It is only necessary to consider that in advance when you know the method of attachment, measured the required length of the cross member.
In the Assembly of this bed part includes setting on the side (on the inner planes, closer to the back) broadening of the wooden bosses for auxiliary area, and its swivel mounting to them (respectively on both sidewalls).
Here also after connection (on the screws wpoty backs) with racks lining the sidewalls. But first to the inner planes should attach the base bracket under the rack “the shield” and locking pin (furniture screw or screw) under the auxiliary area from the first half of the bed, respectively Vivere seats and their installation.
After that the sides can be fastened to the posts, but not outside as it is on the first side of the bed and to the inner side, given the subsequent “dvigenie” them between the sidewalls of the first half of the bed.
The final stage – assembling lattice “shield”of height. On a flat surface (e.g. table) are sequentially stacked slats, one of which, as the control jig is set equal to period.
Then through the laid number are routed from the top two ropes, with a small indentation from the ends of the rails. Remains gently “pin” the rope in the middle of each rail brackets construction staples, flip the resulting “shield” the rope down and lay on shifted half; an unusual bed ready, you can lay.
B. VLADIMIROV