When executed carefully, such a table, despite its rather simple construction, can decorate not only a country house or dacha, but also a city apartment. Especially since now many home craftsmen, making furniture with their own hands, strive to move away from the monotony of industrial samples, for example, when decorating a dining corner in the kitchen.
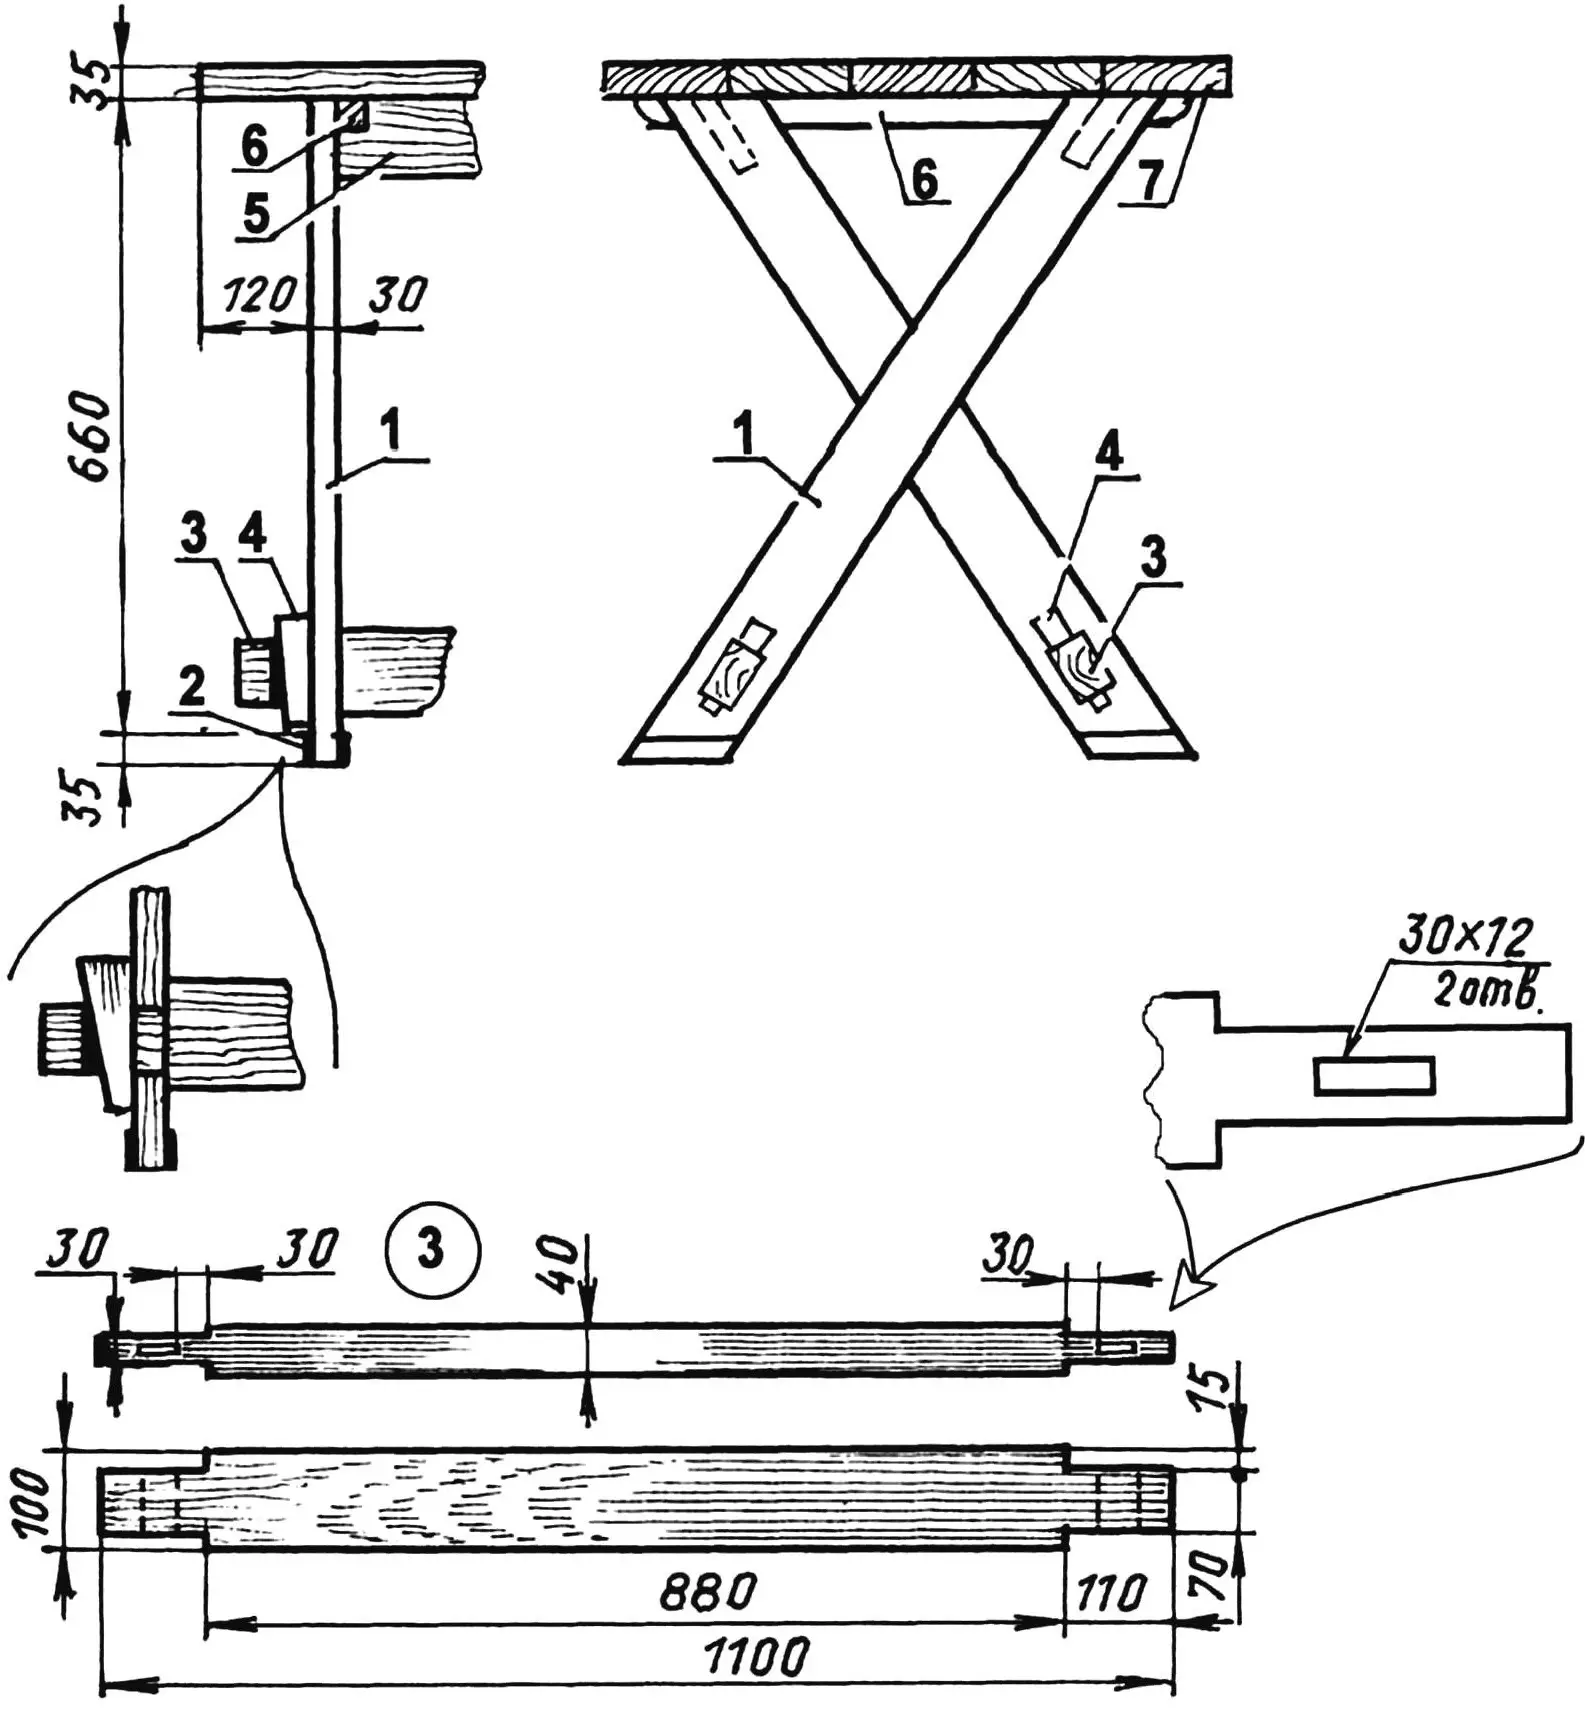
Stylized plank table:
1 — cross-shaped support-legs (board 90×30, 4 pcs.); 2 — support widening cheeks; 3 — lower brace (board 100×40); 4 — brace board wedge; 5 — upper brace (board 130×40); 6 — tabletop crosspiece (bar 40×40, 2 pcs.); 7 — tabletop (board s35)
The feature of the considered option is that it can be executed differently, in accordance with the master’s wishes, since it provides the opportunity to solve both the tabletop and the under-table part in one’s own way: with less or greater decorativeness and degree of stability, as well as the “capital” nature of the assembly itself, depending on the specific purpose of the table — as a permanent interior item or a collapsible transportable one (say, to the dacha for the summer period).
TABLETOP
The simplest and most accessible, but at the same time the most aesthetically effective option for the tabletop execution is the assembled panel type. Smoothly planed, carefully sanded boards up to 35 mm thick are joined into a tightly fitted panel based on two cross bars with a section of 40×40 mm, with the latter fastened with nails (or screws), driven from the side of the bars so that the tips do not protrude to the front side of the tabletop.
In case another solution is chosen and the tabletop will be a furniture panel, a sheet of thick plywood or simply chipboard — it will still be necessary to fasten the mentioned cross bars from below, as they are also a connecting element between the tabletop and the supporting under-table structure.
UNDER-TABLE STRUCTURE
A feature of the considered table construction is also the variability of the solution of its supporting part. There are no legs here in their traditional modern understanding (which, by the way, simplifies the construction). Their role is performed by X-shaped or panel supports (depending on the performer’s preference).
The first option is made from boards with a section of 90×30 mm. At the intersection points of each pair of supports, both boards have interlocking half-lap joints. In the non-collapsible version, these places are additionally fastened with screws.

In the upper part, the X-supports are fastened to the cross bars of the tabletop (also with screws or furniture screws with wing nuts — in the collapsible version). At these same points, the brace boards of the under-table structure join with the cross bars, having corresponding cutouts for the bars; fastening — in the form of screws screwed through the X-support boards. The same pair of brace boards is also at the bottom of the X-supports, fastening to which is carried out thanks to elongated tenons with holes passing through the corresponding windows in the support boards and fixed with wooden wedges. The supports themselves in the lower part can have widening cheeks made of overlay strips.
In the collapsible version, instead of the upper brace boards, one central one can be used, connecting the intersection points of the supports (through the corresponding windows in them), with the same wedge fastening as in the lower part.
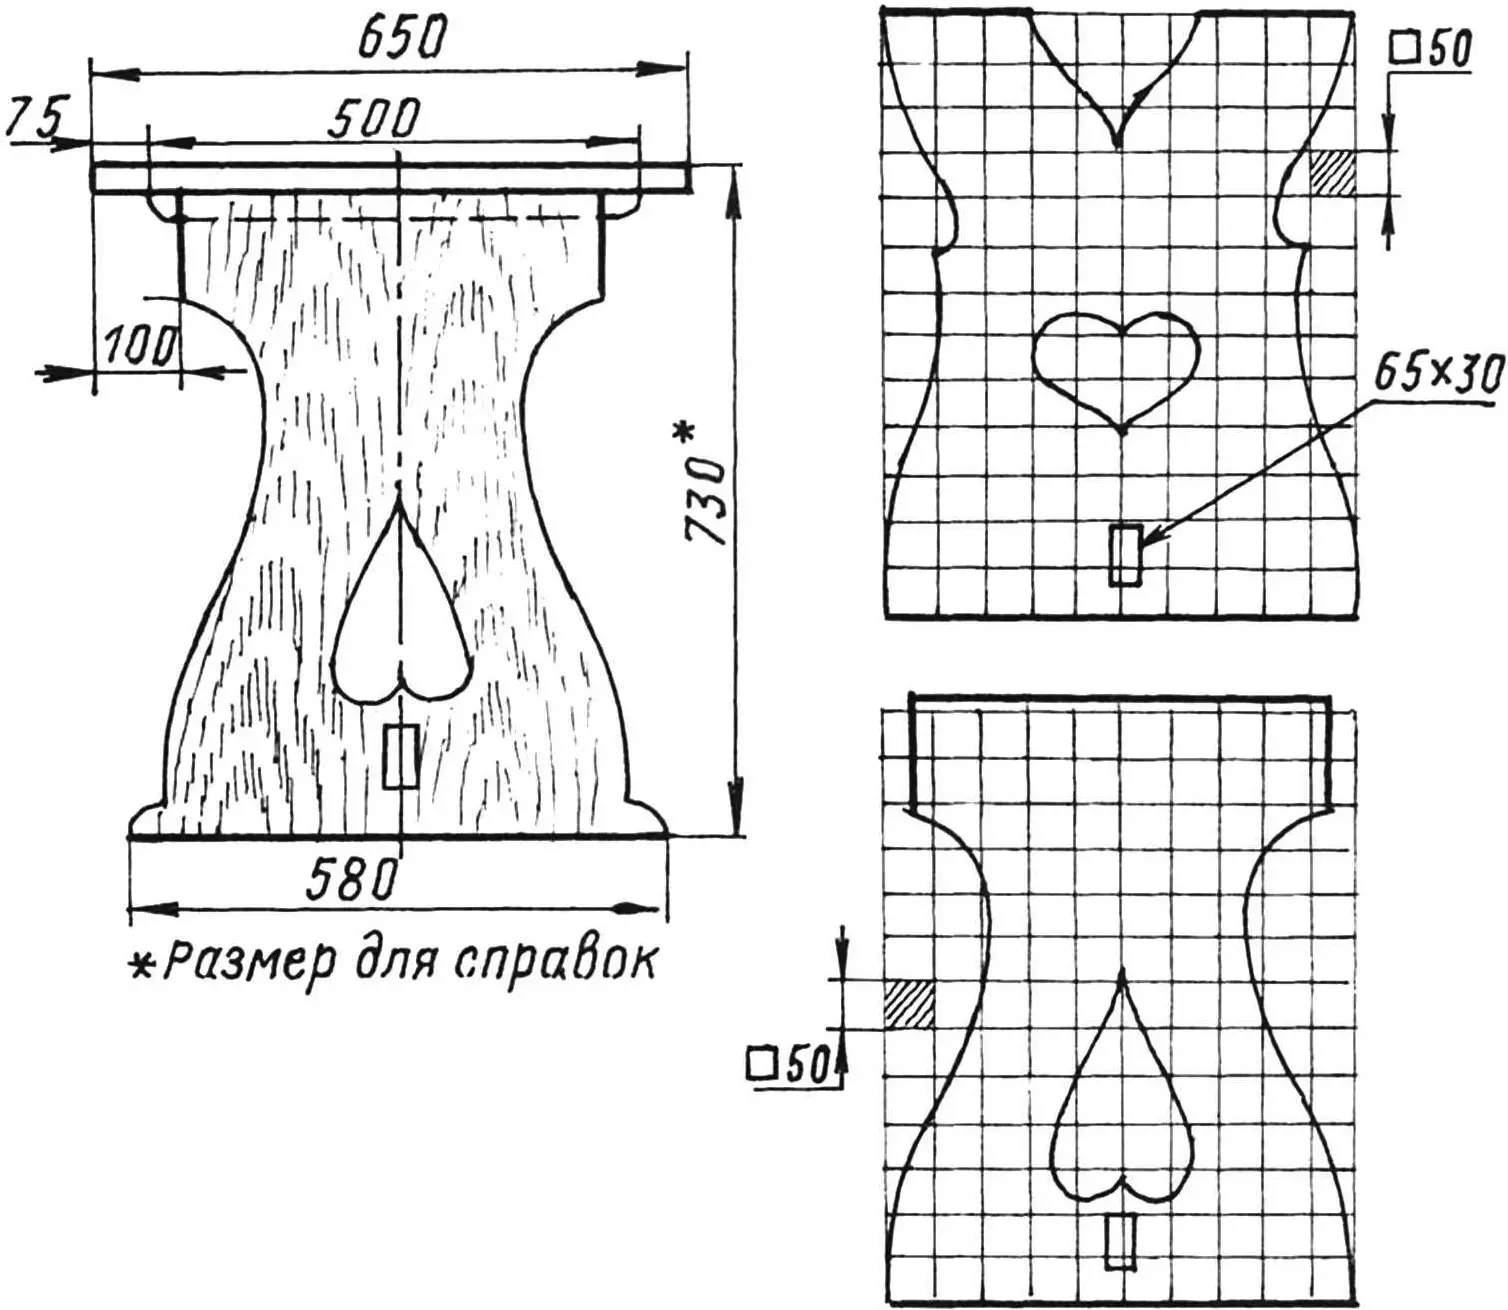
As already mentioned, the supporting part of the table can also be panel-type, decorated with figured cutouts, the shape of which will depend on the performer’s imagination (the cutouts also somewhat lighten the construction). The material can be ready-made furniture panels or chipboard, as well as plank panels joined similarly to the tabletop panel.
Panel supports are also fastened to the cross bars of the tabletop (also with screws or furniture screws with wing nuts) and have their own brace boards. In this case, two are sufficient: one each in the central and lower parts, with the same wedge fastening.
FINISHING
It can be performed after the final assembly, but it’s better to take care of it immediately after preparing all the parts: it’s more convenient, and the result will be of higher quality. After all, industrial samples are now often supplied in sets of ready-made parts with finished finishing of each (and even carefully packaged so as not to damage the surface).
Blanks from furniture panels practically do not require refinement, except for gluing or painting the sawn edges. But parts made of chipboard, not only for aesthetic but also environmental reasons, must be painted in several layers with enamel or nitro paints.
Especially effective can be the finishing of a table made of purely plank elements — both the tabletop and the under-table structure. Wood often has a natural beautiful texture, which sometimes is enough to just slightly emphasize with careful sanding, in another case — to enhance with stain treatment.
The final finishing in this case involves simple rubbing with any available wax paste for furniture or careful polishing followed by varnish coating (transparent or dark, as chosen) in several layers with careful intermediate drying and sanding.
Recommend to read
 … CART LIFE
Twenty-first century, of course, not age of animal (horse) transport. However, for those who live in rural areas where there are no gas stations for many miles around, this... Vehicle microclimate
Many motorists, especially owners of domestic cars, have experienced all the “joys” of winter operation of their beloved “steeds” firsthand. A particular “pleasure” is bringing the...
