
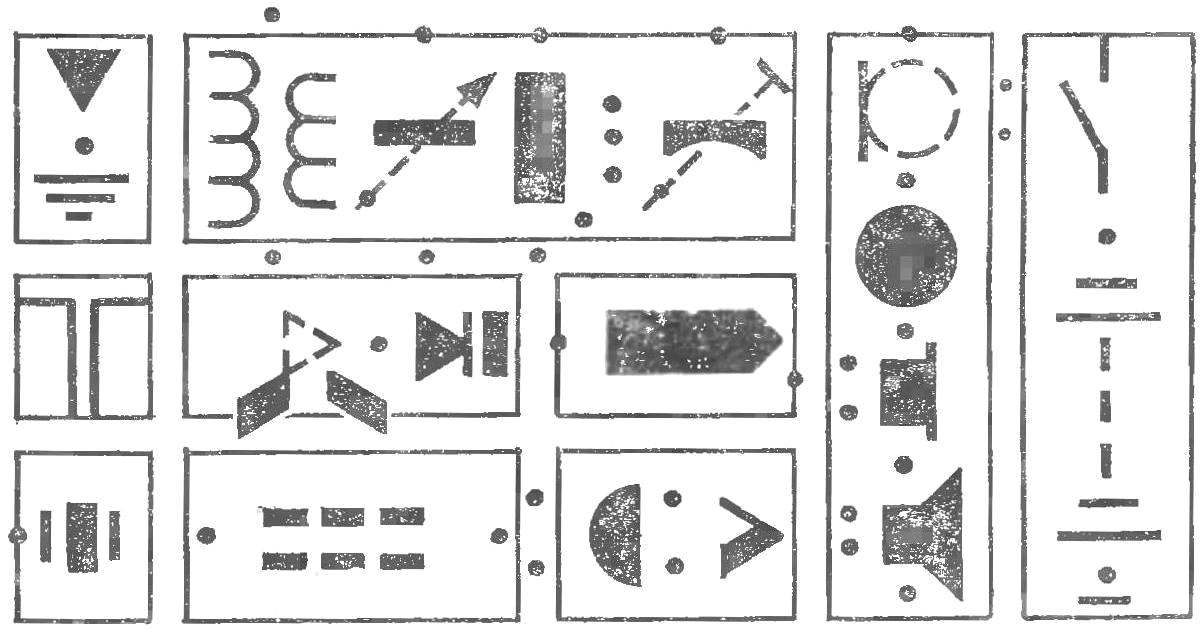
 Draw the circuit diagram, weathering adopted the proportionality of graphic symbols electronic elements, it is not as simple as it might seem at first. Great help here can have a stencil plate of thin transparent material with holes and slots corresponding in form to symbols of parts adopted in the Unified system for design documentation (ESKD). This stencil need not only for Amateurs but also professionals working in this field of technology.
Stencil is easy to do yourself with the help of simple devices. On a plywood Board with thickness of 12 mm and size 200 250 mm fasten the edges perpendicular to each other two lines of length 200 and 250 mm. Short press the drawing and the blank stencil to which is best suited plastic WINEPROS thickness 0.3—0.5 mm, but you can use transparent plexiglass.
Before proceeding to the manufacture of the stencil, prepare the glue and indelible ink. The adhesive is needed to correct errors, eliminate cracks. In 100 g of dichloroethane to dissolve shavings of Plexiglas and the resulting emulsion is poured into two bottles. In one of them add the paste of black or blue ballpoint pens. The solution should not be viscous, so they can draw a normal spring.
The figure below shows the stencil in 1:1 scale. The marking of the workpiece is the most important operation in its manufacture. Shilom plan shallow wells — the future centres of the circles, and then, razor-sharp tip of a knife while the contours of the drawing: horizontal, vertical, and finally all other lines.
The width of the slits for the pencil is not less than 0.2 mm, for ball-point pen — 0.8 mm. Respectively, and the sizes of all the shapes on the stencil, designed by ballpoint pen, it is necessary to increase by 0.8 mm.

Stencil for drawing circuit diagrams.
Parallel risks is applied on the billet by using a simple device: two cutter made from a saw blade, fasten with each other on the width of the parallel lines.
Between the workpiece and the drawing lay the black paper. On its background are clearly visible all the lines and dots scratched on the surface of the workpiece. When all errors are corrected, the paper changed to the blackened thin cardboard. Now the outlines are cut with a sharp knife. In conclusion, the stencil is carefully cut, leaving a margin of 3-5 mm.
If you find that certain lines are cut to the end, the operation is repeated, placing a blank piece of rubber. The slits in this case it is better to do it with a piece of safety razor blade.
Round holes are cut with a compass on metal. One leg of the tool is sharpened as the cutter and work them alternately on both sides of the workpiece. The stencil, designed by a ballpoint pen, all radii should be increased by 0.4 mm. the Small hole puncture: a pencil, awl, ballpoint — ostrozatochennymi needle files. Burrs are cut with a razor blade.
Tools for stencil production run on the piece of leather the GOI paste.
M. PAVLOV, Lyubertsy, Moscow region
Recommend to read
 FIGHTING FROM MURMANSK
This "bouzoukia" developed in the aeromodelling circle regional station of young technicians in the city of Murmansk. Speaking with her at the regional competitions, an eighth-grader...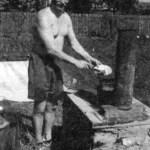 THE GARDENER’S STOVE
In rural estate-type houses, and even in simple country cottages, of which there are countless numbers today, it's unlikely to get by without some kind of stove — Russian, Dutch, or a...
