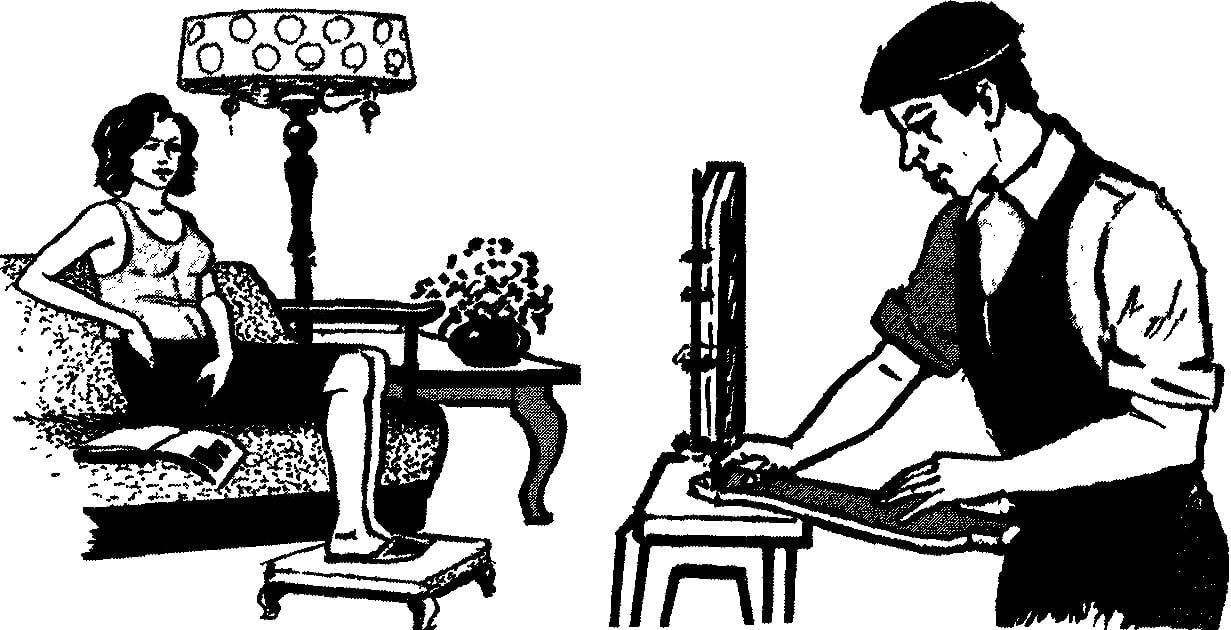
 The diversity of forms imparted to the curved legs of furniture can be applied to various modern types of furniture, and not just on the products vintage style. While the home worker is the most attractive is a simple model notched legs homemade furniture offered by the French magazine “System D”.
 Methods of making curved supports that are described in this article are not a repetition of those which are commonly used in the furniture factories — they are more affordable and are perfect for small groups of furniture workshops and individual craftsmen.
Figure 2 shows three example types of legs, the most easy to manufacture and profiling: for office, stand for trinkets and soft multi-purpose benches. Next to them is given shadowy outlines of the bars from which they are derived. Thanks to the ingenious method of cutting such shaped support furniture require less effort and material waste is thus no more than in the manufacture of more complex models.
Use tape or a regular bow saw or jigsaw makes a relatively simple, providing this kind of curves: the curved legs, the simplest form can be cut rough and finished trim manually, and even faster than on the machine.
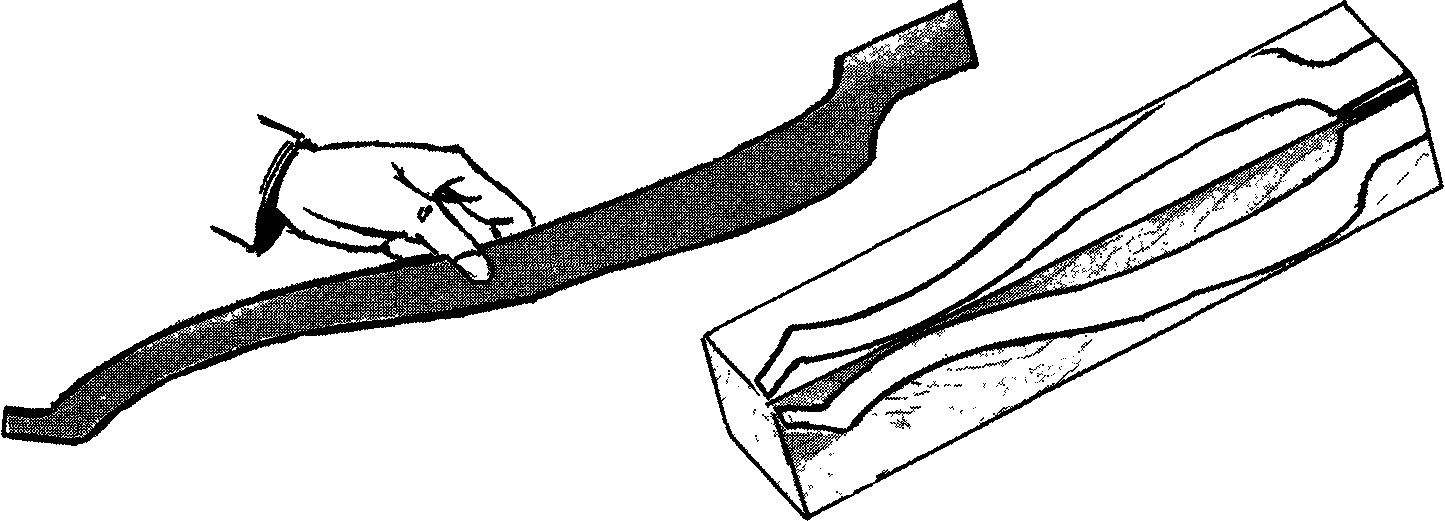
Fig. 1. The pattern for the bent legs of the table (plywood, s10) and using it on the workpiece.
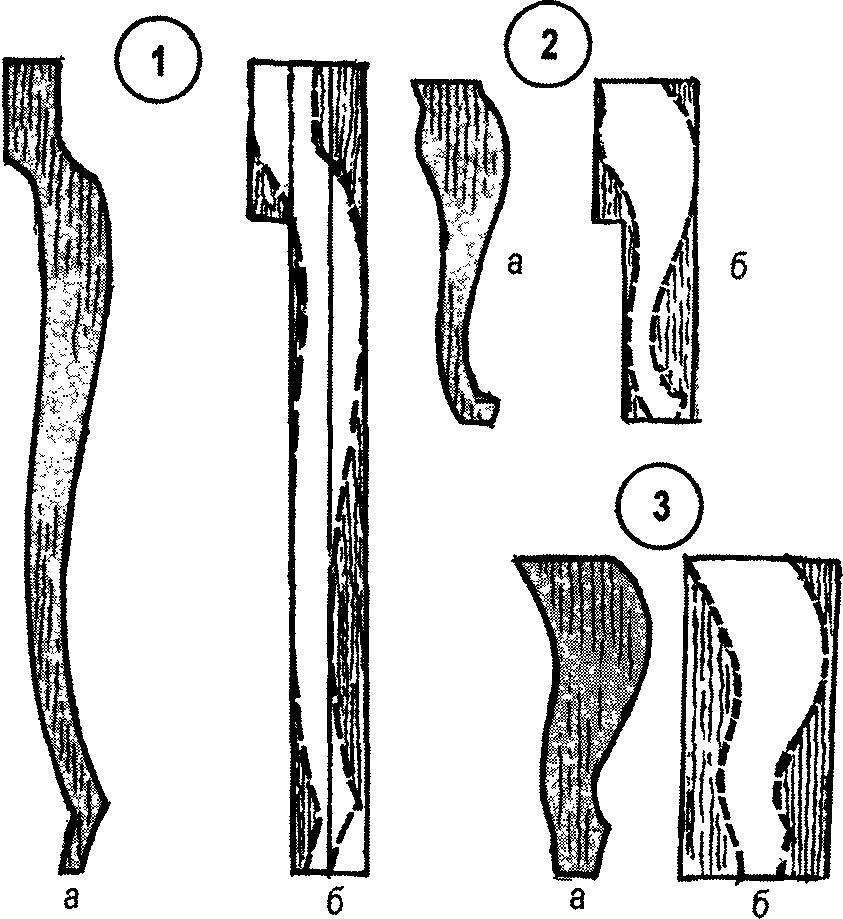
Fig. 2. Options curved furniture legs (a) and the form of blanks for their production (b):
1—high leg for the Bureau; 2—middle leg for the stand, bedside tables, 3 small feet for the bench.
Blank
As some parts of the legs are very thin, you need to use a dense and durable wood, such as maple or birch. These two breeds are particularly suitable because if you finish it they give the possibility to successfully imitate walnut or mahogany.
The first step is harvesting of the bar of sufficient size, so that it was possible to cut the whole leg of the corresponding profile. So it can be “composite” — glued boards are 35 mm thick.
The rallying in this plane the boards should be treated with a jointer and precisely customized. To apply adhesive, hot curing (for example, PVA). Ensure that the clamps are clamped boards evenly along the entire length. Allow the glue to cure fully before the next operation.
In the case of rallying the blanks for the legs, which must withstand considerable loads, it is very important to use a glue of high quality.
To complete the procurement template is used, which facilitates the tracing of the contour of the leg on its edge. You must take into account that the contour should be applied on two adjacent faces of the workpiece bulges to each other.
While drying the glue on the workpiece, make a template (such as that shown in figure 1) from a piece of plywood with a thickness of 10 mm. First, cut out a strip of plywood of the required length and width. Intended type of legs you can draw on it (the basic contours of the three models of legs shown in the picture with the grid) However, to achieve maximum accuracy of fold lines, the original template must be drawn on a piece of hard cardboard, then contour cut and applied on the plywood that will be cut along the contour pattern (each, of course, is only one example of furniture).
The curve line from the left pattern line is the back side of the leg; line right in the same figure — front face.
Mark the template profile of the workpiece. Carefully check the alignment of the contours on the faces of the bar (without such verification before the beginning of cutting the workpiece may be damaged). Two front side legs most noticeable in the finished product, but certain points can be traced all four sides of the legs, especially when you look along the length of the table.
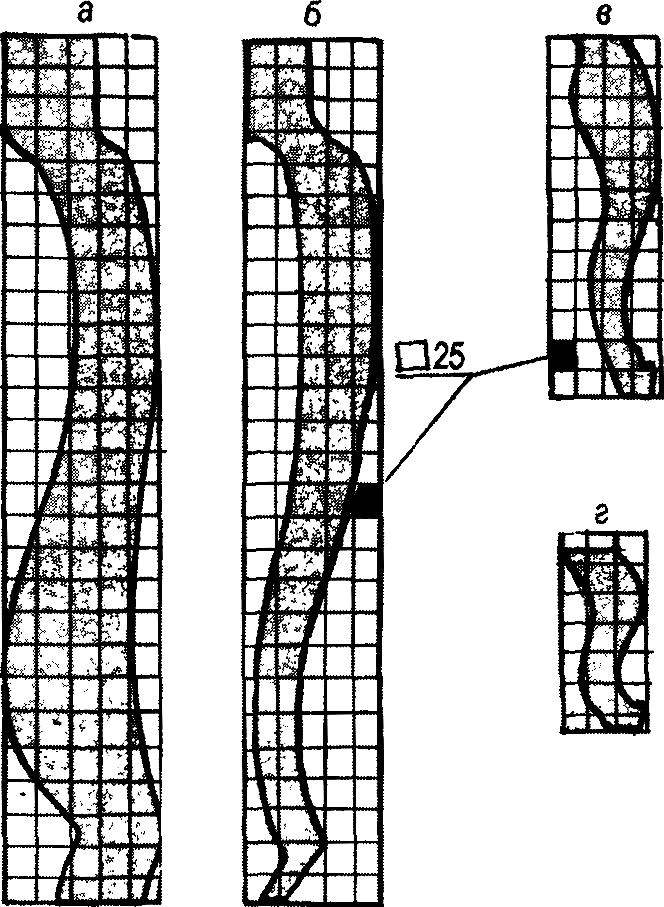
Fig. 3. The main outlines of the templates on the grid:
and for the legs of heavy furniture, b — for easy table — to stand, Mr. to the bench.
Sawing
In order to cut a curved profile on a workpiece of this thickness, it is better to use a jigsaw.
Scrape off the glue that might come out of the joints under pressure when gluing boards into the workpiece, and carefully scrub the face. When sawing strictly adhere to the target circuit and not push the workpiece on the saw because it can cause overheating and jamming of the saw blade.
After one part is cut, place the old place the cut piece and seal the two parts one or two pins, placing them so that the saw blade could not hurt during the second trim face. The installation on the old place cut piece gives a great support plane for subsequent cuts. Nevertheless, this support is not politicalparty — if the end of one part of the workpiece is slightly lifted during operation of the saw, this can cause jamming of the web and pin it down.
Once sawn curves of small radius, proceed slowly enough haste leads to violation of accuracy of cut.
Revision of the workpiece
Protruding corners on the legs of the obtained sample is usually preserved corners in the upper part of curve is sometimes rounded. All roughness after sawing should be wiped with a polishing cloth or a well-sharpened scraper (scraper). The last tool is particularly recommended for long curved surfaces; to avoid jamming of the cutter it should be adjusted so as to take in every movement as thin as possible chips.
In conclusion, treat all curvilinear profiles on all faces — uncorrected defects complicate the final finish.
If the leg is intended for the table, the plane of the end face in its upper part must be aligned at right angles to the vertical faces, and there should be cutouts for connections to support elements of the cover.
Options — any
The models legs are shown in the figures, are marked, cut and finished the same way, approximately the same method as described above. On the legs the outer ledge can be a rounded Top, curved legs mounted support part, in which are cut the grooves for Assembly with the other elements of furniture This model is very suitable for a base for a radio or banquettes by the fireplace, But the use of such legs is not limited to only these types of furniture, it can be longer or shorter, have a different shape of the upper parts; this model can be applied in various cases.
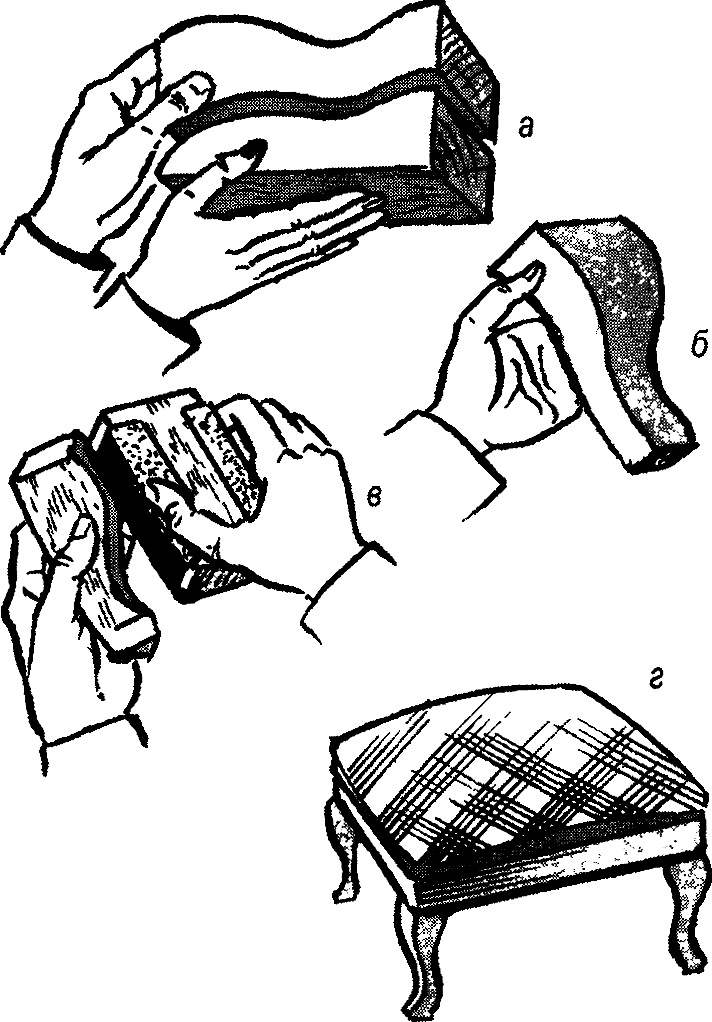
Fig. 4. Manufacturer of small legs (simplified version):
a — cut block; b — the resulting billet legs, in the manual revision blanks legs — skin on the bar, g — ready bench with curved legs.
Short leg is shown in figure 4, very suitable for low stools or benches. Sample simple legs that we see in the figure, does not belong, strictly speaking, to the old style, but its silhouette consists of the same curves, which allows to attribute this specimen to the same category of curved legs For the layout of this model do not even need a template: its outline is so simple and the size is so small that it can be drawn, put it on the blank piece of cardboard with a rough profile, However, so the shorter leg is sometimes difficult to cut due to the uneven texture of the wood.
Before sawing a workpiece, it is necessary to ensure that all of its faces are at right angles to each other — this is necessary to ensure reliable support while sawing.
Short leg is usually attached a long screw or plug-in is installed on a round tenon (dowel), spreading the glue contact surfaces.
Recommend to read
 WITHOUT THEM
Usually, to make a loop on the wire to connect to the switch or outlet that electricians use pliers. Two pins Ø 4 mm, installed in front of the handle of a screwdriver, can successfully... SHELF-RING
Indeed, such an unusual O-shaped shelves will not find in stores. It can be made only on their own, because it is made from... old table. Yes, the same round, which was an obstacle in...
