
 In many apartments you can find small “secret” and rarely used by tenants. These include, in particular, include space for doors. At the same time, they can be used for storage of various “trifles” and even books. In my humble study also found a similar area, where well placed shelving. His sketch was hand quickly. Then came the trip to the store for buying furniture boards (planed boards) of “forest”: the three – dimensions 18x300x2000 mm, one mm and one 18x200x2000-18x200x1000 mm and three dozen screws self-tapping screws and two “corners” for mounting the rack to the wall.
As mentioned, furniture panels, you want to warn the buyer that their quality is far from advertised. It is primarily the bad treatment of the surface and its deformation. Besides, on one of the shields showed a decent “plague” of resin. The latter is probably due to the bad drying of pine, besides not felled in winter, when the SAP flow ceases and during summer.
Preparing all the details necessary to apply a layout for the holes on the sides for attaching shelves and lintels. Holes in the sides made on a drill press, pre-exposing them horizontally level. The fact is that if drilling holes with a drill, especially at the ends of the shelves, when the thickness of 18 mm holes can be at an angle and screws-the screws go in the side and in the shelves will come out.
Then drew lines in the middle of the edges of the shelves and putting them on the layout for the holes of the screws in the sides, fixed with corners, pressed clamps. Then, making a small indentation with a drill in the shelves, you can begin to assemble the rack.
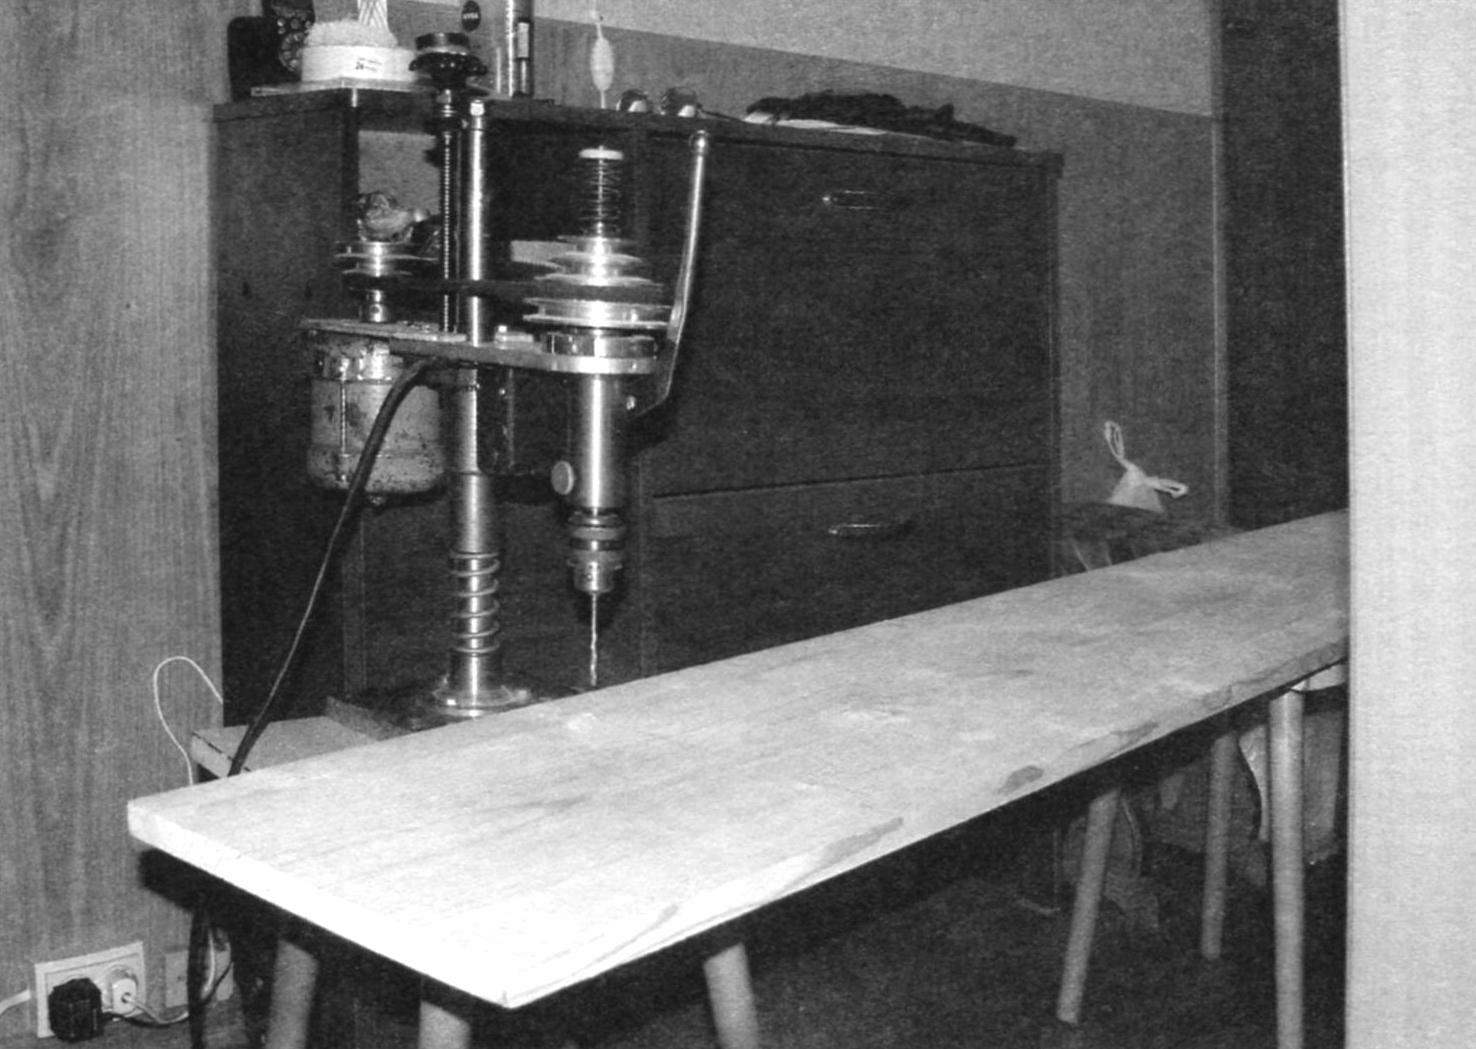
Holes in the side walls of the rack drilled on the machine, after having put them horizontally using a level
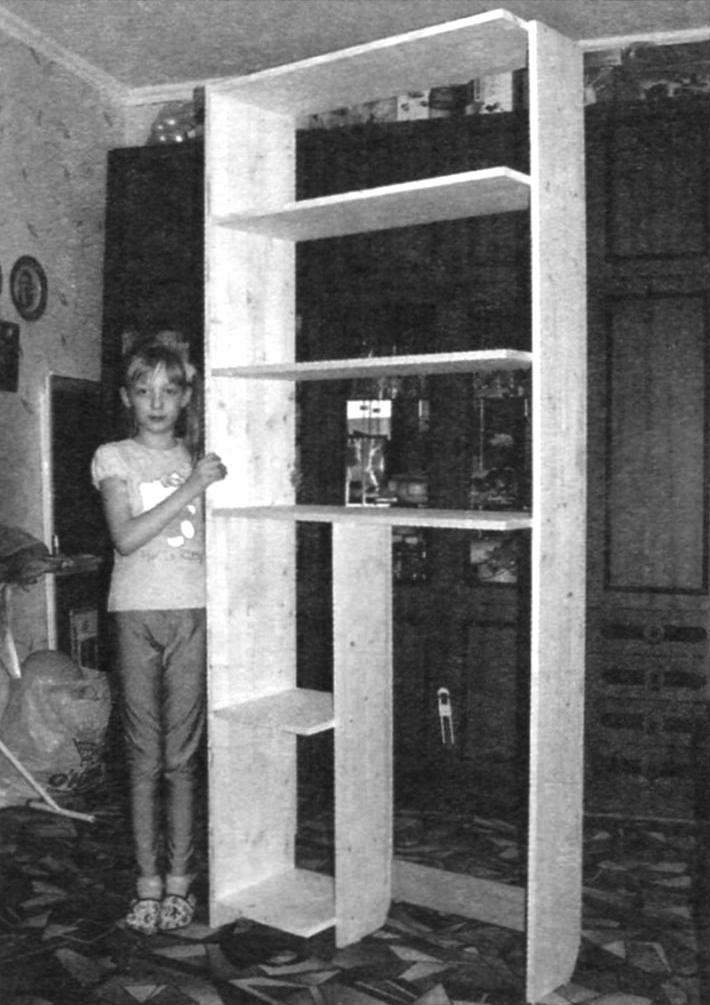
Assembled rack before you install

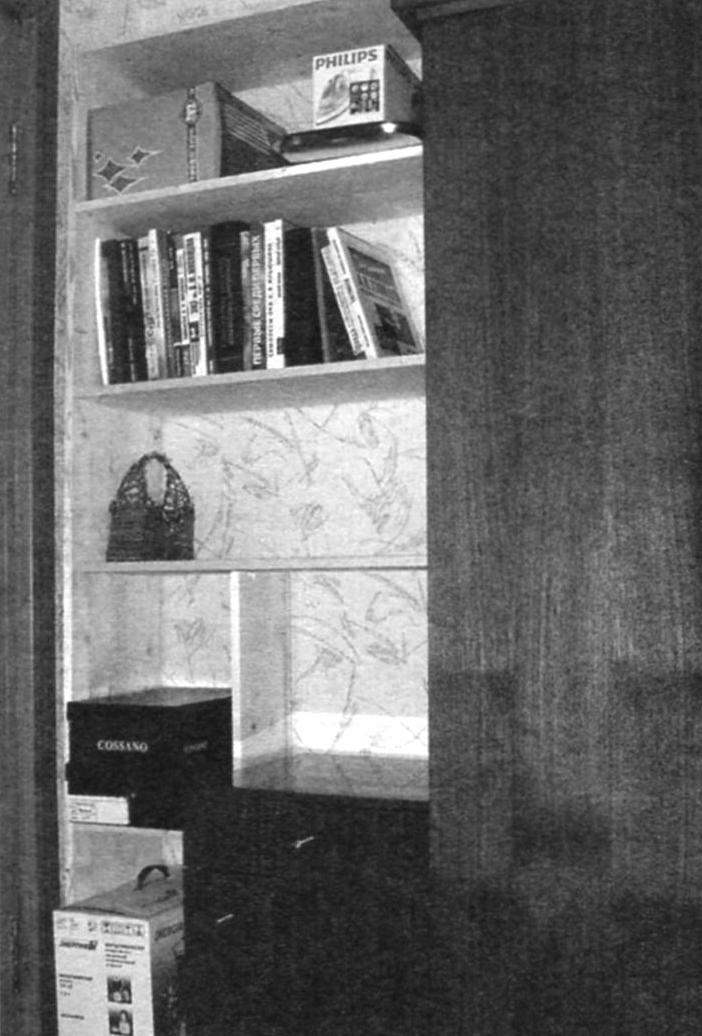
Rack out of the box took his place behind the door
Although the rack rests on the floor (bottom to its side walls nailed plastic slider), but the top attached it to the wall using the lugs and screws. So from the back wall refused. The only horizontal jumper for rigidity made it to the bottom, where the left niche shelf under the bedside table.
For cutting of furniture boards and Assembly of the rack has spent about nine hours, and the cost of all parts did not exceed 2000 virtually any. All work, except the electric drill (used as a screwdriver) and the drill press is made manually.
It would be desirable to cover “construction” stain, or other suitable means of protection, giving it a “marketable”. But autumn in the yard, and drive a noxious odor in the apartment is not worth it. This procedure left until the summer, since the rack can be easily disassembled.
If the rack is designed for bath areas, where there is always high humidity, then all parts should be treated with Sadolin or other protective coating.
N. YAKUBOVICH
Recommend to read
 LADDER OF TYRE
Usually the approaches to the water source, whether a spring or stream, uncomfortable, and in these places the required steps. Make the step from old car profile tyres from trucks,... MERKAVA TANK OF THE ISRAELI ARMY
CREATE МЕRKAVА TANK MK.1. In his first war, which began in December 1947, Israel, even before the proclamation as States do not come with any armor. Only by the end of hostilities in...
