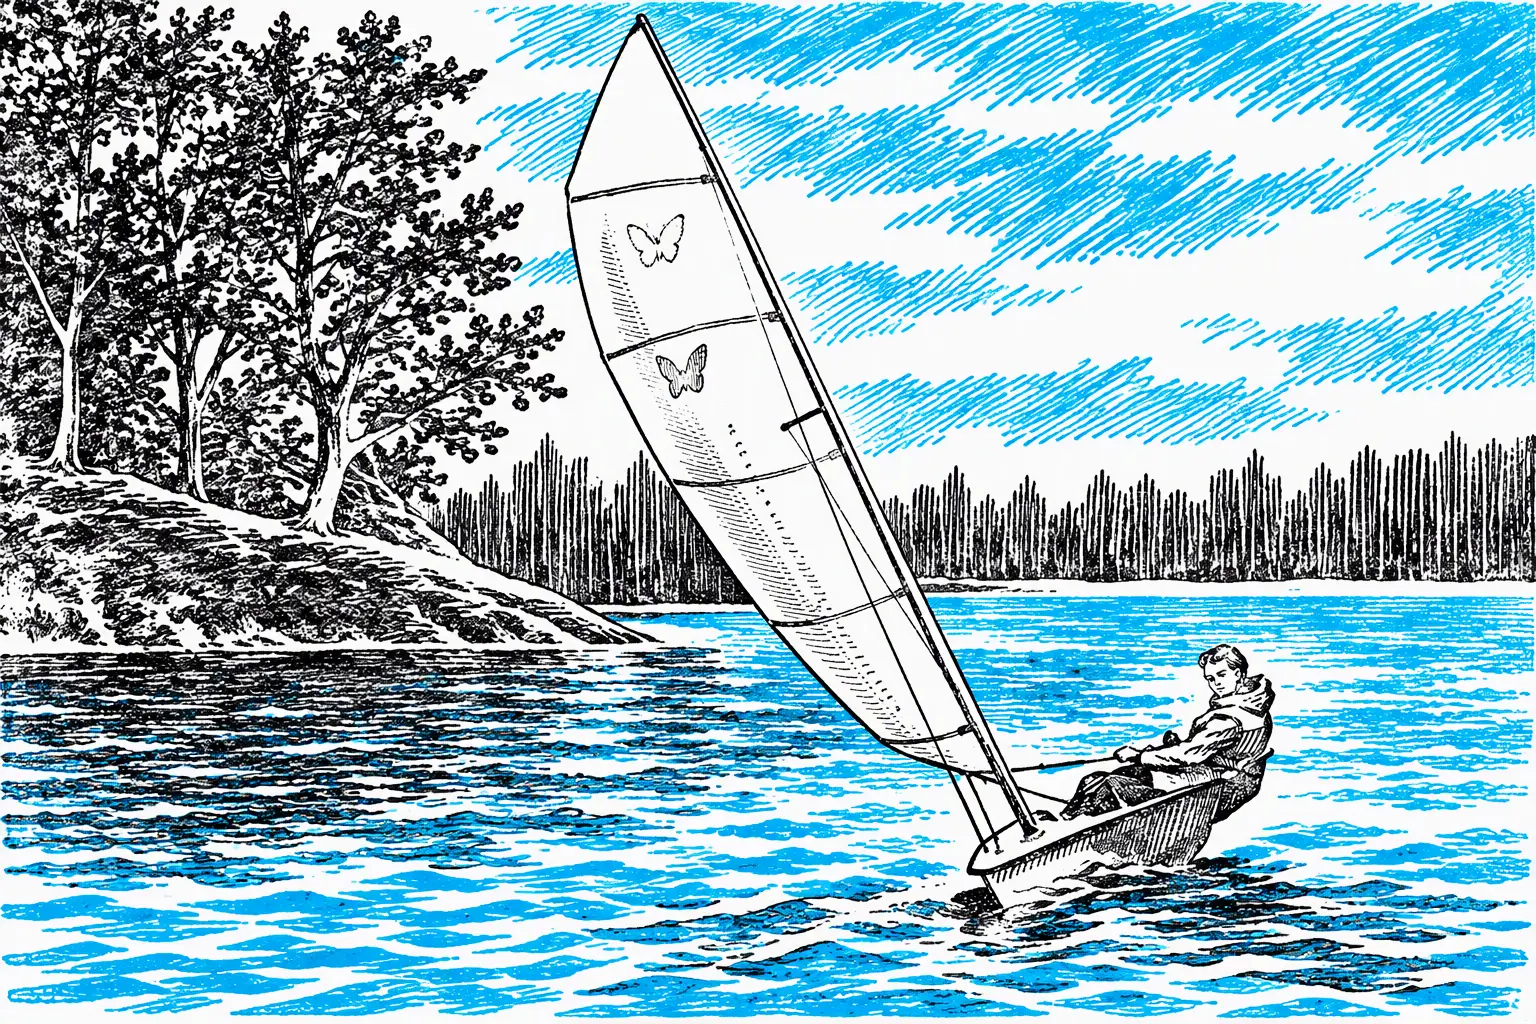
“Butterfly” — that is the name of this sports dinghy. Thousands of similar little craft sail the waters of lakes and reservoirs in many countries of the world. Boats of this class are especially popular in Czechoslovakia and the GDR. These sailing boats are not monotypes, that is, they do not have a strictly defined shape. The rules allow, while keeping the vessel’s main dimensions, both modifications of its lines and the use of various materials for building the hull. One of the design variants of the “Butterfly” is what we offer to our readers’ attention.
The sailing boat’s dimensions are as follows: overall length — 3.35 m, overall beam — 1.6 m, sail area — 8 m2.
The drawings and building technology given here are intended for the use of pressed cardboard (hardboard). Moreover, the entire hull is formed from a single sheet 3 mm thick.
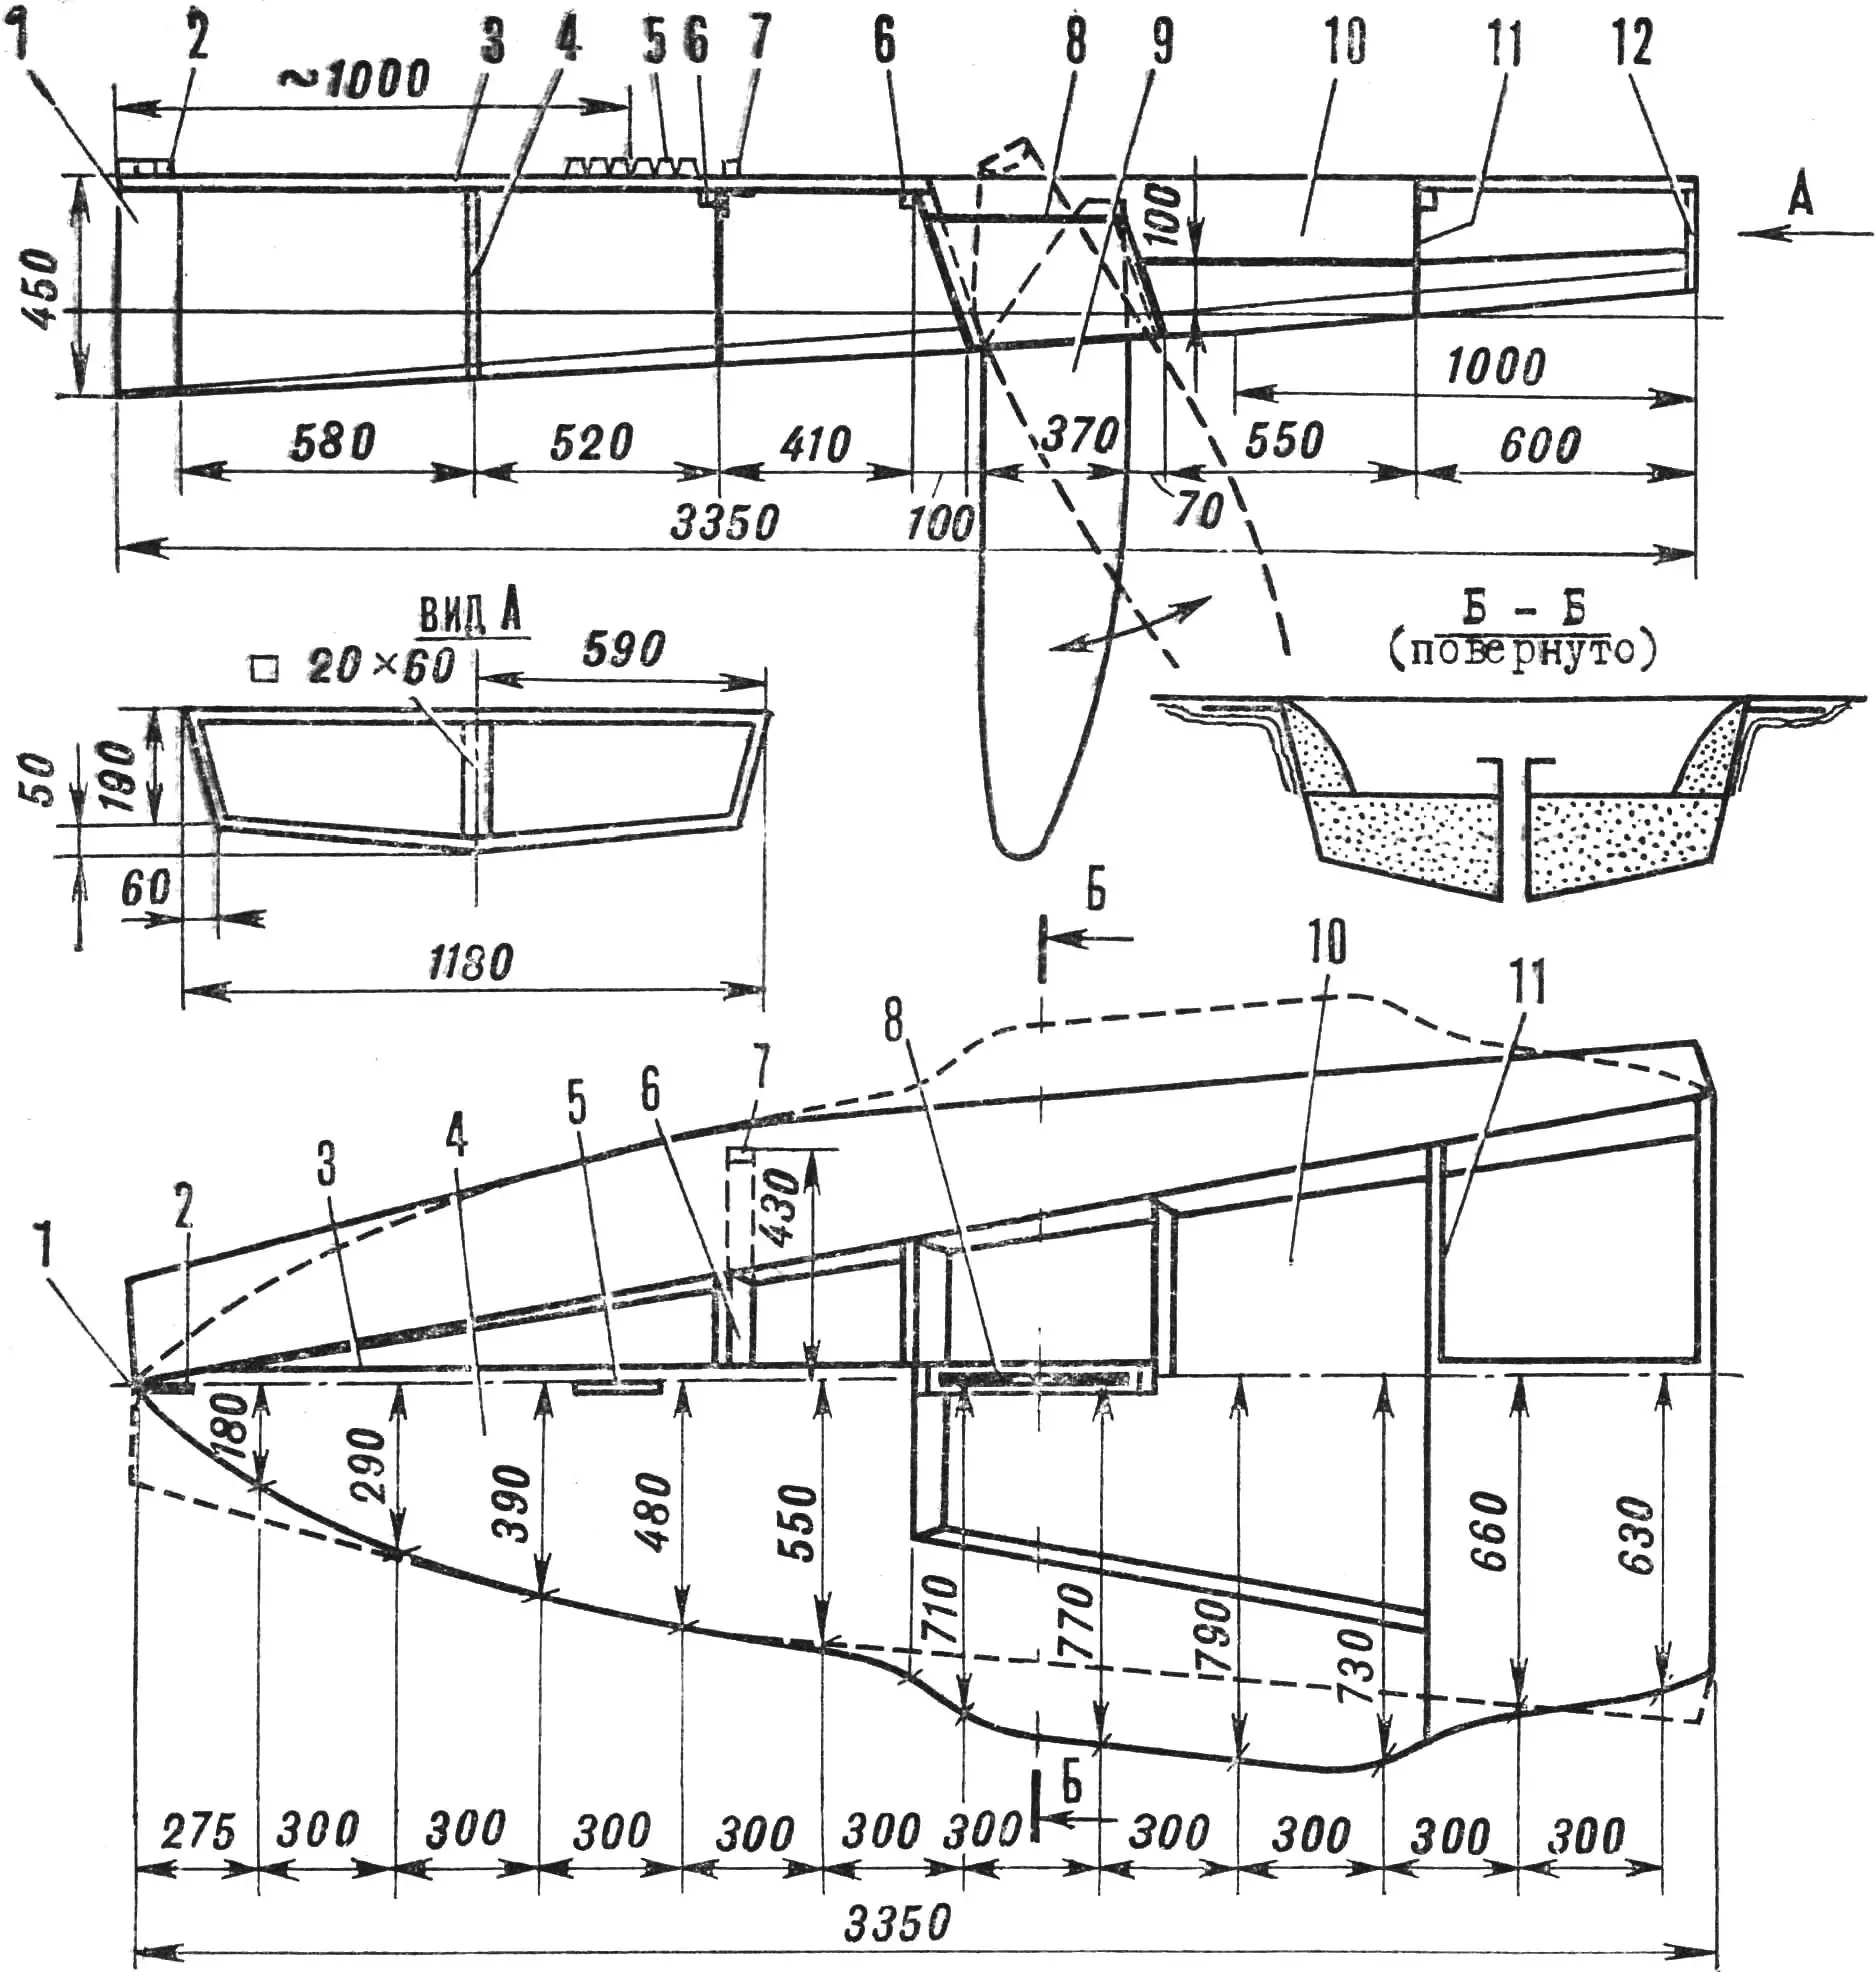
1 — stem, 2 — forestay chainplate, 3 — deck, 4 — bulkhead, 5 — mast step, 6 — beam, 7 — shroud chainplate, 8 — centerboard trunk, 9 — centerboard, 10 — cockpit, 11 — cockpit bulkhead, 12 — transom.
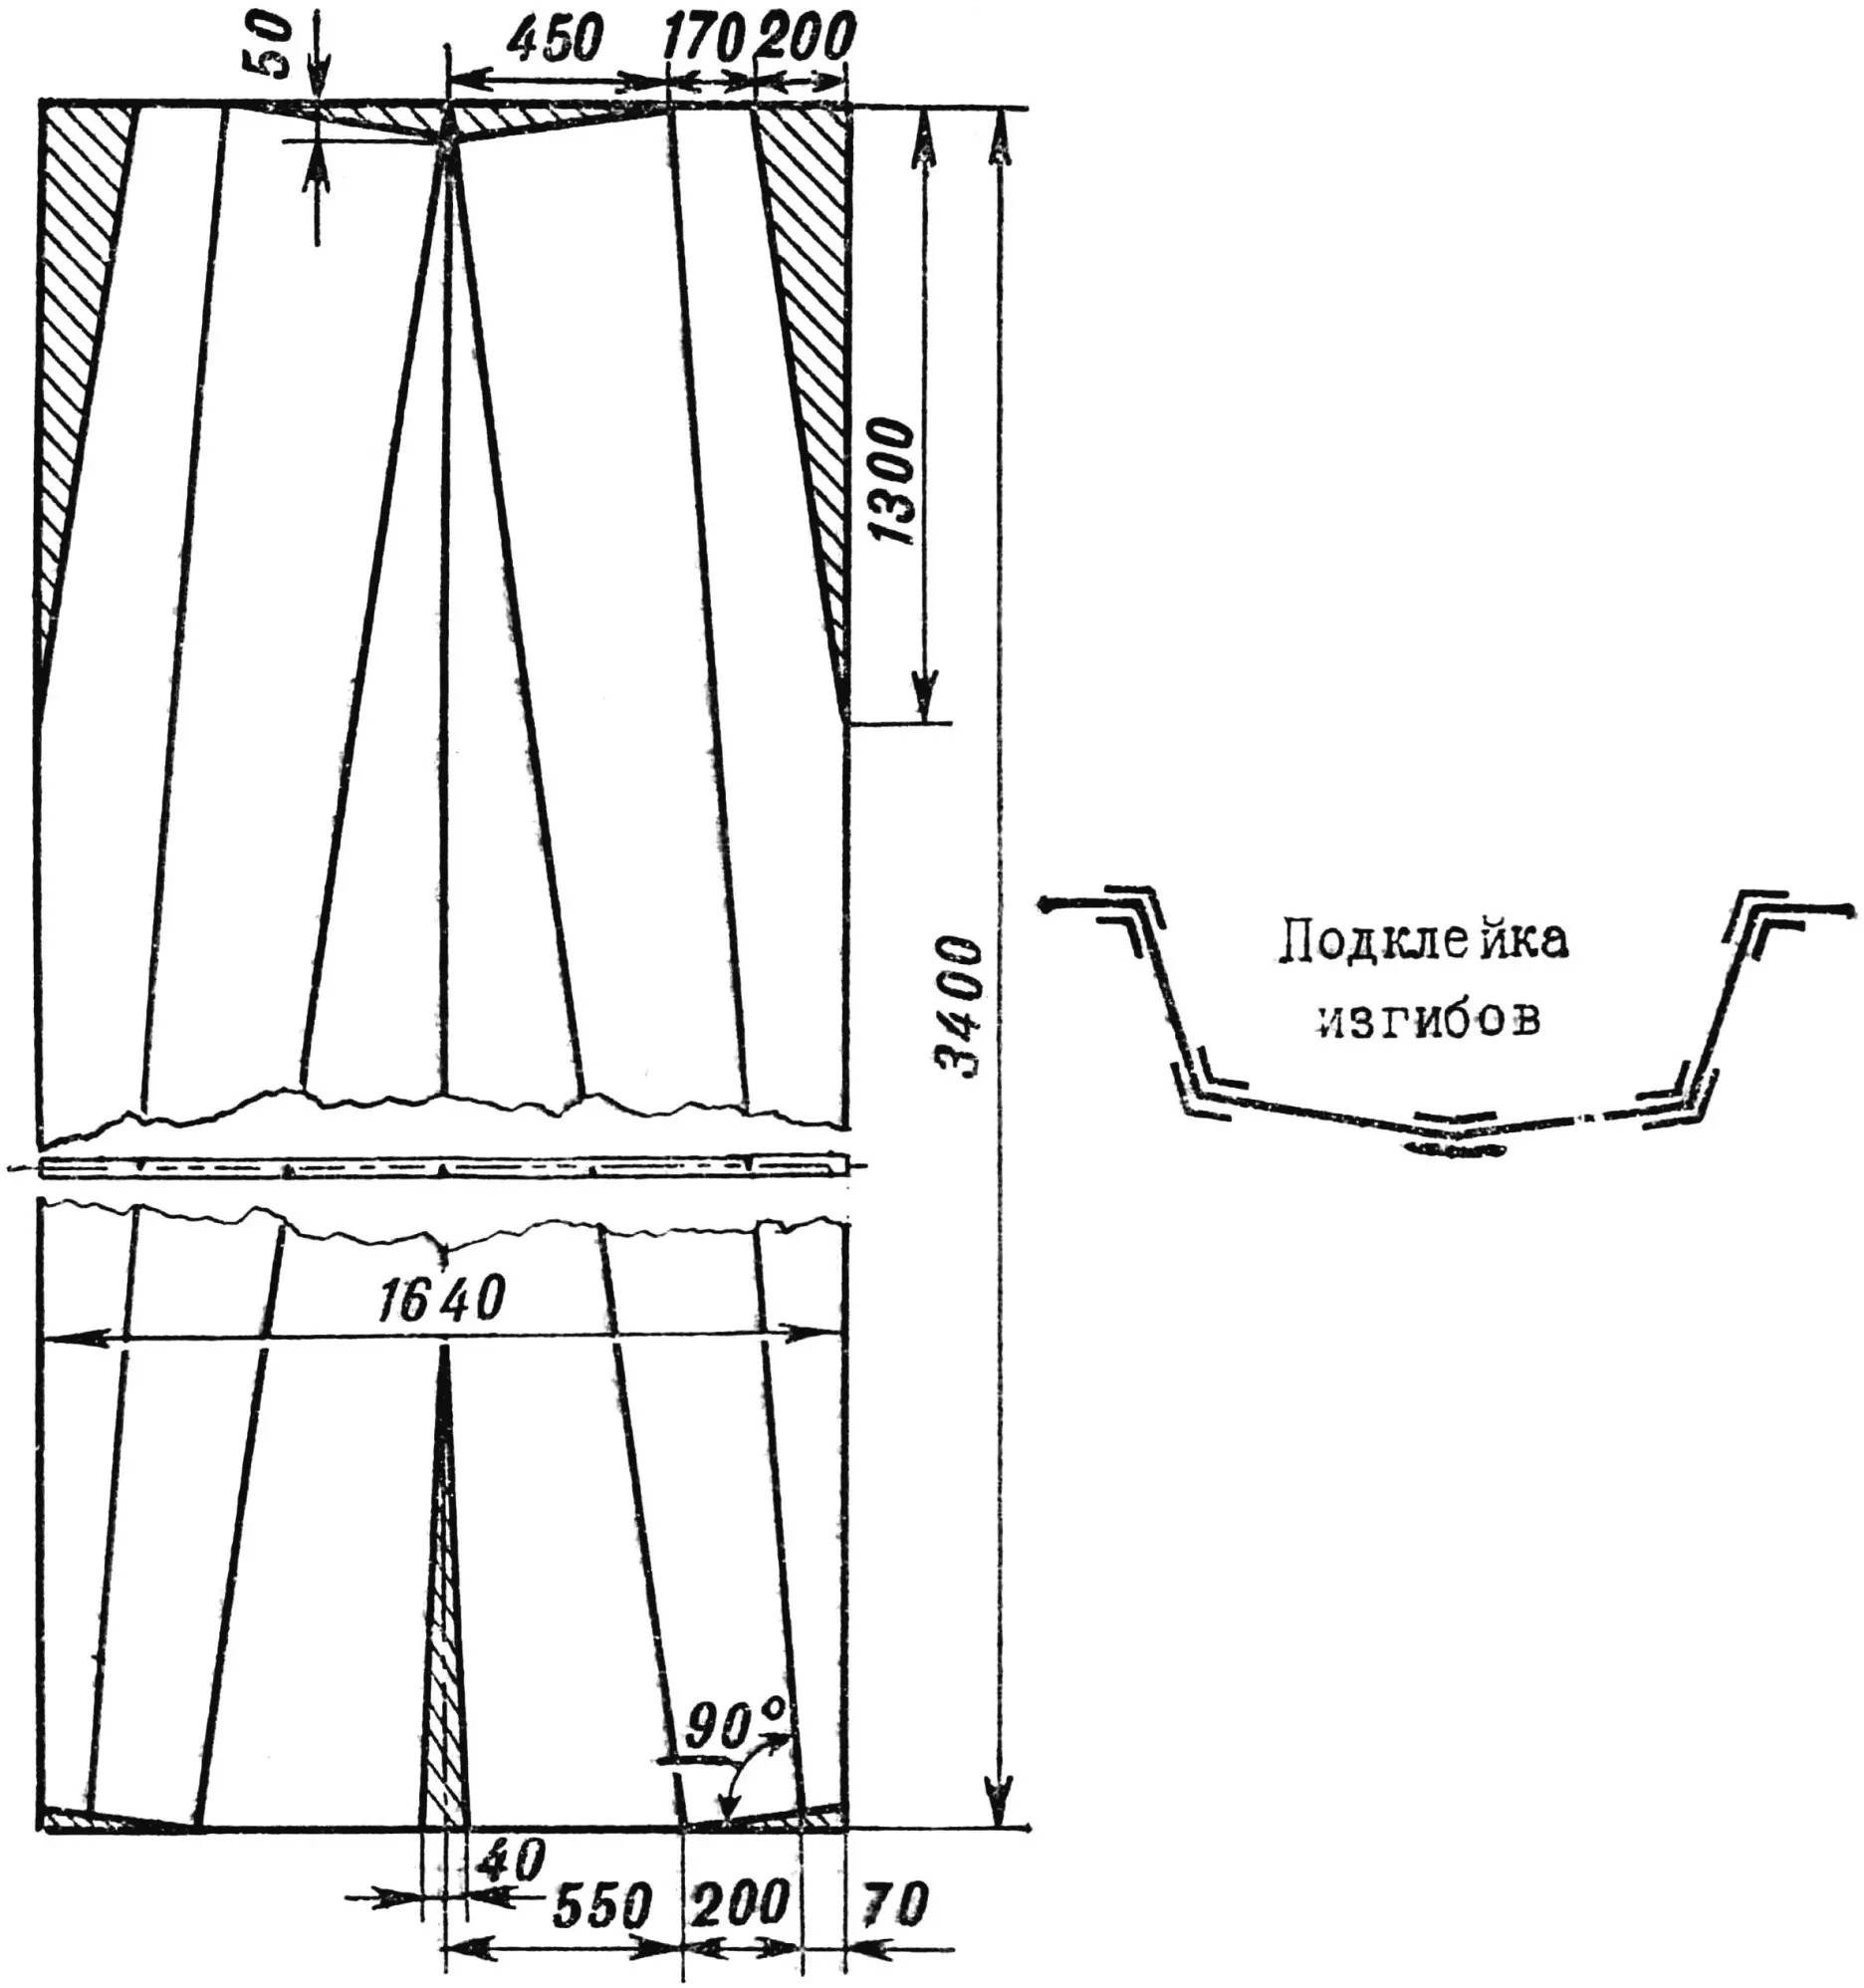
For this you will need a sheet measuring 1640X3400 mm. It is marked out on both sides. The layout of the lines on the face and reverse sides of the sheet is shown in Figure 2. Straight lines should be drawn perpendicular to the centerline (CL); bulkheads will later be installed here. Their positions are shown in Figure 1.
After marking, the excess material is removed. Then the cardboard is scored along the fold lines to about half its thickness. The cuts are made only on the side of the marking lines. This operation should be done very carefully so as not to cut through the cardboard.
Next, the transom is cut from five-millimeter hardboard. Along its diametral plane (on the axis of symmetry), a wooden batten is glued with any waterproof adhesive; the steering gear will be mounted on it.
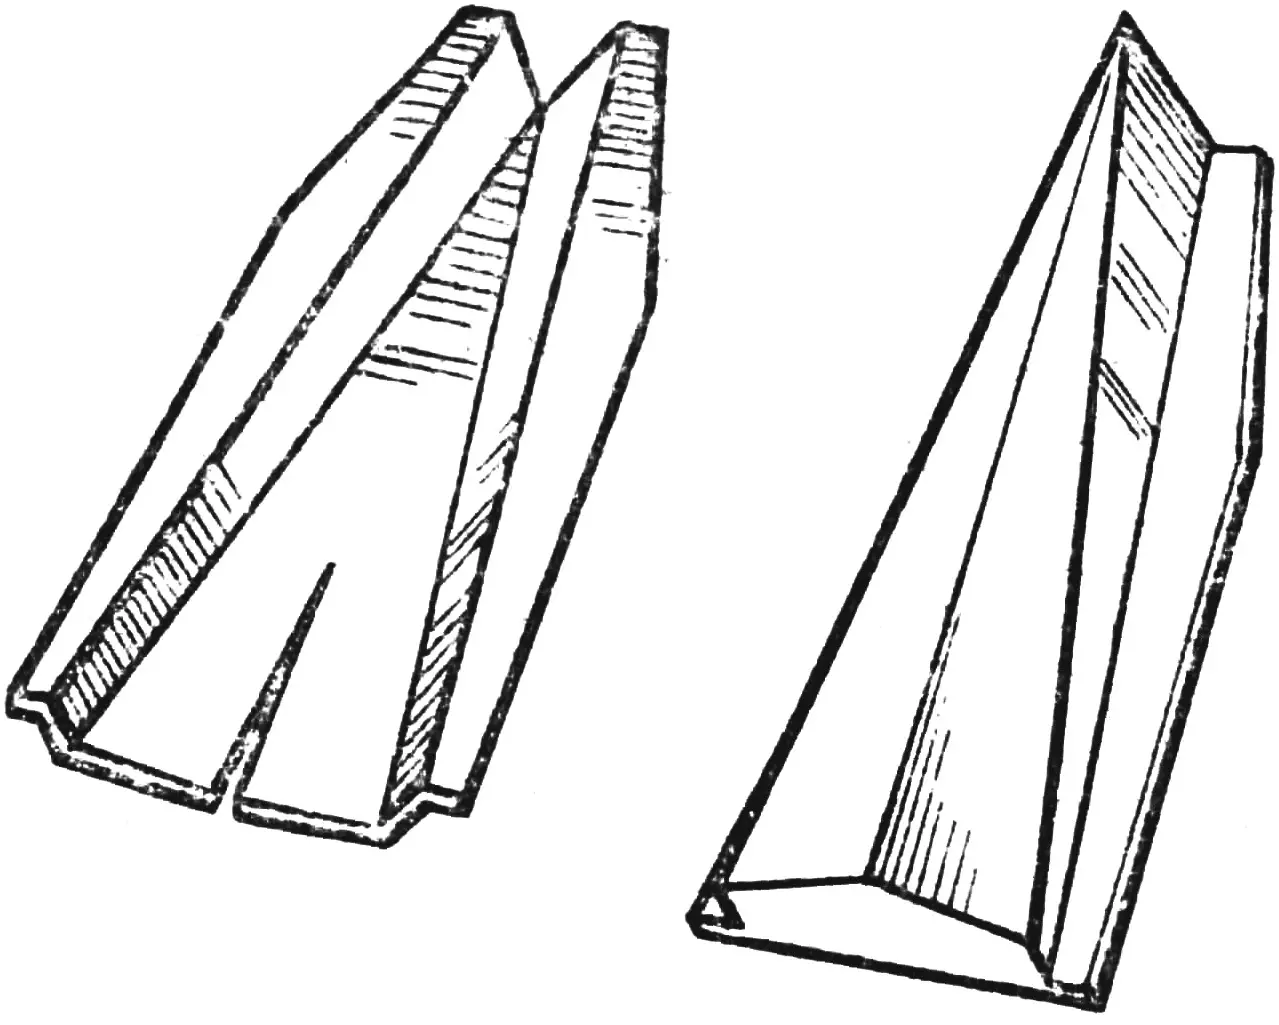
Now we proceed to assembling the hull. The marked and scored hardboard sheet is folded as shown in the drawings, and the transom is clamped to the resulting blank with clamps; in the same way the sheets are joined at the forward part of the hull, forming the stem. Do not forget that it must be reinforced with an insert of hardwood — oak or ash.
Finally, the transom is fixed to the hull with strips of glass cloth (in 2— 3 layers) impregnated with epoxy adhesive. In exactly the same way the hull folds are taped inside and out.
After the resin has cured, bulkheads of 5 mm hardboard or 3—4 mm plywood are glued into the hull.
The design of the centerboard trunk is shown in Figure 1. It is assembled with adhesive and screws from 5 mm plywood and pine battens. Before gluing it in, a slot is cut in the bottom. The size of the slot, as well as the width of the centerboard trunk, is determined by the thickness of the centerboard. The trunk is fastened to the bottom with epoxy adhesive and screws, after which the joint is taped with strips of glass cloth.
The “Butterfly” has a self-draining cockpit, which greatly helps set the dinghy upright after a capsize and prevents the cockpit from being flooded by waves. The boat’s unsinkability is provided by filling the space between the third bulkhead and the transom with foam plastic (see Figure 1). For draining water from the cockpit, openings (scuppers) are cut in the fourth bulkhead and the transom at the level of the cockpit sole. Inside, the cockpit is lined with glass cloth or cotton fabric on epoxy adhesive. To keep the sailor’s feet from slipping on the bottom, shortly before the resin cures it is sprinkled with sawdust or dry sand and rolled with a roller.
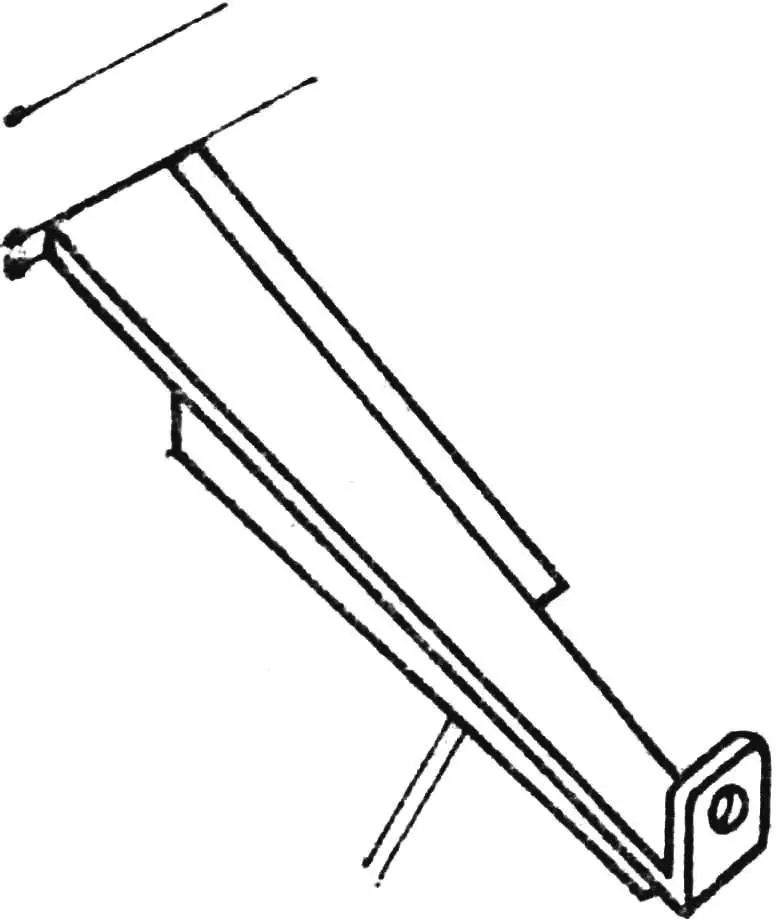
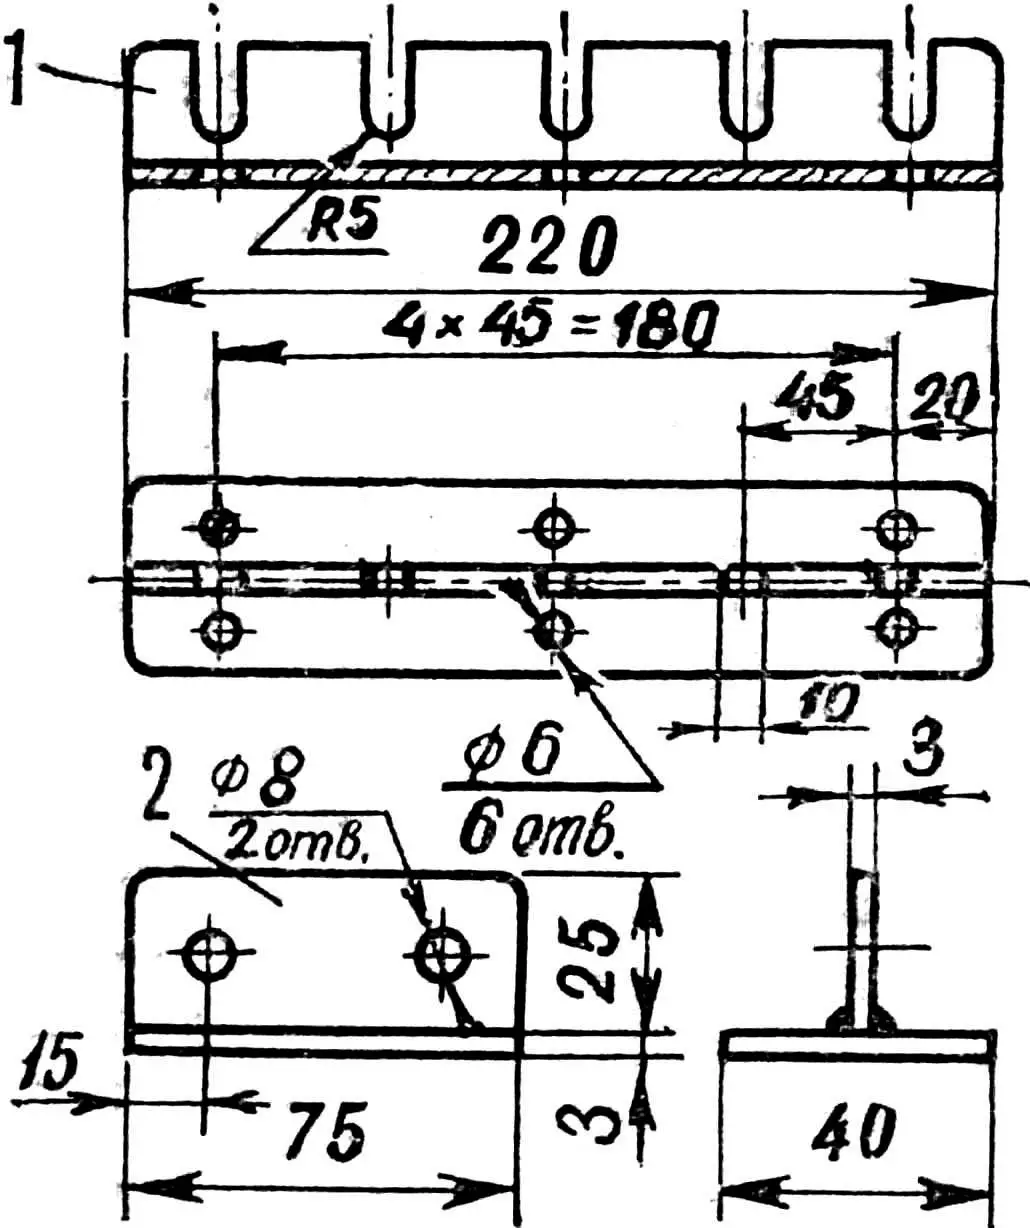
Before installing the deck, the shroud chainplates (Fig. 3) must be bolted to the second bulkhead; they are made from a duralumin or steel angle section with flange thickness of 2 mm for steel or 4—5 mm for duralumin.
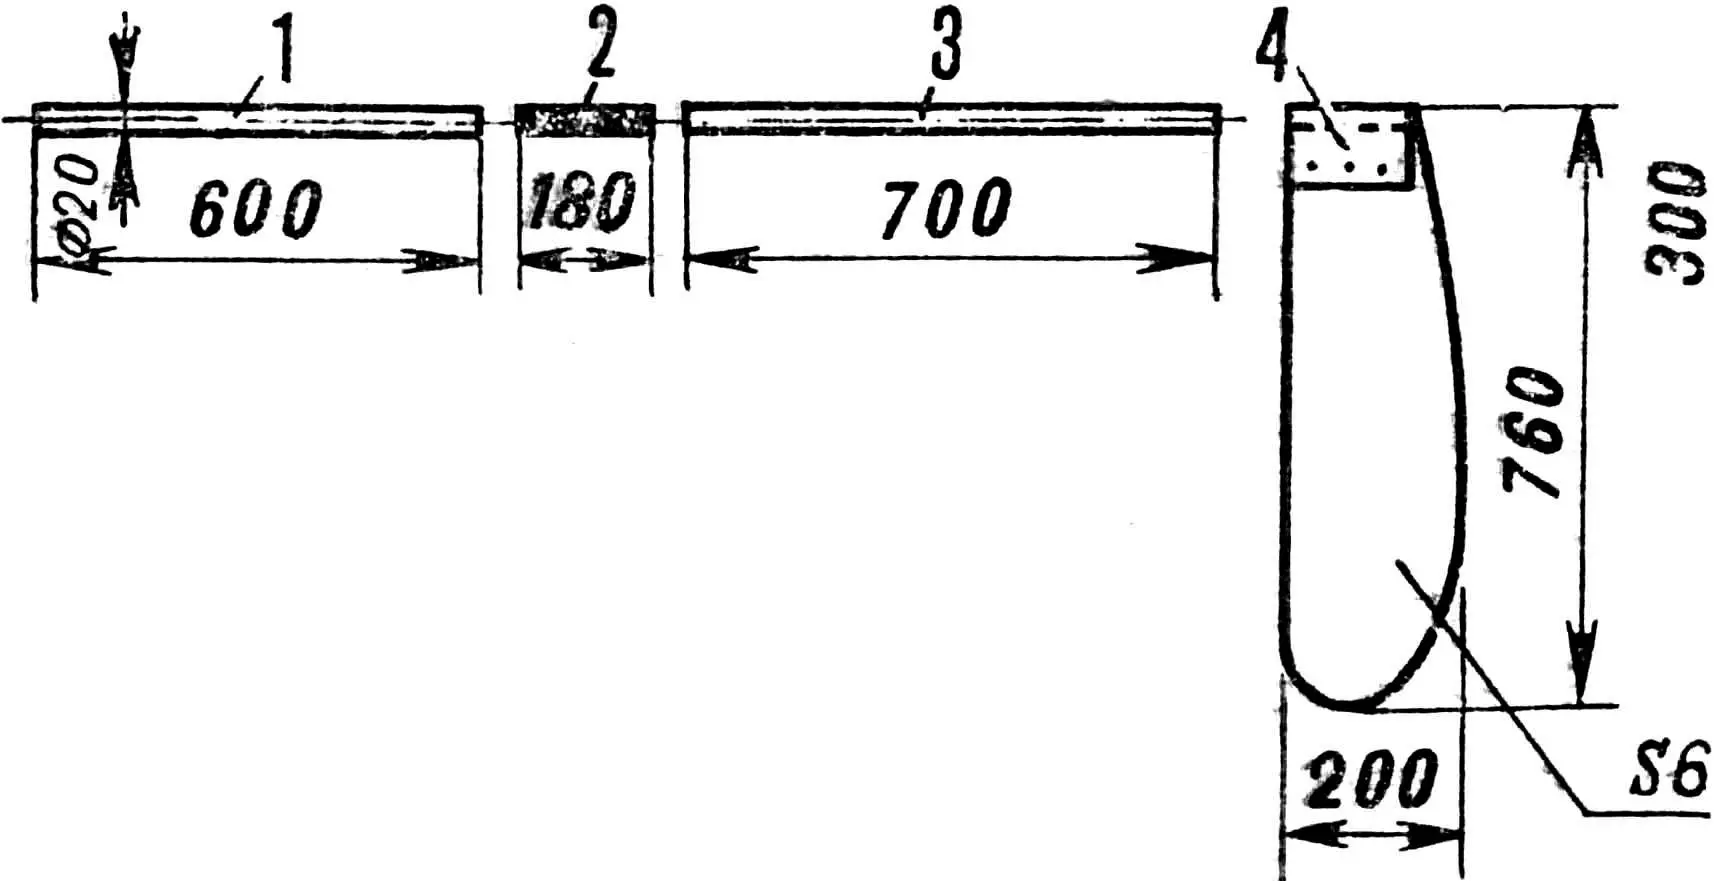
1 — tiller extension, 2 — connector (rubber tube), 3 — tiller, 4 — rudder blade.
The deck is also cut from pressed cardboard. It is fastened to the hull with strips of glass cloth and epoxy resin. After that, all roughness and runs should be cleaned off and the hull sheathed with glass cloth on epoxy or polyester resins. In a pinch, glass cloth can be replaced with cotton fabric, and the resin with any waterproof varnish or paint.
On the deck are installed the mast step and the forestay chainplate (Fig. 4) — lengths of steel T-section profile.
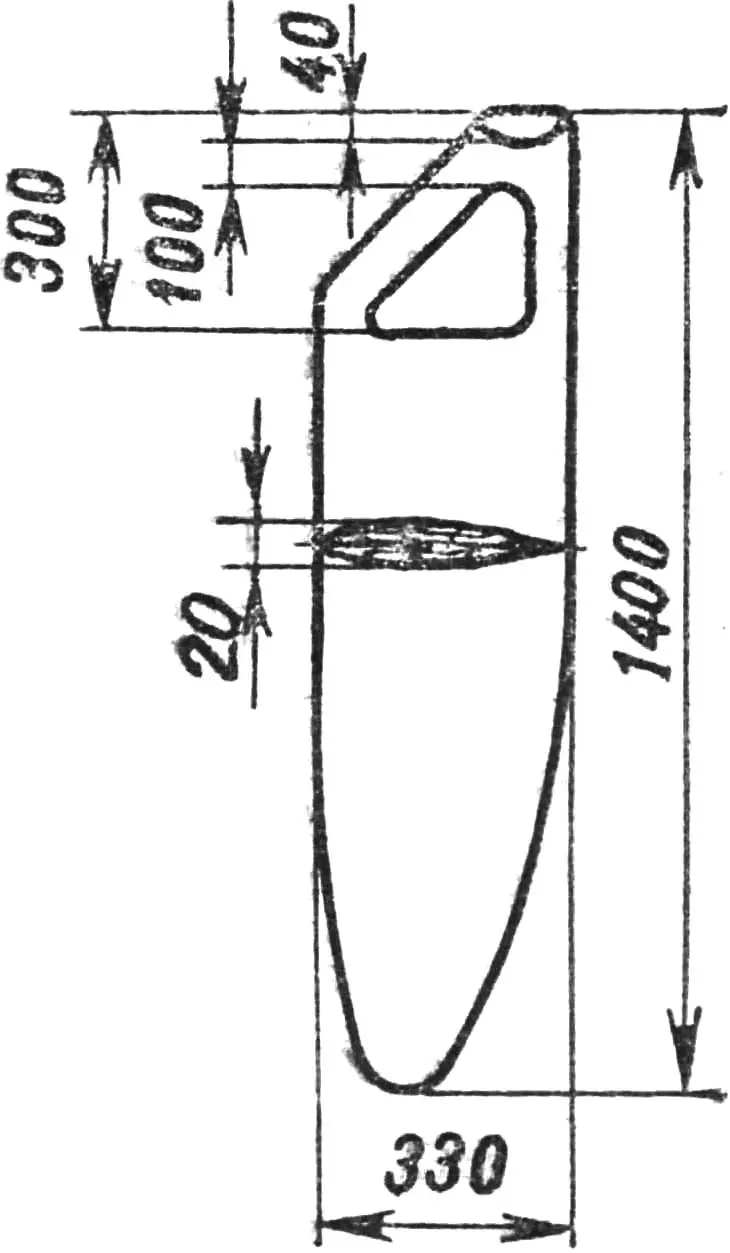
The rudder blade and the centerboard (Figs. 5, 6) are cut from a 3 mm steel sheet or from 6 mm duralumin. A good centerboard can also be made from plywood about 20 mm thick if it is given a fair, double-convex profile. The tiller with extension is made from oak or ash battens.
The spars of the “Butterfly” are laminated from pine battens of 25X75 mm section (for the mast) and 20X40 mm (for the boom). Inside both parts, shaped grooves are cut — luff tracks. The sail is secured in them. The luff track should be cut before the battens are glued into a pack. In the upper part of the mast a window is cut for installing a sheave for the mainsail halyard.
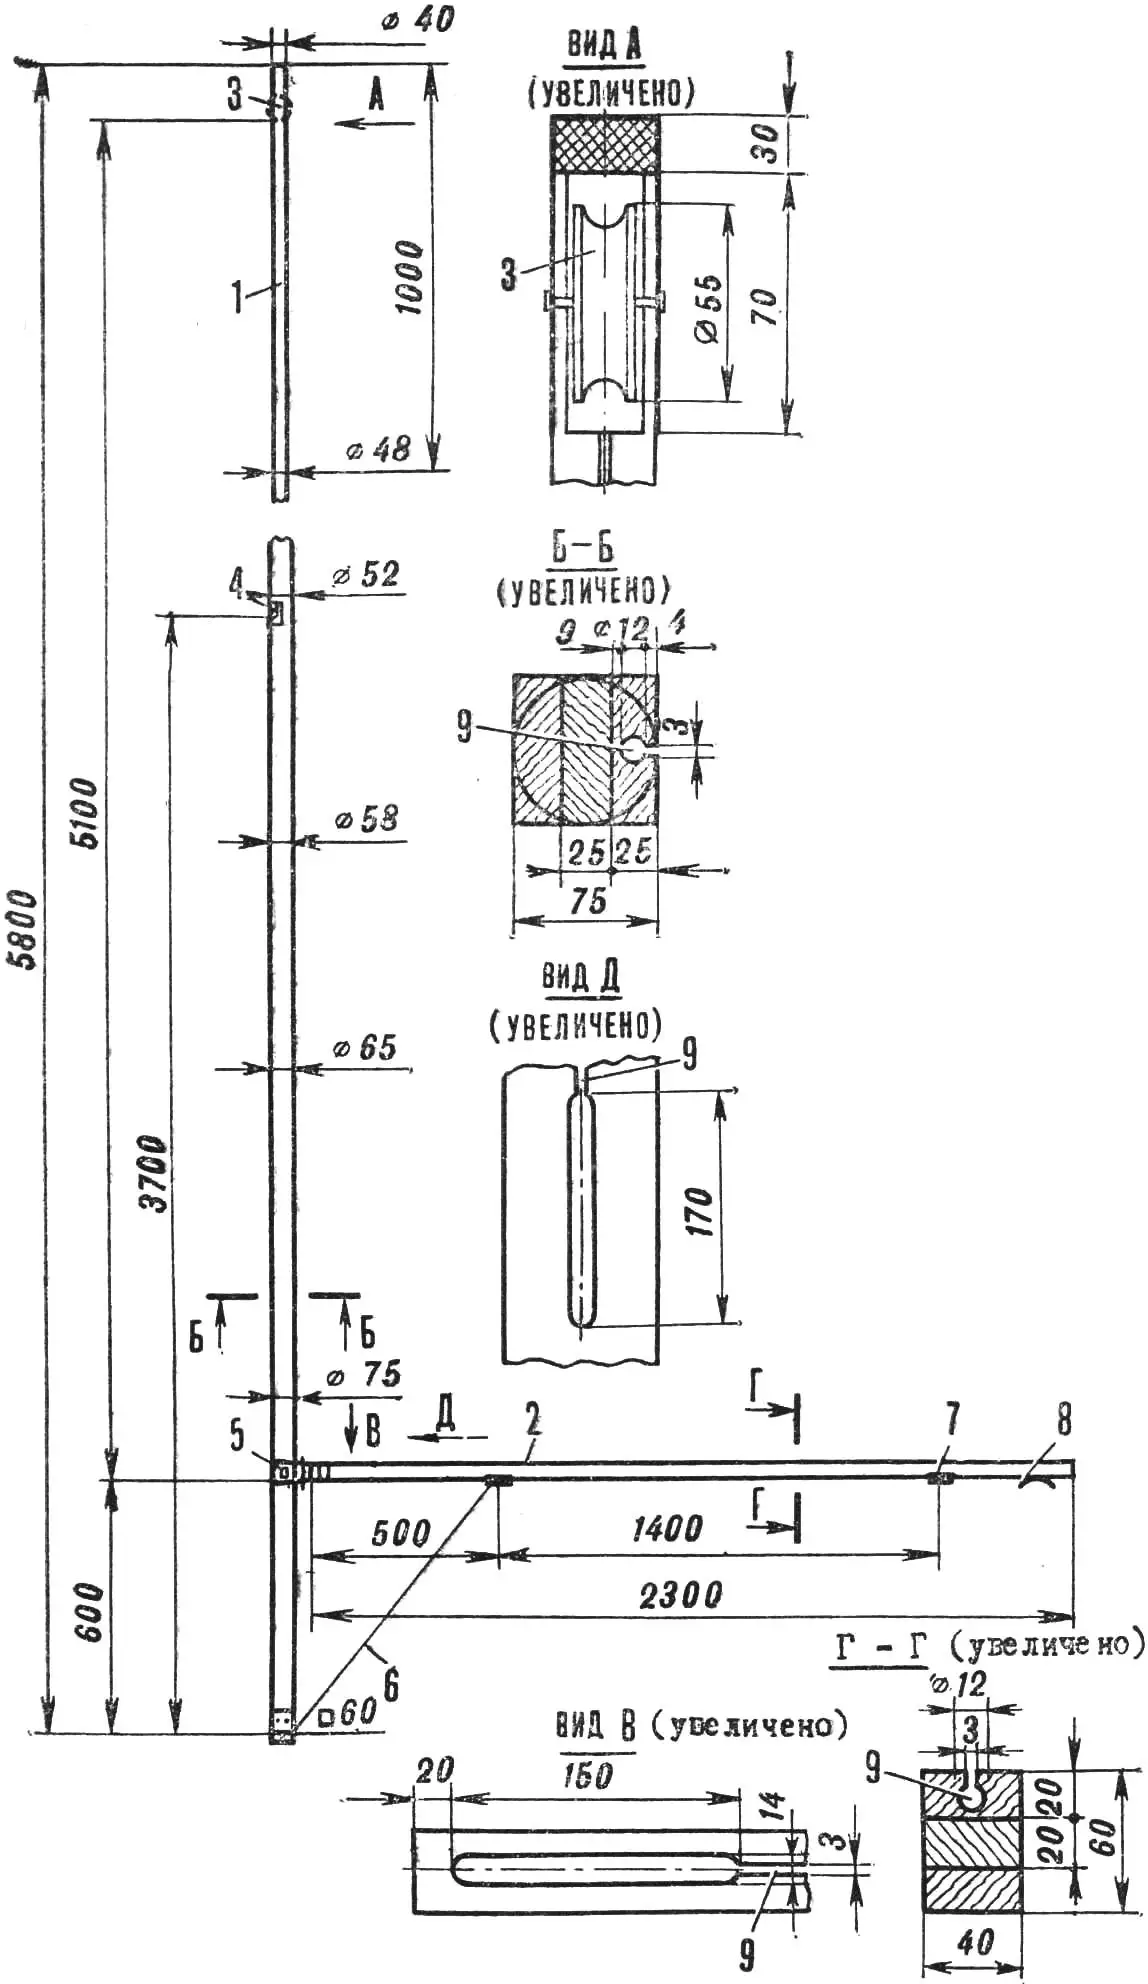
1 — mast, 2 — boom, 3 — mainsail halyard block, 4, 5, 7 — mast and boom fittings, 6 — downhaul, 8 — cleat, 9 — luff track.
After final finishing of the mast and boom they are impregnated with hot drying oil and varnished.
The spar fittings (Fig. 9) are cut from sheet stainless steel, or from ordinary steel with subsequent galvanizing.
Cutting out and sewing the sail should be given the closest attention, because the boat’s sailing qualities depend on how carefully it is made. The sail can be sewn from lavsan, canvas, or tent fabric. Pillow ticking or bolonia will also do. About 13 m of it will be needed at a width of 1 m. The sizes of the individual panels are given in Figure 10. When basting the blanks, an allowance of about 50 mm for seams must be left. The panels are sewn on a sewing machine, necessarily with a zigzag stitch.
On the leech side, batten pockets are sewn into the sail for battens — narrow strips of wood that give the sail a definite shape. All corners are reinforced with patches — triangular pieces of fabric. A headboard is also attached to the head of the sail — a triangular duralumin plate with a hole in the upper part for joining to the mainsail halyard.
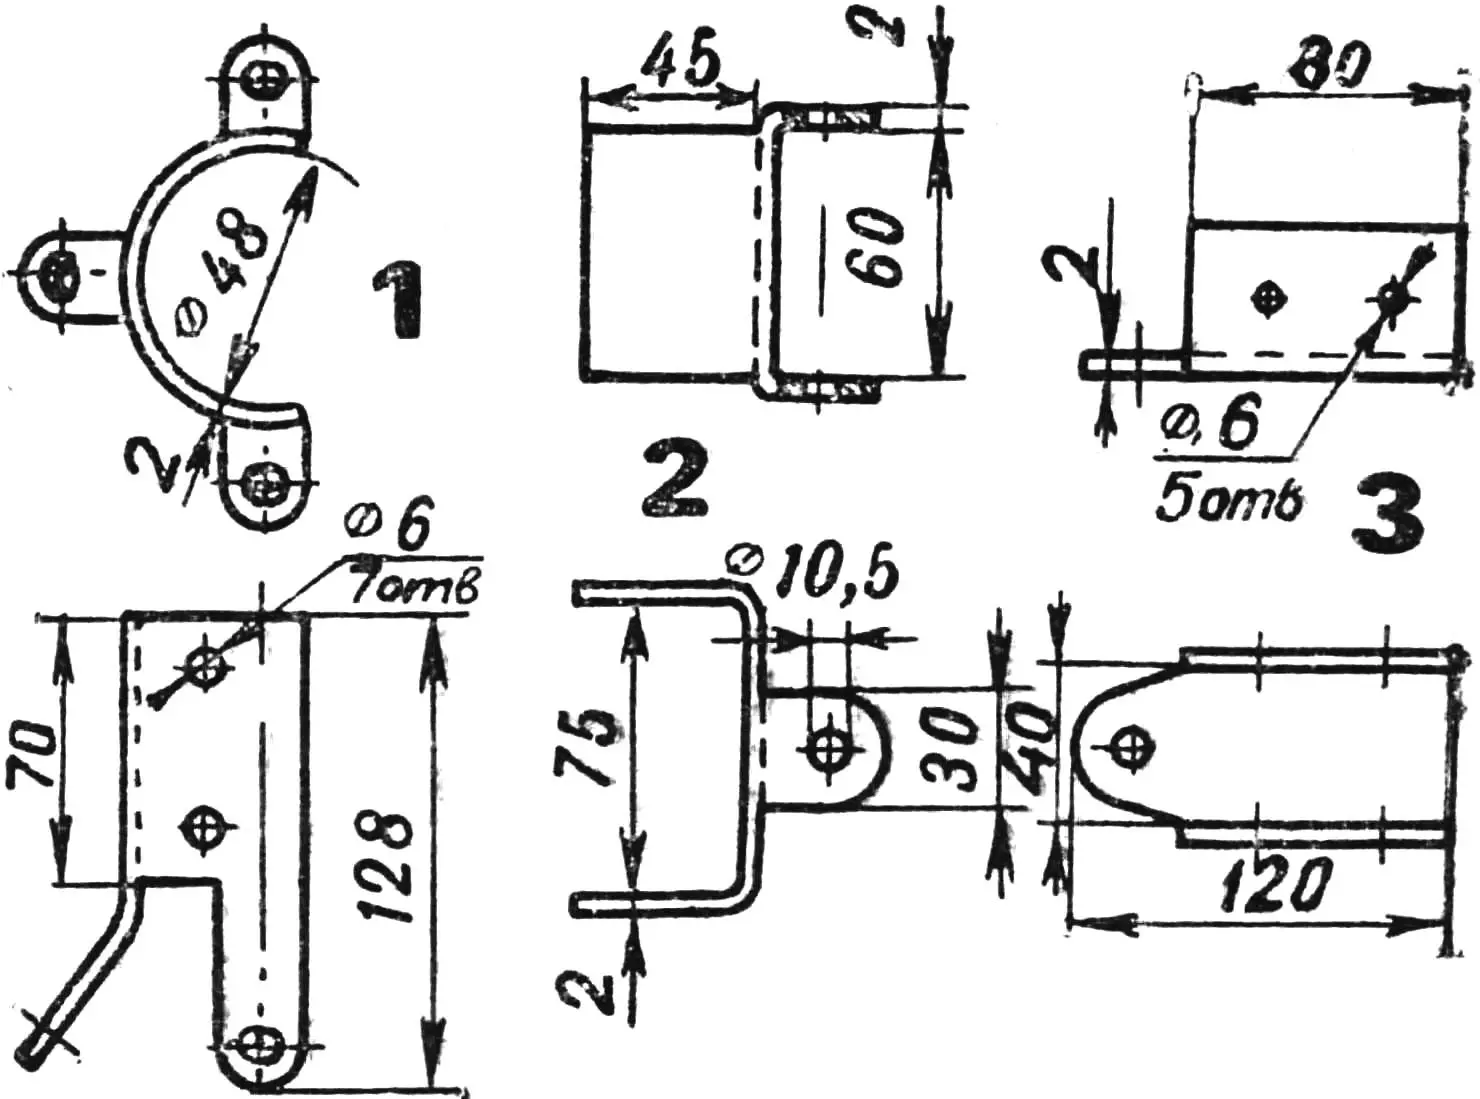
1 — upper mast fitting, 2 — lower mast fitting, 3 — boom fitting.
A synthetic or natural luff rope Ø 8 mm is sewn to the luff and foot of the sail. The leech is bound with a strip of fabric cut from the same material as the sail.
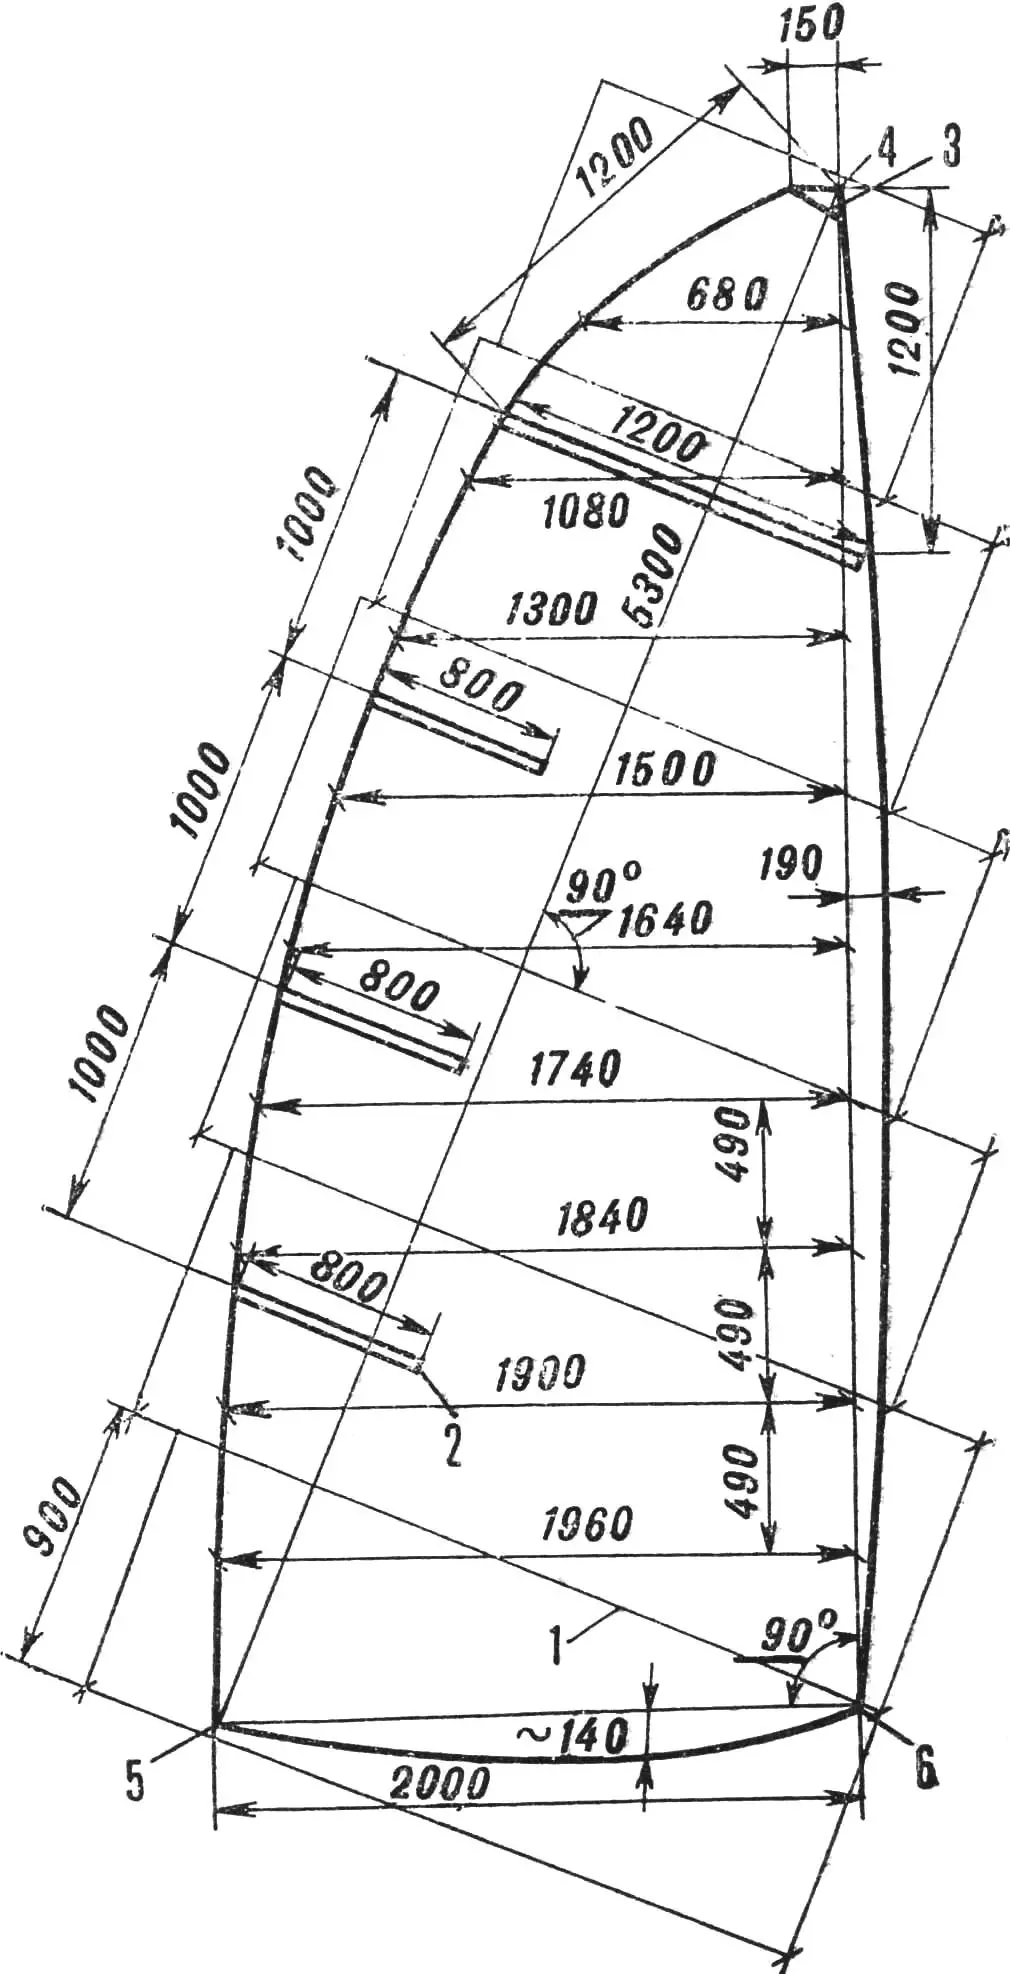
1 — seam, 2 — batten pocket, 3 — head, 4 — headboard, 5 — clew with grommet, 6 — tack with grommet.
The standing rigging of the dinghy (forestay and a pair of shrouds) is made of steel wire rope Ø 3—4 mm. The ends of the rope are finished in a thimble or a copper tube. Screw turnbuckles are used to tension the shrouds and forestay.
At this point the building of the sports sailing boat can be considered finished. Hoist the sail and set out on your first voyage!
“M-K” 7’85, Based on materials from the magazine “Praktik”, GDR
Recommend to read
 SET “COTTAGER”
A modern home cannot be imagined without books. In any apartment today your library: fiction, special literature, textbooks. This means you need cabinets, shelves. Sometimes hard to buy... DRILL-BABY
The construction of any model is unthinkable without cutting in detail dozens of holes in the first place is quite small, with a diameter of less than 1 mm. you Buy such a drill, of...
